

Yogurt dog treats are the perfect way to spoil your furry friend with a healthy and delicious snack! Forget those store-bought treats filled with questionable ingredients. Imagine the joy on your dog’s face when you present them with a homemade, frozen delight that’s both good for them and incredibly tasty. Are you ready to ditch the guilt and embrace a simple recipe that will have your pup begging for more?
While the concept of dog treats is relatively modern, the idea of giving our canine companions special foods dates back centuries. Historically, dogs were often given scraps from the table, but as our understanding of canine nutrition has evolved, so has the quality of their treats. These yogurt dog treats are a testament to that evolution, offering a blend of wholesome ingredients that cater to your dog’s well-being.
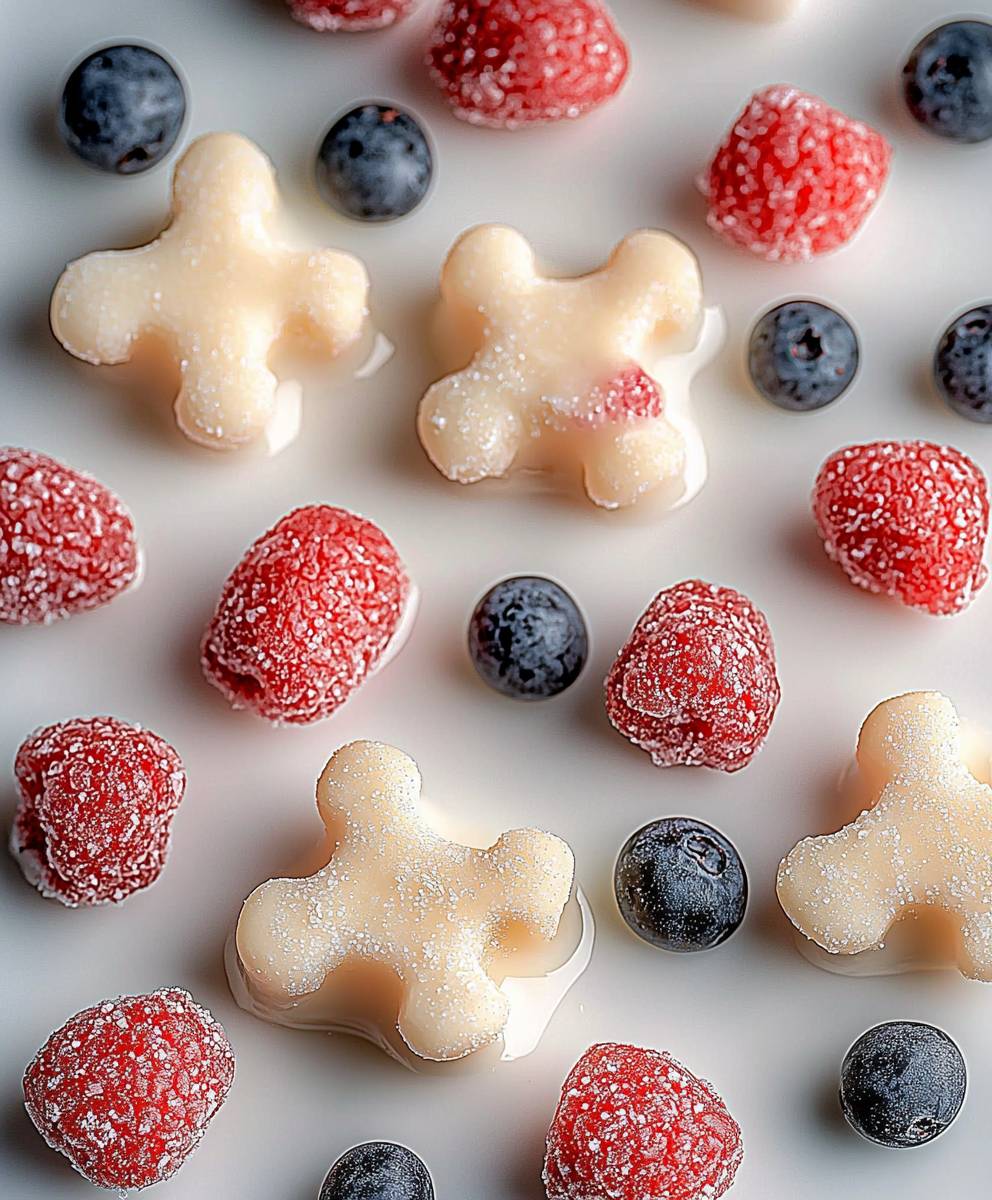
What makes these treats so irresistible? It’s the creamy, cool texture combined with the subtle tang of yogurt that dogs adore. Plus, they’re incredibly convenient to make! With just a few simple ingredients and minimal effort, you can whip up a batch of these frozen goodies in no time. They are perfect for hot summer days, training rewards, or simply as a special “I love you” gesture. So, let’s get started and create some tail-wagging happiness!

Ingredients:
- Plain Yogurt: 3 cups (full-fat or low-fat, but avoid any with artificial sweeteners)
- Ripe Banana: 2 medium (mashed well)
- Rolled Oats: 1 cup (old-fashioned or quick-cooking)
- Peanut Butter: ½ cup (make sure it’s xylitol-free! Xylitol is toxic to dogs)
- Honey: 2 tablespoons (optional, for added sweetness and binding)
- Optional Add-ins:
- Blueberries: ½ cup (fresh or frozen)
- Strawberries: ½ cup (fresh or frozen, chopped)
- Carrots: ½ cup (shredded)
- Apples: ½ cup (peeled and diced)
- Pumpkin Puree: ½ cup (not pumpkin pie filling!)
Preparing the Yogurt Mixture
- Mash the Bananas: In a large mixing bowl, thoroughly mash the bananas using a fork or potato masher. You want them to be as smooth as possible to avoid any large chunks in the final treats. This will also help them blend evenly with the other ingredients.
- Combine Yogurt and Banana: Add the plain yogurt to the bowl with the mashed bananas. Gently stir them together until they are well combined. Make sure there are no streaks of yogurt or banana remaining. A smooth, consistent mixture is key for even freezing.
- Add Peanut Butter and Honey (Optional): Now, add the peanut butter to the yogurt and banana mixture. If you’re using honey, add it at this stage as well. Stir everything together until the peanut butter is fully incorporated. This might take a little elbow grease, as peanut butter can be thick. Ensure there are no clumps of peanut butter remaining. The honey will help bind the ingredients and add a touch of sweetness that dogs love.
- Incorporate the Oats: Add the rolled oats to the mixture. Stir well to ensure the oats are evenly distributed throughout. The oats will help to thicken the mixture and provide a bit of texture to the treats. Let the mixture sit for about 5-10 minutes to allow the oats to absorb some of the liquid. This will prevent the treats from being too watery when frozen.
- Add Optional Add-ins (if using): If you’re using any of the optional add-ins like blueberries, strawberries, carrots, apples, or pumpkin puree, now is the time to add them. Gently fold them into the yogurt mixture until they are evenly distributed. Be careful not to overmix, as this could crush the berries or make the mixture too dense.
Freezing the Dog Treats
- Prepare Your Freezing Method: You have a few options for freezing the dog treats:
- Silicone Molds: These are ideal for creating cute and uniform treats. You can use molds in various shapes and sizes, such as paw prints, bones, or simple circles.
- Ice Cube Trays: These are a convenient and readily available option. They create small, bite-sized treats that are perfect for training or smaller dogs.
- Cookie Sheet: If you don’t have molds or ice cube trays, you can spread the mixture onto a parchment-lined cookie sheet. Once frozen, you can break it into smaller pieces.
- Fill the Molds or Trays: Carefully spoon the yogurt mixture into your chosen molds or ice cube trays. If you’re using a cookie sheet, spread the mixture evenly to your desired thickness (about ¼ to ½ inch).
- Smooth the Surface: Gently tap the molds or trays on the counter to release any air bubbles and ensure the mixture is evenly distributed. If you’re using a cookie sheet, smooth the surface with a spatula.
- Freeze for at Least 4 Hours: Place the molds, trays, or cookie sheet in the freezer and freeze for at least 4 hours, or until the treats are completely solid. It’s best to leave them overnight to ensure they are fully frozen.
Storing the Frozen Treats
- Remove from Molds or Trays: Once the treats are frozen solid, remove them from the molds or ice cube trays. If you used a cookie sheet, break the frozen sheet into smaller pieces.
- Store in an Airtight Container: Transfer the frozen treats to an airtight container or freezer bag. This will help prevent freezer burn and keep them fresh for longer.
- Label and Date: Label the container or bag with the date you made the treats. This will help you keep track of how long they’ve been in the freezer.
- Store in the Freezer: Store the treats in the freezer for up to 2-3 months.
Serving Suggestions and Important Considerations
- Serving Size: The appropriate serving size will depend on the size and breed of your dog. Start with a small amount and observe how your dog reacts. These treats are meant to be a supplement to their regular diet, not a replacement.
- Introduce Slowly: If your dog is not used to frozen treats, introduce them slowly to avoid any digestive upset. Start with one small treat and gradually increase the amount over time.
- Monitor for Allergies: Always monitor your dog for any signs of allergies or sensitivities after giving them a new treat. Common signs of allergies include itching, skin rashes, vomiting, or diarrhea. If you notice any of these signs, discontinue use and consult with your veterinarian.
- Xylitol Warning: Never use peanut butter that contains xylitol. Xylitol is extremely toxic to dogs and can be fatal. Always check the ingredient list carefully before using peanut butter in any homemade dog treats.
- Yogurt Considerations: Use plain, unsweetened yogurt. Flavored yogurts often contain artificial sweeteners or other ingredients that are not safe for dogs. Full-fat or low-fat yogurt can be used, but avoid non-fat yogurt, as it may contain added sugars or artificial sweeteners.
- Fruit and Vegetable Safety: While most fruits and vegetables are safe for dogs in moderation, some can be toxic. Always research any new ingredients before giving them to your dog. Grapes and raisins, for example, are toxic to dogs and should never be included in homemade treats.
- Hygiene: Always wash your hands thoroughly before preparing dog treats. Use clean bowls, utensils, and molds to prevent contamination.
- Supervision: Always supervise your dog while they are eating frozen treats. This will help prevent them from choking or eating the treats too quickly.
- Variety: Feel free to experiment with different fruits, vegetables, and other dog-safe ingredients to create a variety of flavors and textures. Just be sure to introduce new ingredients slowly and monitor your dog for any adverse reactions.
- Dental Health: While these treats are generally safe for dogs, they can be high in sugar (from the fruit and honey). Be sure to brush your dog’s teeth regularly to maintain good dental health.
Conclusion:
So, there you have it! These homemade yogurt dog treats are more than just a recipe; they’re a simple act of love you can whip up in minutes. I truly believe this is a must-try for any dog owner looking for a healthy, affordable, and utterly adorable way to spoil their furry best friend. Forget those store-bought treats packed with questionable ingredients with this recipe, you know exactly what your pup is getting, and you can feel good about giving them something both delicious and beneficial. Think of the tail wags and happy barks you’ll receive! The sheer joy on their faces as they gobble down these frozen delights is reward enough, trust me. Plus, you’ll be contributing to their overall well-being with the probiotics from the yogurt. It’s a win-win! But the best part? This recipe is incredibly versatile. Feel free to experiment with different fruits and vegetables to cater to your dog’s specific tastes and dietary needs. Does your dog love peanut butter? Add a tablespoon or two for an extra protein boost and irresistible flavor. Are they a fan of blueberries? Toss in a handful for added antioxidants. You could even sneak in some finely grated carrots or zucchini for a hidden veggie boost. The possibilities are truly endless! For serving suggestions, consider the size of your dog. Smaller breeds will appreciate smaller treats, while larger dogs can handle slightly bigger portions. On a hot summer day, these frozen treats are the perfect way to help your dog cool down. You can also use them as a training reward a healthy and motivating alternative to traditional biscuits. I sometimes even break them into smaller pieces and sprinkle them over my dog’s kibble as a special topping. And don’t be afraid to get creative with the molds! While ice cube trays work perfectly fine, you can also use silicone molds in fun shapes like bones, paws, or even little dog faces. This adds an extra touch of whimsy and makes the treats even more appealing.Why You Should Make These Treats Today
Honestly, I can’t recommend this recipe enough. It’s quick, easy, healthy, and budget-friendly. What more could you ask for? Plus, it’s a fantastic way to bond with your dog and show them just how much you care. So, ditch the processed treats and give these homemade yogurt dog treats a try. I promise you won’t regret it. Your dog will thank you for it with endless love and affection.Share Your Creations!
I’m so excited for you to try this recipe and see the joy it brings to your furry friend. Once you’ve made your own batch of these delightful treats, I’d love to hear about your experience! Share your photos and stories in the comments below. What variations did you try? Did your dog love them? Any tips or tricks you’d like to share with other dog owners? Let’s create a community of happy dogs and happy owners! Don’t forget to tag me in your social media posts I can’t wait to see your adorable creations! Happy baking (or should I say, freezing!) and happy treating! Print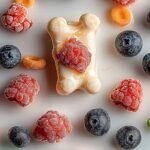
Yogurt Dog Treats: Healthy & Delicious Homemade Recipes
- Total Time: 255 minutes
- Yield: 24–48 treats 1x
Description
Easy, healthy, and delicious frozen dog treats made with yogurt, banana, peanut butter, and oats. Perfect for a refreshing snack on a hot day!
Ingredients
- 3 cups Plain Yogurt (full-fat or low-fat, unsweetened)
- 2 medium Ripe Bananas (mashed)
- 1 cup Rolled Oats (old-fashioned or quick-cooking)
- ½ cup Peanut Butter (xylitol-free!)
- 2 tablespoons Honey (optional)
- Blueberries (fresh or frozen)
- Strawberries (fresh or frozen, chopped)
- Carrots (shredded)
- Apples (peeled and diced)
- Pumpkin Puree (not pumpkin pie filling!)
Instructions
- Mash the Bananas: In a large mixing bowl, thoroughly mash the bananas using a fork or potato masher until smooth.
- Combine Yogurt and Banana: Add the plain yogurt to the bowl with the mashed bananas. Gently stir until well combined.
- Add Peanut Butter and Honey (Optional): Add the peanut butter (and honey, if using) to the yogurt and banana mixture. Stir until fully incorporated and smooth.
- Incorporate the Oats: Add the rolled oats to the mixture. Stir well to ensure even distribution. Let sit for 5-10 minutes to allow the oats to absorb some liquid.
- Add Optional Add-ins (if using): Gently fold in any optional add-ins (blueberries, strawberries, carrots, apples, or pumpkin puree) until evenly distributed.
- Prepare Freezing Method: Choose your freezing method: silicone molds, ice cube trays, or a parchment-lined cookie sheet.
- Fill the Molds or Trays: Carefully spoon the yogurt mixture into your chosen molds or ice cube trays. If using a cookie sheet, spread the mixture evenly to about ¼ to ½ inch thickness.
- Smooth the Surface: Gently tap the molds or trays to release air bubbles and ensure even distribution. Smooth the surface with a spatula if using a cookie sheet.
- Freeze for at Least 4 Hours: Place in the freezer and freeze for at least 4 hours, or preferably overnight, until completely solid.
- Remove from Molds or Trays: Once frozen solid, remove the treats from the molds or ice cube trays. Break the frozen sheet into smaller pieces if using a cookie sheet.
- Store in an Airtight Container: Transfer the frozen treats to an airtight container or freezer bag.
- Label and Date: Label the container or bag with the date.
- Store in the Freezer: Store in the freezer for up to 2-3 months.
Notes
- Xylitol Warning: Never use peanut butter that contains xylitol. Xylitol is extremely toxic to dogs and can be fatal. Always check the ingredient list carefully.
- Use plain, unsweetened yogurt.
- Introduce slowly to your dog to avoid digestive upset.
- Monitor for allergies or sensitivities.
- Adjust serving size based on your dog’s size and breed.
- Supervise your dog while they are eating the treats.
- Be sure to brush your dog’s teeth regularly to maintain good dental health.
- Prep Time: 15 minutes
- Cook Time: 0 minutes


Leave a Comment