

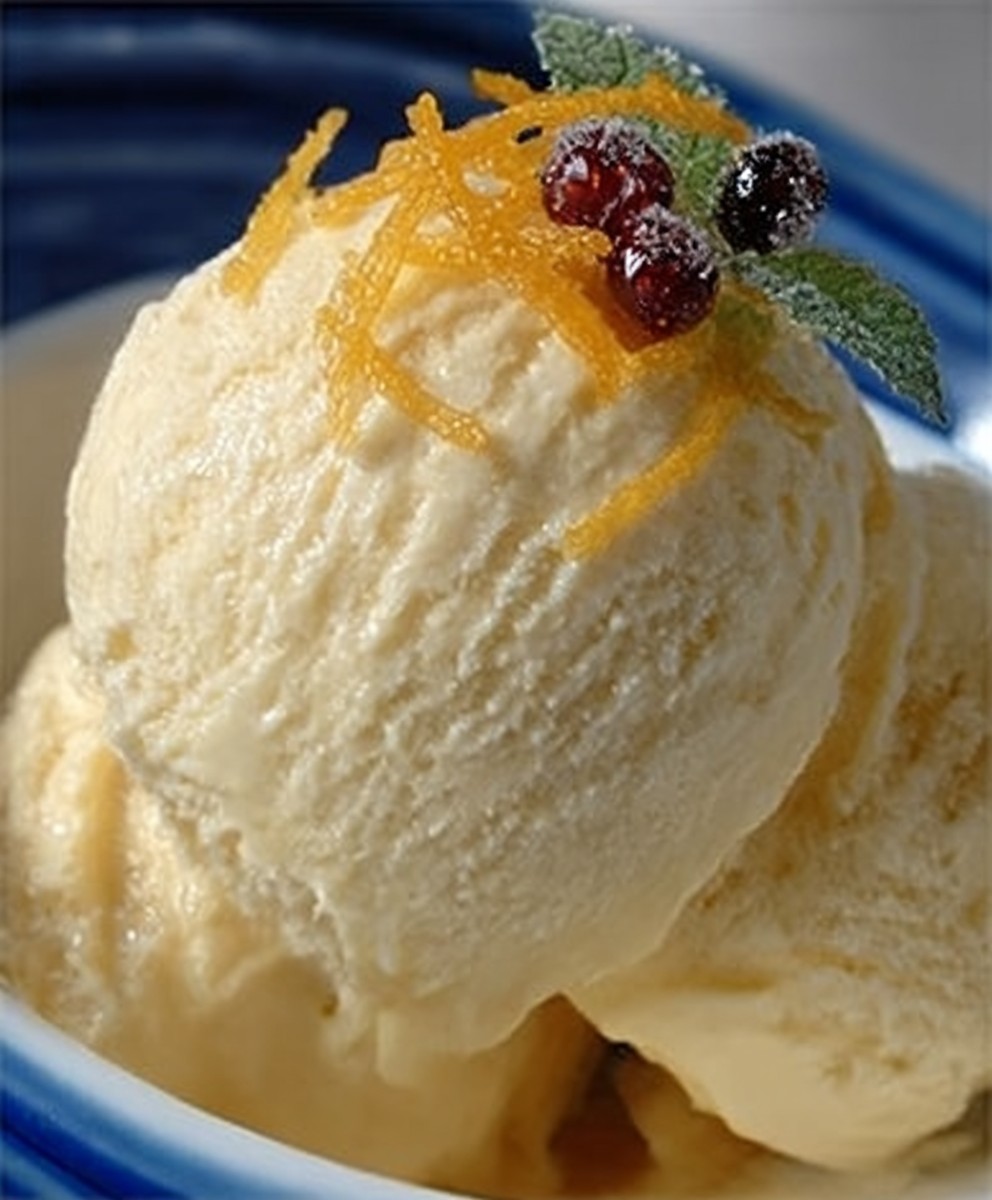
Vanilla ice cream homemade just the words conjure up images of summer days, creamy sweetness, and pure, unadulterated joy, don’t they? Forget the store-bought stuff packed with stabilizers and artificial flavors. We’re talking about the real deal: a luscious, velvety smooth dessert that you can proudly say you made from scratch.
Ice cream, in its various forms, has a rich history dating back centuries. From the icy treats enjoyed by Roman emperors to the elaborate frozen desserts of the French aristocracy, the desire for something cold and sweet has always been a part of human culture. While the exact origins of vanilla ice cream are debated, its popularity exploded in the 19th century, becoming a staple in ice cream parlors and homes alike. It’s a classic for a reason!
But what is it about vanilla ice cream homemade that makes it so irresistible? It’s the simplicity, really. The clean, elegant flavor of vanilla, perfectly balanced with the richness of cream and the sweetness of sugar, is a symphony for the taste buds. Plus, the homemade version allows you to control the ingredients, ensuring a higher quality and a more satisfying experience. The texture is divine smooth, creamy, and melt-in-your-mouth perfection. And let’s be honest, there’s something incredibly rewarding about creating something so delicious with your own two hands. So, are you ready to ditch the store-bought and embark on a journey to homemade ice cream bliss? Let’s get started!

Ingredients:
- 2 cups heavy cream
- 1 cup whole milk
- ¾ cup granulated sugar
- 1 vanilla bean, split lengthwise and seeds scraped (or 2 teaspoons pure vanilla extract)
- Pinch of salt
Preparing the Vanilla Infusion:
Okay, let’s get started! The first step is to infuse our dairy with that beautiful vanilla flavor. This is where the magic happens, and trust me, using a real vanilla bean makes all the difference. If you only have vanilla extract, that’s perfectly fine too, but the bean adds a depth of flavor that’s just incredible.
-
Combine the Cream, Milk, and Sugar: In a medium saucepan, pour in your 2 cups of heavy cream and 1 cup of whole milk. Add the ¾ cup of granulated sugar and a pinch of salt. The salt might seem odd, but it actually enhances the sweetness and brings out the vanilla flavor even more.
-
Add the Vanilla Bean (or Extract): If you’re using a vanilla bean, carefully split it lengthwise with a sharp knife. Then, using the back of the knife, scrape out all those tiny, precious vanilla seeds. Add both the seeds and the pod to the saucepan. If you’re using vanilla extract, hold off on adding it until after the mixture has cooled.
-
Heat the Mixture: Place the saucepan over medium heat. We want to heat the mixture gently, so keep a close eye on it. Stir constantly with a whisk to help the sugar dissolve and prevent the milk from scorching. You’re aiming for the mixture to be steaming hot, but not boiling. We don’t want to scald the milk.
-
Infuse the Flavor: Once the mixture is steaming, remove it from the heat. Cover the saucepan with a lid and let it sit for at least 30 minutes, or even better, an hour. This allows the vanilla flavor to really infuse into the cream and milk. The longer it sits, the more intense the vanilla flavor will be. If you used a vanilla bean, remove the pod after the infusion time. You can rinse and dry the pod and bury it in a jar of sugar to make vanilla sugar!
-
Cool the Mixture: After the infusion, we need to cool the mixture down completely. This is crucial for getting a smooth and creamy ice cream. Pour the mixture into a bowl and cover it with plastic wrap, pressing the plastic wrap directly onto the surface of the cream mixture. This prevents a skin from forming on top. Refrigerate the mixture for at least 4 hours, or preferably overnight. The colder the mixture, the better the ice cream will be.
Churning the Ice Cream:
Now for the fun part churning! This is where the magic really happens, and we transform our vanilla-infused cream into delicious, homemade ice cream. Make sure your ice cream maker bowl is properly frozen according to the manufacturer’s instructions. This usually means freezing it for at least 24 hours.
-
Prepare the Ice Cream Maker: Take your frozen ice cream maker bowl out of the freezer. It should be rock solid. Assemble the ice cream maker according to the manufacturer’s instructions.
-
Pour in the Mixture: Remove the chilled cream mixture from the refrigerator. If you haven’t already, add the vanilla extract now (if you didn’t use a vanilla bean). Pour the mixture into the ice cream maker bowl.
-
Churn the Ice Cream: Turn on the ice cream maker and let it churn according to the manufacturer’s instructions. This usually takes about 20-30 minutes. The ice cream is ready when it has thickened to the consistency of soft-serve ice cream. It should be thick and creamy, but still slightly soft.
-
Check the Consistency: Keep an eye on the ice cream as it churns. You want it to be thick and creamy, but not too hard. If it gets too hard, it will be difficult to scoop. If it’s too soft, it will melt quickly.
Freezing and Storing:
We’re almost there! Now that we’ve churned our ice cream, we need to harden it up in the freezer. This will give it that perfect scoopable consistency.
-
Transfer to a Freezer-Safe Container: Carefully transfer the soft-serve ice cream from the ice cream maker bowl to a freezer-safe container. A loaf pan or a plastic container with a tight-fitting lid works well. I like to use a container that’s specifically designed for ice cream, as it helps prevent freezer burn.
-
Press Plastic Wrap on Top: To prevent ice crystals from forming on the surface of the ice cream, press a piece of plastic wrap directly onto the surface. This creates a barrier between the ice cream and the air.
-
Freeze for at Least 2 Hours: Place the container of ice cream in the freezer and freeze for at least 2 hours, or preferably longer. This will allow the ice cream to harden completely.
-
Check for Hardness: After 2 hours, check the ice cream to see if it’s firm enough to scoop. If it’s still too soft, freeze it for another hour or two.
-
Store Properly: Once the ice cream is frozen solid, you can store it in the freezer for up to 2 weeks. Be sure to keep it tightly sealed to prevent freezer burn.
Serving Suggestions:
Finally, the best part enjoying your homemade vanilla ice cream! Here are a few serving suggestions to get you started:
-
Classic Scoop: Simply scoop the ice cream into a bowl or cone and enjoy it as is. Sometimes, the simplest things are the best!
-
Sundae: Top your ice cream with your favorite toppings, such as chocolate sauce, caramel sauce, sprinkles, whipped cream, and cherries.
-
Affogato: Pour a shot of hot espresso over a scoop of vanilla ice cream for a delicious and simple dessert.
-
Milkshake: Blend the ice cream with milk and your favorite flavorings for a creamy and refreshing milkshake.
-
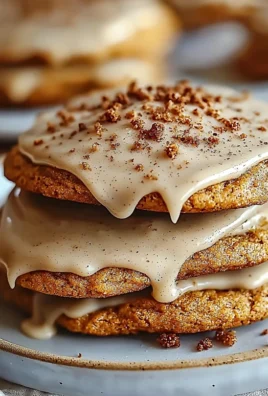
Ice Cream Sandwiches: Sandwich a scoop of ice cream between two cookies for a classic ice cream sandwich.
Tips and Tricks for Perfect Vanilla Ice Cream:
-
Use High-Quality Ingredients: The better the ingredients, the better the ice cream. Use fresh, high-quality heavy cream and whole milk for the best results.
-
Don’t Skip the Infusion: Infusing the cream with vanilla is crucial for getting that intense vanilla flavor. Don’t skip this step!
-
Chill Thoroughly: Make sure the cream mixture is completely chilled before churning. This will help the ice cream freeze properly and prevent ice crystals from forming.
-
Don’t Overchurn: Be careful not to overchurn the ice cream, as this can make it grainy. Stop churning when it reaches the consistency of soft-serve ice cream.
-
Harden Properly: Allow the ice cream to harden completely in the freezer before serving. This will give it that perfect scoopable consistency.
Troubleshooting:
-
Ice Cream is Grainy: This can be caused by not chilling the cream mixture thoroughly enough, overchurning the ice cream, or using low-quality ingredients. Make sure to chill the mixture completely, avoid overchurning, and use high-quality ingredients.
-
Ice Cream is Too Soft: This can be caused by not freezing the ice cream maker bowl properly, not chilling the cream mixture thoroughly enough, or not freezing the ice cream long enough after churning. Make sure the bowl is completely frozen, the mixture is completely chilled, and the ice cream is frozen for at least 2 hours after churning.
-
Conclusion:
So, there you have it! This homemade vanilla ice cream recipe is more than just a dessert; it’s an experience. It’s about creating something truly special from scratch, knowing exactly what ingredients are going into it, and sharing that joy with the people you love. I truly believe that once you taste the difference between store-bought and this creamy, dreamy homemade version, you’ll never go back.
Why is this a must-try? Because it’s incredibly easy to make, even if you’ve never made ice cream before. The ingredients are simple and readily available, and the process is straightforward. But the real magic lies in the flavor. The pure, unadulterated vanilla taste is simply divine, and the texture is unbelievably smooth and rich. Forget those icy, artificial-tasting tubs from the supermarket this is the real deal. Plus, making it yourself allows you to control the sweetness and richness to perfectly suit your own preferences.
But the fun doesn’t stop there! This vanilla ice cream is a blank canvas for all sorts of delicious creations. Serve it straight up in a waffle cone for a classic treat. Or, elevate it with a drizzle of warm chocolate sauce and a sprinkle of chopped nuts. For a more sophisticated dessert, try pairing it with a slice of warm apple pie or a decadent chocolate brownie. It’s also fantastic in milkshakes, floats, and even affogato (poured over a shot of hot espresso trust me, it’s amazing!).
Looking for variations? Get creative! Infuse the cream with other flavors while it’s heating. Try adding a vanilla bean pod for an even more intense vanilla flavor. Or, stir in a tablespoon or two of your favorite liqueur, like bourbon or rum, for an adult twist. You could also add mix-ins like chocolate chips, chopped cookies, or fresh berries during the last few minutes of churning. The possibilities are endless!
I’m so excited for you to try this recipe and experience the joy of homemade vanilla ice cream for yourself. It’s a guaranteed crowd-pleaser, perfect for summer barbecues, birthday parties, or simply a cozy night in. Don’t be intimidated it’s easier than you think!
So, grab your ingredients, dust off your ice cream maker (or get ready to use the no-churn method!), and get ready to create something truly delicious. I promise you won’t regret it. And when you do, please, please, please come back and let me know how it turned out! Share your photos, your variations, and your stories in the comments below. I can’t wait to hear all about your homemade ice cream adventures. Happy churning! I’m confident that this will become your go-to vanilla ice cream recipe.
Vanilla Ice Cream Homemade: The Ultimate Guide to Creamy Perfection
Rich and creamy homemade vanilla ice cream, infused with real vanilla bean for an unforgettable flavor.
Ingredients
- 2 cups heavy cream
- 1 cup whole milk
- ¾ cup granulated sugar
- 1 vanilla bean, split lengthwise and seeds scraped (or 2 teaspoons pure vanilla extract)
- Pinch of salt
Instructions
- In a medium saucepan, combine heavy cream, whole milk, granulated sugar, and salt.
- Add vanilla bean seeds and pod (or hold vanilla extract for later).
- Heat over medium heat, stirring constantly until steaming but not boiling.
- Remove from heat, cover, and let sit for 30 minutes to 1 hour to infuse vanilla flavor. Remove vanilla bean pod.
- Pour mixture into a bowl, cover with plastic wrap (pressing onto the surface), and refrigerate for at least 4 hours, or preferably overnight.
- Prepare ice cream maker according to manufacturer’s instructions.
- Pour chilled cream mixture into the ice cream maker. If you didn’t use vanilla bean, add vanilla extract now.
- Churn for 20-30 minutes, or until the consistency of soft-serve ice cream.
- Transfer ice cream to a freezer-safe container.
- Press plastic wrap onto the surface of the ice cream.
- Freeze for at least 2 hours, or until firm enough to scoop.
- Store in the freezer for up to 2 weeks.
Notes
- For the best flavor, use a real vanilla bean.
- Chilling the cream mixture thoroughly is crucial for preventing ice crystals.
- Don’t overchurn the ice cream, as this can make it grainy.
- Pressing plastic wrap onto the surface of the ice cream prevents freezer burn.
- Serve as a classic scoop, sundae, affogato, milkshake, or ice cream sandwich.


Leave a Comment