

Vanilla Ice Cream Homemade: Is there anything more classic and comforting than a scoop of creamy, dreamy vanilla ice cream? I think not! Forget the store-bought stuff loaded with stabilizers and artificial flavors. Today, we’re diving headfirst into the delightful world of crafting your very own vanilla ice cream homemade, and trust me, it’s easier than you think.
Vanilla ice cream, in its simplest form, dates back centuries, with early versions being enjoyed by royalty and the elite. The rich flavor of vanilla, derived from the vanilla bean orchid, was once a rare and precious commodity, making vanilla ice cream a symbol of luxury. But thankfully, times have changed, and now we can all indulge in this timeless treat!
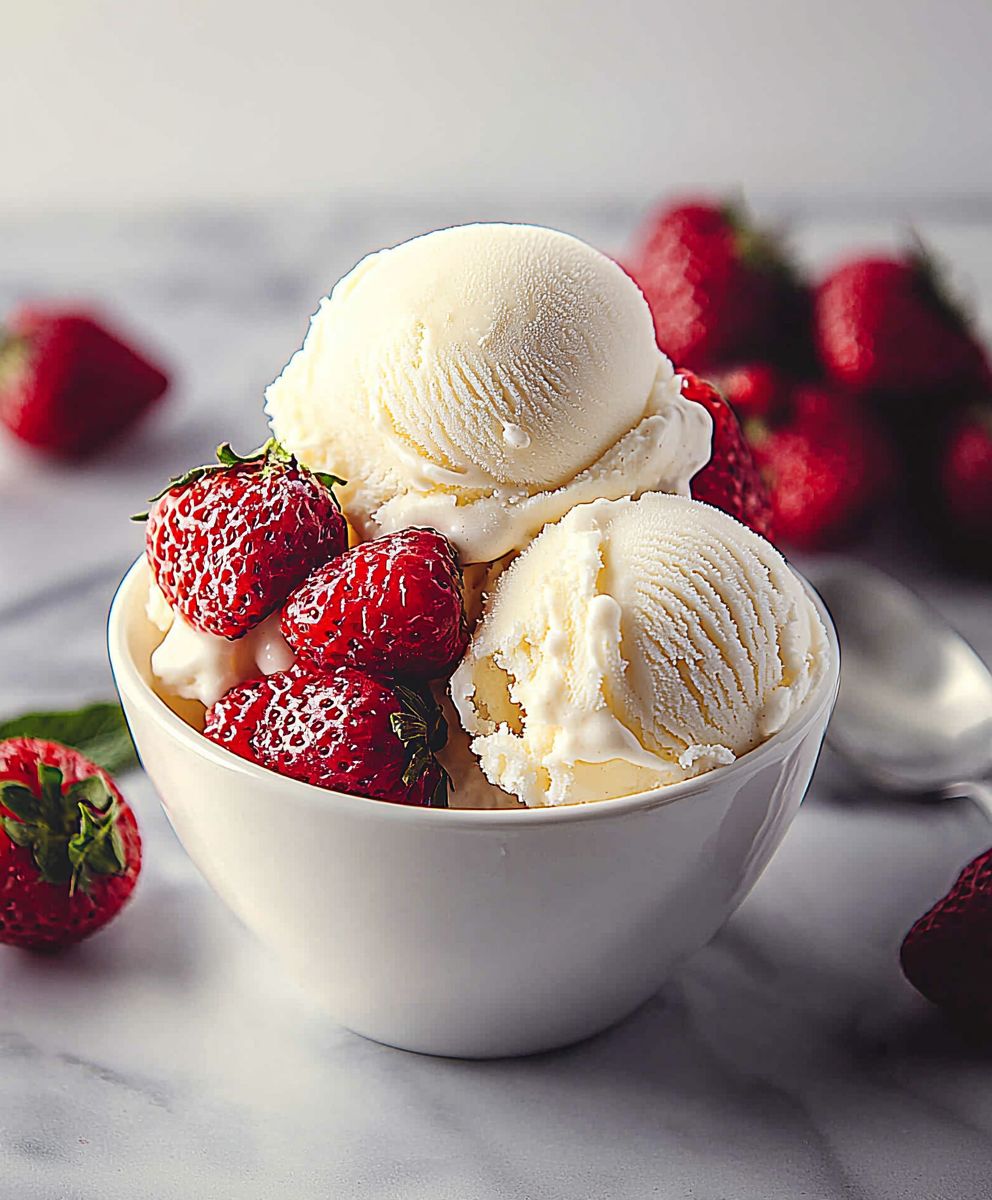
What is it about vanilla ice cream that makes it so universally loved? Perhaps it’s the smooth, velvety texture that melts in your mouth, or the subtle sweetness that perfectly complements a warm slice of pie. Maybe it’s the blank canvas it provides, ready to be adorned with your favorite toppings, from fresh berries to decadent chocolate sauce. Whatever the reason, vanilla ice cream holds a special place in our hearts (and stomachs!). So, grab your ingredients, and let’s embark on this delicious adventure together. You’ll be amazed at how rewarding it is to create your own perfect batch of vanilla ice cream at home!

Ingredients:
- 2 cups heavy cream
- 1 cup whole milk
- ¾ cup granulated sugar
- 1 vanilla bean, split lengthwise and seeds scraped (or 2 teaspoons pure vanilla extract)
- Pinch of salt
Preparing the Vanilla Base:
- First, we’re going to infuse our dairy with that beautiful vanilla flavor. If you’re using a vanilla bean, grab a small saucepan. Pour in the heavy cream, whole milk, and granulated sugar. Add the pinch of salt.
- Now, take that vanilla bean and, using a sharp knife, carefully split it lengthwise. Use the back of your knife to scrape out all those tiny, precious vanilla seeds. Add both the seeds and the pod to the saucepan. The pod itself has a ton of flavor, so don’t throw it away!
- Place the saucepan over medium heat. We want to heat the mixture until it’s just steaming and the sugar is completely dissolved. Stir it frequently with a whisk to prevent the sugar from sticking to the bottom and burning. Don’t let it boil! Boiling can change the texture of the ice cream and we want it to be perfectly smooth and creamy.
- Once the sugar is dissolved and the mixture is steaming (you’ll see little wisps of steam rising from the surface), remove the saucepan from the heat.
- If you used a vanilla bean, cover the saucepan and let the mixture steep for at least 30 minutes, or even better, an hour. This allows the vanilla flavor to really infuse into the cream and milk. The longer it steeps, the more intense the vanilla flavor will be. If you’re using vanilla extract, you’ll add it later, so skip this step.
- After steeping, remove the vanilla bean pod. You can rinse and dry the pod and save it to use in other recipes, like sugar or coffee. Just bury it in the sugar or coffee grounds for a subtle vanilla flavor.
- If you used vanilla extract, now is the time to stir it in.
Chilling the Mixture:
- This is a crucial step! We need to thoroughly chill the vanilla base before churning it. Pour the mixture into a bowl. I like to use a metal bowl because it chills faster.
- Cover the bowl tightly with plastic wrap, pressing the plastic wrap directly onto the surface of the mixture. This prevents a skin from forming on top.
- Place the bowl in the refrigerator and chill for at least 4 hours, or preferably overnight. The colder the mixture, the better the ice cream will churn.
Churning the Ice Cream:
- Now for the fun part! Get your ice cream maker ready. Make sure the bowl is properly frozen according to the manufacturer’s instructions. This usually means freezing it for at least 24 hours.
- Remove the chilled vanilla base from the refrigerator. Give it a quick stir.
- Pour the vanilla base into the frozen ice cream maker bowl.
- Turn on the ice cream maker and let it churn according to the manufacturer’s instructions. This usually takes about 20-25 minutes. The mixture will thicken and become a soft-serve consistency.
- Keep an eye on the ice cream as it churns. You’ll know it’s ready when it has a thick, soft-serve consistency and the ice cream maker starts to struggle a little.
Freezing and Hardening:
- Once the ice cream is churned, it will be a soft-serve consistency. While delicious, it’s not quite firm enough to scoop. We need to harden it in the freezer.
- Transfer the soft-serve ice cream to an airtight container. I like to use a freezer-safe container with a tight-fitting lid. You can also use a loaf pan lined with plastic wrap.
- Gently press a piece of plastic wrap onto the surface of the ice cream to prevent ice crystals from forming.
- Place the container in the freezer and freeze for at least 2-3 hours, or until it’s firm enough to scoop. The longer it freezes, the harder it will become.
Serving and Storing:
- When you’re ready to serve, remove the ice cream from the freezer and let it sit at room temperature for a few minutes to soften slightly. This will make it easier to scoop.
- Use an ice cream scoop to scoop the ice cream into bowls or cones.
- Serve immediately and enjoy!
- Store any leftover ice cream in the freezer in an airtight container. It will keep for several weeks, but it’s best enjoyed within a week or two for the best flavor and texture.
Tips for the Best Vanilla Ice Cream:
- Use high-quality ingredients. The better the ingredients, the better the ice cream will taste. Use fresh, high-quality heavy cream and whole milk. And if you’re using vanilla extract, make sure it’s pure vanilla extract, not imitation.
- Don’t skip the chilling step. Chilling the vanilla base thoroughly is essential for creating a smooth and creamy ice cream.
- Follow your ice cream maker’s instructions. Each ice cream maker is different, so be sure to follow the manufacturer’s instructions for best results.
- Don’t overchurn the ice cream. Overchurning can result in a grainy texture. Churn until the ice cream is a soft-serve consistency, then transfer it to the freezer to harden.
- Store the ice cream properly. Storing the ice cream in an airtight container will help prevent ice crystals from forming and keep it fresh.
Variations:
- Chocolate Chip Vanilla Ice Cream: Add ½ cup of mini chocolate chips to the ice cream during the last few minutes of churning.
- Strawberry Vanilla Ice Cream: Add 1 cup of chopped fresh strawberries to the ice cream during the last few minutes of churning.
- Coffee Vanilla Ice Cream: Add 2 tablespoons of instant coffee granules to the vanilla base before chilling.
- Mint Chocolate Chip Vanilla Ice Cream: Add ¼ teaspoon of peppermint extract and ½ cup of mini chocolate chips to the ice cream during the last few minutes of churning.
Troubleshooting:
- Ice cream is too icy: This is usually caused by not chilling the vanilla base thoroughly enough or by not storing the ice cream properly. Make sure to chill the base for at least 4 hours, or preferably overnight, and store the ice cream in an airtight container.
- Ice cream is too grainy: This can be caused by overchurning the ice cream or by using low-quality ingredients. Don’t overchurn the ice cream and use fresh, high-quality ingredients.
- Ice cream is too soft: This can be caused by not freezing the ice cream maker bowl properly or by not freezing the ice cream long enough after churning. Make sure the bowl is properly frozen and freeze the ice cream for at least 2-3 hours after churning.
Conclusion:
And there you have it! I truly believe this homemade vanilla ice cream recipe is a must-try for anyone who appreciates the simple pleasures in life. Forget the store-bought stuff loaded with artificial flavors and preservatives. This recipe delivers a creamy, dreamy, intensely vanilla-flavored experience that will have you questioning why you ever settled for anything less. The rich, smooth texture is unlike anything you can find on the shelves, and the pure vanilla flavor shines through in every single bite. It’s the perfect blank canvas for all your ice cream dreams! But why is it a must-try, you ask? Beyond the superior taste and texture, it’s about the experience. Making ice cream from scratch is surprisingly therapeutic. The gentle stirring, the anticipation as it churns, and the sheer joy of tasting your own creation it’s an activity that connects you to your food in a way that simply buying a pint never could. Plus, you have complete control over the ingredients, ensuring you’re only using the best quality cream, milk, and vanilla. Now, let’s talk serving suggestions! This homemade vanilla ice cream is incredibly versatile. Of course, it’s divine all on its own, served in a simple bowl or cone. But it also shines as a complement to other desserts. Imagine a scoop melting over a warm slice of apple pie, or alongside a decadent chocolate brownie. It’s the perfect partner for fruit crumbles, cobblers, and even waffles or pancakes. And don’t be afraid to get creative with variations! Want to add a little crunch? Stir in some chopped nuts, like toasted pecans or walnuts, during the last few minutes of churning. Craving something fruity? Fold in fresh berries, like strawberries, raspberries, or blueberries, after the ice cream is finished churning. For a more decadent treat, swirl in some caramel sauce or hot fudge. You could even add a splash of your favorite liqueur for an adult-friendly twist. Consider infusing the milk and cream with spices like cinnamon or cardamom for a warm, comforting flavor. Another fun idea is to add chunks of your favorite cookies or candy bars. The possibilities are truly endless! I’ve personally experimented with so many different variations, and I’ve never been disappointed. My current favorite is adding a swirl of homemade salted caramel and a sprinkle of sea salt on top the perfect balance of sweet and salty! I’m so excited for you to try this recipe and experience the magic of homemade vanilla ice cream for yourself. It’s a recipe that’s been passed down in my family for generations, and I’m thrilled to share it with you. So, grab your ingredients, dust off your ice cream maker, and get ready to create something truly special. And most importantly, don’t forget to share your experience! I’d love to hear what you think of the recipe, what variations you tried, and any tips or tricks you discovered along the way. Leave a comment below, tag me in your photos on social media, or simply tell a friend about your delicious creation. Happy ice cream making! I can’t wait to hear all about your sweet success! Print
Vanilla Ice Cream Homemade: The Ultimate Guide
- Total Time: 360 minutes
- Yield: Approximately 1 quart 1x
Description
Classic homemade vanilla ice cream. Rich, creamy, and bursting with vanilla flavor, this recipe is easy to make and perfect for any occasion.
Ingredients
- 2 cups heavy cream
- 1 cup whole milk
- ¾ cup granulated sugar
- 1 vanilla bean, split lengthwise and seeds scraped (or 2 teaspoons pure vanilla extract)
- Pinch of salt
Instructions
- Preparing the Vanilla Base: If using a vanilla bean, in a small saucepan, combine heavy cream, whole milk, granulated sugar, and salt. Split the vanilla bean lengthwise and scrape out the seeds. Add both the seeds and the pod to the saucepan.
- Place the saucepan over medium heat. Heat the mixture until it’s just steaming and the sugar is completely dissolved, stirring frequently. Do not boil.
- Remove from heat. If using a vanilla bean, cover and let steep for at least 30 minutes (or up to an hour) to infuse the flavor. If using vanilla extract, skip this step.
- After steeping, remove the vanilla bean pod. Rinse and dry the pod for future use. If using vanilla extract, stir it in now.
- Chilling the Mixture: Pour the mixture into a bowl (metal chills faster). Cover tightly with plastic wrap, pressing it onto the surface.
- Refrigerate for at least 4 hours, or preferably overnight.
- Churning the Ice Cream: Prepare your ice cream maker according to the manufacturer’s instructions (usually freezing the bowl for 24 hours).
- Remove the chilled vanilla base from the refrigerator and stir.
- Pour the vanilla base into the frozen ice cream maker bowl.
- Turn on the ice cream maker and churn according to the manufacturer’s instructions (usually 20-25 minutes). Churn until it reaches a soft-serve consistency.
- Freezing and Hardening: Transfer the soft-serve ice cream to an airtight container (or a loaf pan lined with plastic wrap).
- Gently press a piece of plastic wrap onto the surface of the ice cream.
- Freeze for at least 2-3 hours, or until firm enough to scoop.
- Serving and Storing: Remove from the freezer a few minutes before serving to soften slightly.
- Scoop and serve.
- Store leftover ice cream in the freezer in an airtight container for up to a week or two for best quality.
Notes
- Use high-quality ingredients for the best flavor.
- Chilling the base thoroughly is crucial for a smooth texture.
- Follow your ice cream maker’s instructions carefully.
- Don’t overchurn the ice cream.
- Store properly to prevent ice crystals.
- Prep Time: 15 minutes
- Cook Time: 5 minutes


Leave a Comment