Vanilla Frosting: the quintessential sweet cloud that elevates any baked good from simple to sublime. Have you ever wondered why a simple cake becomes utterly irresistible with just a swirl of creamy, dreamy frosting? It’s more than just sugar; it’s an experience! From birthday celebrations to quiet afternoon treats, vanilla frosting has been a beloved companion to cakes, cupcakes, and cookies for generations.
While the exact origins of frosting are debated, sweetened toppings have graced baked goods since at least the 17th century. However, it was the rise of refined sugar that truly allowed vanilla frosting to flourish, becoming the smooth, spreadable delight we know and love today. Its versatility is undeniable. The subtle sweetness of vanilla complements a wide range of flavors, making it the perfect partner for everything from rich chocolate cake to delicate lemon cupcakes.
But why do we adore it so much? Beyond its historical charm, vanilla frosting offers a delightful combination of textures and tastes. The smooth, melt-in-your-mouth feel, coupled with the comforting aroma of vanilla, creates a sensory experience that’s hard to resist. Plus, let’s be honest, it’s incredibly easy to make! Whether you’re a seasoned baker or a kitchen novice, whipping up a batch of homemade vanilla frosting is a guaranteed way to impress. So, let’s get started and create some magic!
Ingredients:
- 1 cup (2 sticks) unsalted butter, softened
- 3-4 cups powdered sugar, sifted
- 1/4 cup milk or heavy cream
- 2 teaspoons pure vanilla extract
- Pinch of salt
Preparing the Butter:
Okay, let’s start with the most crucial element: the butter! It absolutely must be softened. I cannot stress this enough. If your butter is even slightly cold, you’ll end up with lumpy frosting, and nobody wants that. The ideal consistency is when you can easily press your finger into it, leaving a slight indentation. If you forgot to take it out of the fridge in advance (we’ve all been there!), you can try microwaving it in 5-second intervals, but be extremely careful not to melt it. Melted butter is a frosting disaster waiting to happen.
Once your butter is perfectly softened, place it in the bowl of your stand mixer fitted with the paddle attachment. If you don’t have a stand mixer, a hand mixer will work just fine, but be prepared for a bit of an arm workout!
Creaming the Butter:
This is where the magic begins. We need to cream the butter until it’s light and fluffy. This process incorporates air into the butter, which is what gives the frosting its smooth and airy texture. Turn your mixer on to medium speed and let it run for about 3-5 minutes, scraping down the sides of the bowl occasionally with a rubber spatula. You’ll notice the butter gradually changing in color and becoming lighter and more voluminous. Don’t rush this step; it’s essential for achieving the perfect frosting consistency.
Adding the Powdered Sugar:
Now comes the powdered sugar, also known as confectioners’ sugar. This is what gives the frosting its sweetness and structure. But here’s a pro tip: sift it! Sifting the powdered sugar removes any lumps and ensures that it incorporates smoothly into the butter. Trust me, it makes a world of difference.
Add the powdered sugar one cup at a time, mixing on low speed after each addition. This is crucial to prevent a powdered sugar explosion that will coat your entire kitchen (and you!). Once each cup is mostly incorporated, scrape down the sides of the bowl to ensure everything is evenly mixed. After you’ve added the first three cups, assess the consistency. If the frosting seems too thick, hold off on adding the fourth cup. You can always add more later if needed.
Adding the Liquid and Vanilla:
Next, we’ll add the liquid and vanilla extract. The liquid helps to thin out the frosting and make it more spreadable, while the vanilla extract adds that classic vanilla flavor. You can use either milk or heavy cream for the liquid. Heavy cream will result in a richer, more decadent frosting, while milk will create a lighter version. I usually opt for milk, but feel free to experiment and see what you prefer.
Add the milk or heavy cream and vanilla extract to the bowl. Mix on low speed until just combined. Be careful not to overmix at this stage, as overmixing can cause the frosting to become tough.
Adjusting the Consistency:
Now it’s time to fine-tune the consistency of the frosting. This is where your personal preference comes into play. If the frosting is too thick, add a tablespoon of milk or heavy cream at a time, mixing on low speed until you reach the desired consistency. If the frosting is too thin, add a tablespoon of powdered sugar at a time, again mixing on low speed until it thickens up.
Remember to scrape down the sides of the bowl frequently to ensure everything is evenly mixed. The ideal consistency should be smooth, creamy, and easily spreadable. It should hold its shape when piped but not be so stiff that it’s difficult to work with.
Adding the Salt:
Don’t forget the pinch of salt! It might seem counterintuitive to add salt to a sweet frosting, but it actually enhances the sweetness and balances out the flavors. A small pinch is all you need; too much salt will ruin the frosting.
Whipping the Frosting:
Once you’ve achieved the desired consistency, turn the mixer up to medium-high speed and whip the frosting for another 1-2 minutes. This will make it even lighter and fluffier. Keep an eye on it, though, as overwhipping can cause the frosting to become too airy and lose its structure.
Tasting and Adjusting:
The most important step of all: taste the frosting! This is your chance to make any final adjustments. If it’s not sweet enough, add a little more powdered sugar. If it needs more vanilla flavor, add a few drops of vanilla extract. If it’s too sweet, add a tiny pinch more salt. Trust your taste buds and adjust accordingly.
Using the Frosting:
Your vanilla frosting is now ready to use! It’s perfect for frosting cakes, cupcakes, cookies, or any other dessert that needs a touch of sweetness. You can spread it on with a spatula, pipe it on with a piping bag, or even use it as a dip for fruit. The possibilities are endless!
Storage:
If you’re not using the frosting immediately, you can store it in an airtight container in the refrigerator for up to a week. When you’re ready to use it, let it come to room temperature and then rewhip it with your mixer to restore its smooth and creamy texture.
Troubleshooting:
Lumpy Frosting: This is usually caused by using butter that is too cold. Make sure your butter is properly softened before you start. If your frosting is already lumpy, you can try microwaving it in 5-second intervals, stirring after each interval, until the butter is softened enough to smooth out. Be careful not to melt the butter completely.
Too Thick Frosting: Add a tablespoon of milk or heavy cream at a time, mixing on low speed until you reach the desired consistency.
Too Thin Frosting: Add a tablespoon of powdered sugar at a time, mixing on low speed until it thickens up.
Grainy Frosting: This can be caused by using granulated sugar instead of powdered sugar. Make sure you’re using powdered sugar, and that it’s sifted to remove any lumps.
Frosting Separating: This can happen if the butter is too warm or if the frosting is overmixed. If the frosting is separating, try chilling it in the refrigerator for 15-20 minutes and then rewhip it with your mixer.
Variations:
Chocolate Frosting: Add 1/2 cup of unsweetened cocoa powder to the frosting along with the powdered sugar.
Strawberry Frosting: Add 1/4 cup of strawberry puree to the frosting along with the milk or heavy cream.
Lemon Frosting: Add 1-2 tablespoons of lemon juice and 1 teaspoon of lemon zest to the frosting along with the milk or heavy cream.
Almond Frosting: Substitute almond extract for the vanilla extract.
Step-by-Step Instructions:
- Ensure your butter is softened to room temperature. It should be easily indented with a finger.
- Place the softened butter in the bowl of a stand mixer fitted with the paddle attachment (or use a hand mixer).
- Cream the butter on medium speed for 3-5 minutes, scraping down the sides of the bowl occasionally, until light and fluffy.
- Sift the powdered sugar to remove any lumps. This is a very important step!
- Add the sifted powdered sugar one cup at a time, mixing on low speed after each addition to prevent a sugar cloud. Scrape down the sides of the bowl after each addition.
- Once you’ve added 3 cups of powdered sugar, assess the consistency. If it seems too thick, hold off on the fourth cup.
- Add the milk (or heavy cream) and vanilla extract to the bowl.
- Mix on low speed until just combined. Be careful not to overmix.
- Adjust the consistency by adding more milk (if too thick) or powdered sugar (if too thin), one tablespoon at a time, mixing on low speed after each addition.
- Add a pinch of salt to enhance the sweetness.
- Whip the frosting on medium-high speed for 1-2 minutes to make it even lighter and fluffier. Watch carefully to avoid overwhipping.
- Taste the frosting and adjust the sweetness, vanilla flavor, or salt as needed.
- Use the frosting immediately or store it in an airtight container in the refrigerator for up to

Conclusion:
So there you have it! This isn’t just any frosting; it’s a vanilla frosting experience. I truly believe this recipe is a must-try for anyone who appreciates the simple elegance of vanilla. It’s the kind of frosting that elevates any dessert, transforming a basic cake or cupcake into something truly special. The smooth, creamy texture and the pure, unadulterated vanilla flavor are simply irresistible. It’s the perfect balance of sweetness and richness, without being cloying or overpowering.
But why is it a must-try? Because it’s incredibly versatile! It’s not just for cakes and cupcakes. Imagine dolloping it onto warm brownies, swirling it into a homemade cinnamon roll, or even using it as a dip for fresh strawberries. The possibilities are endless! And the best part? It’s so easy to make. Even if you’re a beginner baker, you can whip up this frosting in minutes and impress your friends and family with your newfound skills.
Speaking of versatility, let’s talk about serving suggestions and variations. For a classic pairing, frost a chocolate cake or vanilla cupcakes. The contrast of flavors is simply divine. If you’re feeling adventurous, try adding a touch of citrus zest, like lemon or orange, for a bright and refreshing twist. A pinch of sea salt can also enhance the vanilla flavor and add a subtle complexity. For a richer, more decadent frosting, use browned butter instead of regular butter. The nutty, caramel-like notes of browned butter will take this frosting to a whole new level.
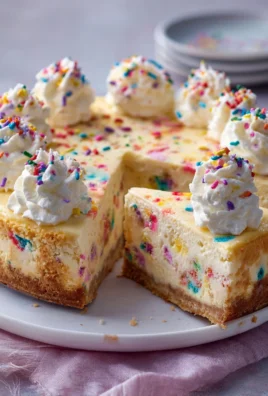
And don’t forget about decorations! A simple sprinkle of colorful sprinkles is always a crowd-pleaser, but you can also get creative with fresh berries, chocolate shavings, or even edible flowers. The presentation is just as important as the taste, so have fun and let your imagination run wild!
I’ve personally used this vanilla frosting recipe for countless occasions, from birthday parties to holiday gatherings, and it’s always a hit. I’ve received so many compliments on its flavor and texture, and I’m confident that you will too. It’s the kind of recipe that you’ll want to keep in your back pocket for years to come.
So, what are you waiting for? Grab your ingredients, put on your apron, and get ready to create some magic in the kitchen. I promise you won’t be disappointed. This frosting is so good, you might even want to eat it straight from the bowl (I won’t judge!).
I’m so excited for you to try this recipe and experience the joy of homemade vanilla frosting. Once you’ve made it, I’d love to hear about your experience. Did you try any of the variations I suggested? Did you use it on a cake, cupcakes, or something else entirely? What did your friends and family think?
Please, share your photos and stories in the comments below. I can’t wait to see what you create! Happy baking! And remember, the secret ingredient is always love (and a generous helping of vanilla!). Let me know if you have any questions, I’m always happy to help. Enjoy your delicious, homemade vanilla frosting!
Vanilla Frosting: The Ultimate Guide to Perfecting Your Recipe
Classic, creamy vanilla frosting perfect for cakes, cupcakes, and cookies. Easy to make and customize!
Ingredients
- 1 cup (2 sticks) unsalted butter, softened
- 3-4 cups powdered sugar, sifted
- 1/4 cup milk or heavy cream
- 2 teaspoons pure vanilla extract
- Pinch of salt
Instructions
- Ensure your butter is softened to room temperature. It should be easily indented with a finger.
- Place the softened butter in the bowl of a stand mixer fitted with the paddle attachment (or use a hand mixer).
- Cream the butter on medium speed for 3-5 minutes, scraping down the sides of the bowl occasionally, until light and fluffy.
- Sift the powdered sugar to remove any lumps. This is a very important step!
- Add the sifted powdered sugar one cup at a time, mixing on low speed after each addition to prevent a sugar cloud. Scrape down the sides of the bowl after each addition.
- Once you’ve added 3 cups of powdered sugar, assess the consistency. If it seems too thick, hold off on the fourth cup.
- Add the milk (or heavy cream) and vanilla extract to the bowl.
- Mix on low speed until just combined. Be careful not to overmix.
- Adjust the consistency by adding more milk (if too thick) or powdered sugar (if too thin), one tablespoon at a time, mixing on low speed after each addition.
- Add a pinch of salt to enhance the sweetness.
- Whip the frosting on medium-high speed for 1-2 minutes to make it even lighter and fluffier. Watch carefully to avoid overwhipping.
- Taste the frosting and adjust the sweetness, vanilla flavor, or salt as needed.
- Use the frosting immediately or store it in an airtight container in the refrigerator for up to a week. Let come to room temperature and rewhip before using.
Notes
- Butter is Key: Softened butter is crucial for smooth frosting. Microwave in 5-second intervals if needed, but be careful not to melt.
- Sift the Sugar: Sifting powdered sugar prevents lumps.
- Adjust Consistency: Add milk or powdered sugar, one tablespoon at a time, to achieve desired consistency.
- Don’t Overmix: Overmixing can make the frosting tough.
- Storage: Store in an airtight container in the refrigerator for up to a week. Rewhip before using.
- Lumpy Frosting: Caused by butter that is too cold.
- Too Thick Frosting: Add a tablespoon of milk or heavy cream at a time, mixing on low speed until you reach the desired consistency.
- Too Thin Frosting: Add a tablespoon of powdered sugar at a time, mixing on low speed until it thickens up.
- Grainy Frosting: Make sure you’re using powdered sugar, and that it’s sifted to remove any lumps.
- Frosting Separating: Try chilling it in the refrigerator for 15-20 minutes and then rewhip it with your mixer.



Leave a Comment