

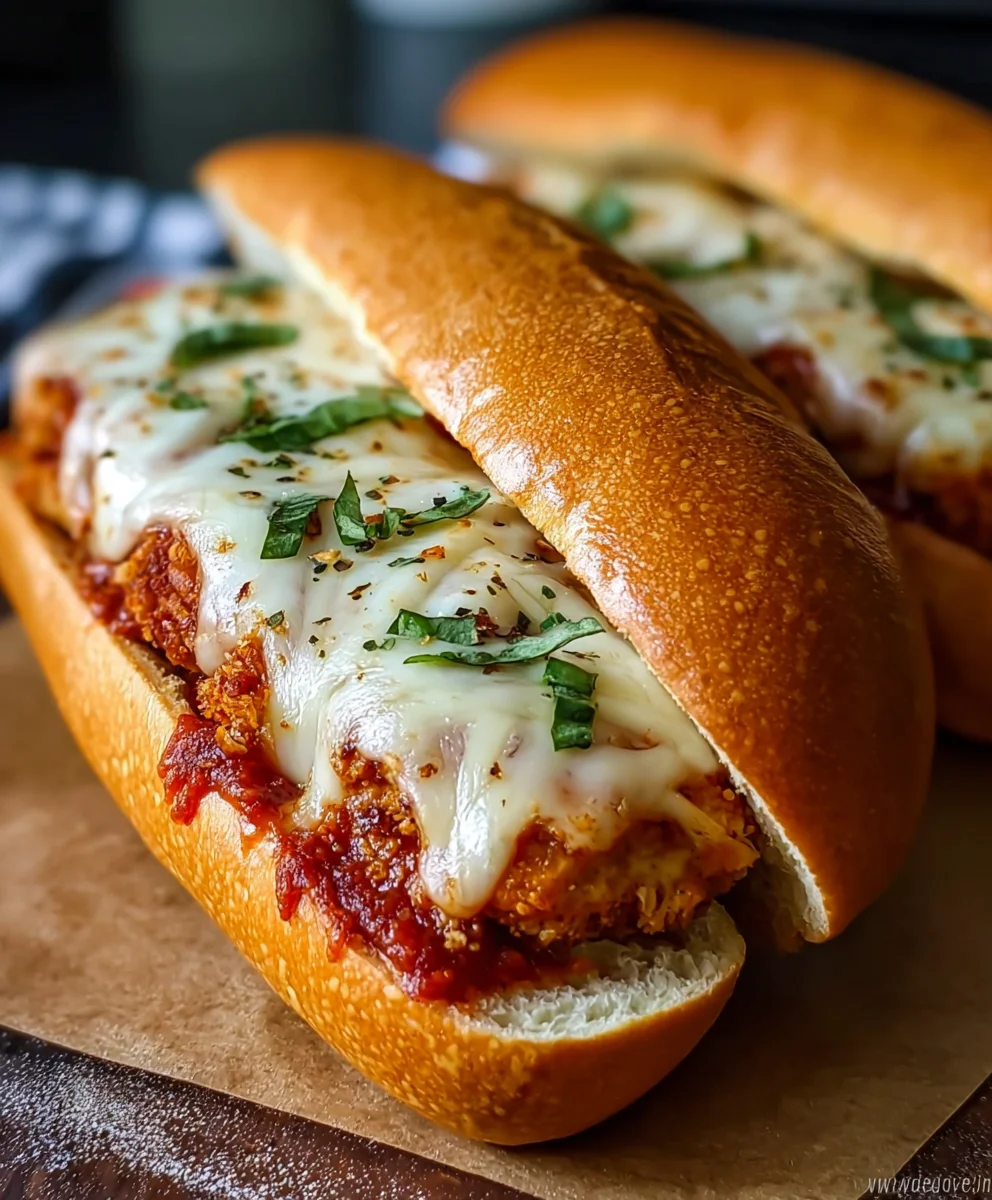
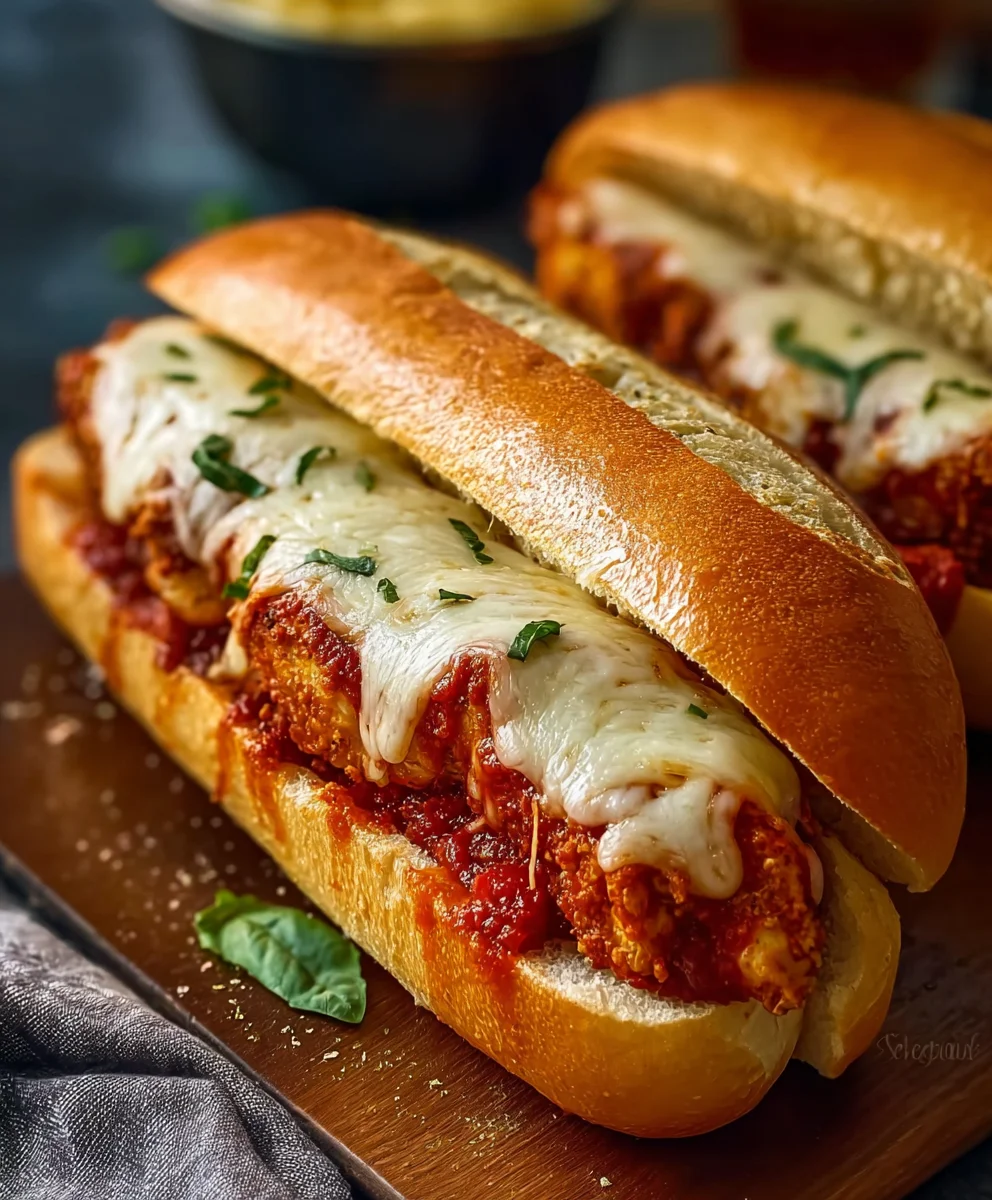
Chicken Parmesan Sub – what a magnificent creation! Just thinking about it brings a smile to my face and a rumble to my stomach. Imagine perfectly crispy, golden-fried chicken cutlets, smothered in a vibrant, rich marinara sauce, generously blanketed with gooey, melted mozzarella and Parmesan cheeses, all nestled lovingly inside a toasted, crusty roll. It’s more than just a sandwich; it’s an experience, a symphony of flavors and textures that tantalizes the taste buds with every single bite.
This iconic sandwich, a true testament to Italian-American culinary ingenuity, takes the beloved classic chicken parmigiana and ingeniously transforms it into a handheld masterpiece. While the origins of chicken parmigiana itself are rooted in Southern Italy, its evolution into the quintessential sub sandwich is a delicious part of American food culture, particularly in bustling delis and pizzerias across the East Coast. People adore this dish for its satisfying heft and incredible balance of savory, cheesy, and tangy notes.
There’s an undeniable allure to its combination of textures and flavors – the crunch of the chicken, the tang of the sauce, the creamy cheese, and the yielding bread. It’s comfort food personified, a satisfying and hearty meal that truly hits the spot, making the Chicken Parmesan Sub a perennial favorite for lunch or dinner. I promise you, crafting this at home is an incredibly rewarding culinary adventure that your family and friends will absolutely adore.

Ingredients:
- For the Crispy Chicken Cutlets:
- 4 boneless, skinless chicken breasts (about 6-8 ounces each), ideally organic or free-range for the best flavor.
- 1 cup all-purpose flour, seasoned generously with 1 teaspoon salt and ½ teaspoon black pepper.
- 2 large eggs, whisked with 1 tablespoon water or milk to create an egg wash.
- 2 cups Panko breadcrumbs, the secret to an extra-crispy exterior for your Chicken Parmesan Sub.
- ½ cup freshly grated Parmesan cheese, plus extra for serving.
- 1 teaspoon dried Italian seasoning.
- ½ teaspoon garlic powder.
- ¼ teaspoon red pepper flakes (optional, for a subtle kick).
- 2-3 cups neutral oil for frying (vegetable, canola, or grapeseed oil work wonderfully).
- Salt and freshly ground black pepper to taste for seasoning the chicken itself.
- For the Rich Tomato Sauce:
- 1 (28-ounce) can crushed tomatoes, preferably San Marzano for superior sweetness and less acidity.
- 1 (15-ounce) can tomato sauce or pureed tomatoes.
- 2 tablespoons olive oil, extra virgin if you have it.
- 1 small yellow onion, finely minced.
- 3 cloves garlic, minced.
- 1 teaspoon dried oregano.
- ½ teaspoon dried basil (or 2 tablespoons fresh basil, chopped, added at the end).
- Pinch of sugar (optional, to balance acidity).
- Salt and freshly ground black pepper to taste.
- For the Ultimate Assembly:
- 4 crusty sub rolls or hoagie rolls, about 8-10 inches long, preferably split down the middle but not all the way through, allowing for a hinged opening.
- 1½ – 2 cups shredded low-moisture mozzarella cheese, the amount can vary based on your personal preference for cheesiness on your Chicken Parmesan Sub.
- ½ cup freshly grated Parmesan cheese, for layering and topping.
- Fresh basil leaves, for garnish (optional, but highly recommended for brightness).
- Butter (optional, for toasting rolls).
Preparing the Chicken for Your Ultimate Chicken Parmesan Sub
Alright, let’s get down to business with the star of our show: the chicken! This initial preparation is crucial for ensuring each bite of your Chicken Parmesan Sub is tender, flavorful, and cooks evenly. Trust me, a little effort here goes a long way.
- First things first, grab your chicken breasts. I like to place each breast between two sheets of plastic wrap or inside a large freezer bag. This prevents a mess and keeps your kitchen clean. Using a meat mallet, the flat side of a heavy pan, or even a rolling pin, carefully pound each chicken breast to an even thickness of about ½ inch. The goal here is consistency – this ensures they all cook at the same rate and remain incredibly tender. Pounding also breaks down the fibers, making for a more succulent bite.
- Once pounded, remove the plastic wrap and pat the chicken dry thoroughly with paper towels. This step is often overlooked but it’s incredibly important. Excess moisture on the chicken will prevent the breading from sticking properly, and we want a perfectly coated cutlet for our Chicken Parmesan Sub. Season both sides of each chicken breast generously with a pinch of salt and freshly ground black pepper.
- Now, let’s set up our breading station. This is a classic three-step process that guarantees a beautiful, crispy crust. You’ll need three shallow dishes or pie plates, arranged in a line.
- In the first dish, combine the all-purpose flour, 1 teaspoon salt, and ½ teaspoon black pepper. Give it a good whisk to ensure everything is evenly distributed.
- In the second dish, whisk your two large eggs with 1 tablespoon of water or milk. This creates our binding agent, the egg wash.
- In the third dish, combine the Panko breadcrumbs, ½ cup freshly grated Parmesan cheese, 1 teaspoon dried Italian seasoning, ½ teaspoon garlic powder, and the optional ¼ teaspoon red pepper flakes. Mix these ingredients thoroughly. Panko is non-negotiable here for that superior crunch; regular breadcrumbs just won’t give your Chicken Parmesan Sub the same glorious texture.
- Time to bread the chicken! Take one pounded chicken breast and dredge it thoroughly in the seasoned flour, ensuring it’s completely coated. Shake off any excess flour – we want a thin, even layer, not a cakey one.
- Next, transfer the floured chicken to the egg wash. Dip it fully, letting any excess egg drip off. Make sure every part of the chicken is covered; this is what the breadcrumbs will cling to.
- Finally, place the egg-coated chicken into the Panko-Parmesan mixture. Press the breadcrumbs firmly onto both sides of the chicken cutlet. Don’t be shy; really press them on to create a thick, even crust. Once coated, place the breaded cutlet on a clean plate or a wire rack set over a baking sheet. Repeat this process for all remaining chicken breasts. If you have time, let the breaded chicken rest in the refrigerator for 15-20 minutes. This helps the breading adhere even better, preventing it from falling off during frying, which is a common issue for many.
Cooking the Crispy Chicken Cutlets
Now that our chicken is beautifully breaded, it’s time to transform it into golden, crispy perfection. This is where the magic happens for the texture of your Chicken Parmesan Sub.
- Choose a large, heavy-bottomed skillet or a cast-iron pan for frying. This type of pan retains heat well, which is crucial for even cooking. Pour in about 2-3 cups of neutral oil – enough to come about ½ to ¾ inch up the sides of the pan. Place the skillet over medium-high heat.
- Achieving the right oil temperature is key to perfectly fried chicken. You’re aiming for a temperature between 350°F and 375°F (175°C – 190°C). If you have a kitchen thermometer, now is the time to use it. If not, a good test is to drop a tiny pinch of breadcrumbs into the oil; if they sizzle vigorously and turn golden brown within 10-15 seconds, your oil is ready. If they burn instantly, the oil is too hot; if they just sit there, it’s not hot enough.
- Carefully place one or two breaded chicken cutlets into the hot oil, being careful not to overcrowd the pan. Overcrowding will lower the oil temperature too much, resulting in greasy, less crispy chicken. Give them space to fry properly.
- Fry the cutlets for about 3-5 minutes per side, or until they are deeply golden brown and cooked through. You’ll see the edges start to crisp up and the color deepen. The internal temperature of the chicken should reach 165°F (74°C) for food safety. I always recommend having a meat thermometer handy to ensure proper doneness. The beautiful aroma filling your kitchen right now is just a preview of the deliciousness to come for your Chicken Parmesan Sub.
- Once cooked, carefully remove the chicken cutlets from the oil using tongs and transfer them to a wire rack set over a baking sheet lined with paper towels. The wire rack is important because it allows air to circulate around the cutlets, preventing them from becoming soggy on the bottom. Sprinkle them lightly with a pinch of salt immediately after they come out of the oil – this enhances their flavor and crispiness. Repeat with the remaining chicken, adding more oil if necessary and ensuring the oil temperature remains consistent between batches.
Simmering the Irresistible Tomato Sauce
While our chicken cutlets are cooling slightly, let’s turn our attention to the heart of any great Chicken Parmesan Sub: the rich, flavorful tomato sauce. A good sauce can elevate a simple dish to something extraordinary.
- In a medium saucepan, heat 2 tablespoons of olive oil over medium heat. Once shimmering, add the finely minced yellow onion. Sauté the onion for about 5-7 minutes, stirring occasionally, until it becomes soft and translucent. Don’t rush this step; properly softened onions lay a foundational layer of sweetness and depth for your sauce.
- Add the minced garlic to the saucepan and cook for another 1-2 minutes, stirring constantly, until fragrant. Be careful not to burn the garlic, as burnt garlic can turn bitter and ruin the flavor of your sauce.
- Pour in the crushed tomatoes and tomato sauce (or pureed tomatoes). Give everything a good stir to combine. Now, add the dried oregano, dried basil (if using dried), and the optional pinch of sugar. The sugar isn’t strictly necessary, but it can help to balance the acidity of the tomatoes, especially if you find your tomatoes a bit tart.
- Bring the sauce to a gentle simmer. Once it’s bubbling lightly, reduce the heat to low, cover the saucepan, and let it simmer for at least 20-30 minutes. The longer it simmers, the more the flavors will meld and deepen, resulting in a truly delicious sauce for your Chicken Parmesan Sub. Stir occasionally to prevent sticking.
- After simmering, taste the sauce and adjust seasonings as needed. Add salt and freshly ground black pepper to your preference. If you’re using fresh basil, stir it in now, just before assembling. The vibrant green of fresh basil adds both visual appeal and a burst of fresh flavor.
Assembling the Perfect Chicken Parmesan Sub
This is where everything comes together, transforming our individual components into a cohesive, mouth-watering Chicken Parmesan Sub. Get ready to create a masterpiece!
- Preheat your oven to 400°F (200°C). If your rolls are a bit soft or you prefer them extra toasty, you can use the broiler for a quick minute later, but baking will help melt the cheese more evenly. Have a baking sheet ready.
- Prepare your sub rolls. If they aren’t already, split them lengthwise down the middle, being careful not to cut all the way through, so they open like a book. If you like, you can lightly butter the insides of the rolls before toasting for an extra layer of richness and a slightly crispier interior.
- For maximum flavor and to prevent a soggy bottom, I like to toast the rolls lightly. Place the open rolls on the baking sheet, cut-side up, and bake for 3-5 minutes, or until they are lightly golden and fragrant. Alternatively, you can briefly broil them (watch very carefully, as they can burn quickly!). This creates a barrier against the sauce and adds a lovely textural element to your Chicken Parmesan Sub.
- Once toasted, remove the rolls from the oven. Spoon a generous layer of our rich tomato sauce onto the bottom half of each roll. Don’t be shy, but don’t drown it either. We want flavor in every bite without it becoming a soupy mess.
- Next, place one or two (depending on the size of your cutlets and rolls) of the crispy chicken cutlets on top of the sauce in each roll. If your cutlets are very large, you might want to slice them in half or even into thirds crosswise to fit better into the rolls. This ensures you get a good chicken-to-bread ratio in every bite of your Chicken Parmesan Sub.
- Spoon a little more tomato sauce over the chicken cutlets. This adds moisture and ensures the chicken stays flavorful and moist throughout the baking process.
- Now, for the cheese! Generously sprinkle shredded mozzarella cheese over the sauced chicken. Then, add a final flourish of freshly grated Parmesan cheese. The combination of mozzarella for gooeyness and Parmesan for sharp, salty flavor is unbeatable. Stack it high; this is a sub, after all!
- Carefully transfer the assembled Chicken Parmesan Subs back to the baking sheet. Return them to the preheated oven and bake for 8-12 minutes, or until the mozzarella cheese is completely melted, bubbly, and starting to turn golden brown in spots. If you desire an even browner, crispier cheese topping, you can switch to the broiler for the last minute or two, keeping a very close eye on them to prevent burning.
Finishing Touches and Serving Your Chicken Parmesan Sub
The moment of truth has arrived! Your kitchen should be filled with incredible aromas right now, signaling that your magnificent Chicken Parmesan Sub is nearly ready to be devoured.
- Carefully remove the baking sheet from the oven. The subs will be piping hot, so handle them with care.
- If you have fresh basil on hand, now is the perfect time to add it. Sprinkle a few torn or thinly sliced fresh basil leaves over the melted cheese on each sub. The heat from the sub will gently warm the basil, releasing its beautiful aroma and adding a fresh, herbaceous counterpoint to the rich flavors. This really brightens up the entire Chicken Parmesan Sub.
- Allow the subs to rest for just a minute or two before serving. This short resting period allows the cheese to set slightly, preventing it from sliding off, and allows the various layers to meld together. It also makes them a little easier to handle without burning your fingers!
- Serve your glorious Chicken Parmesan Sub immediately. These are best enjoyed hot and fresh. You might want to have extra napkins on hand, as these can be wonderfully messy in the best possible way. This isn’t just a sandwich; it’s a hearty, satisfying meal that truly hits the spot. Enjoy every single amazing bite!
Conclusion:
Well, friends, we’ve reached the end of our culinary journey, but truly, it’s just the beginning of your delicious adventure. I sincerely hope you’ve enjoyed following along with this recipe for what I truly believe is not just a meal, but an experience. This isn’t just another dinner; it’s a celebration of classic flavors, elevated to new heights. The combination of succulent, tender chicken, perfectly breaded and fried to a golden crisp, blanketed in a vibrant, homemade marinara sauce, and then crowned with a generous layer of bubbling, melted mozzarella and Parmesan cheese, all nestled within a toasted, crusty roll… it’s a symphony for your taste buds. Every bite delivers that satisfying crunch, followed by juicy chicken, savory sauce, and gooey cheese, making it an utterly irresistible dish. It’s the kind of comfort food that wraps you in a warm hug, perfect for a cozy night in, or a vibrant gathering with loved ones. This recipe is a must-try because it takes something inherently simple and transforms it into something truly extraordinary. You’ll find yourself craving it long after the last crumb is gone, and I promise you, the effort is more than worth the incredible reward.
Elevate Your Experience: Serving Suggestions & Creative Variations
Now that you’re armed with the knowledge to create this masterpiece, let’s talk about how to make it even more special, or perhaps, how to put your own unique spin on it. For serving, while these incredible subs are undeniably hearty and satisfying on their own, pairing them with a simple, crisp side salad tossed in a light vinaigrette can provide a refreshing contrast and cut through the richness beautifully. A bowl of garlicky pasta salad or some perfectly seasoned oven-roasted potatoes would also make fantastic companions. Don’t forget the drink! A classic iced tea, a light lager, or even a sparkling water with a squeeze of lemon would complement the flavors wonderfully. But where the real fun begins is in the variations! Feel free to experiment with different cheeses – a blend of provolone and mozzarella can add an extra depth of flavor, or a sprinkle of smoked gouda for a hint of smokiness. If you like things spicier, a pinch of red pepper flakes in your marinara sauce will give it a pleasant kick. For a lighter touch, you could even try grilling or baking your chicken cutlets instead of frying them, though you might miss a bit of that glorious crunch. Consider adding some caramelized onions or sautéed bell peppers to your sub before melting the cheese for an added layer of sweetness and texture. Or, for a truly decadent experience, a smear of homemade pesto under the cheese would be absolutely divine. The beauty of this recipe is its versatility; it invites you to play and customize it to your heart’s desire. The goal is always to create that perfect Chicken Parmesan Sub that speaks directly to your cravings.
Your Turn to Create & Share!
So, what are you waiting for? I’ve shared all my secrets and tips, and now it’s your turn to step into the kitchen and bring this incredible dish to life. Don’t hesitate to give this recipe a try; I guarantee it will become a new favorite in your culinary repertoire. There’s immense satisfaction in creating something so delicious from scratch, especially when it results in such a crowd-pleasing meal. Once you’ve whipped up your own batch of these amazing subs, I would absolutely love to hear about your experience! Did you stick to the recipe, or did you venture into your own creative variations? What was your favorite part of the process? Did your family or friends rave about it as much as I think they will? Please share your triumphs, your tweaks, and your delicious results with me and our community. Snap a picture, tell us your story, and let us know how your Chicken Parmesan Sub turned out! Your feedback and shared joy are what make this whole cooking journey so incredibly rewarding for me. Happy cooking, and I can’t wait to see what deliciousness you create!
Ultimate Chicken Parmesan Sub Recipe
The Chicken Parmesan Sub is a delicious Italian-American classic that combines crispy, golden chicken breasts with tangy marinara sauce and melty mozzarella cheese, all served on a toasted sub roll. This sandwich is perfect for a hearty lunch or dinner, offering a satisfying combination of textures and flavors that will leave you craving more.
Ingredients
-
4 boneless, skinless chicken breasts (about 6-8 ounces each)
-
1 cup all-purpose flour, seasoned with 1 teaspoon salt and ½ teaspoon black pepper
-
2 large eggs, whisked with 1 tablespoon water or milk
-
2 cups Panko breadcrumbs
-
½ cup freshly grated Parmesan cheese (for breading)
-
1 teaspoon dried Italian seasoning
-
½ teaspoon garlic powder
-
¼ teaspoon red pepper flakes (optional)
-
2-3 cups neutral oil for frying (vegetable, canola, or grapeseed)
-
Salt and freshly ground black pepper (for chicken)
-
1 (28-ounce) can crushed San Marzano tomatoes
-
1 (15-ounce) can tomato sauce or pureed tomatoes
-
2 tablespoons olive oil
-
1 small yellow onion, finely minced
-
3 cloves garlic, minced
-
1 teaspoon dried oregano
-
½ teaspoon dried basil (or 2 tablespoons fresh basil, chopped)
-
Pinch of sugar (optional)
-
Salt and freshly ground black pepper (for sauce)
-
4 crusty sub rolls or hoagie rolls (8-10 inches)
-
1½ – 2 cups shredded low-moisture mozzarella cheese
-
½ cup freshly grated Parmesan cheese (for layering and topping)
-
Fresh basil leaves, for garnish (optional)
-
Butter (optional, for toasting rolls)
Instructions
-
Step 1
Pound chicken breasts to an even ½-inch thickness. Pat them dry and season generously with salt and pepper. -
Step 2
Prepare three shallow dishes: 1) flour, 1 tsp salt, ½ tsp pepper; 2) whisked eggs with water/milk; 3) Panko breadcrumbs, ½ cup Parmesan, 1 tsp Italian seasoning, ½ tsp garlic powder, and optional ¼ tsp red pepper flakes. Mix each dish well. -
Step 3
Dredge each chicken breast in the seasoned flour (shaking off excess), then dip in egg wash (letting excess drip off), then firmly press into the Panko-Parmesan mixture to coat thoroughly. Place breaded cutlets on a wire rack. Refrigerate for 15-20 minutes if time allows for better adhesion. -
Step 4
Heat 2-3 cups neutral oil in a large, heavy-bottomed skillet to 350-375°F (175-190°C). Fry 1-2 cutlets at a time for 3-5 minutes per side until golden brown and cooked through (internal temp 165°F/74°C). Transfer to a wire rack over a baking sheet, sprinkle with salt. -
Step 5
In a medium saucepan, heat 2 tablespoons olive oil over medium heat. Sauté minced yellow onion for 5-7 minutes until soft. Add minced garlic and cook for 1-2 minutes until fragrant. -
Step 6
Pour in crushed tomatoes and tomato sauce. Stir in dried oregano, dried basil, and optional pinch of sugar. Bring to a gentle simmer, then reduce heat to low, cover, and let simmer for 20-30 minutes, stirring occasionally. -
Step 7
Taste sauce and adjust salt and pepper. If using fresh basil, stir it in now. -
Step 8
Preheat oven to 400°F (200°C). Split sub rolls lengthwise, not cutting all the way through. Optionally, lightly butter the insides. -
Step 9
Place open rolls cut-side up on a baking sheet. Bake for 3-5 minutes until lightly golden and fragrant, or briefly broil (watch carefully). -
Step 10
Spoon a generous layer of tomato sauce onto the bottom half of each toasted roll. Place 1-2 crispy chicken cutlets on the sauce. Spoon a little more sauce over the chicken. -
Step 11
Generously sprinkle shredded mozzarella cheese over the chicken, then add freshly grated Parmesan cheese. Transfer assembled subs to the baking sheet and bake for 8-12 minutes, or until cheese is melted, bubbly, and golden. Broil for 1-2 minutes if desired for extra crispiness (watch closely). -
Step 12
Carefully remove from oven. Garnish with torn or thinly sliced fresh basil leaves (optional). Let rest for 1-2 minutes before serving hot. Enjoy!
Important Information
Nutrition Facts (Per Serving)
It is important to consider this information as approximate and not to use it as definitive health advice.
Allergy Information
Please check ingredients for potential allergens and consult a health professional if in doubt.


Leave a Comment