

Texas Style Chili: the very name conjures images of crackling campfires, wide-open skies, and the rich, savory aroma of a truly unforgettable meal. Forget everything you think you know about chili this isn’t your average bowl of beans and ground beef! We’re talking about a deeply flavorful, meat-centric masterpiece that’s simmered to perfection, a true taste of the Lone Star State.
The history of Texas Style Chili is as bold and colorful as the state itself. Originating in the early 19th century with the “Chili Queens” of San Antonio, who served up steaming bowls of this hearty stew in the city’s plazas, it quickly became a staple of Texan cuisine. It’s a dish born from resourcefulness and a love for bold flavors, a testament to the state’s pioneering spirit.
But what makes this chili so beloved? It’s the pure, unadulterated flavor of beef, slow-cooked with a blend of chilies and spices that create a symphony of taste. The texture is rich and satisfying, with tender chunks of meat that practically melt in your mouth. And while it requires a bit of time to simmer, the hands-on effort is minimal, making it a perfect dish for a weekend gathering or a cozy night in. Trust me, once you’ve tasted authentic Texas Style Chili, you’ll never go back to the canned stuff!

Ingredients:
- 3 lbs Beef Chuck, cut into 1-inch cubes
- 2 tbsp Olive Oil
- 1 large Onion, chopped
- 2 Green Bell Peppers, chopped
- 2 Jalapeño Peppers, seeded and minced (adjust to your spice preference)
- 4 cloves Garlic, minced
- 1 (28 oz) can Crushed Tomatoes
- 1 (15 oz) can Tomato Sauce
- 1 (15 oz) can Diced Tomatoes, undrained
- 2 tbsp Chili Powder
- 1 tbsp Cumin
- 1 tbsp Smoked Paprika
- 1 tsp Oregano
- 1/2 tsp Cayenne Pepper (optional, for extra heat)
- 1/2 tsp Ground Coriander
- 1/4 tsp Allspice
- 2 cups Beef Broth
- 1 tbsp Brown Sugar
- 1 tbsp Apple Cider Vinegar
- 1 (15 oz) can Kidney Beans, drained and rinsed (optional, for a more traditional chili)
- Salt and Black Pepper to taste
- Optional toppings: Shredded Cheddar Cheese, Sour Cream, Green Onions, Cilantro, Corn Chips
Browning the Beef: The Foundation of Flavor
This is arguably the most important step! Don’t rush it. Browning the beef properly creates a deep, rich flavor that permeates the entire chili. We’re aiming for a beautiful, dark crust on each piece of beef.
- Prepare the Beef: Pat the beef chuck cubes dry with paper towels. This is crucial! Excess moisture will steam the beef instead of browning it. Season generously with salt and black pepper.
- Heat the Oil: In a large, heavy-bottomed pot or Dutch oven, heat the olive oil over medium-high heat. You want the oil shimmering, but not smoking.
- Brown in Batches: Add the beef to the pot in batches, being careful not to overcrowd it. Overcrowding will lower the temperature of the pot and prevent proper browning. Work in 2-3 batches, depending on the size of your pot.
- Sear on All Sides: Sear each piece of beef on all sides until deeply browned, about 3-5 minutes per side. Don’t be tempted to move the beef around too much. Let it sit undisturbed to develop a good crust.
- Remove and Set Aside: Once browned, remove the beef from the pot and set aside. Don’t worry about cooking the beef all the way through at this point; it will finish cooking in the chili.
Building the Flavor Base: Aromatics and Spices
Now that we have our beautifully browned beef, it’s time to build the flavor base of the chili. This involves sautéing the vegetables and blooming the spices to release their full potential.
- Sauté the Vegetables: Add the chopped onion and green bell peppers to the pot and cook over medium heat until softened, about 5-7 minutes. Stir occasionally to prevent burning.
- Add the Jalapeños and Garlic: Add the minced jalapeño peppers and garlic to the pot and cook for another minute, until fragrant. Be careful not to burn the garlic, as it can become bitter.
- Bloom the Spices: Add the chili powder, cumin, smoked paprika, oregano, cayenne pepper (if using), ground coriander, and allspice to the pot. Cook for 1-2 minutes, stirring constantly, until fragrant. This process, called “blooming,” helps to release the essential oils in the spices and enhance their flavor.
Simmering to Perfection: Bringing it All Together
This is where the magic happens! We’ll combine the browned beef, the flavorful base, and the liquids, and let it simmer low and slow to develop a rich, complex flavor.
- Add the Tomatoes: Pour in the crushed tomatoes, tomato sauce, and diced tomatoes (undrained) to the pot. Stir to combine.
- Return the Beef: Return the browned beef to the pot.
- Add the Broth: Pour in the beef broth. Make sure the beef is mostly submerged in the liquid. If needed, add a little more broth or water.
- Add the Sweet and Tangy: Stir in the brown sugar and apple cider vinegar. These ingredients add a touch of sweetness and acidity that balances the flavors of the chili.
- Simmer: Bring the chili to a simmer, then reduce the heat to low, cover, and simmer for at least 2-3 hours, or even longer for a richer flavor. The longer it simmers, the more tender the beef will become and the more the flavors will meld together. Stir occasionally to prevent sticking.
- Check for Seasoning: After simmering for at least 2 hours, taste the chili and adjust the seasoning as needed. You may need to add more salt, pepper, chili powder, or other spices to your liking.
- Add the Beans (Optional): If using kidney beans, add them to the chili during the last 30 minutes of simmering. This will allow them to heat through without becoming mushy.
Serving and Enjoying: The Grand Finale
After hours of simmering, your Texas-style chili is finally ready! Now it’s time to serve it up and enjoy the fruits of your labor.
- Serve Hot: Ladle the chili into bowls and serve hot.
- Add Toppings: Offer a variety of toppings for your guests to choose from, such as shredded cheddar cheese, sour cream, green onions, cilantro, and corn chips.
- Enjoy!: Sit back, relax, and enjoy your delicious, homemade Texas-style chili!
Tips for the Best Chili:
- Use High-Quality Beef: The quality of the beef will greatly impact the flavor of the chili. Choose a good quality beef chuck with some marbling for the best results.
- Don’t Skimp on the Browning: As mentioned earlier, browning the beef is crucial for developing a rich, deep flavor. Take your time and don’t overcrowd the pot.
- Adjust the Spice Level: The amount of jalapeño peppers and cayenne pepper can be adjusted to your spice preference. If you prefer a milder chili, use less jalapeño and omit the cayenne pepper. If you like it hot, add more!
- Simmer Low and Slow: The longer the chili simmers, the more tender the beef will become and the more the flavors will meld together. Aim for at least 2-3 hours, or even longer if you have the time.
- Make it Ahead: Chili is even better the next day! The flavors have more time to meld together. Make it a day ahead and refrigerate it overnight. Reheat gently before serving.
- Experiment with Different Beans: While kidney beans are a classic choice, you can experiment with other types of beans, such as pinto beans, black beans, or even great northern beans.
- Add a Touch of Chocolate: For a richer, more complex flavor, try adding a square or two of dark chocolate to the chili during the last 30 minutes of simmering. The chocolate will add a subtle depth of flavor that you won’t be able to put your finger on.
- Use Fresh Herbs: If you have fresh herbs on hand, such as cilantro or oregano, add them to the chili during the last 30 minutes of simmering for a burst of fresh flavor.
Variations:
- Vegetarian Chili: Omit the beef and use vegetable broth instead of beef broth. Add more vegetables, such as corn, zucchini, or sweet potatoes.
- Chicken Chili: Substitute the beef with chicken thighs or breasts, cut into bite-sized pieces.
- White Chicken Chili: Use chicken broth, white beans (such as great northern beans), and green chilies.
- Spicy Chili: Add more jalapeño peppers, cayenne pepper, or other hot peppers to increase the spice level.
- Smoky Chili: Add a teaspoon of liquid smoke to the chili for a smoky flavor.
Conclusion:
This Texas Style Chili recipe isn’t just another chili recipe; it’s a hearty, flavorful experience that will transport you straight to the heart of Texas. The deep, rich flavors, the satisfying texture of the beef, and the subtle kick of the spices all combine to create a truly unforgettable dish. It’s the kind of meal that warms you from the inside out, perfect for a chilly evening or a casual gathering with friends and family.
But what truly sets this chili apart is its simplicity. We’ve stripped away all the unnecessary ingredients and focused on the core elements that make a great chili: quality beef, flavorful spices, and a long, slow simmer to allow the flavors to meld together perfectly. Forget the beans (we’re serious, this is Texas chili!), and embrace the pure, unadulterated taste of beef and chili peppers.
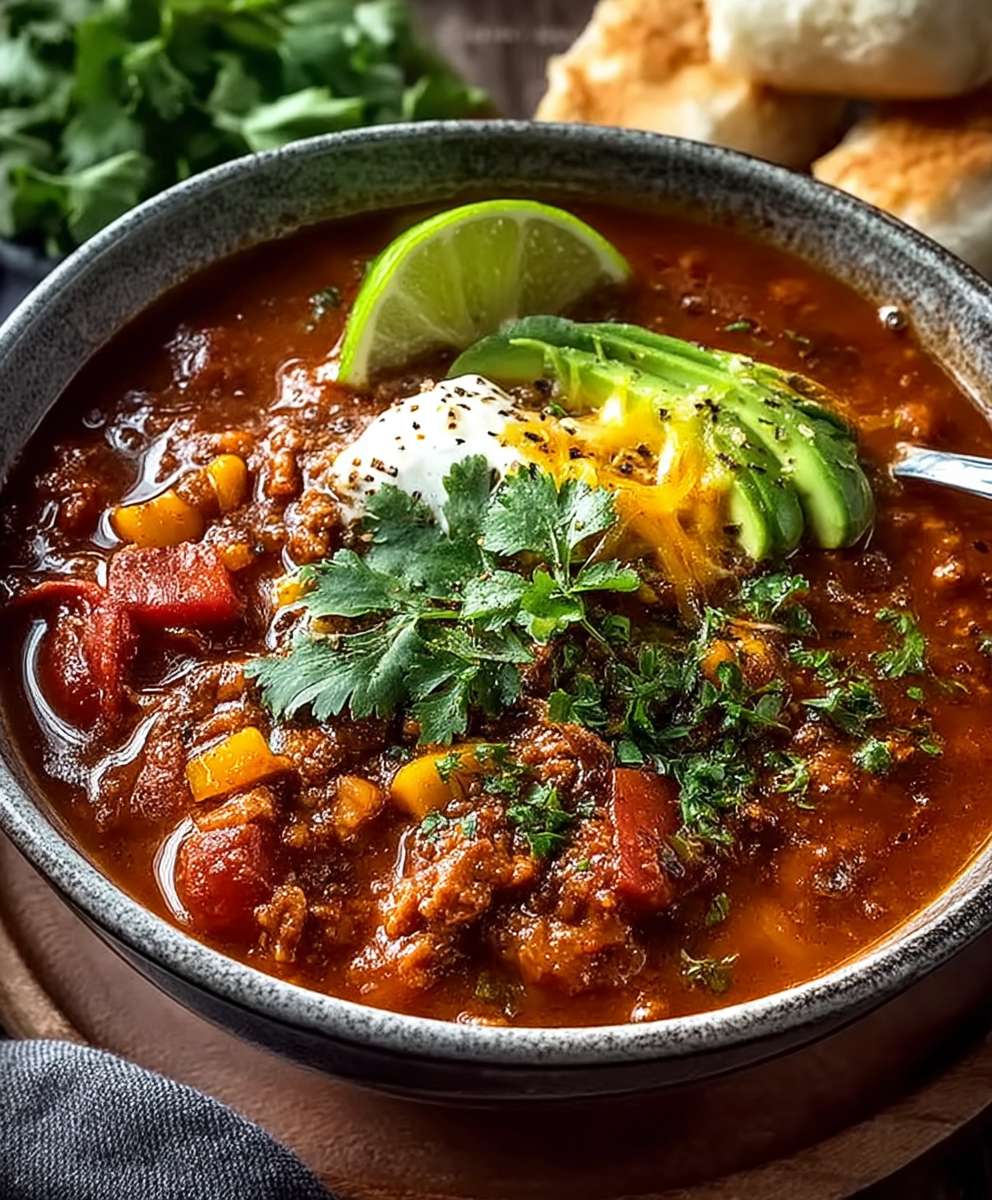
Now, you might be wondering, “How should I serve this masterpiece?” Well, the possibilities are endless! For a classic presentation, ladle the chili into bowls and top with your favorite garnishes. Think shredded cheddar cheese, a dollop of sour cream, chopped onions, and a sprinkle of fresh cilantro. A side of warm cornbread or crusty bread is also a must for soaking up every last drop of that delicious sauce.
But don’t be afraid to get creative! This Texas Style Chili is incredibly versatile and can be adapted to suit your own personal preferences. Want to add a little extra heat? Throw in a chopped jalapeño or a pinch of cayenne pepper. Prefer a slightly sweeter flavor? A tablespoon of brown sugar or molasses will do the trick. You can even use different cuts of beef, such as chuck roast or brisket, for a slightly different texture and flavor profile.
And speaking of variations, consider using this chili as a base for other dishes. It’s fantastic served over nachos, as a filling for tacos or burritos, or even as a topping for baked potatoes. You can also use it to make a delicious chili mac and cheese or a hearty chili dog. The possibilities are truly endless!
I truly believe that this recipe is a must-try for any chili lover. It’s easy to make, incredibly flavorful, and guaranteed to impress your friends and family. So, what are you waiting for? Gather your ingredients, fire up your stove, and get ready to experience the best Texas Style Chili you’ve ever tasted.
I’m so confident that you’ll love this recipe that I’m eager to hear about your experience. Once you’ve made it, please come back and leave a comment below. Let me know what you thought, what variations you tried, and any tips or tricks you discovered along the way. Your feedback is invaluable and helps me to continue creating delicious and easy-to-follow recipes for you to enjoy.
Don’t forget to share your photos on social media too! Tag me in your posts so I can see your culinary creations. I can’t wait to see what you come up with! Happy cooking!
Texas Style Chili: The Ultimate Guide to Authentic Flavor
Hearty Texas-style chili, simmered low and slow for maximum flavor. Featuring tender beef, aromatic spices, and a rich tomato base.
Ingredients
- 3 lbs Beef Chuck, cut into 1-inch cubes
- 2 tbsp Olive Oil
- 1 large Onion, chopped
- 2 Green Bell Peppers, chopped
- 2 Jalapeño Peppers, seeded and minced (adjust to your spice preference)
- 4 cloves Garlic, minced
- 1 (28 oz) can Crushed Tomatoes
- 1 (15 oz) can Tomato Sauce
- 1 (15 oz) can Diced Tomatoes, undrained
- 2 tbsp Chili Powder
- 1 tbsp Cumin
- 1 tbsp Smoked Paprika
- 1 tsp Oregano
- 1/2 tsp Cayenne Pepper (optional, for extra heat)
- 1/2 tsp Ground Coriander
- 1/4 tsp Allspice
- 2 cups Beef Broth
- 1 tbsp Brown Sugar
- 1 tbsp Apple Cider Vinegar
- 1 (15 oz) can Kidney Beans, drained and rinsed (optional, for a more traditional chili)
- Salt and Black Pepper to taste
- Optional toppings: Shredded Cheddar Cheese, Sour Cream, Green Onions, Cilantro, Corn Chips
Instructions
- Prepare the Beef: Pat the beef chuck cubes dry with paper towels. Season generously with salt and black pepper.
- Heat the Oil: In a large, heavy-bottomed pot or Dutch oven, heat the olive oil over medium-high heat.
- Brown in Batches: Add the beef to the pot in batches, being careful not to overcrowd it. Sear each piece of beef on all sides until deeply browned, about 3-5 minutes per side.
- Remove and Set Aside: Once browned, remove the beef from the pot and set aside.
- Sauté the Vegetables: Add the chopped onion and green bell peppers to the pot and cook over medium heat until softened, about 5-7 minutes. Stir occasionally.
- Add the Jalapeños and Garlic: Add the minced jalapeño peppers and garlic to the pot and cook for another minute, until fragrant.
- Bloom the Spices: Add the chili powder, cumin, smoked paprika, oregano, cayenne pepper (if using), ground coriander, and allspice to the pot. Cook for 1-2 minutes, stirring constantly, until fragrant.
- Add the Tomatoes: Pour in the crushed tomatoes, tomato sauce, and diced tomatoes (undrained) to the pot. Stir to combine.
- Return the Beef: Return the browned beef to the pot.
- Add the Broth: Pour in the beef broth. Make sure the beef is mostly submerged in the liquid. If needed, add a little more broth or water.
- Add the Sweet and Tangy: Stir in the brown sugar and apple cider vinegar.
- Simmer: Bring the chili to a simmer, then reduce the heat to low, cover, and simmer for at least 2-3 hours, or even longer for a richer flavor. Stir occasionally.
- Check for Seasoning: After simmering for at least 2 hours, taste the chili and adjust the seasoning as needed.
- Add the Beans (Optional): If using kidney beans, add them to the chili during the last 30 minutes of simmering.
- Serve Hot: Ladle the chili into bowls and serve hot with your favorite toppings.
Notes
- Use high-quality beef chuck for the best flavor.
- Browning the beef is crucial for developing a rich, deep flavor. Don’t rush this step.
- Adjust the spice level to your preference by using more or less jalapeño and cayenne pepper.
- Simmering the chili low and slow is key to tender beef and melded flavors.
- Chili is even better the next day! Make it ahead and refrigerate overnight.
- Experiment with different beans, such as pinto beans or black beans.
- For a richer flavor, add a square or two of dark chocolate during the last 30 minutes of simmering.
- Add fresh herbs like cilantro or oregano during the last 30 minutes for a burst of fresh flavor.


Leave a Comment