Description
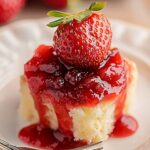
Homemade Strawberry Rhubarb Preserves bursting with fresh flavor. This classic recipe is perfect for spreading on toast, scones, or enjoying with yogurt.
Ingredients
Scale
- 4 cups (about 1 pound) fresh rhubarb, trimmed and cut into 1/2-inch pieces
- 4 cups (about 1 pound) fresh strawberries, hulled and quartered
- 6 cups granulated sugar
- 1/4 cup bottled lemon juice (for pectin activation and preservation)
- 1/2 teaspoon butter or margarine (to reduce foaming)
- Pinch of salt (enhances flavor)
- Optional: 1 teaspoon vanilla extract (added at the end for extra flavor)
Instructions
- Wash and Prepare the Rhubarb: Thoroughly wash the rhubarb stalks under cold running water to remove any dirt or debris. Trim off the leafy ends (rhubarb leaves are poisonous and should not be consumed). Cut the stalks into 1/2-inch pieces. Uniformity in size helps ensure even cooking. Place the chopped rhubarb in a large, heavy-bottomed pot or Dutch oven.
- Wash and Prepare the Strawberries: Rinse the strawberries gently under cold water. Hull the strawberries (remove the green tops) using a strawberry huller or a paring knife. Quarter the strawberries, ensuring they are roughly the same size as the rhubarb pieces. Add the quartered strawberries to the pot with the rhubarb.
- Add Sugar and Lemon Juice: Pour the granulated sugar over the rhubarb and strawberries in the pot. Add the bottled lemon juice. The lemon juice is crucial for activating the pectin in the fruit, which helps the preserves to set properly. It also acts as a natural preservative.
- Macerate the Fruit: Gently stir the mixture to combine the fruit, sugar, and lemon juice. Cover the pot with a lid or plastic wrap and let it sit at room temperature for at least 2-3 hours, or preferably overnight, to macerate. Maceration allows the sugar to draw out the juices from the fruit, creating a naturally sweet and flavorful syrup. This step is essential for achieving a good consistency in the finished preserves. Stir the mixture occasionally during the maceration process to ensure the sugar dissolves evenly. You’ll notice the fruit releasing a significant amount of liquid as it sits.
- Bring to a Boil: Place the pot with the macerated fruit mixture over medium-high heat. Add the butter or margarine. This helps to reduce foaming during the cooking process, preventing the preserves from boiling over. Stir the mixture constantly until the sugar is completely dissolved. Once the sugar is dissolved, bring the mixture to a rolling boil. A rolling boil is a boil that continues even when stirred.
- Cook to Setting Point: Continue to cook the preserves at a rolling boil, stirring frequently to prevent sticking and scorching. As the mixture cooks, it will thicken and the fruit will soften. The cooking time will vary depending on the heat of your stove and the moisture content of the fruit, but it typically takes about 20-30 minutes.
- Test for Setting Point: There are several ways to test if the preserves have reached the setting point:
- Cold Plate Test: Place a small plate in the freezer before you start cooking the preserves. To test, spoon a small amount of the hot preserves onto the cold plate. Return the plate to the freezer for 1-2 minutes. Then, push the preserves with your finger. If the surface wrinkles, the preserves are ready. If the preserves are still runny, continue cooking and test again in a few minutes.
- Candy Thermometer: Use a candy thermometer to monitor the temperature of the preserves. The setting point for preserves is typically around 220°F (104°C). Make sure the thermometer is not touching the bottom of the pot.
- Spoon Test: Dip a cold metal spoon into the boiling preserves. Lift the spoon and let the preserves drip off the side. If the drips come together and form a sheet or a thick, slow drip, the preserves are ready.
- Remove from Heat: Once the preserves have reached the setting point, remove the pot from the heat. If using, stir in the vanilla extract. Skim off any foam that may have formed on the surface of the preserves using a clean spoon.
- Sterilize Jars: Sterilizing the jars is crucial for preventing spoilage and ensuring the preserves are safe to eat. There are several methods for sterilizing jars:
- Boiling Water Bath: Place the jars in a large pot with enough water to cover them by at least 1 inch. Bring the water to a boil and boil for 10 minutes. Remove the jars from the boiling water using jar lifters and place them on a clean towel-lined surface to dry.
- Dishwasher: Wash the jars in the dishwasher on the hottest setting with a sanitizing cycle. Leave the jars in the dishwasher until you are ready to fill them.
- Oven: Preheat the oven to 250°F (120°C). Place the clean jars on a baking sheet and heat them in the oven for 20 minutes.
- Prepare Lids and Rings: Wash the canning lids and rings in hot, soapy water. The lids do not need to be boiled, but some people prefer to simmer them in hot water to soften the sealing compound. Follow the manufacturer’s instructions for preparing the lids.
- Fill the Jars: Ladle the hot preserves into the sterilized jars, leaving 1/4 inch of headspace (the space between the top of the preserves and the top of the jar). Use a clean, damp cloth to wipe the rim of each jar to remove any spills or drips.
- Remove Air Bubbles: Insert a clean utensil (like a small spatula or bubble remover) down the sides of the jar to release any trapped air bubbles. Gently tap the jar on the counter to help release any remaining air bubbles.
- Place Lids and Rings: Place a sterilized lid on each jar, ensuring the sealing compound is facing down. Screw on the canning ring until it is fingertip tight (not too tight, not too loose).
- Process in a Boiling Water Bath: Place the filled jars in a boiling water bath canner. Make sure the jars are completely covered with water by at least 1 inch. Bring the water to a rolling boil and process the jars for 10 minutes for half-pint or pint jars. Adjust processing time for altitude:
- 1,001 to 3,000 feet: Add 5 minutes
- 3,001 to 6,000 feet: Add 10 minutes
- 6,001 to 8,000 feet: Add 15 minutes
- 8,001 to 10,000 feet: Add 20 minutes
- Cool and Check Seals: After processing, turn off the heat and carefully remove the jars from the canner using jar lifters. Place the jars on a towel-lined surface, leaving space between them for air circulation. Let the jars cool completely, undisturbed, for 12-24 hours. As the jars cool, you should hear a “popping” sound as the lids seal. After the jars have cooled completely, check the seals by pressing down on the center of each lid. If the lid is concave and does not flex, the jar is properly sealed. If the lid flexes, the jar is not sealed and should be reprocessed with a new lid or stored in the refrigerator and used within a few weeks.
- Remove Rings: Once you’ve confirmed that the jars are properly sealed, remove the canning rings. This prevents moisture from accumulating under the rings and causing rust.
- Label and Store: Label each jar with the date and contents. Store the sealed jars in a cool, dark, and dry place. Properly processed and sealed preserves can be stored for up to 1 year.
- Refrigerate After Opening: Once a jar is opened, refrigerate it and use it within a few weeks.
Notes
- Rhubarb leaves are poisonous and should not be consumed.
- Macerating the fruit is essential for achieving a good consistency in the finished preserves.
- The setting point for preserves is typically around 220°F (104°C) if using a candy thermometer.
- Sterilizing the jars is crucial for preventing spoilage.
- Adjust processing time for altitude as indicated.
- If a jar does not seal properly, reprocess with a new lid or store in the refrigerator and use within a few weeks.
- Prep Time: 30 minutes
- Cook Time: 20 minutes