

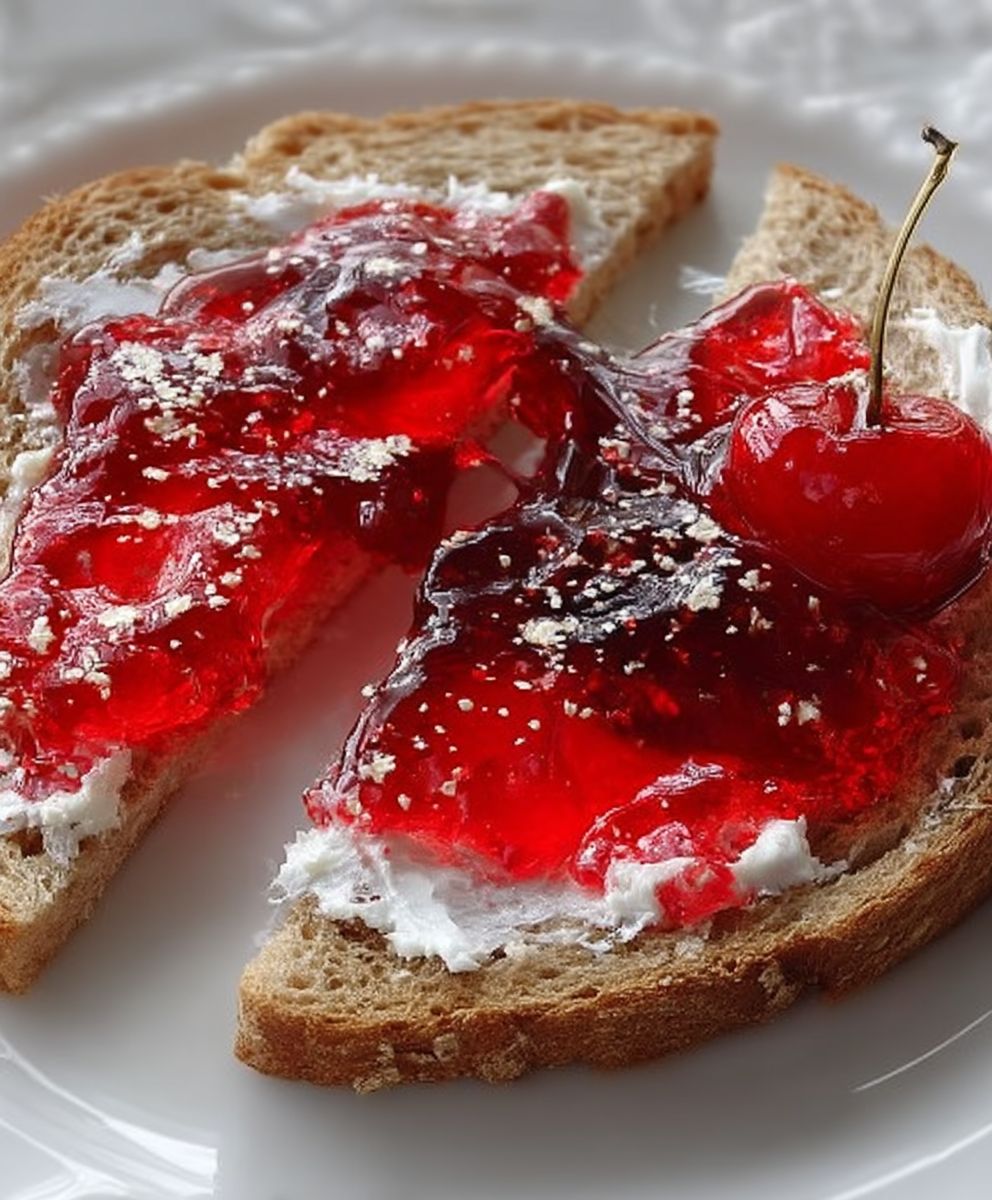
Sour Cherry Jam: Prepare to be transported to a world of tart, sweet, and utterly irresistible flavor! Imagine spreading a vibrant ruby-red jam onto your morning toast, the tangy aroma filling your kitchen with the promise of a delightful day. This isn’t just any jam; it’s a taste of summer captured in a jar, a burst of sunshine even on the gloomiest days.
Sour cherries, also known as tart cherries, have a rich history, particularly in Eastern European cultures where they are cherished for their unique flavor and versatility. For generations, families have passed down recipes for preserving these precious fruits, ensuring that the taste of summer lingers long into the winter months. Making sour cherry jam is more than just a culinary endeavor; it’s a connection to tradition and a celebration of seasonal bounty.
But what makes this jam so beloved? It’s the perfect balance of sweet and tart, a flavor profile that awakens the palate and leaves you wanting more. The slightly acidic tang of the cherries cuts through the sweetness, creating a complex and satisfying taste experience. Beyond the flavor, the smooth, spreadable texture is simply divine. Whether you’re a seasoned jam maker or a curious beginner, this recipe is surprisingly easy to follow, allowing you to create a homemade masterpiece that will impress your friends and family. Get ready to experience the magic of sour cherry jam!

Ingredients:
- 4 pounds sour cherries, pitted (about 8 cups pitted)
- 6 cups granulated sugar
- 1/4 cup lemon juice, freshly squeezed
- 1/2 teaspoon almond extract (optional, but highly recommended!)
- 1 pouch (1.75 ounces) powdered pectin (low-sugar pectin is best for a firmer set with less sugar)
- 1/4 cup water (for dissolving pectin)
Preparing the Cherries:
Okay, let’s get started! The first and most important step is prepping those beautiful sour cherries. Trust me, this is where most of the work lies, but the end result is SO worth it. Pitting cherries can be a bit tedious, but put on some music or a podcast, and you’ll be through it before you know it. I like to use a cherry pitter to make the process faster, but you can also use a paring knife or even a clean paperclip in a pinch.
- Wash the Cherries: Give your sour cherries a good rinse under cold water. Make sure to remove any stems or leaves that might still be attached.
- Pit the Cherries: This is the big one! Pit all 4 pounds of cherries. As you pit them, inspect them for any blemishes or bruises and discard those. You want only the best cherries for your jam. Collect the pitted cherries in a large bowl.
- Measure the Cherries: Once all the cherries are pitted, measure out approximately 8 cups. This is important for ensuring the correct ratio of fruit to sugar and pectin.
Preparing the Pectin:
While the cherries are sitting pretty, let’s get the pectin ready. This is what will help your jam thicken up nicely. I prefer using low-sugar pectin because it allows you to use less sugar while still achieving a good set. If you’re using regular pectin, you might need to adjust the sugar amount slightly, so follow the instructions on the pectin package.
- Dissolve the Pectin: In a small bowl, whisk together the powdered pectin and 1/4 cup of water until the pectin is completely dissolved. This prevents clumps from forming when you add it to the cherries. Set this aside for later.
Cooking the Jam:
Now for the fun part cooking the jam! This is where the magic happens, and your kitchen will start to smell absolutely divine. Make sure you have a large, heavy-bottomed pot for this. A heavy bottom will help prevent the jam from scorching.
- Combine Cherries and Sugar: In your large pot, combine the pitted cherries and the granulated sugar. Stir well to coat the cherries evenly with the sugar.
- Add Lemon Juice and Almond Extract: Stir in the lemon juice and almond extract (if using). The lemon juice helps to balance the sweetness and also acts as a natural preservative. The almond extract adds a lovely depth of flavor that complements the sour cherries perfectly.
- Bring to a Boil: Place the pot over medium-high heat and bring the mixture to a full rolling boil, stirring constantly. A “full rolling boil” means that the mixture continues to boil even when you stir it.
- Add the Pectin Mixture: Once the mixture is at a full rolling boil, quickly pour in the dissolved pectin mixture. Stir constantly to ensure it’s evenly distributed.
- Boil and Stir: Continue to boil the jam, stirring constantly, for exactly 1 minute. This is crucial for activating the pectin and achieving the proper set. Use a timer to ensure accuracy.
- Test for Setting: After 1 minute, remove the pot from the heat and test for setting. There are a couple of ways to do this:
- Cold Plate Test: Place a small plate in the freezer before you start making the jam. To test, spoon a small amount of jam onto the cold plate and return it to the freezer for 1-2 minutes. Then, push the jam with your finger. If it wrinkles and forms a skin, it’s ready.
- Candy Thermometer: Use a candy thermometer to monitor the temperature of the jam. It should reach 220°F (104°C) for a proper set.
If the jam doesn’t set after the first test, return it to the heat and boil for another minute, then test again. Repeat until the jam reaches the desired consistency. Be careful not to overcook it, as this can result in a tough jam.
- Remove from Heat and Skim: Once the jam has reached the desired set, remove it from the heat. Use a spoon to skim off any foam or scum that has formed on the surface. This will give your jam a clearer, more appealing appearance.
Canning the Jam (Optional):
If you want to preserve your sour cherry jam for longer storage, you can can it using the water bath canning method. This process creates a vacuum seal that prevents spoilage.
- Prepare Jars and Lids: Wash your canning jars, lids, and bands in hot, soapy water. Rinse well. Sterilize the jars by boiling them in a large pot of water for 10 minutes. Keep the jars hot until ready to fill. You can also sterilize them in the dishwasher. Heat the lids in a separate saucepan of simmering water (do not boil) to soften the sealing compound.
- Fill the Jars: Ladle the hot jam into the hot sterilized jars, leaving 1/4 inch of headspace at the top. Headspace is the space between the top of the jam and the lid.
- Remove Air Bubbles: Use a non-metallic spatula or bubble remover to gently run around the inside of the jar to release any trapped air bubbles.
- Wipe Jar Rims: Wipe the rims of the jars with a clean, damp cloth to remove any spills or drips. This is important for ensuring a good seal.
- Place Lids and Bands: Place a lid on each jar, and then screw on a band until it is fingertip tight. Fingertip tight means that the band is snug but not overly tight.
- Process in a Water Bath Canner: Place the filled jars in a water bath canner filled with enough boiling water to cover the jars by at least 1 inch. Bring the water back to a rolling boil and process for 10 minutes for half-pint or pint jars. Adjust processing time for altitude according to canning guidelines.
- Cool and Check Seals: After processing, turn off the heat and carefully remove the jars from the canner using a jar lifter. Place the jars on a towel-lined surface to cool completely. As the jars cool, you should hear a popping sound as the lids seal. After 12-24 hours, check the seals by pressing down on the center of each lid. If the lid doesn’t flex, it’s sealed. If the lid flexes, it’s not sealed, and you should either reprocess the jar with a new lid or store the jam in the refrigerator.
- Store: Store sealed jars of jam in a cool, dark place for up to a year. Refrigerate any unsealed jars and use within a few weeks.
No-Canning Option:
If you don’t want to go through the canning process, that’s perfectly fine! You can still enjoy your homemade sour cherry jam. Simply let the jam cool completely, then transfer it to clean jars or containers and store it in the refrigerator. It will keep for several weeks.
Serving Suggestions:
Now that you have a beautiful batch of homemade sour cherry jam, it’s time to enjoy it! Here are a few of my favorite ways to use it:
- On Toast or Biscuits: This is the classic way to enjoy jam, and it’s always a winner.
- With Yogurt or Oatmeal: Add a spoonful of jam to your yogurt or oatmeal for a burst of flavor.
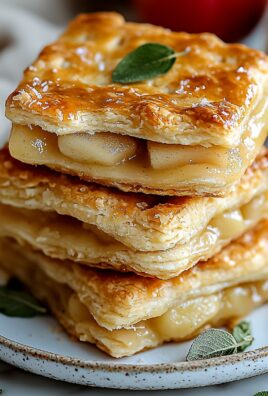
- As a Filling for Pastries: Use it as a filling for tarts, pies, or pastries.
- With Cheese and Crackers: The sweet and tart flavor of the jam pairs perfectly with cheese and crackers.
- As a Glaze for Meats: Brush it on grilled or roasted meats for a sweet and tangy glaze.
- In Thumbprint Cookies: A dollop of sour cherry jam in the center of a thumbprint cookie is pure heaven.
Tips for Success:
- Use Fresh, High-Quality Cherries: The better the cherries, the better the jam.
- Don’t Overcook the Jam: Overcooked jam can be tough and rubbery.
- Adjust Sugar to Taste: If you prefer a less sweet jam, you can reduce the amount of sugar slightly.
Conclusion:
This Sour Cherry Jam recipe isn’t just another jam recipe; it’s a burst of sunshine in a jar, a taste of summer you can savor all year round. The vibrant tartness of the sour cherries, perfectly balanced with just the right amount of sweetness, creates a flavor profile that’s both sophisticated and utterly addictive. I truly believe this is a must-try for anyone who appreciates homemade goodness and wants to elevate their breakfast, desserts, or even savory dishes.
Why is it a must-try? Because it’s incredibly versatile! Imagine spreading it on warm, buttery toast for a simple yet satisfying breakfast. Or picture yourself swirling a spoonful into your morning yogurt or oatmeal for a delightful flavor boost. But the possibilities don’t stop there! This jam is also fantastic with scones, croissants, and even as a glaze for grilled meats like pork or chicken. The subtle tartness cuts through the richness of the meat, creating a truly unforgettable culinary experience.
And speaking of versatility, let’s talk about variations! While I adore the classic recipe, feel free to experiment and make it your own. For a hint of warmth, try adding a pinch of cinnamon or a star anise during the cooking process. A splash of almond extract can also enhance the cherry flavor beautifully. If you’re feeling adventurous, consider incorporating a bit of orange zest for a citrusy twist. And for those who enjoy a little kick, a pinch of chili flakes can add a surprising and delightful depth of flavor.
Serving suggestions are endless! Beyond the obvious breakfast applications, this Sour Cherry Jam is a star ingredient in desserts. Use it as a filling for tarts, pies, or even thumbprint cookies. It’s also a wonderful accompaniment to cheese platters, pairing particularly well with creamy cheeses like brie or goat cheese. And don’t forget about using it as a glaze for cakes or pastries it adds a beautiful shine and a burst of flavor that will impress your guests.
I’ve personally made this jam countless times, and each batch is a little different, reflecting the subtle variations in the cherries and my own creative whims. That’s the beauty of homemade it’s always unique and always made with love.
I’m so excited for you to try this recipe and experience the joy of making your own Sour Cherry Jam. It’s a rewarding process that will fill your kitchen with the most wonderful aroma and your pantry with a jar of pure deliciousness.
So, what are you waiting for? Gather your ingredients, put on some music, and get ready to embark on a jam-making adventure! I promise you won’t regret it. And once you’ve made your first batch, I’d love to hear about your experience. Share your photos, your variations, and your serving suggestions in the comments below. Let’s create a community of jam lovers and inspire each other with our culinary creations! I can’t wait to see what you come up with! Happy jamming!
Sour Cherry Jam: The Ultimate Guide to Making & Enjoying
Tart-sweet homemade Sour Cherry Jam, perfect on toast, pastries, or as a glaze. Easy to make with fresh cherries and low-sugar pectin.
Ingredients
- 4 pounds sour cherries, pitted (about 8 cups pitted)
- 6 cups granulated sugar
- 1/4 cup lemon juice, freshly squeezed
- 1/2 teaspoon almond extract (optional, but highly recommended!)
- 1 pouch (1.75 ounces) powdered pectin (low-sugar pectin is best for a firmer set with less sugar)
- 1/4 cup water (for dissolving pectin)
Instructions
- Rinse sour cherries under cold water, removing stems and leaves.
- Pit all 4 pounds of cherries, discarding any blemishes. Measure out approximately 8 cups of pitted cherries.
- In a small bowl, whisk together the powdered pectin and 1/4 cup of water until completely dissolved. Set aside.
- In a large, heavy-bottomed pot, combine the pitted cherries and granulated sugar. Stir well.
- Stir in the lemon juice and almond extract (if using).
- Place the pot over medium-high heat and bring the mixture to a full rolling boil, stirring constantly.
- Quickly pour in the dissolved pectin mixture. Stir constantly to ensure it’s evenly distributed.
- Continue to boil the jam, stirring constantly, for exactly 1 minute. Use a timer.
- Remove from heat and test for setting using the cold plate test or a candy thermometer (220°F/104°C). If it doesn’t set, return to heat and boil for another minute, then test again.
- Remove from heat and skim off any foam or scum that has formed on the surface.
- If canning, follow proper water bath canning procedures. Sterilize jars, fill with hot jam (1/4 inch headspace), remove air bubbles, wipe rims, place lids and bands, process in a water bath canner for 10 minutes (adjust for altitude), cool, and check seals.
- Let the jam cool completely, then transfer it to clean jars or containers and store it in the refrigerator.
Notes
- Use fresh, high-quality sour cherries for the best flavor.
- Low-sugar pectin is recommended for a firmer set with less sugar.
- A heavy-bottomed pot helps prevent scorching.
- Don’t overcook the jam, as it can become tough.
- Adjust sugar to taste.
- Almond extract enhances the flavor but is optional.
- If canning, follow safe canning practices.

Leave a Comment