

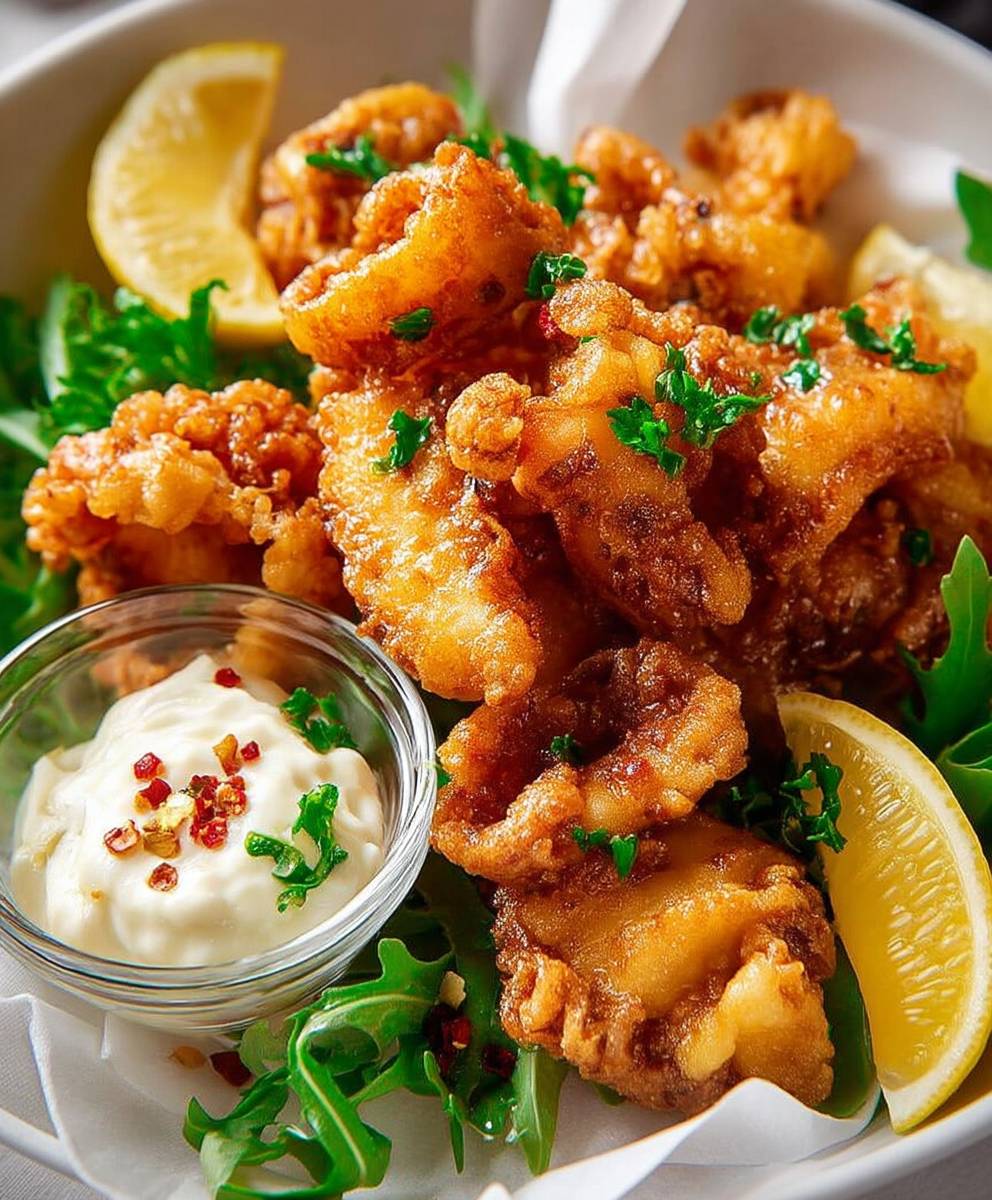
Salt and Pepper Squid: Crispy, tender, and bursting with flavor, this dish is an absolute showstopper that’s surprisingly easy to make at home. Forget ordering takeout; with this recipe, you can create restaurant-quality calamari in your own kitchen, impressing your family and friends with your culinary prowess.
This beloved dish has roots in Cantonese cuisine, where the simple yet brilliant combination of salt and pepper elevates the natural sweetness of seafood. While variations exist across Asia, the core concept remains the same: perfectly cooked squid with a light, crispy coating seasoned with fragrant spices. It’s a testament to the power of simple ingredients, transformed into something truly special.
What makes Salt and Pepper Squid so irresistible? It’s the delightful contrast of textures the satisfying crunch of the exterior giving way to the delicate, melt-in-your-mouth squid within. The seasoning is key; the salt enhances the squid’s natural flavor, while the pepper adds a subtle warmth and a hint of spice. Its a dish that appeals to all ages and palates, making it a guaranteed crowd-pleaser. Plus, it’s quick to prepare, perfect for a weeknight dinner or a weekend appetizer. Get ready to experience the magic of homemade calamari!

Ingredients:
- 1.5 lbs Squid tubes and tentacles, cleaned
- 1 cup Cornstarch
- 1/2 cup All-purpose flour
- 2 tbsp Sea salt, finely ground
- 1 tbsp Black pepper, freshly ground
- 1 tbsp Garlic powder
- 1 tsp Onion powder
- 1/2 tsp Cayenne pepper (optional, for a little heat)
- Vegetable oil, for frying (about 4-6 cups)
- 1 Lemon, cut into wedges, for serving
- 2 Green onions, thinly sliced, for garnish
- 1 Red chili, thinly sliced (optional, for garnish)
Preparing the Squid:
- First, let’s tackle the squid. If you bought whole squid, you’ll need to clean them. Don’t worry, it’s not as daunting as it sounds! Gently pull the tentacles away from the body. You should be able to remove the innards and a clear, plastic-like quill. Rinse the body thoroughly inside and out.
- If you have squid tubes, make sure they’re cleaned. Pat the squid tubes and tentacles completely dry with paper towels. This is crucial for getting that crispy texture we’re after. Excess moisture will steam the squid instead of frying it properly.
- Now, let’s prepare the squid for frying. Slice the squid tubes into rings, about 1/2 inch thick. If the tentacles are large, you can cut them in half or thirds. Smaller tentacles can be left whole.
- Place the sliced squid rings and tentacles in a bowl. Set aside while we prepare the coating.
Making the Crispy Coating:
- In a large bowl, whisk together the cornstarch, all-purpose flour, sea salt, black pepper, garlic powder, onion powder, and cayenne pepper (if using). Make sure everything is evenly distributed. The cornstarch is key for that extra crispy texture, while the flour provides a bit of structure.
- This spice blend is what makes this salt and pepper squid so flavorful. Feel free to adjust the amounts to your liking. If you prefer a milder flavor, reduce the amount of black pepper or omit the cayenne pepper altogether. If you like it spicier, add more cayenne or a pinch of red pepper flakes.
- Now, it’s time to coat the squid. Working in small batches, add the squid to the bowl with the flour mixture. Toss to coat thoroughly, ensuring each piece is evenly covered.
- Once the squid is coated, place it in a colander or on a wire rack to remove any excess flour mixture. This step is important to prevent the oil from getting too murky and to ensure a light and crispy coating. Gently shake off any excess.
Frying the Squid:
- Pour the vegetable oil into a large, heavy-bottomed pot or deep fryer. You’ll need enough oil to completely submerge the squid.
- Heat the oil over medium-high heat to 350-375°F (175-190°C). Use a deep-fry thermometer to monitor the temperature. Maintaining the correct oil temperature is crucial for achieving crispy, golden-brown squid. If the oil is too cool, the squid will absorb too much oil and become soggy. If the oil is too hot, the squid will burn on the outside before it’s cooked through.
- Carefully add the coated squid to the hot oil in small batches. Do not overcrowd the pot, as this will lower the oil temperature and result in soggy squid. Fry for 2-3 minutes, or until golden brown and crispy.
- Use a slotted spoon or spider to remove the fried squid from the oil and place it on a wire rack lined with paper towels to drain excess oil. This helps to keep the squid crispy.
- Repeat the frying process with the remaining squid, making sure to maintain the oil temperature. If the oil starts to get too dirty, you can strain it through a fine-mesh sieve lined with cheesecloth.
Serving and Garnishing:
- Once all the squid is fried, transfer it to a serving platter.
- Squeeze fresh lemon juice over the squid. The acidity of the lemon juice brightens the flavors and cuts through the richness of the fried squid.
- Garnish with thinly sliced green onions and red chili (if using). The green onions add a fresh, herbaceous note, while the red chili provides a pop of color and a touch of heat.
- Serve immediately with lemon wedges for squeezing. Salt and pepper squid is best enjoyed hot and crispy.
Tips for Perfect Salt and Pepper Squid:
- Use fresh squid: The fresher the squid, the better the flavor and texture. Look for squid that is firm, white, and has a mild, sea-like smell.
- Dry the squid thoroughly: As mentioned earlier, drying the squid is essential for achieving a crispy coating. Use paper towels to pat the squid dry before coating it in the flour mixture.
- Don’t overcrowd the pot: Frying the squid in small batches prevents the oil temperature from dropping too much, which can result in soggy squid.
- Maintain the correct oil temperature: Use a deep-fry thermometer to monitor the oil temperature and adjust the heat as needed.
- Serve immediately: Salt and pepper squid is best enjoyed hot and crispy. If you need to keep it warm, you can place it in a preheated oven at 200°F (95°C) for a short period of time.
- Experiment with flavors: Feel free to add other spices to the flour mixture, such as ginger powder, white pepper, or five-spice powder.
- Make it gluten-free: Substitute the all-purpose flour with a gluten-free flour blend.
- Air Fryer Option: For a healthier alternative, you can air fry the squid. Preheat your air fryer to 400°F (200°C). Lightly spray the coated squid with oil and air fry for 8-10 minutes, flipping halfway through, until golden brown and crispy.
Variations:
- Salt and Pepper Shrimp: Substitute the squid with shrimp for a similar dish.
- Salt and Pepper Tofu: Use firm or extra-firm tofu, pressed to remove excess water, and cut into cubes. Coat and fry as directed for the squid.
- Salt and Pepper Chicken: Cut chicken breast into bite-sized pieces, coat, and fry until cooked through.
Serving Suggestions:
- Serve as an appetizer or snack.
- Pair with a dipping sauce, such as sweet chili sauce, sriracha mayo, or a simple soy sauce and sesame oil mixture.
- Serve as part of a larger Asian-inspired meal.
- Enjoy with a cold beer or a refreshing cocktail.
Conclusion:
This Salt and Pepper Squid recipe isn’t just another seafood dish; it’s a culinary adventure waiting to happen! The crispy, golden exterior giving way to tender, perfectly cooked squid, all infused with the simple yet powerful flavors of salt and pepper its a symphony of textures and tastes that will leave you craving more. I truly believe this is a must-try recipe for anyone who loves seafood, appreciates bold flavors, or simply wants to impress their friends and family with a restaurant-quality dish made right in their own kitchen.
But what makes this particular Salt and Pepper Squid so special? It’s the perfect balance of simplicity and execution. We’ve taken a classic dish and refined it, ensuring that every step, from the preparation of the squid to the final sprinkle of seasoning, contributes to an exceptional final product. The result is a dish that’s both incredibly flavorful and surprisingly easy to make. You don’t need to be a professional chef to achieve restaurant-worthy results with this recipe.
And the best part? It’s incredibly versatile! Serve it as a show-stopping appetizer at your next dinner party, pair it with steamed rice and stir-fried vegetables for a complete and satisfying meal, or even toss it into a vibrant salad for a light and refreshing lunch. For a truly authentic experience, try serving it with a side of sweet chili sauce or a tangy lime dipping sauce. The possibilities are endless!
Looking for variations? Consider adding a pinch of chili flakes to the flour mixture for an extra kick of heat. Or, experiment with different types of peppers, such as Szechuan peppercorns, for a more complex and aromatic flavor profile. You could also try using different types of squid, such as baby squid or calamari tubes, depending on your preference. And for those who prefer a lighter option, you can even try air frying the squid instead of deep frying it. Just be sure to adjust the cooking time accordingly.
I’m confident that you’ll absolutely love this recipe. It’s quick, easy, and delivers incredible flavor every single time. But don’t just take my word for it try it for yourself! I’ve poured my heart and soul into perfecting this recipe, and I’m so excited for you to experience the magic of perfectly cooked, crispy, and flavorful Salt and Pepper Squid.
So, what are you waiting for? Gather your ingredients, fire up your stove, and get ready to create a culinary masterpiece. And most importantly, don’t forget to share your experience with me! I’d love to hear your feedback, see your photos, and learn about any variations you’ve tried. Tag me in your social media posts, leave a comment below, or send me an email I’m always eager to connect with fellow food lovers and hear about their culinary adventures. Happy cooking! I can’t wait to see what you create. This Salt and Pepper Squid is a guaranteed crowd-pleaser, so get ready for the compliments to roll in!
Salt and Pepper Squid: The Ultimate Guide to Crispy Perfection
Crispy, flavorful salt and pepper squid, fried to golden perfection and seasoned with a delicious blend of spices. A quick, easy, and irresistible Asian-inspired appetizer!
Ingredients
- 1. 5 lbs Squid tubes and tentacles, cleaned
- 1 cup Cornstarch
- 1/2 cup All-purpose flour
- 2 tbsp Sea salt, finely ground
- 1 tbsp Black pepper, freshly ground
- 1 tbsp Garlic powder
- 1 tsp Onion powder
- 1/2 tsp Cayenne pepper (optional, for a little heat)
- Vegetable oil, for frying (about 4-6 cups)
- 1 Lemon, cut into wedges, for serving
- 2 Green onions, thinly sliced, for garnish
- 1 Red chili, thinly sliced (optional, for garnish)
Instructions
- If you bought whole squid, clean them by gently pulling the tentacles away from the body. Remove the innards and the clear quill. Rinse the body thoroughly. If using pre-cleaned squid tubes, ensure they are cleaned.
- Pat the squid tubes and tentacles completely dry with paper towels.
- Slice the squid tubes into rings, about 1/2 inch thick. Cut large tentacles in half or thirds; smaller tentacles can be left whole.
- Place the sliced squid rings and tentacles in a bowl.
- In a large bowl, whisk together the cornstarch, all-purpose flour, sea salt, black pepper, garlic powder, onion powder, and cayenne pepper (if using).
- Working in small batches, add the squid to the bowl with the flour mixture. Toss to coat thoroughly, ensuring each piece is evenly covered.
- Place the coated squid in a colander or on a wire rack to remove any excess flour mixture. Gently shake off any excess.
- Pour the vegetable oil into a large, heavy-bottomed pot or deep fryer. You’ll need enough oil to completely submerge the squid.
- Heat the oil over medium-high heat to 350-375°F (175-190°C). Use a deep-fry thermometer to monitor the temperature.
- Carefully add the coated squid to the hot oil in small batches. Do not overcrowd the pot. Fry for 2-3 minutes, or until golden brown and crispy.
- Use a slotted spoon or spider to remove the fried squid from the oil and place it on a wire rack lined with paper towels to drain excess oil.
- Repeat the frying process with the remaining squid, making sure to maintain the oil temperature. If the oil starts to get too dirty, you can strain it through a fine-mesh sieve lined with cheesecloth.
- Once all the squid is fried, transfer it to a serving platter.
- Squeeze fresh lemon juice over the squid.
- Garnish with thinly sliced green onions and red chili (if using).
- Serve immediately with lemon wedges for squeezing.
Notes
- Use fresh squid for the best flavor and texture.
- Drying the squid thoroughly is essential for achieving a crispy coating.
- Don’t overcrowd the pot when frying to maintain the oil temperature.
- Maintain the correct oil temperature for optimal results.
- Serve immediately for the best taste and texture.
- Experiment with flavors by adding other spices to the flour mixture.
- Make it gluten-free by substituting the all-purpose flour with a gluten-free flour blend.
- For a healthier alternative, air fry the squid at 400°F (200°C) for 8-10 minutes, flipping halfway through.


Leave a Comment