

Easy Charcuterie Board – the very phrase conjures images of effortless elegance and delightful gatherings, doesn’t it? As someone who loves to entertain but also values precious time, I can confidently say that mastering the art of the charcuterie board is a game-changer for any host. Are you eager to impress your guests with a stunning display of flavors and textures, all while minimizing your time in the kitchen? This is precisely why the charcuterie board has become a global phenomenon and a beloved centerpiece for so many.
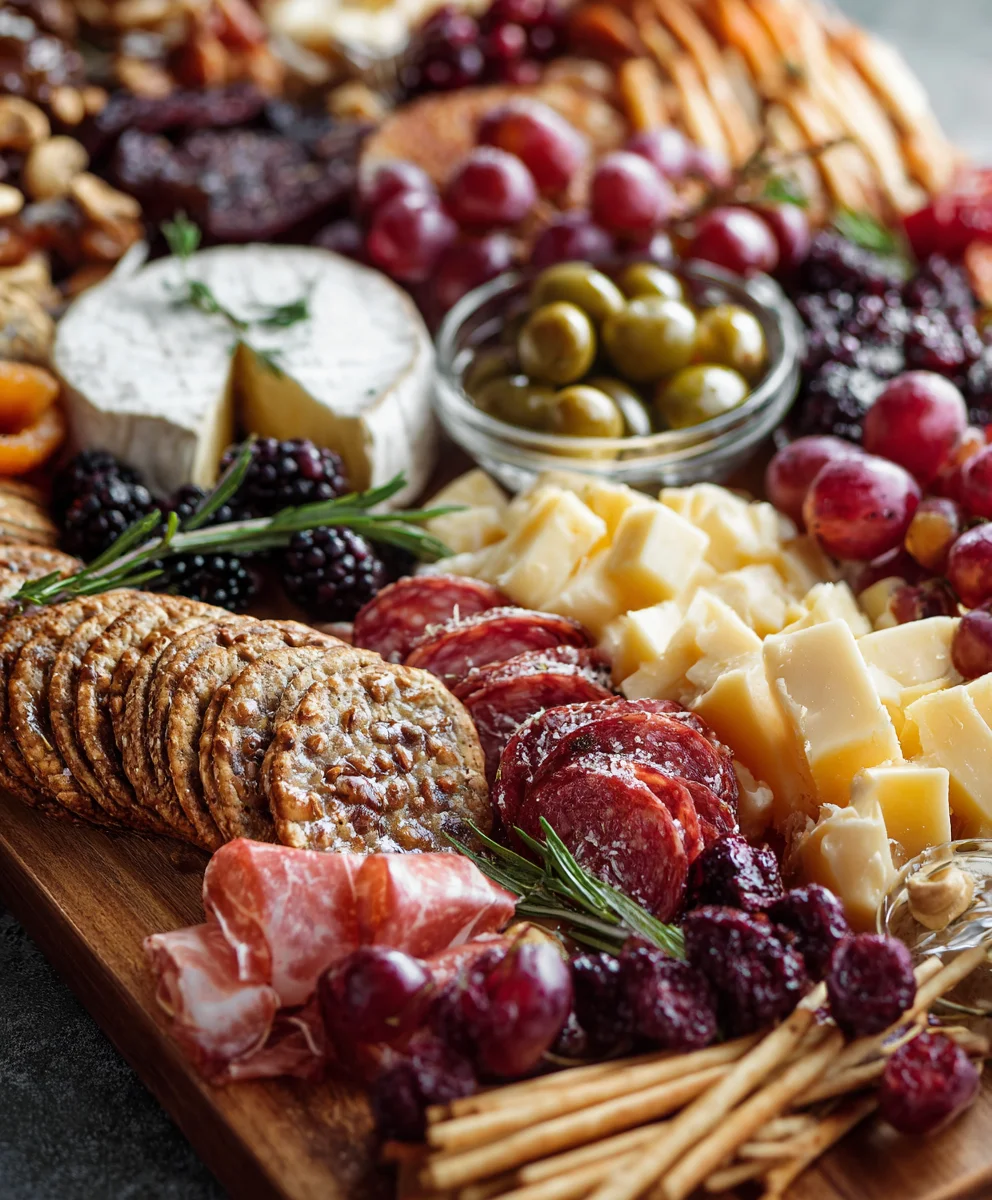
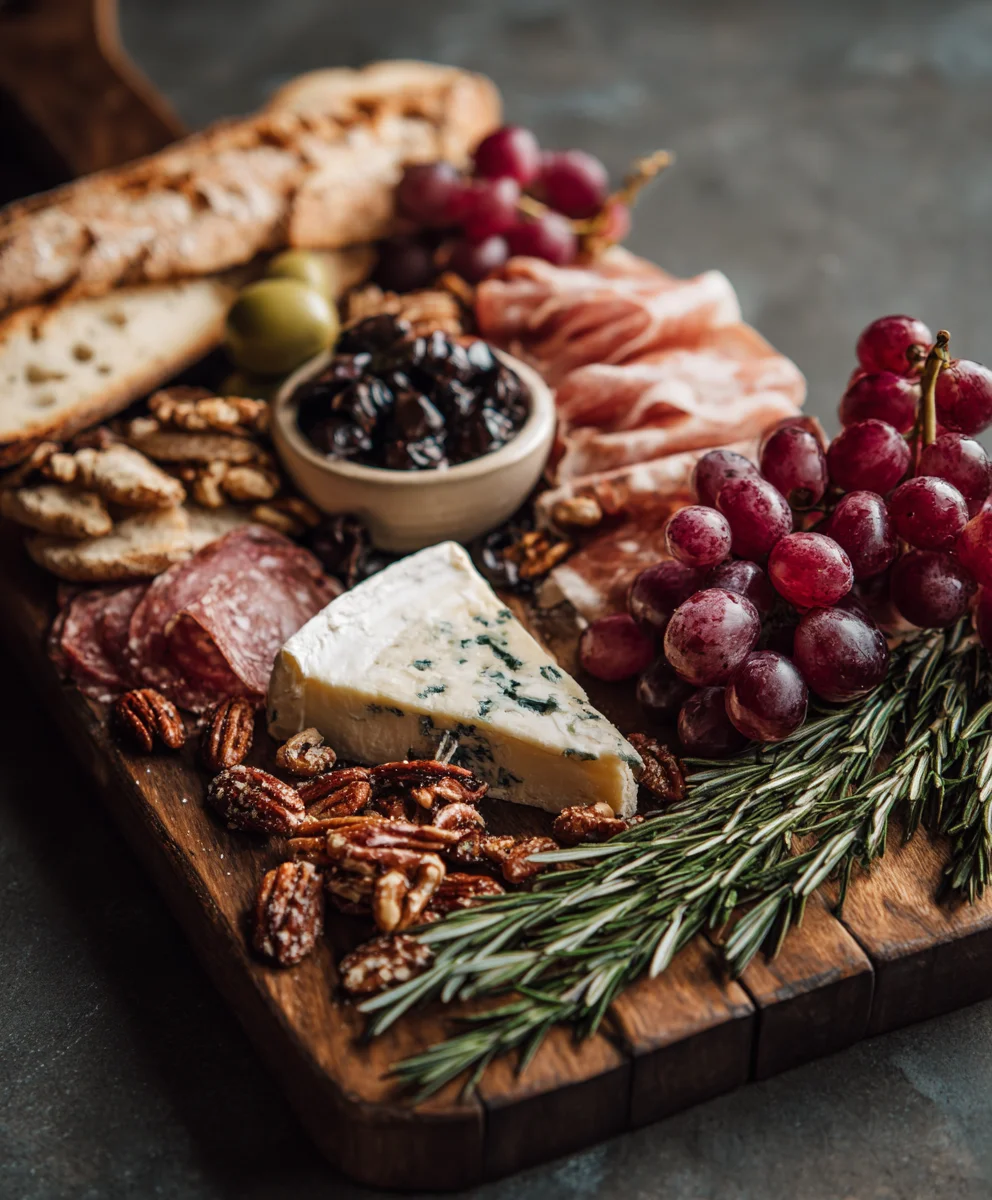
Originating from France, where “charcuterie” traditionally referred to the preparation of cured meats, the modern charcuterie board has beautifully evolved into a vibrant tapestry of cheeses, fruits, nuts, olives, crackers, and delectable spreads. It’s no longer just an appetizer; it’s a social experience, a conversation starter, and an edible work of art that beautifully reflects a long-standing European tradition of communal dining. What truly makes an Easy Charcuterie Board a perennial favorite is its remarkable versatility and the sheer joy of discovery it offers. Every guest can create their perfect bite, exploring endless combinations – perhaps a sharp aged cheddar with a sweet fig preserve, or a salty prosciutto wrapped around a crisp melon slice. I personally adore how the simplicity of creating an easy charcuterie board caters to diverse palates and dietary preferences with such grace and style. It truly is the ultimate low-stress, high-impact entertaining solution, offering a symphony of tastes, visual appeal, and delightful convenience for any occasion.

Ingredients:
- For the Cheeses (2-4 varieties, 4-6 oz each):
- A soft, creamy cheese like Brie, Camembert, or fresh goat cheese (chevre).
- A semi-hard cheese such as sharp Cheddar, Gouda, or Monterey Jack.
- A firm, aged cheese like Parmesan, Manchego, or an aged white Cheddar.
- An optional blue cheese like Gorgonzola or Roquefort for a bold flavor, if you’re feeling adventurous.
- For the Cured Meats (2-3 varieties, 3-4 oz each):
- Thinly sliced Prosciutto or Serrano ham.
- Salami (Genoa, Calabrese, or Soppressata – choose one with a nice texture and spice profile).
- Pepperoni or Chorizo, if you prefer a spicier kick.
- Capicola or Mortadella for variety in flavor and texture.
- For the Crackers and Breads (3-4 varieties):
- A neutral-flavored water cracker or plain crispbread.
- Toasted baguette slices (crostini) or rustic bread.
- Whole wheat or multi-grain crackers for texture.
- Gluten-free crackers, if accommodating dietary needs.
- For the Fruits (seasonal, 1-2 cups total):
- Fresh grapes (red and green, on the vine for visual appeal).
- Berries like strawberries, blueberries, or raspberries.
- Sliced apples or pears (tossed lightly with lemon juice to prevent browning).
- Dried fruits such as apricots, figs, or cranberries.
- For the Nuts (1/2 – 1 cup total):
- Mixed nuts: Marcona almonds, pistachios, candied walnuts, or pecans.
- Cashews or plain roasted almonds.
- For the Olives and Pickles (1 small bowl each):
- Marinated olives (Kalamata, Castelvetrano, or a mixed olive medley).
- Cornichons or other small pickled gherkins.
- Pickled pearl onions (optional).
- For the Spreads and Dips (2-3 small bowls):
- Honey or hot honey for drizzling over cheese.
- Fig jam, apricot preserves, or raspberry preserves.
- A savory dip like whole grain mustard or a small amount of pesto (optional).
- Hummus or a white bean dip (optional, if you want a heartier dip).
- For Garnish:
- Fresh rosemary sprigs, thyme, or basil leaves.
- Edible flowers (optional, for an extra touch of elegance).
Gathering Your Charcuterie Essentials: The Foundation of Your Easy Charcuterie Board
Creating an Easy Charcuterie Board that truly impresses begins long before any food touches the platter. My first step is always to think about the canvas – the board itself! You’ll want a sturdy, food-safe surface. A beautiful wooden board, a large slate slab, or even a ceramic platter works wonderfully. The size of your board should be chosen based on how many people you plan to serve. For a small gathering of 2-4, a 12×18 inch board might be perfect, but for larger parties, I often use a substantial 24×18 inch board or even combine a couple of smaller ones to create a grand display.
- Select Your Board: Choose a board that not only fits your aesthetic but is also large enough to hold all your delightful ingredients without looking overly crowded. I find that a little bit of overflow, where ingredients gracefully spill over the edges, adds to the rustic charm, but you don’t want a cramped look.
- Gather Small Bowls and Utensils: You’ll need several small bowls or ramekins for olives, nuts, and any spreads or jams. Don’t forget small serving spoons, cheese knives, and perhaps some mini tongs. Having these ready makes assembly much smoother and ensures guests can easily serve themselves.
- Plan Your Color and Texture Palette: As I’m envisioning my board, I like to think about the variety of colors and textures I want to include. A great charcuterie board is a feast for the eyes as much as it is for the palate. Think about contrasting colors like dark grapes with light cheeses, and different textures from creamy brie to crunchy nuts.
- Shop Smart: When I’m at the grocery store or a specialty food shop, I always aim for a balance of familiar favorites and one or two exciting new discoveries. Don’t feel pressured to buy the most expensive items; quality over quantity is key. For example, a good quality sharp cheddar can be just as satisfying as a specialty aged gouda, especially when you’re building an Easy Charcuterie Board. Freshness is paramount, so always check expiration dates, especially for cheeses and meats.
- Consider Dietary Needs: If you know any of your guests have dietary restrictions (e.g., gluten-free, vegetarian, nut allergies), it’s a lovely touch to include specific options for them. I might add some gluten-free crackers, or clearly label items if cross-contamination is a concern.
Preparing Your Components for Brilliance: The Hands-On Work for Your Easy Charcuterie Board
Once all your ingredients are gathered, the next crucial phase is preparation. This isn’t just about unwrapping; it’s about making each item shine and easy for your guests to enjoy. I always make sure to give myself ample time for this stage, as rushing can lead to a less appealing final presentation. Aim to start this about an hour before you plan to assemble the board, especially for cheeses that benefit from coming to room temperature.
- Bring Cheeses to Room Temperature: This is a secret weapon for maximizing flavor! I typically remove most of my cheeses from the refrigerator about 30-60 minutes before serving. This allows their flavors and textures to fully develop. Exception: very soft, fresh cheeses like goat cheese can be brought out closer to assembly time to maintain their shape.
- Prepare Your Cheeses:
- Soft Cheeses (Brie, Camembert): I like to leave these whole or cut them into a few large wedges. You can even cut a small decorative slice off the top rind of a wheel of Brie to hint at its creamy interior.
- Semi-Hard Cheeses (Cheddar, Gouda): These are versatile. I often slice some into uniform blocks or cubes for easy grabbing, and then for visual interest, I might cut some into triangles or long, thin planks.
- Firm/Aged Cheeses (Parmesan, Manchego): For these, I love to use a cheese plane to create beautiful, thin shavings, or for a more rustic look, I break off irregular chunks using a cheese knife or even my hands. The craggy edges add wonderful texture to the board.
- Goat Cheese (Chèvre): If using a log, I slice it into neat rounds. For extra flair, you can lightly drizzle honey or sprinkle fresh herbs over it.
- Arrange Your Cured Meats: This is where you can get a little creative!
- Prosciutto/Serrano Ham: These thin, delicate slices look best when folded artfully. I often create little “ribbons” or “ruffles” by folding them loosely in half or quarters, then arranging them in small piles. This makes them easier to pick up.
- Salami/Pepperoni: For round slices, I like to fold them into quarters or halves and arrange them in overlapping lines or circles. Another fun trick is to create a “salami rose” by layering slices around a small glass, then inverting it. This definitely makes your Easy Charcuterie Board stand out!
- Harder Salami Sticks: If you have a whole salami, slice it into thin rounds yourself. This always tastes fresher than pre-packaged slices.
- Wash and Prepare Fruits: Gently wash all your fresh fruits under cool water and pat them completely dry.
- Grapes: Leave them on small stems; they look more inviting and are easier for guests to grab.
- Berries: Keep them whole.
- Apples/Pears: Slice these just before assembly or toss them lightly with a tiny bit of lemon juice to prevent browning. I usually cut them into wedges or thin slices.
- Dried Fruits: Simply arrange these as they are.
- Prepare Nuts and Olives: Drain any liquid from your olives and cornichons. Place nuts and olives into their designated small bowls. I often use tiny forks or toothpicks in the olive bowl for easy serving.
- Ready Your Spreads and Jams: Transfer honey, jams, and any mustards into their respective small bowls. Make sure to provide a clean spoon for each.
- Slice Bread and Arrange Crackers: If using a baguette, slice it into thin crostini and toast them lightly for extra crunch and flavor. Arrange your crackers in various stacks or fanned out, ensuring they are easily accessible. I like to have a few different shapes and textures of crackers.
The Art of Assembling Your Easy Charcuterie Board: A Step-by-Step Masterclass
This is where the magic happens! Assembling your Easy Charcuterie Board is an enjoyable, creative process. Think of your board as a canvas and your ingredients as your colors. I always aim for a balance of colors, textures, and heights to create an inviting visual landscape. Don’t be afraid to let items touch and mingle; a full, abundant board feels more generous and appealing.
- Place Your Anchor Items First: I always start by placing my small bowls for olives, nuts, and spreads onto the board. These act as anchors and help define the overall layout. Distribute them strategically around the board, creating natural divisions. Also, place any larger, uncut blocks or wheels of cheese in their desired spots. This gives structure to your design.
- Arrange the Cheeses: Now, distribute your prepared cheese pieces around the board. Place different types of cheese in different areas. I like to group similar textures or flavors together but also ensure that there’s a good mix throughout the board. For example, place a few cubes of cheddar near the crackers, and a soft brie wedge in another section. Leave some space around each cheese for guests to cut or pick.
- Add the Cured Meats: Next, carefully arrange your folded or rolled cured meats. I usually snake them around the cheeses or pile them artfully into empty spaces. Don’t just lay them flat; create volume and visual interest with your folding techniques. You can even make little “rivers” of prosciutto or “mountains” of salami. This is a key step in making your Easy Charcuterie Board look abundant and inviting.
- Intersperse Crackers and Bread: Now it’s time for the carb companions. Place crackers and sliced bread strategically throughout the board, making sure they are near the cheeses and meats. You can fan them out, stack them, or create little “cracker waterfalls” cascading into gaps. I often use different types of crackers to fill various spaces, adding more visual interest. Ensure there’s a variety available in different areas of the board so guests don’t have to reach too far.
- Fill Gaps with Fruits and Nuts: This is where your board really comes alive with color and freshness.
- Fresh Fruits: Tuck in clusters of grapes, piles of berries, and slices of apple or pear into any remaining open spaces. Grapes look particularly lovely draped over a cheese or nestled between meats.
- Dried Fruits: Scatter dried apricots, figs, or cranberries artistically around the board. They add a different texture and concentrated sweetness.
- Nuts: Pour your prepared nuts into the small bowls or sprinkle them directly into any small nooks and crannies. I love how nuts can fill tiny gaps and add a satisfying crunch to every bite.
- Integrate Olives and Pickles: These briny elements are essential palate cleansers. Make sure your small bowls of olives and cornichons are easily accessible. Their dark colors and distinctive shapes add visual contrast.
Adding the Finishing Touches and Serving: Ensuring Your Easy Charcuterie Board is Picture-Perfect
You’re almost there! The final steps are all about enhancing the visual appeal and ensuring your Easy Charcuterie Board is ready for guests to devour. These small details can make a huge difference in presentation and overall enjoyment.
- Garnish for Freshness: A few sprigs of fresh rosemary or thyme instantly elevate the look of the board, adding a pop of green and a wonderful aroma. I like to tuck them amongst the cheeses or meats. If I have them, a few edible flowers can add a truly sophisticated and beautiful touch.
- Drizzle with Honey: If using honey, give a generous drizzle over a specific cheese (like goat cheese or brie) or simply provide a small jar with a spoon for guests to serve themselves. Hot honey is also a fantastic addition for those who enjoy a little kick.
- Check for Balance and Abundance: Take a step back and look at your creation. Does it look full and inviting? Are there any obvious empty spots? If so, fill them with more nuts, grapes, or another cracker. The goal is for the board to look abundant and generous, without being messy. I sometimes shift items slightly to create a more harmonious flow.
- Provide Utensils: Double-check that you have a dedicated cheese knife for each hard and soft cheese, small spoons for spreads, and perhaps some mini tongs for the meats. This makes it easy and hygienic for guests to serve themselves.
- Consider Presentation: If you’re serving wine, have the bottles open and ready. For a truly thoughtful touch, you might even have a small tag indicating the type of each cheese.
- Serving Temperature: For the best flavor, serve your Easy Charcuterie Board at room temperature. This is especially important for the cheeses, as their flavors are much more pronounced when not chilled. I typically aim to have the board assembled and ready about 15-30 minutes before guests arrive.
- Enjoy and Replenish: Once your guests start to enjoy your amazing charcuterie board, don’t be afraid to replenish items as they get low, especially crackers and popular cheeses. Having extra ingredients on standby makes this a breeze. Most importantly, sit back, relax, and enjoy the fruits of your labor!
Conclusion:
And there you have it, my friends! We’ve journeyed through the simple yet utterly sophisticated art of crafting a board that promises to be the undisputed star of any gathering. What I truly adore about this particular recipe is how it elegantly solves the age-old dilemma of wanting to impress your guests without spending an entire day slaving away in the kitchen. It’s a testament to the fact that culinary brilliance doesn’t always demand complex techniques or exotic ingredients. Instead, it champions thoughtful selection and artful arrangement, transforming everyday items into an extraordinary display.
This isn’t just a recipe; it’s a blueprint for stress-free entertaining, a secret weapon in your hosting arsenal. Imagine the gasps of delight as your guests lay their eyes on the vibrant colors, varied textures, and enticing aromas emanating from your meticulously arranged spread. The beauty of this approach lies in its inherent versatility. Whether you’re a seasoned chef or someone who considers boiling water an accomplishment, you’ll find immense satisfaction in bringing this creation to life. It’s a rewarding experience, not just in the final presentation, but in the joyful process of curating and composing each element. The sheer joy of watching friends and family gather around, reaching for different delectable bites, sharing stories and laughter over a spread you’ve lovingly prepared – that, to me, is the ultimate reward.
But the journey with your board doesn’t end once it’s beautifully arranged on the table. Oh no, the possibilities for customization and themed variations are truly endless, limited only by your imagination and the delicious treasures you can find. For a delightful brunch, consider adding mini quiches, artisanal jams, and a selection of fresh pastries alongside your usual cheeses and fruits. Pair it with sparkling rosé or a crisp mimosa for an elevated morning experience. If you’re leaning into a dessert theme, swap out some savory components for decadent chocolates, fresh berries, macarons, and perhaps a small bowl of sweet dip like a salted caramel or chocolate hazelnut spread. It becomes an indulgent treat, perfect for a romantic evening or a sophisticated end to a dinner party.
For seasonal flair, think about what nature offers. In autumn, incorporate spiced nuts, fig preserves, crisp apple slices, and perhaps some cranberry studded cheese. During the summer months, load it with juicy peaches, vibrant cherries, and light, refreshing cheeses like fresh mozzarella or goat cheese, accompanied by a bright pesto or a herbaceous olive oil dip. And for the holiday season? Think deep reds and greens, rosemary sprigs for garnish, gingerbread cookies, and perhaps some spiced pecans. The key is to embrace the bounty of each season, allowing it to inspire your selection and create a board that truly reflects the time of year.
Considering dietary preferences?
This recipe is incredibly adaptable! For your vegetarian friends, simply omit the cured meats and load up on an even wider array of cheeses, nuts, seeds, fresh and dried fruits, and an expanded selection of dips like hummus, baba ghanoush, or a vibrant roasted red pepper spread. Gluten-free options are just as easy; there’s a fantastic assortment of gluten-free crackers, rice cakes, and breadsticks available now, or you can simply focus on fresh vegetables like cucumber slices, carrot sticks, and bell pepper strips as vehicles for your delicious toppings. Vegan boards are also a breeze to assemble, featuring plant-based cheeses (which have come a long way!), roasted vegetables, marinated artichoke hearts, olives, and plenty of fresh produce. You can really make it work for absolutely everyone, ensuring no one feels left out of the culinary fun.
Now, for the exciting part!
I genuinely, wholeheartedly urge you to roll up your sleeves and give this recipe a try. Don’t be intimidated by the seemingly intricate final product; remember, we’ve broken it down into easily manageable steps. You’ll be amazed at how effortlessly you can create an impressive spread that looks like it took hours of painstaking effort. This Easy Charcuterie Board is more than just food on a plate; it’s an experience, a conversation starter, and a focal point for connection. It’s an edible work of art that tastes as good as it looks, and I promise you, once you try it, you’ll wonder how you ever entertained without it.
When you do craft your masterpiece, please, please share your experiences! I absolutely love seeing your culinary creations and hearing about the joy they bring to your tables. Did you discover a fantastic new cheese pairing? Or perhaps a unique fruit combination that blew your guests away? Maybe you even came up with a clever theme that truly captured the essence of your gathering. Drop a comment below or tag me on social media – I can’t wait to celebrate your success with you. Let’s inspire each other and continue to spread the love for simple, beautiful, and utterly delicious food. Happy building, and happy feasting!
Easy Charcuterie Board
A versatile and delightful charcuterie board featuring a vibrant tapestry of cheeses, cured beef, fruits, nuts, olives, crackers, and spreads. Perfect for impressing guests with minimal kitchen time, offering diverse flavors and textures for any occasion.
Ingredients
-
1-1.5 lbs assorted cheeses (e.g., Brie, Sharp Cheddar, Parmesan, optional Blue)
-
6-12 oz assorted cured beef (e.g., Beef Prosciutto, Beef Salami, Beef Pepperoni)
-
3-4 varieties crackers/breads (e.g., water crackers, toasted baguette slices, multi-grain crackers)
-
1-2 cups assorted fresh & dried fruits (e.g., grapes, berries, sliced apples, dried apricots)
-
1/2-1 cup assorted nuts (e.g., almonds, pistachios, walnuts)
-
1 small bowl marinated olives
-
1 small bowl cornichons or pickled gherkins
-
2-3 small bowls spreads (e.g., honey, fig jam, whole grain mustard)
-
Fresh rosemary sprigs (optional, for garnish)
Instructions
-
Step 1
Choose a food-safe board suitable for your guest count (e.g., 12×18 inches for 2-4 guests). Gather small bowls for olives, nuts, and spreads, along with serving spoons, cheese knives, and tongs. Plan for varied colors and textures. -
Step 2
Remove most cheeses from the refrigerator 30-60 minutes before serving to reach room temperature. Prepare cheeses: leave soft cheeses whole/wedged, slice semi-hard cheeses into blocks/triangles, and break firm cheeses into irregular chunks. -
Step 3
Artfully fold or roll cured beef slices (e.g., ribbons of Beef Prosciutto, folded Beef Salami). Wash and dry fresh fruits; slice apples/pears, tossing with lemon juice to prevent browning. Drain olives/cornichons. Transfer nuts, olives, cornichons, spreads, and jams to small bowls. Slice baguette into crostini (toast lightly if desired) and arrange crackers. -
Step 4
Begin assembly by placing anchor items: small bowls for olives, nuts, and spreads, and any larger cheese blocks/wheels on the board first to establish layout. -
Step 5
Distribute prepared cheeses and artfully arranged cured beef around the board, creating volume and visual interest by folding and piling. -
Step 6
Intersperse crackers and bread strategically near cheeses and meats. Fill remaining gaps with fresh fruits (grapes, berries, sliced apples) and dried fruits, scattering nuts into small spaces. Ensure bowls of olives, cornichons, and other spreads are easily accessible. -
Step 7
Garnish with fresh rosemary sprigs. Drizzle honey over specific cheeses or provide a separate jar. Provide dedicated utensils for each item. Check for balance and abundance. Serve at room temperature for optimal flavor (assemble 15-30 mins before guests arrive). Enjoy and replenish items as needed.
Important Information
Nutrition Facts (Per Serving)
It is important to consider this information as approximate and not to use it as definitive health advice.
Allergy Information
Please check ingredients for potential allergens and consult a health professional if in doubt.

Leave a Comment