

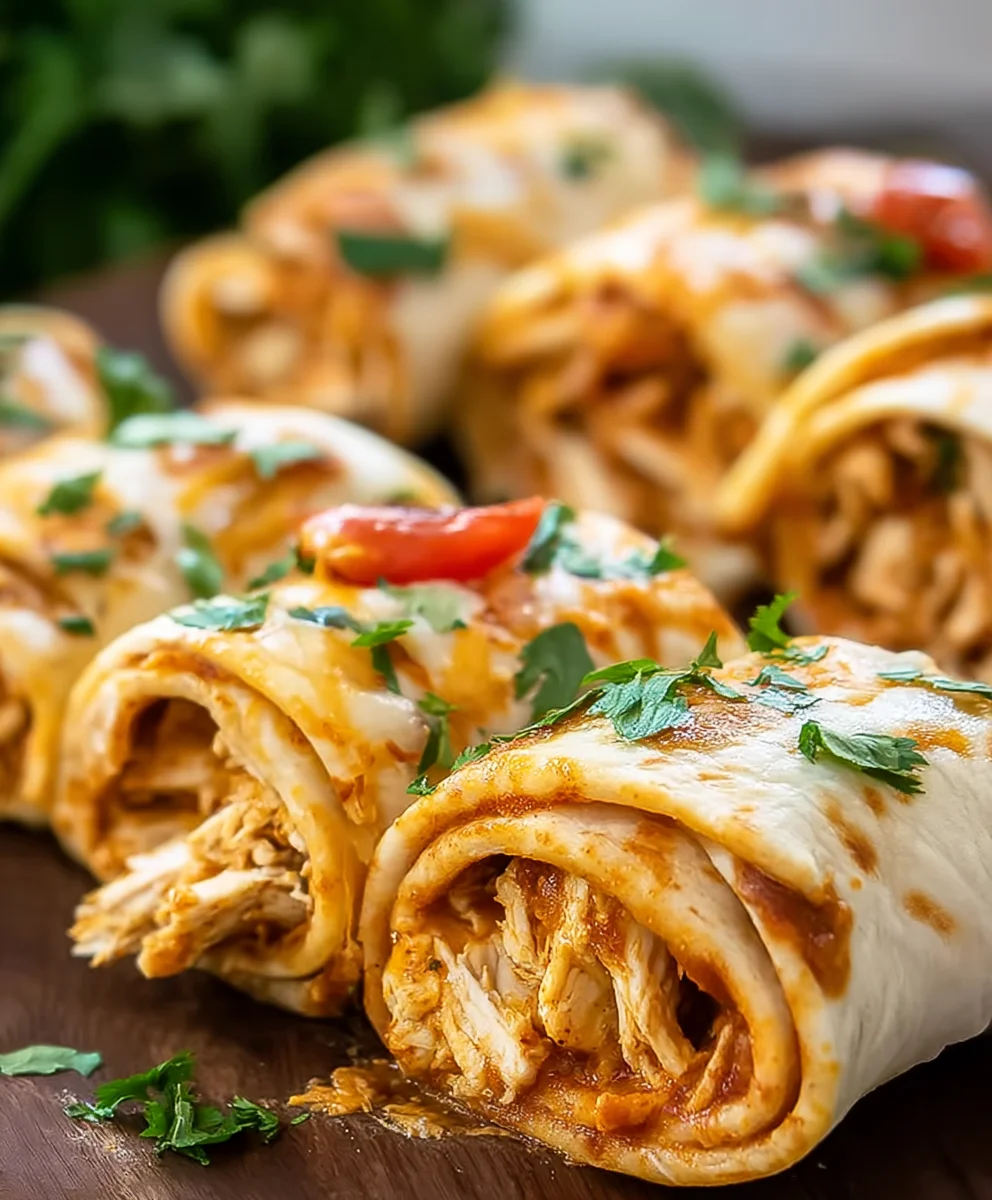
Chicken Enchilada Roll Ups are an absolute game-changer for weeknight dinners, offering all the beloved flavors of traditional enchiladas without the fuss of rolling and stacking. I am incredibly excited to share this recipe with you, as it has become a cherished staple in my own kitchen and for good reason! Prepare to fall in love with a dish that perfectly balances rich, savory chicken, vibrant enchilada sauce, and generous amounts of gooey, melted cheese, all neatly tucked into soft tortillas.
While classic enchiladas boast a rich history rooted in Mexican cuisine, evolving from simple corn tortillas dipped in chili sauce, this roll-up rendition brings a modern, convenient twist. It respects the foundational elements of flavor while simplifying the preparation process, making it accessible even on your busiest evenings. You’ll find yourself reaching for this recipe time and again because it’s not just easy; it’s profoundly satisfying.
Why Everyone Loves These Chicken Enchilada Roll Ups
People adore this dish for its irresistible combination of taste and texture: the tender, seasoned chicken filling, the comforting warmth of the enchilada sauce, and the creamy, bubbling cheese all come together in a symphony of flavor. Beyond the exquisite taste, the sheer convenience of assembling these tasty parcels makes them a winning choice for family meals or entertaining. They are a delightful way to enjoy a hearty, flavorful meal with minimal effort, ensuring a delicious experience every time.

Ingredients:
- For the Creamy Chicken Filling:
- 3 cups cooked chicken, shredded (I often use a rotisserie chicken for ease, or you can boil and shred 2 large chicken breasts)
- 8 oz cream cheese, softened to room temperature (the softening is crucial for a smooth filling!)
- ½ cup sour cream (full-fat or light, depending on your preference)
- 1 (4 oz) can diced green chilies, mild, undrained (don’t drain, the liquid adds flavor and moisture)
- ½ cup finely diced yellow onion (about half a medium onion)
- 2 cloves garlic, minced (freshly minced makes a huge difference!)
- 1 teaspoon ground cumin
- 1 teaspoon chili powder
- ½ teaspoon smoked paprika (for that extra depth of flavor)
- ½ teaspoon salt, or to taste
- ¼ teaspoon black pepper, or to taste
- 1 cup shredded Monterey Jack cheese (or a Mexican blend), divided for filling and topping
- For the Enchilada Roll Ups and Sauce:
- 10-12 medium (8-inch) flour tortillas (I find flour tortillas hold up better for roll-ups than corn, and are less prone to tearing)
- 2 tablespoons unsalted butter
- 2 tablespoons all-purpose flour
- 2 tablespoons chili powder (use a good quality one for the best flavor)
- 1 teaspoon ground cumin
- ½ teaspoon onion powder
- ¼ teaspoon garlic powder
- 2 ½ cups chicken broth (low sodium is often best so you can control the salt)
- ½ cup tomato sauce (plain canned tomato sauce works perfectly)
- ½ teaspoon salt, or to taste
- 1 ½ cups shredded Colby Jack or Mexican blend cheese, for topping (use freshly shredded if possible, it melts better!)
- Optional Garnishes and Serving Suggestions:
- Fresh cilantro, chopped
- Diced avocado or a dollop of guacamole
- Extra sour cream or Greek yogurt
- Sliced pickled jalapeños
- Lime wedges for squeezing
Preparing the Irresistible Chicken Filling for Your Chicken Enchilada Roll Ups:
- First things first, if your chicken isn’t already cooked and shredded, let’s get that done. I usually grab a rotisserie chicken from the grocery store because it’s such a time-saver and the flavor is fantastic. If you’re cooking chicken breasts, simply boil or bake them until cooked through, then shred them using two forks or even a stand mixer with the paddle attachment – it works wonders! Aim for about 3 cups of beautifully shredded chicken.
- In a large, sturdy mixing bowl, combine your shredded chicken. Now, add the star creamy ingredients: the softened cream cheese and sour cream. Make sure your cream cheese is truly at room temperature; it will mix in so much more smoothly without clumping.
- Next, stir in the full can of diced green chilies. Do not drain them! The liquid from the chilies adds extra moisture and a subtle tang that really enhances the flavor of the filling.
- In a small skillet over medium heat, add a tiny drizzle of olive oil. Sauté your finely diced yellow onion until it becomes translucent and tender, about 5-7 minutes. Then, add the minced garlic and cook for another minute until fragrant. This step is important for developing a deep flavor base for our filling. Raw onion can be a bit too sharp.
- Add the sautéed onion and garlic to the chicken mixture. Now it’s time for the spices: sprinkle in the ground cumin, chili powder, smoked paprika, salt, and black pepper. These spices are what give our Chicken Enchilada Roll Ups their signature Tex-Mex flair.
- Finally, add about half a cup of the shredded Monterey Jack cheese to the filling mixture. This helps bind everything together and adds an extra layer of cheesiness right into the heart of the roll ups.
- Using a strong spoon or your clean hands, thoroughly mix all the ingredients until everything is well combined and the chicken is evenly coated in the creamy, spicy mixture. Take your time with this step to ensure every bite of your roll up will be bursting with flavor. The mixture should be thick, creamy, and wonderfully aromatic.
Crafting Your Rich Enchilada Sauce for the Perfect Coating:
While you can certainly use a good quality store-bought enchilada sauce to save time, I find that making a quick, homemade sauce truly elevates these Chicken Enchilada Roll Ups. It’s surprisingly easy and the flavor is unparalleled.
- Grab a medium-sized saucepan and melt 2 tablespoons of unsalted butter over medium heat. Once the butter is melted and slightly bubbling, whisk in 2 tablespoons of all-purpose flour. This creates a roux, which will thicken our sauce and provide a smooth base. Cook the roux for 1-2 minutes, whisking constantly, until it’s a pale golden color and smells slightly nutty. This cooking time is crucial to cook out the raw flour taste.
- To the roux, add your dry spices: the chili powder, ground cumin, onion powder, and garlic powder. Stir them into the roux and cook for another minute, allowing the spices to toast slightly. This step really helps to bloom the flavors of the spices, intensifying their aroma and taste. Your kitchen will start smelling absolutely incredible!
- Gradually whisk in the chicken broth, a little at a time, making sure to incorporate it fully into the roux before adding more. This prevents lumps and ensures a silky-smooth sauce. Keep whisking until all the broth is added and the mixture is smooth.
- Stir in the tomato sauce and the ½ teaspoon of salt. Bring the sauce to a gentle simmer, then reduce the heat to low and let it cook for about 5-7 minutes, stirring occasionally, until it thickens to your desired consistency. It should be thick enough to coat the back of a spoon. Taste the sauce and adjust the salt or add a pinch more chili powder if you feel it needs it. Remember, this sauce is going to infuse so much flavor into our Chicken Enchilada Roll Ups.
- Once your sauce is ready, remove it from the heat. We’ll use some for the bottom of the dish, some to pour over the top, and maybe even a little for dipping if you’re like me!
Assembling Your Delicious Chicken Enchilada Roll Ups:
- Preheat your oven to 375°F (190°C). This ensures the oven is nice and hot, ready to cook our enchiladas evenly.
- Lightly grease a large 9×13-inch baking dish. Spread about ½ cup of your prepared enchilada sauce evenly across the bottom of the dish. This prevents the tortillas from sticking and adds a wonderful layer of flavor from the very first bite.
- Now, it’s tortilla time! To make your flour tortillas more pliable and prevent them from tearing when you roll them, you can warm them slightly. I usually stack them and microwave them for about 20-30 seconds, or you can warm them individually in a dry skillet over medium heat for about 10-15 seconds per side. This step is highly recommended for easy rolling!
- Lay one warmed tortilla flat on a clean surface. Spoon about ¼ to ⅓ cup of the creamy chicken filling down the center of the tortilla. Don’t overfill, or it will be hard to roll!
- Sprinkle a small amount (about 1 tablespoon) of the remaining Monterey Jack cheese over the chicken filling. This adds another layer of cheesy goodness inside.
- Carefully roll the tortilla up tightly, starting from one edge, making sure the filling stays tucked in. Place the rolled enchilada seam-side down in your prepared baking dish.
- Repeat this process with the remaining tortillas and chicken filling until your baking dish is full. You should get between 10 to 12 Chicken Enchilada Roll Ups, depending on how generously you fill them. They should fit snugly in the dish, which helps them hold their shape.
- Once all the roll ups are in the dish, generously pour the rest of your homemade enchilada sauce evenly over the top of them. Make sure every roll up is coated in that delicious, rich sauce.
- Finally, sprinkle the remaining 1 ½ cups of Colby Jack or Mexican blend cheese over the sauced enchilada roll ups. I always go a little heavy on the cheese here; who doesn’t love a perfectly golden, bubbly cheese topping?
Baking Your Golden-Brown Chicken Enchilada Roll Ups:
- Cover the baking dish loosely with aluminum foil. This helps to steam the enchiladas and ensures they cook through without the cheese browning too quickly.
- Bake in the preheated oven for 20 minutes. During this time, the flavors will meld, the tortillas will soften, and the chicken filling will heat through beautifully.
- After 20 minutes, remove the foil. Now it’s time to get that glorious golden-brown, bubbly cheese crust!
- Return the dish to the oven and bake for an additional 10-15 minutes, or until the cheese is melted, bubbly, and lightly golden brown around the edges. Keep a close eye on it during this stage to prevent over-browning.
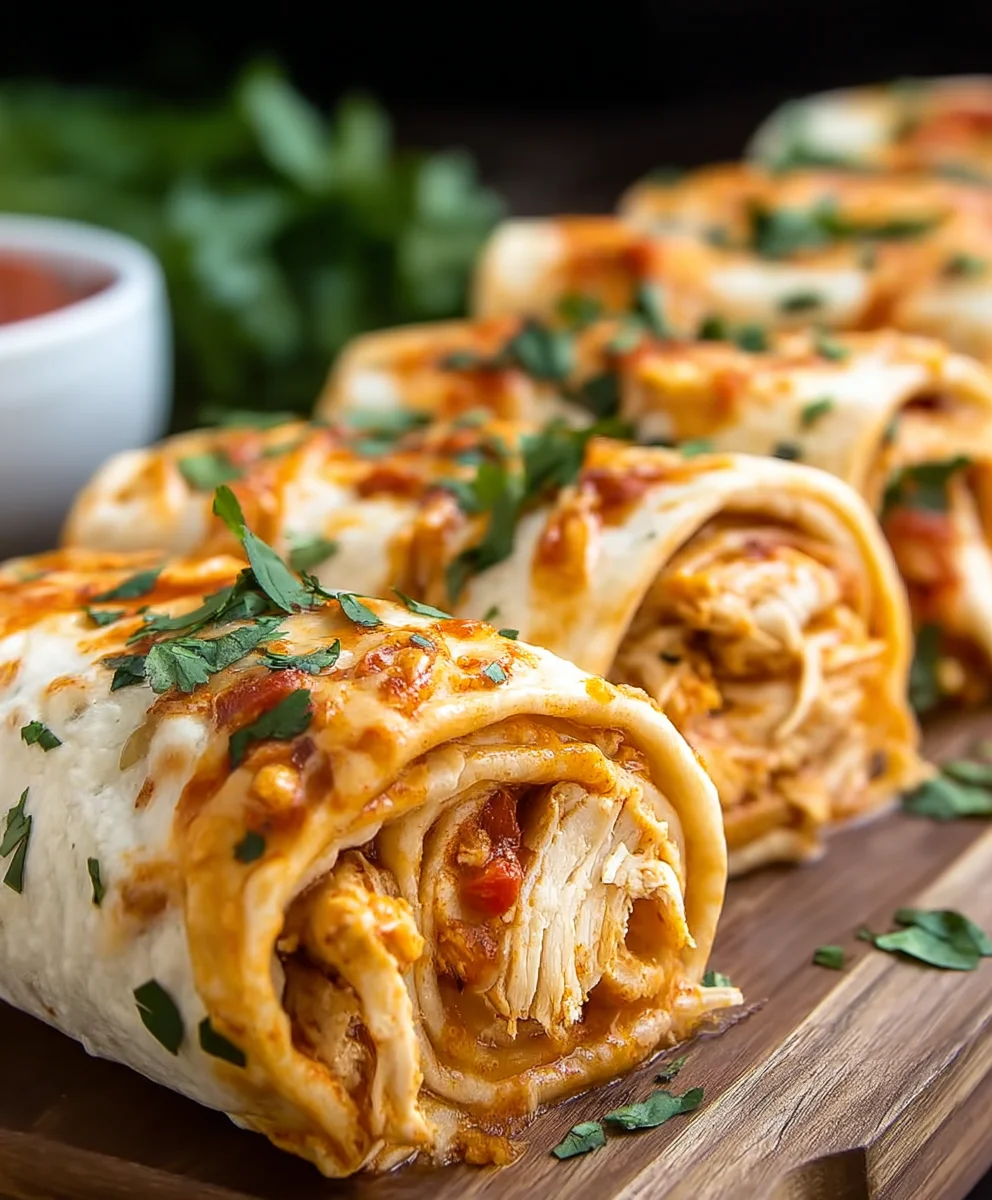
- Once baked to perfection, carefully remove the Chicken Enchilada Roll Ups from the oven. It’s important to let them rest for 5-10 minutes before serving. This resting period allows the cheese and sauce to set slightly, making them easier to serve without falling apart. Plus, it gives you a moment to admire your culinary masterpiece!
Serving Suggestions and Tips for the Best Chicken Enchilada Roll Ups:
- These Chicken Enchilada Roll Ups are fantastic on their own, but they truly shine with some fresh garnishes. I love to sprinkle a generous amount of fresh cilantro over the top right before serving. A dollop of extra sour cream or some fresh diced avocado adds a cool, creamy contrast that is simply divine. Don’t forget a squeeze of fresh lime juice for a bright finish!
- For a complete meal, serve your enchiladas alongside some classic Mexican rice, refried beans, or even a simple green salad with a light vinaigrette. The flavors complement each other wonderfully.
- Make-Ahead Tip: You can assemble the Chicken Enchilada Roll Ups completely (up to the point of baking) a day in advance. Cover the baking dish tightly with plastic wrap or foil and refrigerate. When ready to bake, remove from the fridge about 30 minutes prior to baking to allow it to come closer to room temperature, then bake as directed, potentially adding an extra 10-15 minutes to the covered baking time.
- Freezing Instructions: If you want to prepare these for future meals, you can freeze them unbaked or baked.
- To freeze unbaked: Assemble the enchilada roll ups in a freezer-safe baking dish, cover with sauce and cheese, then wrap tightly with plastic wrap and then foil. Freeze for up to 3 months. To bake, thaw overnight in the refrigerator, then bake as directed (you might need extra covered baking time).
- To freeze baked: Let the cooked enchiladas cool completely. You can freeze individual portions wrapped well, or the entire dish. Thaw in the refrigerator and reheat gently in the oven or microwave.
- Flavor Variations: Feel free to customize your filling! You could add a small can of drained corn, a handful of black beans, or even some finely diced bell peppers for extra vegetables and texture. Experiment with different cheese blends too, like Pepper Jack for a spicier kick!
- Remember, the key to great Chicken Enchilada Roll Ups is layers of flavor, from the seasoned chicken to the rich sauce and the bubbly cheese. Don’t skip any steps, especially the softening of the cream cheese and warming the tortillas! Enjoy creating and devouring this comforting and delicious dish!
<h2>Conclusion:</h2>
<p>Friends, if you’ve been searching for that one dish that effortlessly combines comfort, flavor, and sheer crowd-pleasing appeal, then your quest truly ends here. I cannot emphasize enough just how much I adore this recipe, and I am absolutely confident that you will too. These <strong>Chicken Enchilada Roll Ups</strong> are more than just a meal; they are an experience, a delightful journey for your taste buds that will leave everyone at the table utterly satisfied and probably asking for seconds. What makes them an absolute must-try, you ask? Well, for starters, their ingenious “roll up” format makes them incredibly easy to assemble, eliminating the fuss often associated with traditional enchiladas. Each bite is a harmonious blend of tender, seasoned chicken, rich, savory sauce, and melted cheese, all encased in a soft tortilla. It’s a symphony of textures and flavors that feels both gourmet and incredibly comforting at the same time.</p>
<p>Beyond their undeniable deliciousness, these enchilada roll ups are a fantastic solution for so many mealtime dilemmas. Hosting a casual get-together? They’re perfect for feeding a crowd with minimal stress. Looking for an impressive yet easy weeknight dinner? Look no further! They even make fantastic leftovers, becoming even more flavorful the next day. The beautiful thing about this dish is its inherent versatility. It strikes that perfect balance of being hearty enough for a main course, yet sophisticated enough to feel like a special occasion meal. The cheesy, saucy goodness is something truly special, and I’m genuinely excited for you to experience it.</p>
<h4>Serving Suggestions and Creative Variations:</h4>
<p>Now, while these <strong>Chicken Enchilada Roll Ups</strong> are certainly stellar on their own, pairing them with the right accompaniments can elevate your meal to an entirely new level. I love serving them alongside a vibrant <strong>cilantro-lime rice</strong> to add a zesty freshness that cuts through the richness of the enchiladas. A simple side of <strong>refried beans</strong> or <strong>black beans</strong>, perhaps seasoned with a touch of cumin and garlic, always complements the meal beautifully. For a touch of freshness and crunch, a crisp <strong>green salad</strong> with a light vinaigrette or a generous helping of <strong>pico de gallo</strong> and sliced <strong>avocado</strong> on top are absolute winners. Don’t forget the classic dollop of <strong>sour cream</strong> or <strong>Greek yogurt</strong> and a sprinkle of fresh <strong>chopped cilantro</strong> right before serving – these small additions make a huge difference.</p>
<p>Feeling adventurous? These roll ups are incredibly forgiving and adaptable, inviting you to get creative in the kitchen. For a vegetarian twist, consider replacing the chicken with a hearty mixture of seasoned black beans, corn, and sautéed bell peppers. If you prefer a different protein, shredded beef or ground turkey can easily be swapped in. You can experiment with different cheese blends too; a mix of Monterey Jack, sharp cheddar, and a sprinkle of Cotija cheese can add an extra layer of flavor. Don’t be afraid to adjust the spice level to your liking – a dash of cayenne pepper in the filling or a few slices of jalapeño baked right on top can really kick things up a notch. For an even creamier texture, stir a tablespoon or two of cream cheese into your enchilada sauce before pouring it over the rolls. You could even use different flavored tortillas, like spinach or whole wheat, for a subtle variation. For those watching their carbs, consider using low-carb tortillas or even hollowing out bell pepper halves and filling them for a vibrant, veggie-packed alternative. The possibilities are truly endless, allowing you to tailor this recipe perfectly to your family’s preferences.</p>
<h5>Your Turn to Create and Share!</h5>
<p>So, what are you waiting for? I wholeheartedly encourage you to make these <strong>Chicken Enchilada Roll Ups</strong> this week. Seriously, clear your schedule, gather your ingredients, and prepare to be amazed. I promise you, this recipe is a keeper, one you’ll want to add to your regular rotation. It’s straightforward enough for novice cooks but flavorful enough to impress even the most discerning palates. Once you’ve had a chance to whip up a batch, I would absolutely love to hear about your experience! Did you stick to the recipe, or did you put your own unique spin on it? What were your favorite serving suggestions? Did your family rave about them as much as mine does? Please, share your stories, your photos, and any brilliant variations you came up with in the comments section below. Your insights and creativity inspire me and our wonderful community of home cooks. Happy cooking, my friends, and enjoy every single delicious bite!</p>
Recipe
A delicious recipe
Ingredients
Instructions
Important Information
Nutrition Facts (Per Serving)
It is important to consider this information as approximate and not to use it as definitive health advice.
Allergy Information
Please check ingredients for potential allergens and consult a health professional if in doubt.


Leave a Comment