

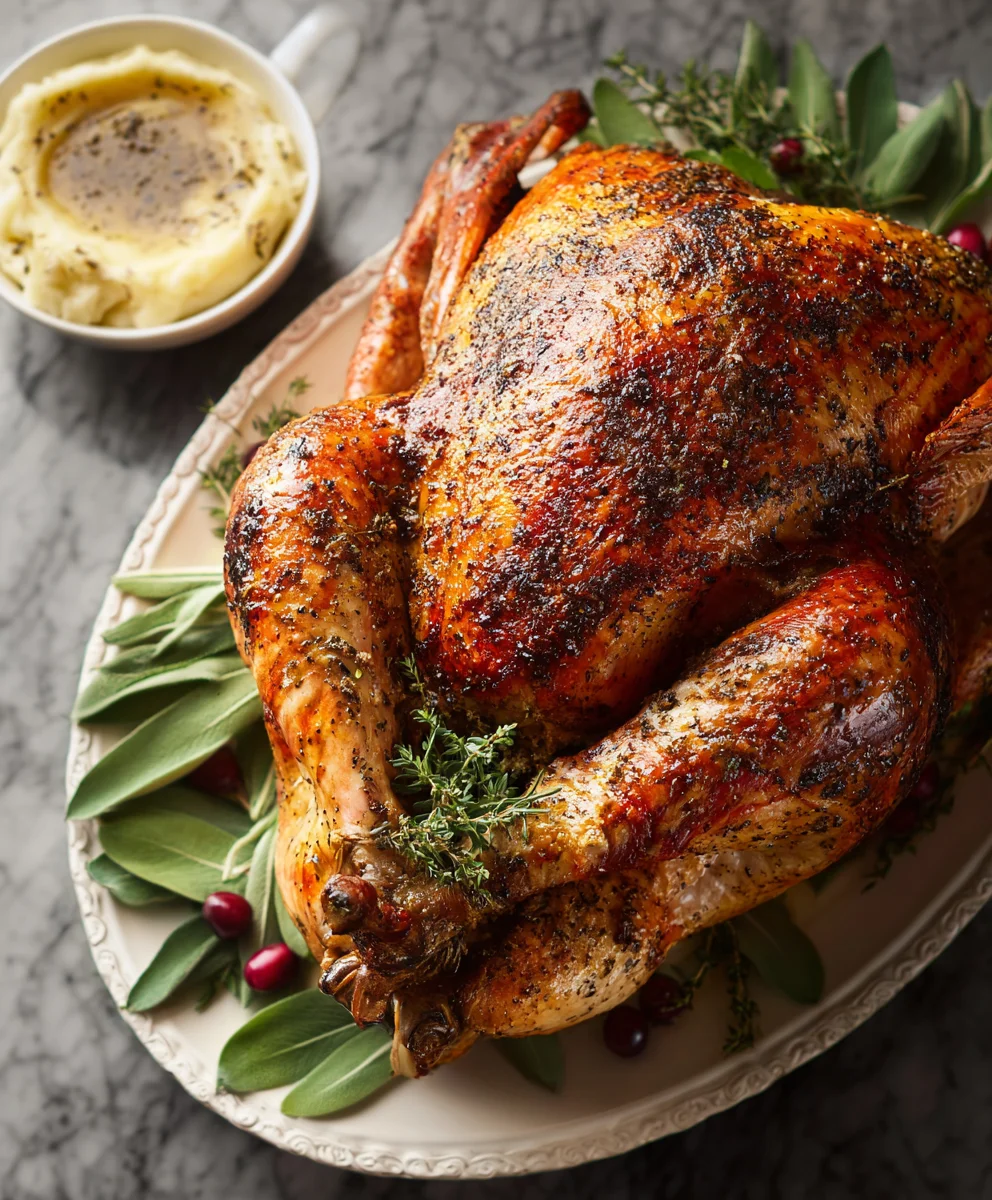
Roast Turkey is more than just a meal; it’s a culinary icon, a symbol of togetherness and abundance that graces tables worldwide, especially during the festive seasons. There’s an undeniable magic that happens when a perfectly golden-brown turkey emerges from the oven, filling your home with an aroma that instantly transports you to cherished holiday memories. This magnificent dish holds a deep cultural significance, particularly in North America where it forms the heart of Thanksgiving celebrations, and across many cultures for Christmas and other special family gatherings. People adore a well-prepared Roast Turkey for its incredibly tender, juicy meat contrasted with delightfully crispy skin, all infused with a rich, savory flavor. It’s the ultimate centerpiece, impressive yet surprisingly approachable, offering comforting warmth and satisfaction to every guest. Preparing a truly memorable feast might seem daunting, but with the right guidance, I assure you, you too can achieve that show-stopping result, ensuring your gathering is truly special.

Ingredients:
- For the Roast Turkey:
- 1 (12-16 pound) whole turkey, preferably fresh or fully thawed
- 1/2 cup unsalted butter, softened
- 2 tablespoons olive oil
- 2 teaspoons sea salt, plus more to taste
- 1 teaspoon freshly ground black pepper, plus more to taste
- 1 large yellow onion, quartered
- 2 celery stalks, roughly chopped
- 2 carrots, roughly chopped
- 4 sprigs fresh rosemary
- 6 sprigs fresh thyme
- 1 whole head garlic, cut in half horizontally
- 1 lemon, quartered
- 4 cups (1 quart) chicken or turkey broth, plus more if needed
- Optional: Kitchen twine for trussing
- For the Brine (Optional, but Highly Recommended):
- 1 gallon (16 cups) water
- 1 cup kosher salt
- 1/2 cup granulated sugar (or brown sugar for a richer flavor)
- 4 sprigs fresh rosemary
- 6 sprigs fresh thyme
- 1 tablespoon whole black peppercorns
- 4 bay leaves
- 2 oranges, quartered
- 1 large yellow onion, quartered
- 1 head garlic, halved horizontally
- For the Herb Butter Blend:
- 1/2 cup unsalted butter, softened
- 2 tablespoons fresh rosemary, finely chopped
- 2 tablespoons fresh thyme, finely chopped
- 1 tablespoon fresh sage, finely chopped
- 2 cloves garlic, minced
- 1 teaspoon sea salt
- 1/2 teaspoon freshly ground black pepper
Equipment You’ll Need:
- Large roasting pan with a sturdy rack
- Meat thermometer (instant-read is best)
- Basting brush
- Aluminum foil
- Large brining bag or a clean, food-safe 5-gallon bucket/cooler (if brining)
- Sharp carving knife and fork
- Cutting board with a juice groove
The Day Before: Brining Your Roast Turkey (Optional but Highly Recommended)
If you’re aiming for the most succulent, flavorful, and moist Roast Turkey you’ve ever had, I truly cannot recommend brining enough. It’s an extra step, but trust me, it’s worth every minute. Brining helps the turkey retain moisture, ensuring it doesn’t dry out during the long cooking process, and infuses it with incredible flavor.
- Prepare the Brine Solution: In a very large stockpot or an even larger food-safe container, combine the 1 gallon of water, kosher salt, granulated sugar, rosemary, thyme, peppercorns, bay leaves, quartered oranges, quartered onion, and halved garlic head. Bring about 4 cups of this mixture to a boil in a saucepan, stirring until the salt and sugar are completely dissolved. This creates a concentrated flavor base.
- Cool the Brine: Remove the heated portion from the stove and let it cool completely. Once cooled, pour it back into the large stockpot with the remaining unheated brine solution. This is crucial; you absolutely do not want to put a hot turkey into warm brine, as it can be a food safety risk and begin to cook the turkey. Ensure the entire brine mixture is completely chilled before proceeding. You can even add a few handfuls of ice to speed up the cooling process, just make sure to account for the additional water it will add.
- Prepare the Turkey: Remove the giblets and neck from the turkey cavity. Rinse the turkey thoroughly inside and out under cold running water. Pat it completely dry with paper towels. A dry surface helps with browning later on.
- Submerge the Turkey: Carefully place the prepared turkey into the chilled brine solution. Make sure the turkey is fully submerged. You might need to place a plate or a clean, heavy object on top of the turkey to keep it underwater.
- Refrigerate: Cover the container or seal the brining bag and place it in the refrigerator for 12-24 hours. For a 12-16 pound turkey, 16-18 hours is usually ideal. Do not brine for longer than 24 hours, as the turkey can become too salty or develop a mealy texture.
Prepping Your Roast Turkey for Roasting Day
Roasting day is exciting! Getting your turkey ready before it goes into the oven is a critical step for a beautiful, golden-brown, and juicy Roast Turkey.
- Remove and Rinse (if brined): If you brined your turkey, carefully remove it from the brine solution. Discard the brine. Rinse the turkey very thoroughly inside and out under cold running water to remove any excess salt. This is a crucial step for preventing an overly salty finished product.
- Pat Dry, Very Dry: Using plenty of paper towels, pat the entire turkey, inside and out, as dry as humanly possible. This is arguably one of the most important steps for crispy skin! Moisture on the skin will steam rather than crisp.
- Bring to Room Temperature: Place the dry turkey on the roasting rack set inside your roasting pan. Let it sit at room temperature for at least 1-2 hours before roasting. This allows the turkey to cook more evenly, preventing the outer parts from overcooking before the center is done.
- Prepare the Herb Butter Blend: In a small bowl, combine the softened 1/2 cup unsalted butter with the finely chopped rosemary, thyme, sage, minced garlic, 1 teaspoon sea salt, and 1/2 teaspoon black pepper. Mix well until everything is thoroughly incorporated. This aromatic butter is going to be our secret weapon for flavor and moisture.
- Loosen the Skin: Gently work your fingers between the skin and the breast meat of the turkey, starting from the cavity opening. Be careful not to tear the skin. Create pockets over the breasts and thighs.
- Apply the Herb Butter Under the Skin: Spoon about two-thirds of the herb butter mixture into the pockets you created under the skin. Gently massage the butter from the outside of the skin to distribute it evenly over the breast and thigh meat. This infuses the meat directly with flavor and helps keep it moist.
- Stuff the Cavity with Aromatics: Loosely stuff the main cavity of the turkey with the quartered yellow onion, chopped celery, chopped carrots, rosemary sprigs, thyme sprigs, halved head of garlic, and quartered lemon. These aromatics will infuse the turkey with a wonderful aroma and flavor from the inside out. Do not pack the cavity tightly, as this can impede air circulation and prevent the turkey from cooking evenly.
- Truss the Turkey (Optional but Recommended): If you have kitchen twine, trussing helps the turkey cook more evenly and makes for a more attractive presentation.
- Tie the drumsticks together by crossing them over each other.
- Tuck the wing tips under the turkey’s body to prevent them from burning.
This also helps to keep the bird compact, ensuring all parts receive heat uniformly.
- Season the Exterior: Rub the remaining herb butter blend all over the exterior of the turkey skin. Then, generously season the entire exterior with 2 teaspoons of sea salt and 1 teaspoon of freshly ground black pepper. Don’t be shy with the seasoning; a large bird needs a good amount of flavor.
- Prepare the Roasting Pan: Pour the 4 cups of chicken or turkey broth into the bottom of the roasting pan. This creates a moist environment, prevents drippings from burning, and forms the base for a delicious gravy later. You can also add some of the extra chopped vegetables (carrots, celery, onion) to the bottom of the pan alongside the broth for additional flavor.
The Roasting Process: Achieving the Perfect Roast Turkey
This is where the magic happens! Roasting a Roast Turkey to perfection requires a combination of temperature control, patience, and a little attention to detail. My goal is always a golden-brown, crispy skin and incredibly tender, juicy meat.
- Preheat Your Oven: Adjust an oven rack to the lower-middle position. Preheat your oven to a high temperature, 425°F (220°C). A high initial temperature helps to crisp the skin and jumpstart the cooking process.
- Initial High Heat Blast: Place the turkey, breast-side up, on the rack in the prepared roasting pan. Carefully transfer the roasting pan to the preheated oven. Roast at 425°F (220°C) for 30 minutes. This initial high heat blast is fantastic for achieving that beautiful golden-brown color on the skin.
- Reduce Temperature and Continue Roasting: After 30 minutes, reduce the oven temperature to 325°F (160°C). Do not open the oven door during this temperature change. Continue roasting, basting every 45-60 minutes with the pan juices. To baste, simply tilt the pan and spoon the accumulated juices over the turkey skin. If the pan drippings start to look dry, add another cup of chicken broth to the bottom of the pan.
- Monitor and Cover for Even Browning: Pay close attention to the turkey’s skin. If the breast or wing tips start to brown too quickly, loosely tent those areas with aluminum foil. This prevents them from burning while the rest of the turkey catches up. Some people even start with the breast covered and remove the foil later. It’s all about watching your specific oven and turkey.
- Check for Doneness with a Meat Thermometer: The most accurate way to tell if your Roast Turkey is done is by using a reliable meat thermometer. Insert the thermometer into the thickest part of the thigh, making sure it doesn’t touch the bone. The turkey is fully cooked when the internal temperature reaches 165°F (74°C). You should also check the thickest part of the breast; it should also register 165°F (74°C). Start checking around 2 to 2.5 hours for a 12-16 lb turkey, but remember, every oven and turkey is different.
- Total Roasting Time Estimates: While a thermometer is key, here are some general guidelines for a 12-16 pound unstuffed turkey: expect it to take approximately 2.5 to 3.5 hours at 325°F (160°C) after the initial high-heat blast. If your turkey is stuffed, it will take longer (add about 30-60 minutes), and the stuffing must also reach 165°F (74°C). For the safest and most delicious results, I always recommend roasting unstuffed, and cooking any stuffing separately.
- Achieving Crispy Skin (Final Stage): If your turkey skin isn’t as crispy as you’d like it to be towards the end of cooking, you can increase the oven temperature to 400°F (200°C) for the last 15-20 minutes, keeping a very close eye on it to prevent burning.
Resting Your Roast Turkey
This step is often overlooked, but it is absolutely crucial for a juicy, tender Roast Turkey. Don’t skip it!
- Remove from Oven and Tent: Once the turkey reaches the target internal temperature of 165°F (74°C), carefully remove the roasting pan from the oven. Transfer the turkey from the roasting pan to a large cutting board with a juice groove.
- Rest the Turkey: Loosely tent the turkey with aluminum foil. This helps to keep it warm while allowing the juices to redistribute throughout the meat. If you carve it immediately, all those delicious juices will run out onto your cutting board, leaving you with dry meat.
- Allow Ample Rest Time: Let the turkey rest for a minimum of 20-30 minutes, or even up to 45 minutes for a larger bird. During this resting period, the internal temperature of the turkey will continue to rise slightly (this is called carryover cooking) and then gradually cool, allowing the muscle fibers to relax and reabsorb all the flavorful juices. This ensures every slice of your Roast Turkey is incredibly moist and tender.
Carving and Serving Your Roast Turkey
After all your hard work, it’s time for the grand finale: carving and serving your magnificent Roast Turkey. Don’t worry, it’s easier than it looks!
- Prepare Your Carving Station: Have a sharp carving knife, a carving fork, and a large cutting board with a juice groove ready. You might also want a separate plate or platter for the carved meat.
- Separate the Legs and Thighs: Locate where the thigh bone connects to the body. Using your carving knife, cut through the skin and joint, separating the entire leg and thigh from the turkey body. Repeat on the other side. You can then separate the drumstick from the thigh if desired.
- Remove the Breasts: Find the breastbone running down the center of the turkey. Make a deep cut along one side of the breastbone. Then, starting from the top, slice horizontally along the rib cage, keeping your knife as close to the bone as possible, until the entire breast half is removed in one piece. Repeat on the other side.
- Slice the Breast Meat: Place each breast half skin-side up on the cutting board. Slice the breast meat against the grain into 1/2-inch thick pieces.
- Arrange and Serve: Arrange the carved turkey meat beautifully on a warm platter. Garnish with some fresh herbs like rosemary and thyme, or a few lemon wedges, for an appealing presentation. Your perfectly cooked Roast Turkey is now ready to be enjoyed!
- Don’t Forget the Pan Juices: While the turkey rests, you can use the flavorful pan drippings to make a delicious gravy. Simply skim off excess fat, deglaze the pan if needed, and thicken with a roux. These juices are liquid gold and will enhance your turkey immensely.
Conclusion:
And there you have it, my friends! We’ve reached the culmination of what I truly believe is the only Roast Turkey recipe you’ll ever need to know. If you’ve been intimidated by the thought of roasting a whole bird, or perhaps you’ve had less-than-stellar results in the past, I promise you, this method is a game-changer. It’s designed not just to produce incredibly succulent, flavorful meat with a beautifully crispy skin, but also to demystify the entire process, making it enjoyable rather than daunting. This isn’t just about cooking a meal; it’s about creating a centerpiece that will elicit gasps of delight and appreciative murmurs around your table, fostering those precious moments of togetherness that we all cherish. The simplicity of the ingredients combined with the straightforward steps means that even a novice can achieve a truly professional-looking and tasting turkey, making you feel like a seasoned culinary expert in your own kitchen.
What makes this particular approach a must-try, you ask? It’s the meticulous balance between achieving that golden-brown, irresistibly crisp skin and ensuring every single fiber of the meat, from the breast to the dark meat, remains incredibly juicy and tender. No more dry, flavorless turkey! We’ve navigated the common pitfalls, ensuring that moisture is locked in, and the natural flavors of the turkey are enhanced, not overshadowed. The aromatic herbs and simple seasonings work in harmony to create a depth of flavor that is both comforting and sophisticated, making it perfect for a grand holiday feast or a special family gathering. It’s a recipe that delivers consistent, mouth-watering results every single time, giving you the confidence to tackle this impressive dish without any pre-dinner stress.
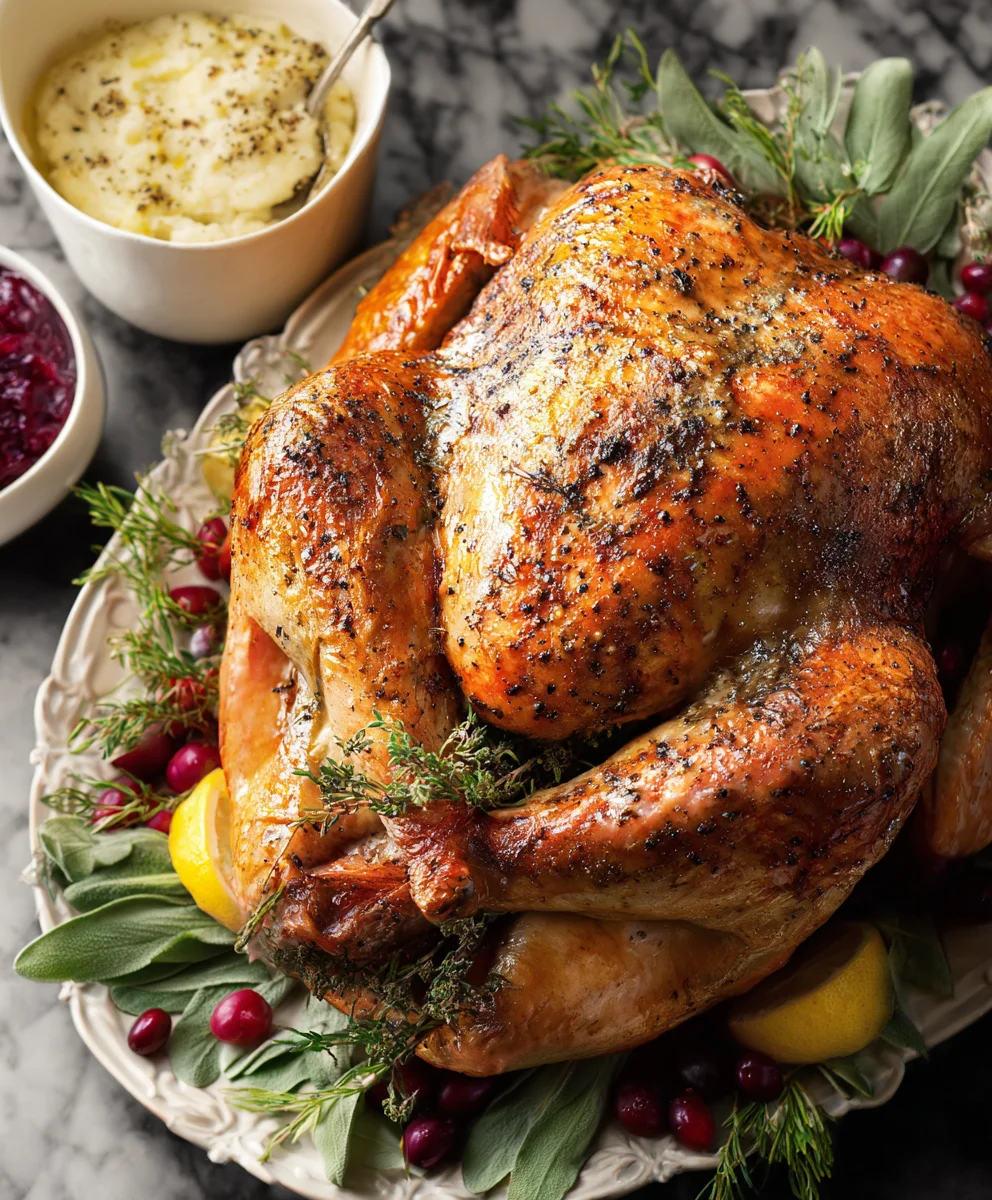
Now, let’s talk about enhancing this magnificent creation further with some serving suggestions and delightful variations that will elevate your dining experience. For classic pairings, you absolutely cannot go wrong with creamy mashed potatoes, generously drizzled with gravy made from the pan drippings – truly, don’t let those flavorful juices go to waste! A vibrant cranberry sauce, whether homemade or store-bought, offers a zesty counterpoint, while perfectly roasted Brussels sprouts, glazed carrots, or sweet potato casserole add essential color and texture. If you’re feeling adventurous, consider a hearty cornbread stuffing baked separately to maintain the turkey’s pristine internal temperature, or a wild rice pilaf for an elegant touch. Garnish your platter with fresh sprigs of rosemary and thyme, perhaps a few vibrant orange slices, to make it visually stunning.
For those looking to experiment, consider infusing your turkey with different flavor profiles. A maple-Dijon glaze brushed on in the last hour of cooking can add a beautiful sheen and a tangy-sweet kick. Alternatively, a lemon-herb butter rubbed under the skin can enhance the citrus notes and contribute to an even crispier exterior. Don’t be afraid to play with your herb blend; sage, marjoram, or even a hint of smoked paprika can introduce exciting new dimensions. As for variations, if you’re a fan of a slightly different texture, a pre-brine can dramatically increase moisture, though I personally find this recipe’s method achieves similar results without the extra step. And let’s not forget the glorious leftovers! Transform them into gourmet sandwiches with a dollop of cranberry aioli, whip up a comforting turkey pot pie, simmer a hearty turkey noodle soup, or create delicious turkey tacos. The possibilities are endless, ensuring that no crumb of your perfectly cooked turkey goes to waste.
So, what are you waiting for? This is your invitation to embark on a culinary adventure that promises delicious rewards. Put aside any past hesitations, gather your ingredients, and follow this guide to create a truly unforgettable meal. I am genuinely excited for you to experience the joy and satisfaction that comes from serving a perfectly cooked Roast Turkey that you prepared yourself. Once you’ve mastered this, you’ll realize just how achievable and rewarding it is. Please, once you’ve tried this recipe, I would absolutely love to hear about your experience! Share your triumphs, your photos, and any creative twists you added. Your feedback and stories inspire me and our entire community of home cooks. Let’s make your next feast the most delicious one yet!
Perfect Roast Turkey Recipe for a Flavorful Holiday Meal
A perfectly golden-brown turkey, infused with rich, savory flavor and incredibly tender, juicy meat contrasted with delightfully crispy skin. This magnificent dish is a culinary icon, perfect for holiday gatherings like Thanksgiving and Christmas.
Ingredients
-
1 (14-16 pound) whole turkey
-
1 cup unsalted butter, softened
-
1 tablespoon fresh sage, finely chopped
-
1 tablespoon fresh thyme, finely chopped
-
1 tablespoon fresh rosemary, finely chopped
-
4 cloves garlic, minced
-
1 teaspoon salt
-
1/2 teaspoon pepper
-
Salt and pepper, to taste (for overall seasoning)
-
2 tablespoons olive oil
-
1 large yellow onion, quartered
-
2 celery stalks, roughly chopped
-
2 carrots, roughly chopped
-
A few sprigs fresh sage, thyme, and rosemary (for cavity)
-
1 head garlic, halved (for cavity)
-
1 lemon, quartered (for cavity)
-
4 cups (1 quart) chicken or turkey broth
-
For the Brine (Optional):
-
1 gallon (16 cups) water
-
1 cup kosher salt
-
1/2 cup granulated sugar
-
1 tablespoon whole black peppercorns
-
4 bay leaves
-
2 oranges, quartered
-
1 large yellow onion, quartered
-
1 head garlic, halved horizontally
-
4 sprigs fresh rosemary
-
6 sprigs fresh thyme
Instructions
-
Step 1
Combine 1 gallon water, kosher salt, sugar, 4 sprigs rosemary, 6 sprigs thyme, peppercorns, bay leaves, 2 oranges, 1 onion, 1 head garlic. Bring 4 cups of this mixture to a boil, dissolve salt/sugar, then cool completely. Add to remaining unheated brine. Rinse turkey, pat dry, then submerge in chilled brine. Refrigerate 12-24 hours (16-18 hours ideal). Do not exceed 24 hours. -
Step 2
If brined, remove turkey, discard brine, rinse thoroughly, and pat very dry. Place on a roasting rack and let sit at room temperature for 1-2 hours. -
Step 3
Combine 1 cup softened butter, 1 tbsp chopped sage, 1 tbsp thyme, 1 tbsp rosemary, 4 minced garlic cloves, 1 tsp salt, and 1/2 tsp pepper. -
Step 4
Gently loosen skin over breast and thighs; spoon two-thirds of herb butter underneath, massaging to distribute. Loosely stuff cavity with quartered onion, chopped celery, carrots, a few sprigs sage/thyme/rosemary, halved garlic head, and quartered lemon. Do not pack tightly. Optional: Truss turkey with kitchen twine. -
Step 5
Rub remaining herb butter over the exterior of the turkey. Season generously with salt and pepper. Pour 4 cups chicken/turkey broth into the bottom of the roasting pan. -
Step 6
Preheat oven to 425°F (220°C). Place turkey breast-side up on the rack in the roasting pan. Roast at 425°F for 30 minutes to crisp the skin. -
Step 7
Reduce oven temperature to 325°F (160°C). Continue roasting, basting every 45-60 minutes with pan juices. If pan looks dry, add more broth. If breast/wing tips brown too quickly, loosely tent with aluminum foil. -
Step 8
Roast until an instant-read meat thermometer inserted into the thickest part of the thigh (without touching bone) and breast registers 165°F (74°C). Approximate total roasting time for a 12-16 lb unstuffed turkey is 2.5 to 3.5 hours at 325°F after the initial blast. For crispier skin, increase to 400°F (200°C) for the last 15-20 minutes, monitoring closely. -
Step 9
Once done, remove turkey from oven and transfer to a large cutting board. Loosely tent with aluminum foil. Let rest for 20-45 minutes to redistribute juices, ensuring moist and tender meat. -
Step 10
Carve by separating legs/thighs at the joint, then remove breast halves by slicing along the breastbone and rib cage. Slice breast meat against the grain into 1/2-inch pieces. Arrange on a warm platter, garnish with fresh herbs. Don’t forget to use the pan drippings for gravy!
Important Information
Nutrition Facts (Per Serving)
It is important to consider this information as approximate and not to use it as definitive health advice.
Allergy Information
Please check ingredients for potential allergens and consult a health professional if in doubt.


Leave a Comment