

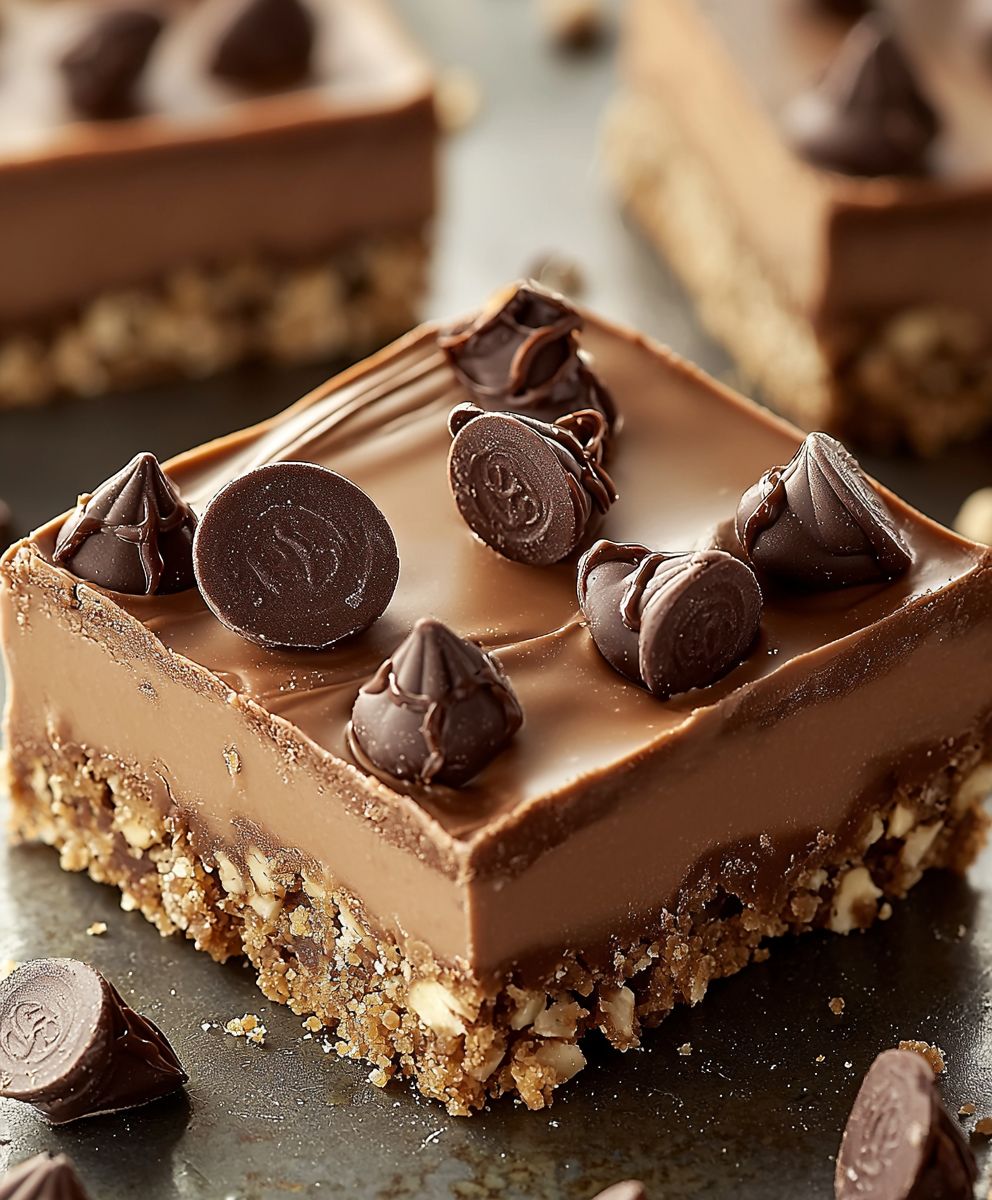
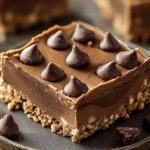
Peanut Butter No Bake Bars: Prepare to be transported back to your childhood with a recipe that’s as simple as it is satisfying! These aren’t just any dessert; they’re a nostalgic trip down memory lane, a sweet symphony of peanut butter and oats that requires absolutely no oven time. Forget slaving away in a hot kitchen these bars are ready in minutes, making them the perfect treat for busy weeknights or impromptu gatherings.
While the exact origins of Peanut Butter No Bake Bars are shrouded in mystery, their popularity exploded in the mid-20th century, coinciding with the rise of convenience foods and the widespread love for peanut butter. They quickly became a staple in family cookbooks, passed down through generations as a reliable and delicious dessert option. Think of them as the ultimate comfort food, a sweet hug in every bite.
What makes these bars so irresistible? It’s the perfect combination of creamy peanut butter, chewy oats, and a touch of sweetness. The texture is divine a delightful contrast between the smooth peanut butter and the slightly crunchy oats. Plus, the no-bake aspect is a major win! Who can resist a dessert that requires minimal effort and delivers maximum flavor? Whether you’re a seasoned baker or a kitchen novice, these Peanut Butter No Bake Bars are guaranteed to be a crowd-pleaser. So, gather your ingredients and let’s get started on this easy and delicious adventure!

Ingredients:
- For the Crust:
- 1 ½ cups graham cracker crumbs (about 12 full sheets)
- ½ cup (1 stick) unsalted butter, melted
- ¼ cup granulated sugar
- For the Peanut Butter Filling:
- 1 cup (2 sticks) unsalted butter, softened
- 3 cups powdered sugar
- 1 cup creamy peanut butter
- 1 teaspoon vanilla extract
- ¼ cup milk
- For the Chocolate Topping:
- 12 ounces semi-sweet chocolate chips
- 2 tablespoons unsalted butter
Preparing the Graham Cracker Crust
Okay, let’s get started with the foundation of our delicious bars the graham cracker crust! This is super easy and comes together in just a few minutes. Trust me, it’s the perfect base for all that peanut butter goodness to come.
- Crush the Graham Crackers: First things first, we need to turn those graham crackers into fine crumbs. You can do this in a couple of ways. My preferred method is using a food processor just toss the graham crackers in and pulse until you have a nice, even crumb. If you don’t have a food processor, no worries! Simply place the graham crackers in a large zip-top bag, seal it tightly, and use a rolling pin to crush them into crumbs. Aim for a consistency similar to coarse sand.
- Combine the Crust Ingredients: In a medium-sized bowl, combine the graham cracker crumbs, melted butter, and granulated sugar. Make sure the butter is fully melted so it incorporates evenly.
- Mix Well: Use a fork or your hands (my personal favorite!) to mix everything together until the crumbs are evenly moistened. The mixture should resemble wet sand and hold its shape when pressed together.
- Press into the Pan: Now, grab an ungreased 9×13 inch baking pan. Pour the graham cracker mixture into the pan and use the bottom of a measuring cup or your fingers to firmly press it into an even layer. Make sure to press it down really well, especially in the corners, so it forms a solid base.
- Chill the Crust: Place the pan in the refrigerator to chill for at least 30 minutes. This will help the crust set and prevent it from crumbling when you add the peanut butter filling. You can even chill it for longer if you want even overnight!
Making the Peanut Butter Filling
Alright, now for the star of the show the creamy, dreamy peanut butter filling! This is where the magic happens, and it’s so simple you won’t believe it. Just a few ingredients and a little mixing, and you’ll have the most irresistible filling ever.
- Cream the Butter: In a large bowl (or the bowl of your stand mixer), cream the softened butter until it’s light and fluffy. This usually takes about 2-3 minutes. Make sure your butter is truly softened not melted for the best results.
- Add the Powdered Sugar: Gradually add the powdered sugar, one cup at a time, mixing on low speed until it’s fully incorporated. Be careful not to add it all at once, or you’ll end up with a cloud of powdered sugar!
- Mix in the Peanut Butter and Vanilla: Add the peanut butter and vanilla extract to the bowl and mix until everything is well combined. Scrape down the sides of the bowl as needed to ensure everything is evenly mixed.
- Add the Milk: Gradually add the milk, one tablespoon at a time, until the filling reaches a smooth and creamy consistency. You might not need all of the milk, so add it slowly and check the consistency as you go. You want it to be spreadable but not too runny.
- Spread over the Crust: Remove the chilled graham cracker crust from the refrigerator. Spread the peanut butter filling evenly over the crust, making sure to reach all the way to the edges.
- Chill Again: Return the pan to the refrigerator and chill for at least 30 minutes, or until the filling is firm. This will make it easier to spread the chocolate topping without the filling mixing in.
Creating the Chocolate Topping
Last but not least, we’re adding the decadent chocolate topping! This is the perfect finishing touch that takes these bars from amazing to absolutely irresistible. It’s so easy to make, and the combination of chocolate and peanut butter is simply divine.
- Melt the Chocolate and Butter: In a heat-safe bowl, combine the chocolate chips and butter. You can melt this in the microwave or over a double boiler.
- Microwave Method: Microwave in 30-second intervals, stirring after each interval, until the chocolate is completely melted and smooth. Be careful not to overheat the chocolate, or it will seize up.
- Double Boiler Method: Place the bowl over a pot of simmering water, making sure the bottom of the bowl doesn’t touch the water. Stir constantly until the chocolate is melted and smooth.
- Stir Until Smooth: Once the chocolate is melted, stir until it’s completely smooth and glossy. The butter helps to create a nice, shiny finish.
- Pour over the Filling: Remove the pan from the refrigerator and pour the melted chocolate evenly over the peanut butter filling.
- Spread Evenly: Use a spatula or knife to spread the chocolate into an even layer, making sure to cover the entire surface of the peanut butter filling.
- Chill to Set: Return the pan to the refrigerator and chill for at least 1 hour, or until the chocolate is completely set. This is the hardest part waiting for them to be ready!
Cutting and Serving
Finally, the moment we’ve all been waiting for cutting and serving these amazing peanut butter no-bake bars! Here are a few tips to make sure they come out perfectly.
- Let them Sit: Before cutting, let the bars sit at room temperature for about 10-15 minutes. This will make them easier to cut without the chocolate cracking too much.
- Use a Warm Knife: Run a large knife under hot water, then dry it thoroughly. This will help you cut through the chocolate and peanut butter layers cleanly. Repeat this process between each cut.
- Cut into Squares: Cut the bars into squares or rectangles of your desired size. I usually cut them into about 24 bars, but you can make them smaller or larger depending on your preference.
- Serve and Enjoy: Serve the bars cold or at room temperature. They’re perfect for parties, potlucks, or just a sweet treat any time of day.
- Storage: Store any leftover bars in an airtight container in the refrigerator for up to a week. They can also be frozen for longer storage just wrap them individually in plastic wrap before freezing.
Tips and Variations
Want to customize these bars to your liking? Here are a few ideas:
- Add Chocolate Chips to the Filling: Stir in ½ cup of mini chocolate chips to the peanut butter filling for an extra chocolatey treat.
- Use Different Types of Peanut Butter: Try using crunchy peanut butter for a bit of texture, or even a flavored peanut butter like chocolate or honey.
- Add a Sprinkle of Sea Salt: Sprinkle a pinch of sea salt over the chocolate topping before it sets for a sweet and salty flavor combination.
- Make it Vegan: Use vegan graham crackers, vegan butter, and a plant-based milk alternative to make these bars vegan-friendly.
- Add Pretzels: Press crushed pretzels into the graham cracker crust for a salty and crunchy base.
Enjoy your homemade Peanut Butter No Bake Bars!
Conclusion:
And there you have it! These Peanut Butter No Bake Bars are truly a must-try for anyone craving a sweet, satisfying treat without the hassle of baking. I know, I know, there are a million no-bake recipes out there, but trust me on this one. The perfect balance of creamy peanut butter, crunchy oats, and just the right amount of sweetness makes these bars absolutely irresistible. They’re quick, easy, and require minimal ingredients what’s not to love? But the best part? They’re incredibly versatile! Feel free to get creative and adapt the recipe to your own tastes. For a richer, more decadent experience, try using dark chocolate chips instead of milk chocolate. Or, if you’re a fan of salty-sweet combinations, sprinkle a little sea salt on top before the bars set. You could even add a layer of melted chocolate on top for an extra special touch. Here are a few serving suggestions to elevate your Peanut Butter No Bake Bar experience:- Enjoy them straight from the fridge: They’re perfectly chilled and firm, making them a refreshing treat on a warm day.
- Pair them with a glass of cold milk: The classic combination never fails!
- Cut them into smaller squares and serve them as party snacks: They’re always a crowd-pleaser.
- Crumble them over ice cream: A delicious and unexpected topping.
- Pack them in your lunchbox for a midday pick-me-up: A much healthier and tastier alternative to processed snacks.
Peanut Butter No Bake Bars: Easy Recipe for a Delicious Treat
- Total Time: 115 minutes
- Yield: 24 bars 1x
Description
Easy no-bake peanut butter bars with graham cracker crust, creamy peanut butter filling, and rich chocolate topping. Perfect make-ahead dessert!
Ingredients
- 1 ½ cups graham cracker crumbs (about 12 full sheets)
- ½ cup (1 stick) unsalted butter, melted
- ¼ cup granulated sugar
- 1 cup (2 sticks) unsalted butter, softened
- 3 cups powdered sugar
- 1 cup creamy peanut butter
- 1 teaspoon vanilla extract
- ¼ cup milk
- 12 ounces semi-sweet chocolate chips
- 2 tablespoons unsalted butter
Instructions
- Crush graham crackers into fine crumbs using a food processor or zip-top bag and rolling pin.
- In a medium bowl, combine graham cracker crumbs, melted butter, and granulated sugar. Mix well until evenly moistened.
- Press the mixture firmly into an ungreased 9×13 inch baking pan to form an even layer.
- Chill the crust in the refrigerator for at least 30 minutes.
- In a large bowl, cream the softened butter until light and fluffy.
- Gradually add the powdered sugar, mixing on low speed until fully incorporated.
- Mix in the peanut butter and vanilla extract until well combined.
- Gradually add the milk, one tablespoon at a time, until the filling reaches a smooth and creamy consistency.
- Spread the peanut butter filling evenly over the chilled graham cracker crust.
- Chill again for at least 30 minutes, or until the filling is firm.
- In a heat-safe bowl, combine the chocolate chips and butter. Melt in the microwave (30-second intervals, stirring in between) or over a double boiler until smooth.
- Stir until completely smooth and glossy.
- Pour the melted chocolate evenly over the peanut butter filling.
- Spread into an even layer.
- Chill for at least 1 hour, or until the chocolate is completely set.
- Let the bars sit at room temperature for 10-15 minutes before cutting.
- Use a warm knife to cut into squares.
- Serve cold or at room temperature.
- Store leftover bars in an airtight container in the refrigerator for up to a week or freeze for longer storage.
Notes
- For best results, ensure butter is softened, not melted, for the peanut butter filling.
- Add milk to the peanut butter filling gradually, as you may not need all of it.
- Warm the knife under hot water between cuts for cleaner slices.
- Prep Time: 20 minutes
- Cook Time: 5 minutes
Leave a Comment