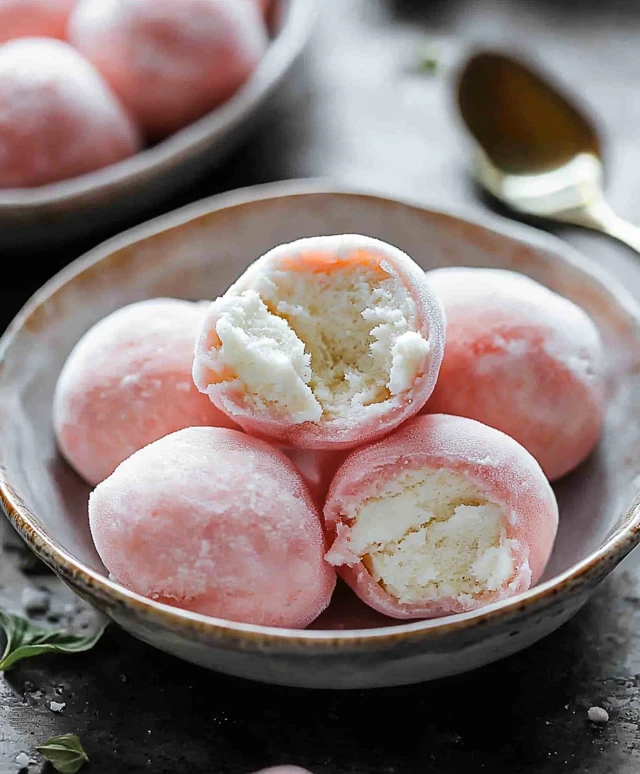
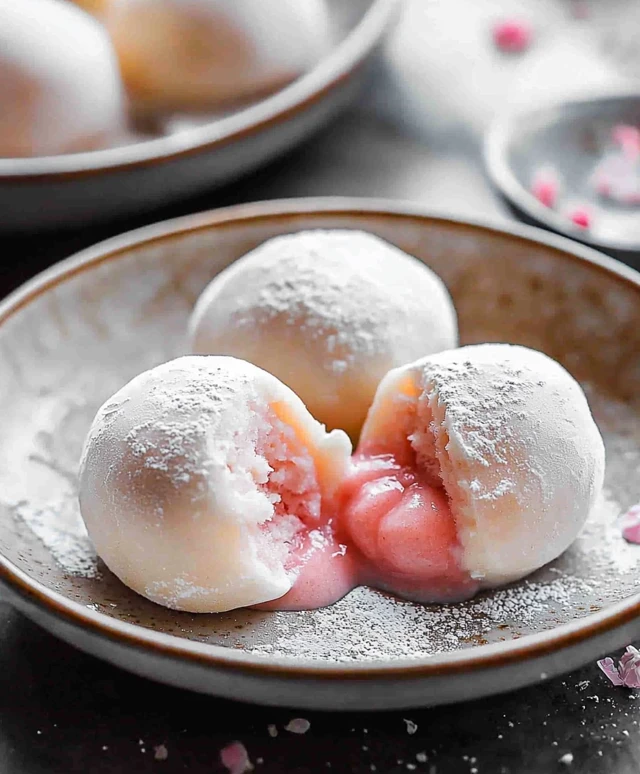
Mochi Ice Cream Treats are a delightful fusion of chewy and creamy that have captured the hearts of dessert lovers around the world. Originating from Japan, mochi is a traditional rice cake made from glutinous rice, and when paired with ice cream, it creates a unique texture that is both satisfying and indulgent. I remember the first time I tried these treats; the combination of the soft, pillowy mochi enveloping the cold, creamy ice cream was an experience unlike any other. People adore Mochi Ice Cream Treats not only for their delicious flavors but also for their fun, bite-sized nature, making them perfect for sharing or enjoying on your own. Whether you prefer classic flavors like matcha and vanilla or adventurous ones like mango and red bean, these treats are sure to please any palate.
Ingredients:
- 1 cup sweet rice flour (also known as mochiko)
- 1/4 cup granulated sugar
- 1 cup water
- 1/2 cup cornstarch (for dusting)
- 1 pint of your favorite ice cream (softened)
- Optional: food coloring (for a fun twist)
- Optional: toppings like crushed nuts, sprinkles, or cocoa powder
Preparing the Mochi Dough
Lets start by making the mochi dough, which is the foundation of our delicious mochi ice cream treats. Follow these steps carefully:
- In a medium-sized mixing bowl, combine the sweet rice flour and granulated sugar. Mix them well to ensure that the sugar is evenly distributed throughout the flour.
- Gradually add the water to the flour mixture while stirring continuously. This will help prevent lumps from forming. If you want to add food coloring for a fun twist, now is the time to do it! Just a few drops will do.
- Once the mixture is smooth, transfer it to a microwave-safe bowl. Cover the bowl with plastic wrap, leaving a small vent for steam to escape.
- Microwave the mixture on high for 1 minute. After 1 minute, take it out and stir it well. It will be hot, so be careful!
- Return the bowl to the microwave and heat for another minute. Stir again, and then microwave for an additional 30 seconds. The mochi should be slightly translucent and sticky when its done.
- Let the mochi cool for a few minutes, but not too long, as it should still be warm when you handle it.
Preparing the Ice Cream
While the mochi dough is cooling, lets prepare the ice cream. This step is crucial because we want the ice cream to be soft enough to scoop but not melted.
- Take your pint of ice cream out of the freezer and let it sit at room temperature for about 10-15 minutes. This will make it easier to scoop.
- Once softened, use a small ice cream scoop or a spoon to scoop out small balls of ice cream, about 1-2 tablespoons each. Place the scoops on a baking sheet lined with parchment paper.
- Once you have scooped out all the ice cream, place the baking sheet in the freezer for at least 30 minutes to firm up the ice cream balls again. This step is essential to ensure that the ice cream doesnt melt when we wrap it in mochi.
Assembling the Mochi Ice Cream Treats
Now comes the fun partassembling our mochi ice cream treats! This is where the magic happens, and youll see how easy it is to create these delightful desserts.
- Once the mochi dough has cooled slightly and the ice cream balls are firm, its time to dust your work surface with cornstarch. This will prevent the mochi from sticking.
- Take a small piece of the mochi dough (about the size of a golf ball) and flatten it in your palm. You want it to be about 1/4 inch thick. If the dough is too sticky, you can dust it lightly with cornstarch.
- Carefully place a frozen ice cream ball in the center of the flattened mochi dough.
- Gently fold the edges of the mochi dough over the ice cream ball, pinching the seams together to seal it. Make sure there are no gaps, or the ice cream will leak out when you eat it!
- Once sealed, roll the mochi ball gently in your hands to smooth it out. If its too sticky, you can dust it with a little more cornstarch.
- Repeat this process for the remaining ice cream balls and mochi dough until you have assembled all your treats.
Freezing the Mochi Ice Cream Treats
After assembling, we need to freeze the mochi ice cream treats to ensure they hold their shape and stay cold.
- Place the assembled mochi ice cream balls back on the parchment-lined baking sheet.

Conclusion:
In conclusion, these Mochi Ice Cream Treats are an absolute must-try for anyone looking to indulge in a delightful dessert that combines chewy, sweet mochi with creamy, flavorful ice cream. The unique texture and taste of mochi paired with your favorite ice cream flavors create a treat that is not only delicious but also fun to eat. Whether you choose classic flavors like vanilla and chocolate or get adventurous with matcha or mango, the possibilities are endless! For serving suggestions, consider presenting these treats on a colorful platter, garnished with fresh fruit or a drizzle of chocolate sauce for an extra touch of elegance. You can also experiment with different fillings, such as fruit sorbets or yogurt, to cater to various dietary preferences. If you’re feeling creative, try adding a sprinkle of crushed nuts or coconut flakes for added texture and flavor. I encourage you to give this recipe a try and experience the joy of making your own Mochi Ice Cream Treats at home. It’s a fun activity to do with friends or family, and I would love to hear about your experiences! Dont forget to share your creations on social media and tag your friends to spread the love for this delightful dessert. Trust me, once you take that first bite, youll understand why these Mochi Ice Cream Treats are a favorite among dessert lovers everywhere! Print
Mochi Ice Cream Treats: A Deliciously Unique Dessert Experience
- Total Time: 93 minutes
- Yield: 10–12 pieces 1x
Description
Enjoy a delightful treat with these homemade Mochi Ice Cream Balls, combining chewy mochi and creamy ice cream. Customize with your favorite flavors and toppings for a fun dessert or refreshing snack!
Ingredients
- 1 cup sweet rice flour (also known as mochiko)
- 1/4 cup granulated sugar
- 1 cup water
- 1/2 cup cornstarch (for dusting)
- 1 pint of your favorite ice cream (softened)
- Optional: food coloring (for a fun twist)
- Optional: toppings like crushed nuts, sprinkles, or cocoa powder
Instructions
- In a medium-sized mixing bowl, combine the sweet rice flour and granulated sugar. Mix well to ensure even distribution.
- Gradually add the water while stirring continuously to prevent lumps. If desired, add a few drops of food coloring.
- Transfer the mixture to a microwave-safe bowl and cover with plastic wrap, leaving a small vent for steam.
- Microwave on high for 1 minute. Carefully stir, then return to the microwave for another minute. Stir again, then microwave for an additional 30 seconds until slightly translucent and sticky.
- Allow the mochi to cool for a few minutes, but keep it warm for handling.
- Let the pint of ice cream sit at room temperature for 10-15 minutes to soften.
- Scoop out small balls of ice cream (about 1-2 tablespoons each) and place them on a parchment-lined baking sheet.
- Freeze the ice cream balls for at least 30 minutes to firm them up.
- Dust your work surface with cornstarch to prevent sticking.
- Take a small piece of mochi dough (about the size of a golf ball) and flatten it to about 1/4 inch thick. Dust with cornstarch if sticky.
- Place a frozen ice cream ball in the center of the flattened mochi dough.
- Fold the edges of the mochi over the ice cream ball, pinching the seams to seal. Ensure there are no gaps.
- Roll the sealed mochi ball gently in your hands to smooth it out, dusting with more cornstarch if necessary.
- Repeat for the remaining ice cream balls and mochi dough.
- Place the assembled mochi ice cream balls back on the parchment-lined baking sheet.
- Freeze for at least 1 hour to ensure they hold their shape and stay cold.
Notes
- Feel free to experiment with different ice cream flavors and toppings to customize your mochi ice cream treats.
- If the mochi dough becomes too sticky, dust with cornstarch as needed while assembling.
- Prep Time: 30 minutes
- Cook Time: 3 minutes


Leave a Comment