

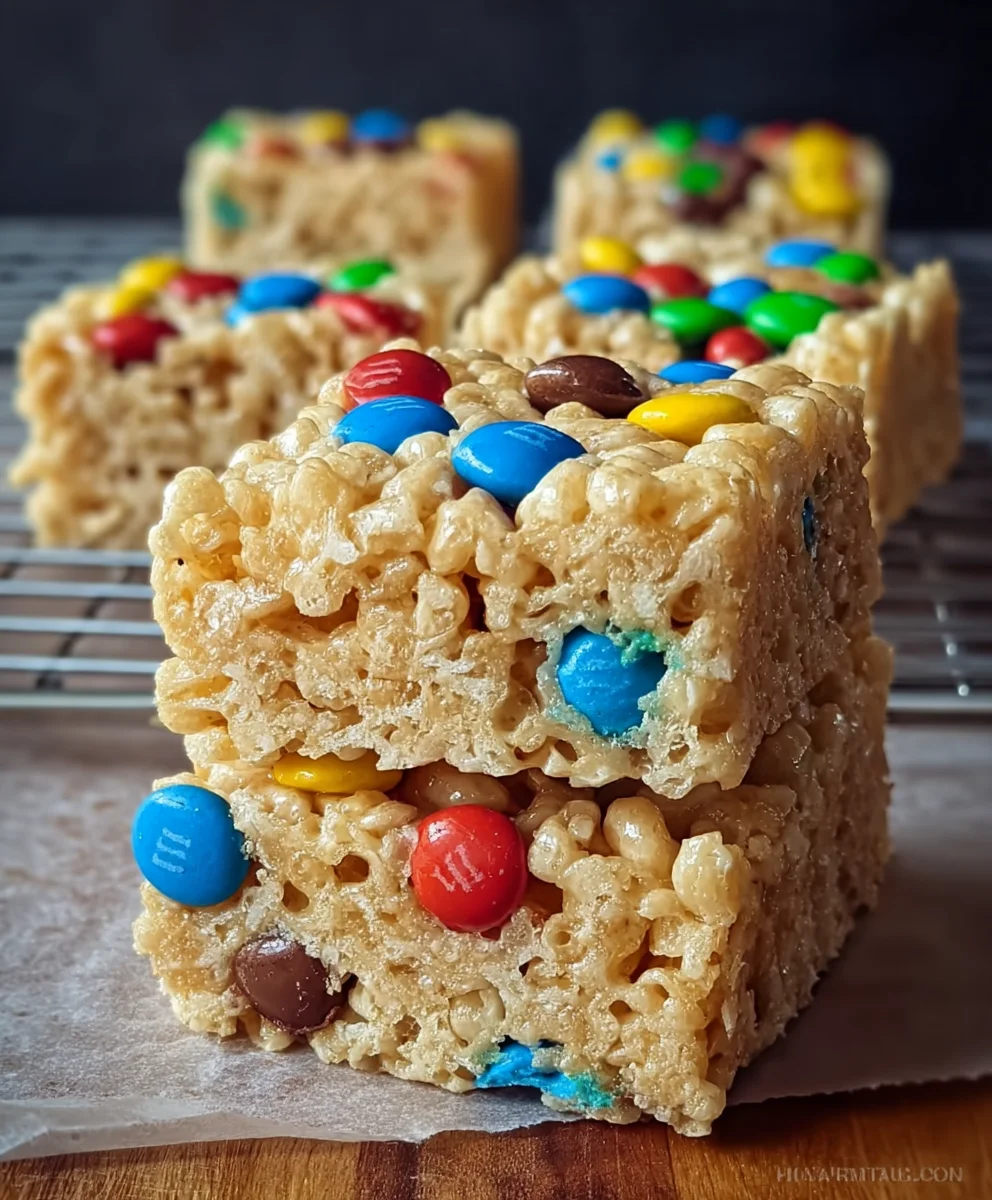
Mms Rice Krispie Treats are more than just a dessert; they are a delightful explosion of color and flavor that brings a smile to every face. Imagine the classic, beloved chewiness of a traditional Rice Krispie Treat, now elevated with the cheerful crunch of colorful M&M’s®. It’s a symphony of textures—the gooey marshmallow, the crisp rice, and the satisfying pop of chocolate candy shells—all in one convenient, no-bake square.
While the original Rice Krispie Treat holds a cherished place in American culinary history, dating back to a Kellogg’s employee’s ingenuity in the 1930s, this M&M-infused version takes that nostalgia and injects it with a vibrant, modern twist. It transforms a simple, comforting treat into a festive showstopper, perfect for celebrations, potlucks, or simply a joyful afternoon snack. I find that the addition of M&M’s makes these Mms Rice Krispie Treats utterly irresistible, transforming a humble dessert into an instant crowd-pleaser that appeals to both children and adults alike. Their ease of preparation and universal appeal make them a go-to choice for any occasion, promising a burst of happiness with every bite.

Ingredients:
- Unsalted Butter: 1/2 cup (which is 1 stick or 8 tablespoons). Using unsalted butter allows us to control the salt content in our treats, ensuring they are perfectly balanced in flavor.
- Mini Marshmallows: 10 ounces (about 6 cups). Mini marshmallows melt more quickly and evenly, contributing to a smoother, less lumpy marshmallow base for our treats. You can use regular large marshmallows, but you’ll need to cut them down or be prepared for a slightly longer melting time.
- Rice Krispies Cereal: 6 cups. The quintessential ingredient for that signature crispy, crunchy texture. Make sure it’s fresh for optimal crispiness!
- M&M’s Milk Chocolate Candies: 1 to 1 1/2 cups. You can choose classic M&M’s, mini M&M’s, or even a holiday mix for a festive touch. The amount depends on how loaded you want your treats to be with colorful chocolate goodness.
- Pure Vanilla Extract: 1 teaspoon (optional, but highly recommended!). A touch of vanilla adds depth and a wonderful aromatic quality that truly elevates the flavor beyond just sweet.
- Salt: 1/4 teaspoon (optional, but also highly recommended!). Just a pinch of salt helps to balance the sweetness of the marshmallows and chocolate, making our Mms Rice Krispie Treats even more irresistible.
Equipment You’ll Need:
- A large, heavy-bottomed pot (or Dutch oven) for melting.
- A very large mixing bowl.
- A 9×13 inch baking pan.
- Parchment paper or wax paper.
- Non-stick cooking spray or extra butter for greasing.
- A sturdy rubber spatula or wooden spoon.
- Measuring cups and spoons.
Preparing Your Workspace and Pan:
- Get Your Pan Ready: First things first, we need to prepare our 9×13 inch baking pan. I like to line mine with parchment paper or wax paper, leaving an overhang on the sides. This creates convenient “handles” that will make lifting the entire block of treats out of the pan incredibly easy once they’ve set. After lining, give the parchment paper a light spray with non-stick cooking spray or lightly grease it with a little extra butter. This extra step ensures our incredibly sticky treats won’t adhere to the paper, allowing for clean removal and cutting. You’ll thank me for this later!
- Measure Out Your Cereal: Into your large mixing bowl, measure out the 6 cups of Rice Krispies cereal. Set this bowl aside. It’s important to have this ready because once the marshmallow mixture is melted, things move pretty quickly, and you don’t want to be fumbling with measuring cereal when the clock is ticking on a perfectly smooth coating.
- Portion Your M&M’s: Go ahead and measure out your 1 to 1 1/2 cups of M&M’s. Keep them separate from the cereal for now. We’ll be adding these vibrant little chocolate candies at a specific point to ensure they don’t melt too much and retain their beautiful color and delightful texture in our Mms Rice Krispie Treats.
The Magical Melt: Butter and Marshmallows:
- Melt the Butter Slowly: Place your large, heavy-bottomed pot over medium-low heat. Add the 1/2 cup of unsalted butter to the pot. We want to melt the butter gently and slowly. The key here is low and slow; don’t rush this process by cranking up the heat. High heat can burn the butter, giving your treats an undesirable nutty or even slightly bitter flavor. As the butter melts, it will become a clear, golden liquid. Keep a close eye on it, stirring occasionally to ensure it melts evenly without scorching.
- Add the Marshmallows: Once the butter is completely melted, it’s time to add the 10 ounces of mini marshmallows to the pot. Immediately reduce the heat to low. This is crucial for achieving that perfectly smooth, pliable marshmallow base for your Mms Rice Krispie Treats. Continuously stir the marshmallows with your rubber spatula or wooden spoon. At first, they’ll seem resistant, but as they warm through, they will start to soften and combine with the melted butter. Continue stirring until the mixture is entirely smooth and creamy, with no lumps remaining. This usually takes about 5-7 minutes. Do not walk away from the pot! Marshmallows can go from perfectly melted to burnt very quickly. We’re looking for a velvety, flowing consistency, almost like a thick, sweet lava.
- Enhance with Vanilla and Salt: Once the marshmallow mixture is completely smooth and off the heat, stir in the 1 teaspoon of pure vanilla extract and the 1/4 teaspoon of salt (if using). The vanilla will release a wonderfully sweet aroma, and the salt, though a small amount, will perform magic by cutting through the sweetness and enhancing all the other flavors, making your Mms Rice Krispie Treats incredibly balanced and addictive. Give it a good stir to ensure these flavor enhancers are fully incorporated into the marshmallow base.
The Grand Assembly: Mixing and Adding the M&Ms:
- Combine Marshmallow with Cereal: Immediately pour the warm, melted marshmallow mixture over the 6 cups of Rice Krispies cereal in the large mixing bowl you prepared earlier. Now, using your sturdy rubber spatula or wooden spoon, gently but quickly fold the cereal into the marshmallow mixture. The goal is to coat every single piece of cereal evenly. Work with a light hand; aggressive stirring can crush the cereal, leading to a denser, less crispy treat. Continue folding until all the cereal pieces are thoroughly coated and glistening with marshmallow. You’ll see the mixture start to come together, becoming one cohesive, sticky mass.
- Introduce the M&M’s: This is the exciting part! Once the cereal is fully coated, sprinkle about two-thirds of your measured M&M’s into the bowl. Gently fold them into the mixture. The warmth of the mixture will soften the M&M’s slightly, but by adding them at this stage, after the initial mixing, we prevent them from fully melting into a muddy mess. We want those distinct, colorful M&M’s to shine through! Save the remaining one-third of the M&M’s for sprinkling on top later; this gives a beautiful visual appeal and ensures some M&M’s remain perfectly intact on the surface.
Pressing, Setting, and Waiting (The Hard Part!):
- Transfer to the Prepared Pan: Now, carefully transfer the entire sticky, glorious mixture into your parchment-lined and greased 9×13 inch baking pan. The mixture will be warm, sticky, and quite voluminous.
- Gently Press into the Pan: This step is critical for achieving perfectly textured Mms Rice Krispie Treats. Lightly spray another piece of parchment paper or the back of your spatula with non-stick cooking spray, or lightly butter your hands. Place the greased parchment or spatula over the mixture in the pan and gently, but firmly, press the mixture evenly into the pan. The key word here is “gently.” If you press too hard, you’ll compact the cereal too much, resulting in dense, hard treats rather than light, airy, and chewy ones. We’re aiming for an even thickness and a relatively flat top. Distribute the remaining one-third of M&M’s over the top of the pressed treats, pressing them in lightly so they adhere. This ensures every piece has a beautiful pop of color and chocolate.
- Allow Them to Set: Once you’ve pressed everything into the pan to your satisfaction, it’s time for the hardest part: waiting! Let the Mms Rice Krispie Treats cool and set completely at room temperature for at least 1 to 2 hours. If you’re in a hurry, you can place them in the refrigerator for about 30 minutes, but be aware that chilling can sometimes make them a little too firm, so room temperature is always my preferred method for optimal chewiness. You’ll know they’re ready when they are firm to the touch and no longer warm in the center.
Serving and Storing Your Delicious M&Ms Rice Krispie Treats:
- Cut and Serve: Once fully set, use the parchment paper overhang as handles to lift the entire slab of Mms Rice Krispie Treats out of the pan and place it onto a cutting board. Using a sharp, large knife that has been lightly greased with non-stick spray (or run under hot water and wiped dry, repeating as needed), cut the slab into squares or rectangles of your desired size. I usually go for 12 large squares (3×4 arrangement) or 24 smaller ones for parties. The greased knife will help prevent sticking and ensure clean, neat cuts through the chewy, M&M-studded goodness.
- Enjoy Your Hard Work: Now, it’s time to savor the fruits of your labor! These homemade Mms Rice Krispie Treats are perfect for a snack, a lunchbox surprise, a party dessert, or just a sweet pick-me-up. The combination of crispy cereal, gooey marshmallow, and the delightful crunch and chocolatey burst of M&M’s is truly magical.
- Storing Your Treats: To keep your treats fresh and perfectly chewy, store them in an airtight container at room temperature. They will remain wonderfully fresh for up to 3 days. Beyond that, they might start to lose some of their crispiness and become a bit harder, though they’ll still be delicious! Avoid refrigerating them for extended periods, as this can make them overly hard and less enjoyable to chew. If you stack them, you might want to place a small piece of parchment paper between layers to prevent them from sticking together.
Conclusion:
So, there you have it, my friends! We’ve journeyed through the simple yet magical process of creating a truly unforgettable dessert. If there’s one recipe I urge you to add to your rotation this year, it’s this one. Why? Because these aren’t just any ordinary treats; they are a delightful explosion of chewy, gooey goodness, elevated by that irresistible crunch and burst of colorful chocolatey joy. They bring a smile to every face, a hint of nostalgia to the adults, and pure excitement to the kids. The beauty of this recipe lies in its incredible simplicity, proving that you don’t need fancy ingredients or complex techniques to whip up something truly spectacular. It’s a testament to the fact that sometimes, the most cherished moments are built on the foundations of classic comfort food, given just a little touch of modern whimsy. This treat is more than just a dessert; it’s an invitation to create happy memories, whether you’re making it for a special occasion or simply to brighten an ordinary Tuesday.
Serving Up the Sweetness: Ideas and Inspirations
Once you’ve got a batch of these glorious creations cooling on your counter, the possibilities for enjoyment are endless! For a casual afternoon pick-me-up, I love to grab one (or two!) with a steaming cup of coffee, a comforting cup of tea, or a cold glass of milk. They make an absolutely fantastic addition to any dessert platter at a party, potluck, or family gathering, instantly brightening the spread with their vibrant colors and playful texture. Thinking about lunchbox surprises for the little ones (or even yourself!)? These treats are perfectly portioned and travel beautifully, bringing a much-needed moment of joy to a busy school or workday. And for a truly decadent experience, imagine a warm square of your homemade treat, slightly softened, served alongside a generous scoop of vanilla bean ice cream. The delightful contrast of the chewy treat with the creamy, cold ice cream is simply divine, creating a dessert experience that feels both comforting and gourmet. Don’t underestimate their power to elevate a simple movie night or a cozy evening by the fireplace.
But don’t stop there! The versatility of these treats is one of their most charming qualities, making them a fantastic canvas for your own culinary creativity. Feel free to play around with them and make them truly your own. Instead of just traditional chocolate M&Ms, why not try a mix of peanut, crispy, or even seasonal holiday-themed M&Ms to match the occasion? A drizzle of melted white chocolate or dark chocolate over the top once they’ve set adds another layer of indulgence and visual appeal, making them look even more professional. For a sophisticated twist, a sprinkle of sea salt flakes over the chocolate drizzle can perfectly balance the sweetness, adding a delightful savory note. You could also experiment with different extracts – a tiny splash of almond extract alongside the vanilla can introduce a subtle new flavor dimension, or even a hint of peppermint for a festive twist. If you’re feeling adventurous, gently fold in some chopped nuts like pecans or walnuts for an added textural crunch, or even mini chocolate chips for an extra burst of chocolatey goodness. And for those special occasions, consider pressing the mixture into a fun-shaped pan before cutting, or using cookie cutters once it’s slightly cooled to create festive shapes for birthdays or holidays. The point is, while the classic recipe is perfect as is, it’s also a fantastic starting point for your personal touch, allowing you to tailor it to your exact preferences or the theme of your event.
So, my dear fellow home bakers and sweet-treat enthusiasts, I genuinely hope you’re feeling inspired and excited to roll up your sleeves and dive into this wonderful recipe. There’s something truly satisfying about creating something so delicious with your own hands, and the smiles it brings to others are the best reward. These Mms Rice Krispie Treats are more than just a dessert; they are an experience waiting to happen, a little burst of happiness that’s easy to achieve and even easier to enjoy. I wholeheartedly encourage you to make a batch this week, share them with your loved ones, perhaps gift them to a friend, or perhaps, keep them all to yourself – I won’t tell! Once you’ve whipped up your own delightful batch, please don’t keep the magic a secret. I would absolutely love to hear about your experience! Did you stick to the classic, or did you get creative with some exciting variations? Snap a photo of your vibrant creations and share them online. Tag me, or simply let me know how it went in the comments section below. Your feedback and stories truly make my day and inspire me to keep sharing more deliciousness with you all. Happy baking, and enjoy every single gooey, crunchy, chocolatey bite!
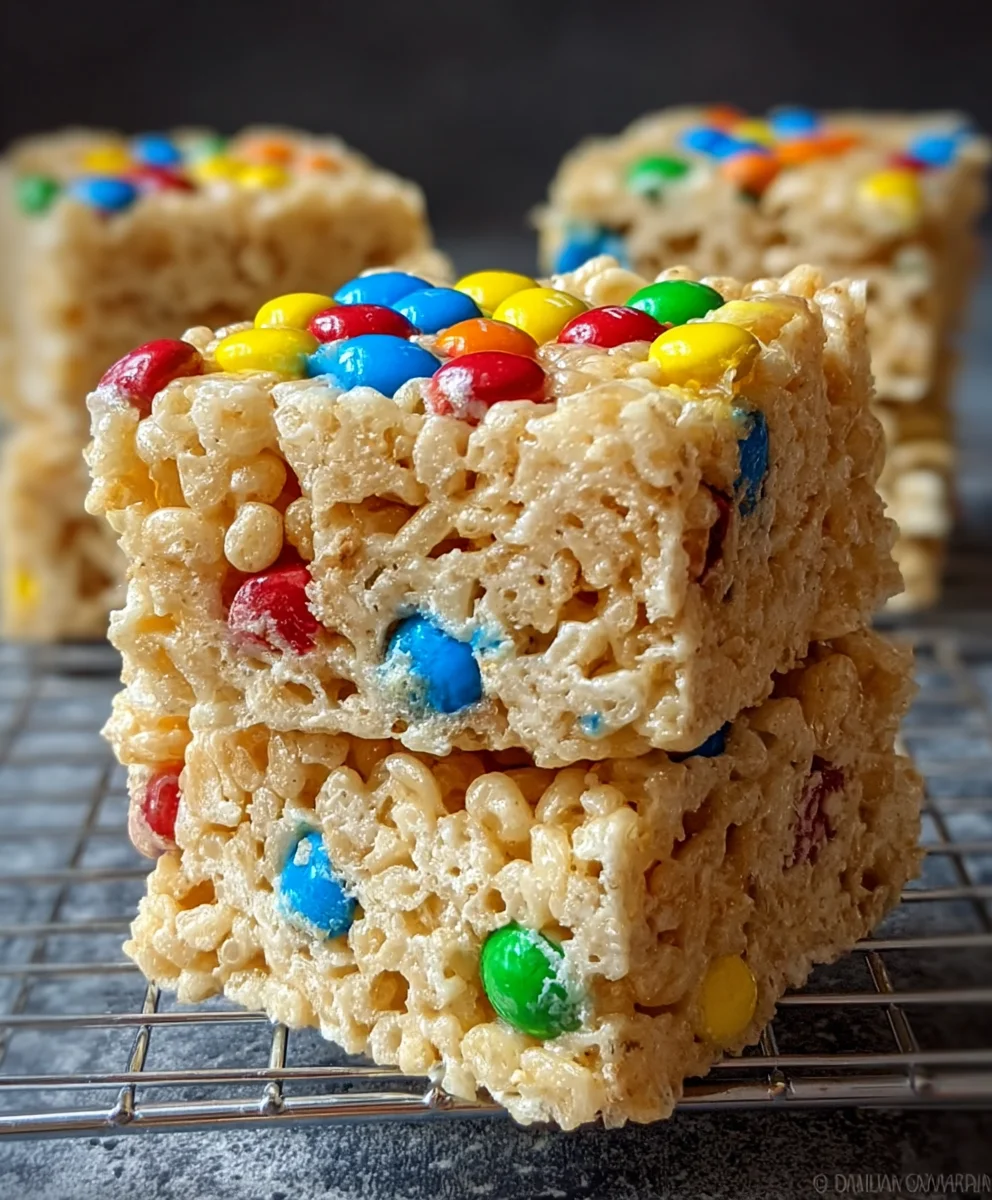
Mms Rice Krispie Treats
Mms Rice Krispie Treats are a delightful explosion of color and flavor, elevating the classic chewy treat with colorful M&M’s®. This easy, no-bake dessert is a festive showstopper, perfect for any occasion, appealing to both children and adults alike.
Ingredients
-
6 cups Puffed Rice Cereal
-
1 (10-ounce) bag Mini Marshmallows
-
½ cup Unsalted Butter
-
1 cup M&M’s Milk Chocolate Candies
-
1 tsp Pure Vanilla Extract (optional)
-
¼ tsp Salt (optional)
Instructions
-
Step 1
Prepare Pan & Cereal: Line a 9×13 inch baking pan with parchment paper, leaving an overhang, and lightly grease. Measure 6 cups puffed rice cereal into a large mixing bowl. -
Step 2
Melt Butter & Marshmallows: In a large pot over medium-low heat, melt ½ cup unsalted butter. Add 1 (10-ounce) bag mini marshmallows; reduce heat to low and stir constantly until completely smooth (approx. 5-7 minutes). -
Step 3
Add Flavorings: Remove the pot from heat. Stir in 1 tsp pure vanilla extract and ¼ tsp salt (if using). -
Step 4
Combine with Cereal: Pour the warm marshmallow mixture over the cereal in the large bowl. Gently fold with a spatula until the cereal is thoroughly coated. -
Step 5
Incorporate M&M’s: Gently fold in ⅔ of the 1 cup M&M’s Milk Chocolate Candies. -
Step 6
Press into Pan: Transfer the mixture to the prepared pan. Using a lightly greased spatula or buttered hands, gently press the mixture evenly into the pan. -
Step 7
Top with M&M’s & Set: Sprinkle the remaining ⅓ M&M’s over the top and lightly press them in. Let set at room temperature for 1-2 hours until firm. -
Step 8
Cut & Serve: Using the parchment overhang, lift the treats onto a cutting board. Cut into squares with a lightly greased knife. -
Step 9
Store: Store Mms Rice Krispie Treats in an airtight container at room temperature for up to 3 days.
Important Information
Nutrition Facts (Per Serving)
It is important to consider this information as approximate and not to use it as definitive health advice.
Allergy Information
Please check ingredients for potential allergens and consult a health professional if in doubt.


Leave a Comment