

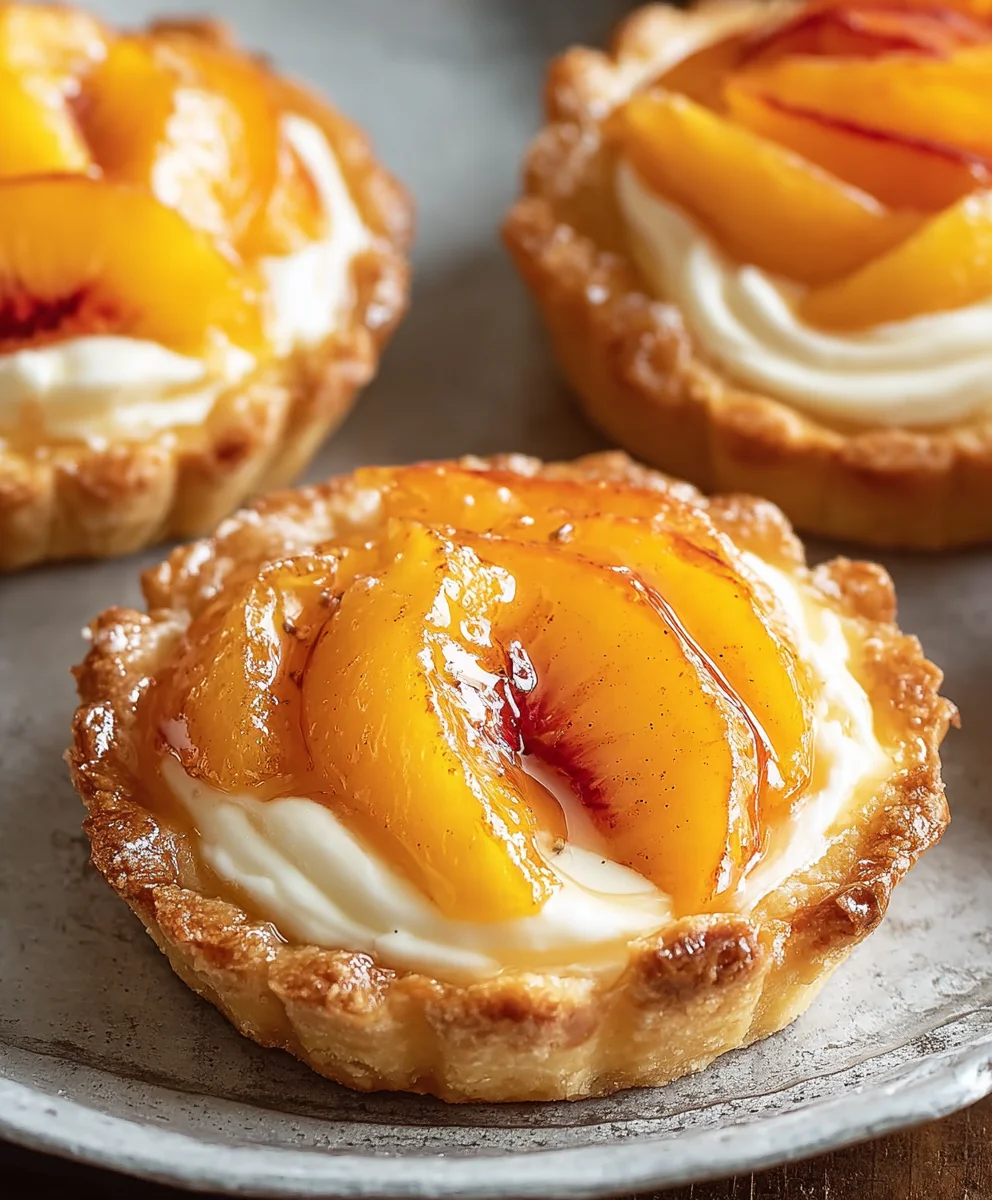
Mini Peach Cream Cheese Tarts are an absolute dream for anyone seeking a delightful balance of sweet, tangy, and utterly creamy textures in a single, perfect bite. As a passionate home baker, I’m thrilled to introduce you to a dessert that effortlessly combines rustic charm with sophisticated elegance. While the concept of fruit tarts dates back centuries, gracing European patisseries with their delicate beauty, these miniature versions offer a modern, approachable twist, making them incredibly popular for contemporary gatherings. Peaches, often revered as a symbol of summer and abundance, particularly in American culinary traditions, find their ideal partner in a smooth, rich cream cheese filling, creating a symphony of flavors that truly sings on the palate.
I find that people absolutely adore these tarts for their unparalleled convenience and their irresistible flavor profile. The vibrant, juicy peaches, whether fresh or frozen, pair exquisitely with the subtle tang of the cream cheese, all nestled within a wonderfully flaky and buttery crust. These Mini Peach Cream Cheese Tarts are not merely a dessert; they are a celebration in miniature, promising to be the star of your next brunch, afternoon tea, or elegant dinner party. Their individual portions mean effortless serving, allowing every guest to enjoy a perfectly composed treat without any fuss. Get ready to fall in love with their charm and exquisite taste!

Ingredients:
- For the Tart Crust:
- 2 ½ cups (300g) all-purpose flour, plus more for dusting
- 1 tablespoon granulated sugar
- 1 teaspoon salt
- 1 cup (226g) unsalted butter, very cold and cut into ½-inch cubes
- ½ cup (120ml) ice water, plus 1-2 tablespoons more if needed
- For the Cream Cheese Filling:
- 16 ounces (450g) full-fat cream cheese, softened to room temperature
- ¾ cup (150g) granulated sugar
- 1 large egg, at room temperature
- 1 teaspoon pure vanilla extract
- ¼ teaspoon salt
- For the Peach Topping:
- 3-4 medium-sized ripe peaches (about 1.5 lbs), peeled, pitted, and thinly sliced
- 2 tablespoons granulated sugar (optional, for macerating peaches)
- 1 tablespoon fresh lemon juice (optional, for macerating peaches and preventing browning)
- 1-2 tablespoons apricot jam or peach preserves, warmed (for glaze, optional)
- Equipment you’ll need:
- Standard 12-cup muffin tin (or two, or tartlet pans)
- Electric mixer (stand or hand-held)
- Rolling pin
- 2.5-inch round cookie cutter or glass rim
- Wire rack for cooling
Preparing the Perfect Tart Crust
- Combine Dry Ingredients: In a large mixing bowl, or the bowl of a food processor, whisk together the 2 ½ cups all-purpose flour, 1 tablespoon granulated sugar, and 1 teaspoon salt. If using a food processor, pulse a few times to combine. This dry mix forms the foundational structure for our delectable Mini Peach Cream Cheese Tarts, so getting it right is key.
- Cut in the Butter: Add the very cold, cubed unsalted butter to the flour mixture. If using a food processor, pulse in short bursts until the butter is cut into pea-sized pieces. You’ll want a mixture that resembles coarse meal, with some larger pieces of butter still visible – these pockets of butter are what create that wonderful flaky texture we all adore in a good tart crust. If doing by hand, use a pastry blender or your fingertips to work the butter into the flour. Be quick about it; we want to keep that butter as cold as possible!
- Add Ice Water: Gradually add the ½ cup of ice water, one tablespoon at a time, pulsing in the food processor or mixing by hand until the dough just starts to come together. The goal here is to add just enough water to hydrate the flour and form a cohesive dough without overworking it. You might not need all of the water, or you might need an extra tablespoon or two, depending on the humidity and your flour. The dough should hold together when squeezed, but it shouldn’t be sticky.
- Form and Chill the Dough: Turn the dough out onto a lightly floured surface. Gently gather it into a cohesive ball, then flatten it into a disc. Wrap the disc tightly in plastic wrap and refrigerate for at least 30 minutes, or up to 2 days. Chilling is absolutely crucial here; it allows the gluten to relax, preventing the crust from shrinking too much during baking, and makes the dough much easier to roll out. This step ensures our mini tart shells maintain their charming shape, ready to cradle the creamy filling.
- Prepare Muffin Tins: While the dough chills, lightly grease your standard 12-cup muffin tin or individual tartlet pans. This will help us easily remove our finished Mini Peach Cream Cheese Tarts later.
- Roll Out the Dough: On a lightly floured surface, roll out the chilled dough to about ⅛-inch thickness. Try to work quickly to keep the dough cool.
- Cut Out Rounds: Using a 2.5-inch round cookie cutter or the rim of a small glass, cut out circles from the dough. Gently press each dough circle into the prepared muffin tin cups, fitting them snugly against the bottom and sides. Re-roll any scraps as needed. This process can be a little delicate, but take your time to ensure each cup has a nice, even base for the filling.
- Pre-bake (Blind Bake) the Crusts: Prick the bottom of each tart shell several times with a fork. This prevents the crust from puffing up too much during baking. For a truly crisp crust, you can blind bake them. Line each shell with a small piece of parchment paper and fill with pie weights or dried beans. Bake in a preheated oven at 375°F (190°C) for 10-12 minutes, or until the edges are just starting to turn golden. Remove the weights and parchment, then bake for another 3-5 minutes until lightly golden. If you’re short on time, you can skip the weights and simply prick the dough, but ensure you keep an eye on them. Let the pre-baked shells cool slightly while you prepare the filling.
Crafting the Creamy Dream Cheese Filling
- Soften Cream Cheese: Ensure your full-fat cream cheese is at room temperature. This is vital for achieving a silky-smooth, lump-free filling. Cold cream cheese will result in a clumpy mixture, which isn’t what we want for these elegant Mini Peach Cream Cheese Tarts.
- Beat Cream Cheese and Sugar: In the bowl of an electric mixer fitted with the paddle attachment, or using a hand-held mixer, beat the softened cream cheese on medium speed for 1-2 minutes until it’s perfectly smooth and creamy. Gradually add the ¾ cup granulated sugar, continuing to beat until the mixture is light and fluffy, about another 2-3 minutes. Scrape down the sides of the bowl frequently to ensure everything is incorporated. You’ll notice the texture becoming incredibly aerated and luscious.
- Add Egg and Flavorings: Reduce the mixer speed to low. Add the large egg, pure vanilla extract, and ¼ teaspoon salt. Mix just until combined. It’s important not to overmix once the egg is added, as this can incorporate too much air, leading to cracks in your filling during baking. We’re aiming for a gentle blend to ensure a perfectly smooth and set filling that complements our peaches beautifully.
- Set Aside: Your heavenly cream cheese filling is now ready! Set it aside while we prepare our vibrant peach topping.
Preparing the Sweet Peach Topping
- Choose and Peel Peaches: Select ripe but firm peaches. To easily peel them, you can blanch them: bring a pot of water to a boil, drop the peaches in for 30-60 seconds, then immediately transfer them to an ice bath. The skins should then slip right off. If you prefer, you can also use a sharp paring knife to carefully peel them, or simply leave the skin on for a more rustic look and added fiber, though I personally find peeled peaches make for a more elegant tart.
- Pit and Slice Peaches: Once peeled, carefully slice the peaches in half, remove the pit, and then thinly slice each half. Aim for slices that are about ⅛ to ¼ inch thick, as these will bake beautifully and arrange nicely on top of our Mini Peach Cream Cheese Tarts.
- Macerate Peaches (Optional but Recommended): In a medium bowl, gently toss the sliced peaches with 2 tablespoons of granulated sugar and 1 tablespoon of fresh lemon juice. The sugar helps to draw out some of the peach’s natural juices, intensifying their flavor, while the lemon juice brightens their taste and prevents them from browning. Let them sit for about 10-15 minutes. This step also gives the peaches a lovely, slightly softened texture that bakes wonderfully.
Assembling and Baking Your Mini Peach Cream Cheese Tarts
- Fill the Tart Shells: Evenly spoon the cream cheese filling into your cooled, pre-baked tart shells. Fill each shell approximately two-thirds full. Don’t overfill, as the cream cheese mixture will puff up slightly during baking. I usually find about 1.5 to 2 tablespoons of filling per mini tart is just right.
- Arrange Peach Slices: Artfully arrange the macerated peach slices on top of the cream cheese filling in each tart. You can fan them out in a pretty rosette pattern, or simply layer them neatly. Don’t be afraid to overlap them slightly to create a beautiful visual appeal. The natural sweetness and slight tartness of the peaches will cut through the richness of the cream cheese filling, creating a harmonious bite.
- Preheat Oven and Bake: Preheat your oven to 350°F (175°C). Carefully transfer the muffin tin with the assembled tarts to the preheated oven. Bake for 20-25 minutes, or until the tart crusts are golden brown, the cream cheese filling is set (it should only jiggle slightly in the center when gently nudged), and the peaches are tender and slightly caramelized. The aroma filling your kitchen at this point will be absolutely divine – a sure sign that your Mini Peach Cream Cheese Tarts are nearing perfection!
- Check for Doneness: The key indicators for doneness are a lightly golden crust, a filling that looks set around the edges and only has a slight jiggle in the very center, and peaches that are soft and slightly darkened. Overbaking can dry out the filling, so keep a close eye on them, especially during the last few minutes.
Cooling and Serving Your Gorgeous Tarts
- Cool Completely: Once baked, remove the muffin tin from the oven and place it on a wire rack. Allow the Mini Peach Cream Cheese Tarts to cool in the pan for at least 15-20 minutes. This initial cooling period allows the tarts to firm up before you attempt to remove them.
- Remove from Pan: Gently run a thin knife around the edge of each tart, then carefully lift them out of the muffin tin and transfer them directly to the wire rack to cool completely. This step is crucial; attempting to move them too soon can cause them to break apart. Patience truly is a virtue when baking, especially with delicate treats like these.
- Apply Optional Glaze: If desired, once the tarts are completely cool, gently warm your apricot jam or peach preserves until it’s loose and brushable. Lightly brush this glaze over the top of the peaches on each tart. This step adds a beautiful glossy shine and an extra layer of peachy flavor, making your Mini Peach Cream Cheese Tarts look even more irresistible.
- Chill Before Serving: For the best texture and flavor, I highly recommend chilling the tarts in the refrigerator for at least 1-2 hours before serving. The cream cheese filling will set even further, making them easier to handle and providing a wonderfully refreshing bite.
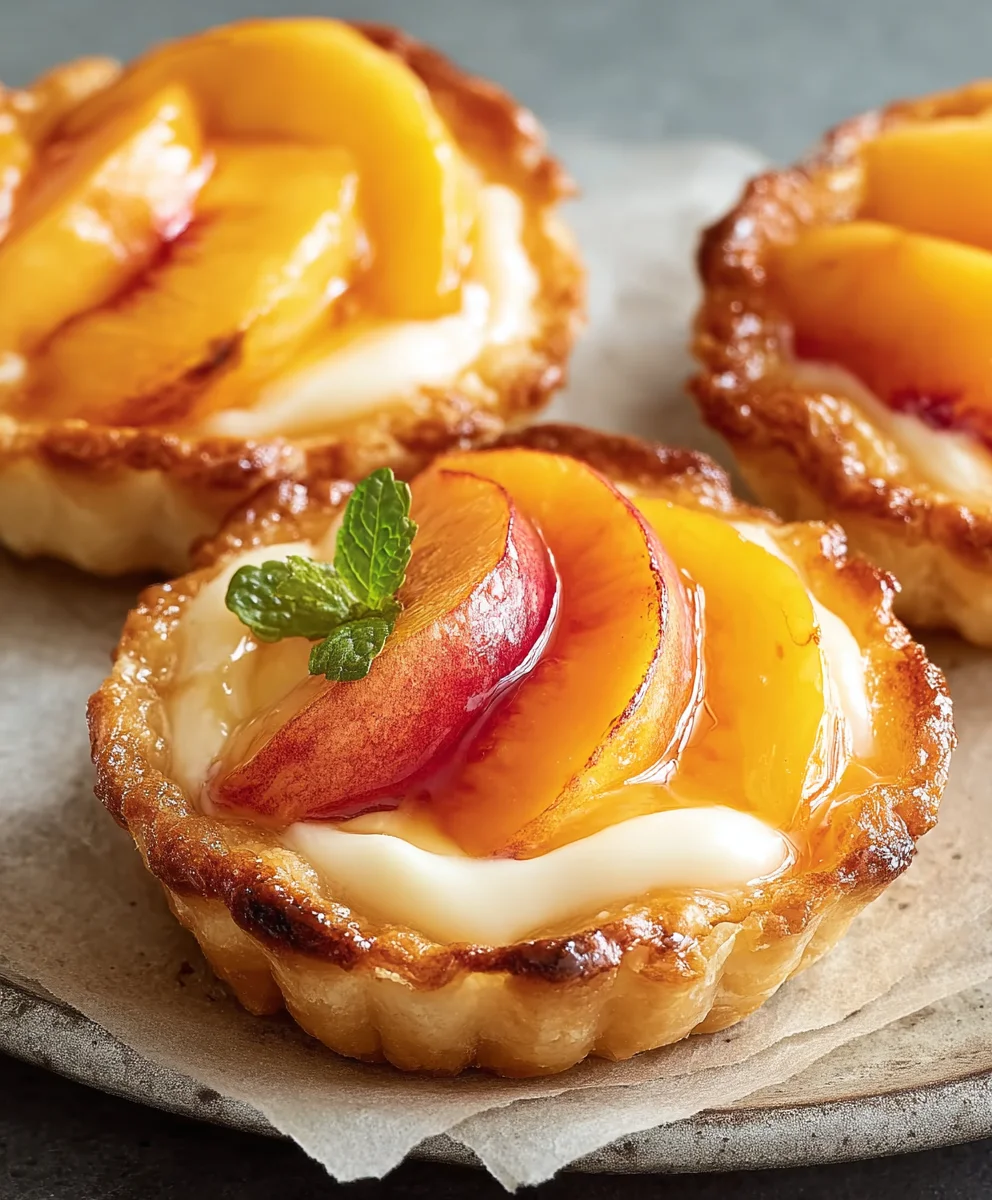
- Garnish and Serve: These beautiful Mini Peach Cream Cheese Tarts are fantastic on their own, but a light dusting of powdered sugar just before serving, or a tiny sprig of fresh mint, can add a lovely finishing touch. They are perfect for brunches, dessert tables, or as a delightful afternoon treat.
- Storage: Store any leftover Mini Peach Cream Cheese Tarts in an airtight container in the refrigerator for up to 3-4 days. While they are best enjoyed fresh, they still retain their charm and deliciousness for a few days, making them excellent for meal prepping or having a sweet treat ready for unexpected guests. Each bite offers a harmonious blend of crisp pastry, creamy tang, and juicy, sweet peaches – a truly exquisite experience!
Conclusion:
And so, we arrive at the sweet culmination of our baking journey! I truly hope you’re feeling inspired and ready to create something absolutely magical in your own kitchen. After guiding you through each step, I can confidently tell you that this recipe isn’t just another dessert; it’s a delightful experience waiting to unfold. The moment you take that first bite, you’ll understand why these tarts are destined to become a staple in your repertoire. It’s the kind of treat that effortlessly brightens any day, makes a simple gathering feel a little more special, and leaves a lasting impression that transcends mere sweetness.
Why These Tarts Are a Must-Try:
What truly sets this recipe apart is the sublime harmony of flavors and textures. Imagine a buttery, perfectly golden shortbread crust, crisp and tender, providing the ideal foundation. Nestled within is a luscious, tangy cream cheese filling, so smooth it practically melts in your mouth, offering a delightful counterpoint to the sweetness of the fruit. And then, the star of the show: juicy, ripe peaches, their natural sweetness accentuated by baking, becoming even more fragrant and tender. Each element plays a crucial role, creating a balanced, sophisticated, yet utterly comforting dessert. It’s not overly sweet, allowing the natural goodness of the peaches to shine through, complemented by the rich tang of the cream cheese. This is a dessert that looks incredibly impressive, as if it took hours of intricate work, but is surprisingly straightforward to assemble, making it perfect for both seasoned bakers and enthusiastic beginners. Ultimately, these Mini Peach Cream Cheese Tarts are more than just a dessert; they are a celebration of summer flavors, an ode to simple elegance, and a truly unforgettable treat that will have everyone asking for your secret recipe.
Serving Suggestions & Delicious Variations:
While these tarts are absolutely divine on their own, a few thoughtful additions can elevate them even further. I love serving them slightly warm, allowing the cream cheese filling to soften just a bit and the peach aromas to become even more pronounced. A small scoop of vanilla bean ice cream or a dollop of freshly whipped cream alongside provides a luxurious touch, adding another layer of creamy indulgence. For a touch of rustic elegance, a light dusting of powdered sugar or a sprinkle of toasted slivered almonds before serving makes them look utterly professional. When it comes to beverages, a crisp, dry sparkling wine or a chilled glass of prosecco would complement the sweetness beautifully, while a robust cup of coffee or a fragrant herbal tea makes for a perfect afternoon treat.
But don’t stop there – the beauty of this recipe lies in its adaptability! Feel free to let your culinary imagination run wild with these variations:
Fruit Alternatives:
- Swap out the peaches for other stone fruits like apricots or plums for a different summer vibe.
- A medley of fresh berries (strawberries, blueberries, raspberries) creates a vibrant “mixed berry” tart.
- In the fall, try roasted pears with a hint of cinnamon or apple slices with a touch of nutmeg.
Crust Creations:
- For a different texture, consider a graham cracker or shortbread cookie crust instead of the standard pastry.
- Add a pinch of ginger or cardamom to the crust dough for an extra layer of spice.
Filling Enhancements:
- Stir in a teaspoon of lemon zest or a dash of almond extract into the cream cheese mixture for added depth of flavor.
- A sprinkle of shredded coconut in the filling can give it a delightful tropical twist.
Topping Touches:
- Brush the baked tarts with a warm apricot jam glaze for an irresistible shine.
- A light crumble topping made from flour, butter, and brown sugar can add a lovely crunchy layer.
Your Turn to Bake & Share!
Now, it’s your moment to shine! I genuinely encourage you to roll up your sleeves, gather your ingredients, and give this recipe a try. There’s an immense joy in creating something delicious from scratch, and I promise you, the reward of these delightful Mini Peach Cream Cheese Tarts is well worth the effort. Don’t be afraid to experiment with the suggestions I’ve offered, or even come up with your own unique twists. Baking is a creative process, and every batch tells a story.
Once you’ve experienced the magic, I would absolutely love to hear about it! Please come back and share your experiences, your successes, and any fun variations you tried in the comments section below. Did you serve them warm or cold? Did you swap out the peaches for another fruit? Your insights and photos inspire me and countless other home bakers in our community. Let’s celebrate the joy of homemade desserts together. Happy baking, my friends!
People Also Ask (FAQs):
- How long do Mini Peach Cream Cheese Tarts last, and how should I store them?
These tarts are best enjoyed fresh, ideally within 2-3 days. Store them in an airtight container in the refrigerator to maintain their freshness and prevent the crust from becoming soggy. If you want to keep them for slightly longer, up to 4-5 days, the refrigerator is still the best place.
- Can I make these Mini Peach Cream Cheese Tarts ahead of time?
Absolutely! You can prepare the tart crusts and bake them a day in advance. You can also mix the cream cheese filling a day ahead and store it in the refrigerator. Assemble and bake the full tarts on the day you plan to serve them for the best taste and texture.
- What kind of peaches are best for tarts? Can I use frozen peaches?
Fresh, ripe peaches are always best for their flavor and texture. Freestone peaches are generally easier to work with. If fresh peaches aren’t in season, you can definitely use frozen sliced peaches. Thaw them completely, drain any excess liquid thoroughly, and pat them dry before using to prevent a watery filling.
- Can I freeze these Mini Peach Cream Cheese Tarts?
Yes, you can! Once baked and completely cooled, arrange the tarts in a single layer on a baking sheet and freeze until solid. Then, transfer them to an airtight freezer-safe container or bag. They can be frozen for up to 2-3 months. Thaw in the refrigerator overnight or at room temperature for a few hours before serving.
- What can I substitute for cream cheese in the filling?
While cream cheese gives the filling its signature tang and creaminess, you could try using mascarpone cheese for a richer, milder flavor, or a combination of ricotta and a touch of sour cream for a lighter, slightly grainy texture. Keep in mind that the flavor profile will change slightly with substitutions.
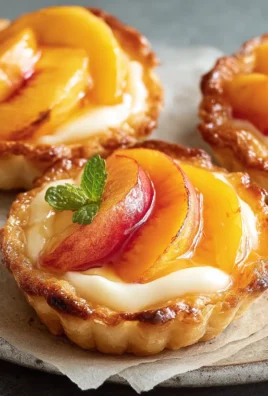
Mini Peach Cream Cheese Tarts
Fresh peaches nestled in buttery pastry with creamy cheese create these irresistible hand-held tarts. An absolute dream for anyone seeking a delightful balance of sweet, tangy, and utterly creamy textures, these mini tarts offer a modern twist on classic fruit tarts. Every bite brings you summer’s sweetness, balanced perfectly with tangy cream cheese and a warmly spiced honey drizzle, making them a celebration in miniature. Perfect for any gathering, they promise effortless serving and exquisite taste.
Ingredients
-
2 ½ cups (300g) all-purpose flour
-
1 tablespoon granulated sugar (for crust)
-
1 teaspoon salt (for crust)
-
1 cup (226g) unsalted butter, cold, cubed
-
½ cup (120ml) ice water
-
16 ounces (450g) full-fat cream cheese, softened
-
¾ cup (150g) granulated sugar (for filling)
-
1 large egg
-
1 teaspoon pure vanilla extract
-
¼ teaspoon salt (for filling)
-
3-4 medium-sized ripe peaches, sliced
-
2 tablespoons granulated sugar (optional, for peaches)
-
1 tablespoon fresh lemon juice (optional, for peaches)
-
1-2 tablespoons apricot jam or peach preserves, warmed (for glaze, optional)
Instructions
-
Step 1
In a food processor or large bowl, whisk 2 ½ cups all-purpose flour, 1 tablespoon granulated sugar, and 1 teaspoon salt. Cut in 1 cup cold, cubed unsalted butter until mixture resembles coarse meal. Gradually add ½ cup ice water, mixing until dough just comes together. Form into a disc, wrap, and chill for at least 30 minutes. -
Step 2
Lightly grease a 12-cup muffin tin. On a lightly floured surface, roll chilled dough to ⅛-inch thickness. Cut out 2.5-inch rounds and gently press into muffin cups. Prick bottoms with a fork. For crispier crusts, blind bake with pie weights or dried beans at 375°F (190°C) for 10-12 minutes. Remove weights/parchment, then bake 3-5 minutes more until lightly golden. Let cool slightly. -
Step 3
In an electric mixer, beat 16 ounces softened full-fat cream cheese until smooth (1-2 minutes). Gradually add ¾ cup granulated sugar and beat until light and fluffy (2-3 minutes). On low speed, mix in 1 large egg, 1 teaspoon pure vanilla extract, and ¼ teaspoon salt until just combined. Do not overmix. -
Step 4
Peel, pit, and thinly slice 3-4 medium-sized ripe peaches. Optionally, in a medium bowl, gently toss sliced peaches with 2 tablespoons granulated sugar and 1 tablespoon fresh lemon juice; let sit for 10-15 minutes. -
Step 5
Preheat oven to 350°F (175°C). Evenly spoon cream cheese filling into the cooled, pre-baked tart shells (approximately 1.5 to 2 tablespoons each). Artfully arrange the macerated peach slices on top of the cream cheese filling in each tart. Carefully transfer the muffin tin to the preheated oven. Bake for 20-25 minutes, or until the tart crusts are golden brown, the cream cheese filling is set (it should only jiggle slightly in the center), and the peaches are tender and slightly caramelized. -
Step 6
Remove from oven and cool in the pan for at least 15-20 minutes on a wire rack. Gently run a thin knife around the edge of each tart, then carefully lift them out and transfer to the wire rack to cool completely. If desired, once completely cool, gently warm 1-2 tablespoons apricot jam or peach preserves and brush over the top of the peaches for a glossy shine. For the best texture and flavor, chill tarts in the refrigerator for at least 1-2 hours before serving. Store any leftover tarts in an airtight container in the refrigerator for up to 3-4 days.
Important Information
Nutrition Facts (Per Serving)
It is important to consider this information as approximate and not to use it as definitive health advice.
Allergy Information
Please check ingredients for potential allergens and consult a health professional if in doubt.


Leave a Comment