

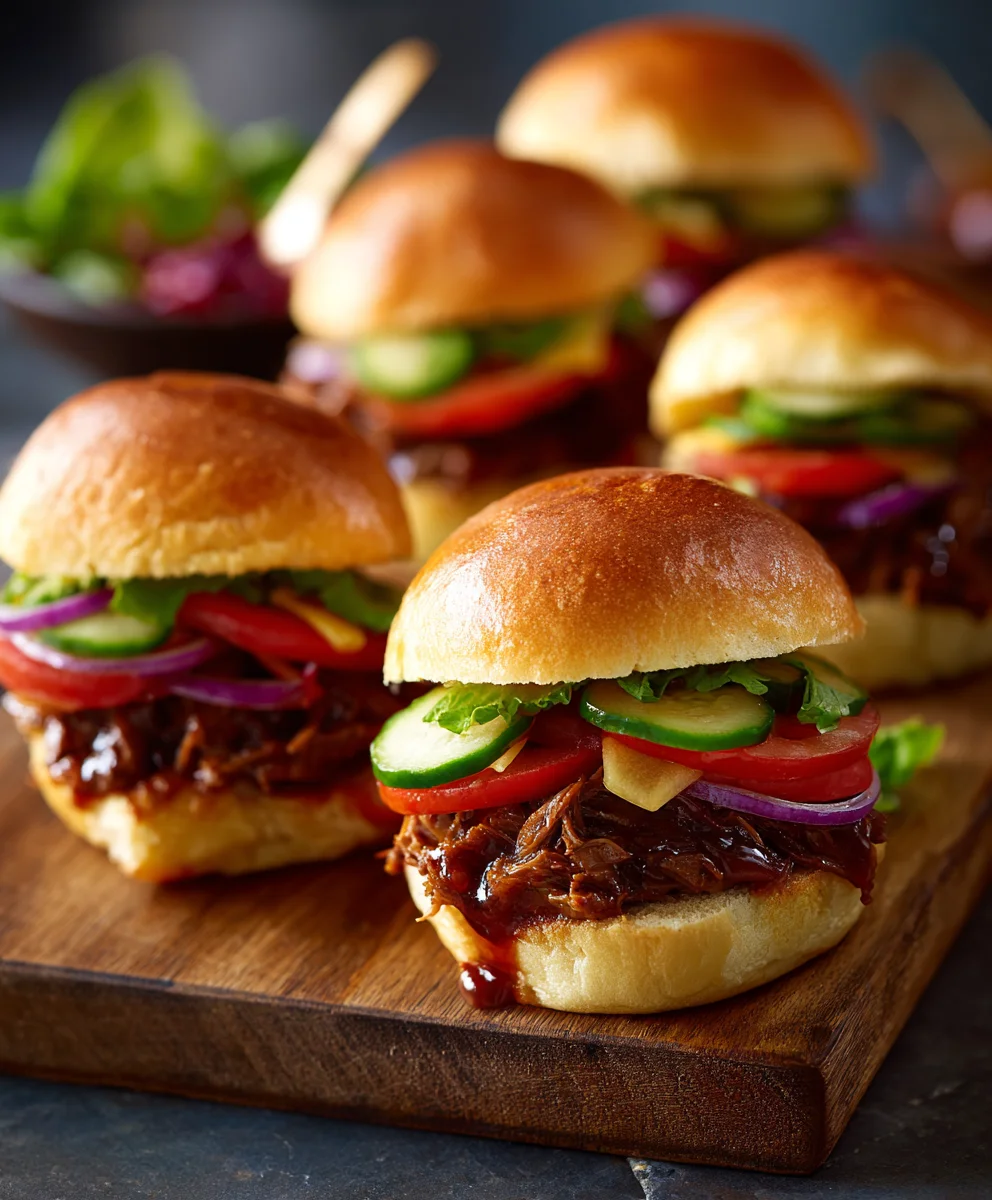
Cowboy Sliders are not just a meal; they are a delightful journey for your taste buds, packing a punch of hearty, satisfying flavors into every miniature bun. I find that these delightful little sandwiches truly capture the essence of robust American comfort food, perfect for any gathering, from a casual backyard BBQ to a lively game night. They offer a unique blend of smoky, savory, and subtly sweet notes that resonate deeply with anyone who appreciates a truly flavorful dish.
The spirit of the “cowboy” in these sliders speaks to a tradition of rugged, satisfying fare, designed to fuel and comfort. While there isn’t a singular ancient historical account for these specific Cowboy Sliders, their inspiration draws from the rich tapestry of American cuisine, where ingredients like succulent beef, tangy barbecue sauce, and melted cheese are celebrated. It’s a modern homage to the generous, unfussy meals shared amongst friends and family.
People absolutely adore this dish for myriad reasons. The tender, seasoned meat, often slow-cooked or grilled to perfection, ensures a juicy bite every time. This is beautifully complemented by the rich, tangy barbecue sauce and the gooey, melted cheese, all nestled within a soft, toasted slider bun. Beyond the incredible taste and texture, their convenience is unmatched. Sliders are inherently fun, easy to eat, and remarkably simple to serve in large quantities, making them the ultimate crowd-pleaser that I am thrilled to share with you.

Ingredients:
- For the Slider Patties:
- 1.5 lbs ground beef (I always opt for 80/20 ground chuck for the perfect balance of rich flavor and satisfying moisture in these Cowboy Sliders. Trust me, it makes a difference!)
- 1 tablespoon Worcestershire sauce (This secret weapon adds an incredible depth of umami to our beef patties, truly enhancing the savory notes.)
- 1 teaspoon smoked paprika (For that essential smoky ‘cowboy’ flavor that defines these sliders.)
- 1/2 teaspoon garlic powder
- 1/2 teaspoon onion powder
- 1/2 teaspoon black pepper, freshly ground is best
- 1/2 teaspoon salt, or to taste
- For the Crispy Bacon:
- 8-10 slices thick-cut bacon (Crispy bacon is non-negotiable for these Cowboy Sliders; it adds a fantastic textural contrast and salty bite. Aim for about two half-slices per slider.)
- For Assembly & Toppings:
- 12 dinner rolls or slider buns (Hawaiian sweet rolls are my absolute favorite choice for Cowboy Sliders. Their slight sweetness perfectly complements the robust, savory fillings.)
- 6 slices cheddar cheese (Feel free to use sharp cheddar, or even a Monterey Jack for a milder melt. I like to cut each slice in half to fit our mini patties perfectly.)
- 1 cup crispy fried onions or onion straws (This is a cornerstone ingredient for the ‘Cowboy’ feel, providing an amazing crunch and savory onion flavor.)
- 1/2 cup BBQ sauce (Choose your favorite! A smoky, slightly sweet BBQ sauce works wonders here. I sometimes like to warm mine up slightly before spreading.)
- 2 tablespoons unsalted butter, melted (For brushing over the tops of our buns, this gives them a beautiful golden sheen and a lovely richness as they bake.)
- Optional: Sliced dill pickles or pickled jalapeños for an extra tang or kick (I sometimes add a few thin slices of jalapeño for a little heat – it’s fantastic!)
- Optional: A sprinkle of sesame seeds or everything bagel seasoning for the top of the buns (Adds a professional touch and extra flavor to your finished Cowboy Sliders.)
Preparation of the Cowboy Slider Patties
- Prepare Your Workstation: First things first, preheat your oven to 375°F (190°C). This will be used for cooking the bacon and later for baking our magnificent Cowboy Sliders. Line a large baking sheet with parchment paper or foil for easier cleanup. If you plan to cook bacon on the stovetop, have a large skillet ready.
- Mix the Ground Beef: In a large mixing bowl, gently combine the ground beef, Worcestershire sauce, smoked paprika, garlic powder, onion powder, black pepper, and salt. Now, this step is crucial: use your hands but mix very gently and just until combined. Overmixing the beef is the arch-nemesis of a tender burger patty! It compresses the meat fibers, resulting in a tough, chewy slider, and we definitely don’t want that for our juicy Cowboy Sliders. My goal here is to evenly distribute the seasonings without breaking down the meat’s texture.
- Form the Slider Patties: Once seasoned, divide the beef mixture into 12 equal portions. I find that about 2 ounces (or approximately 1/4 cup) per portion is perfect for a slider. Roll each portion into a ball, then gently flatten it into a patty about 1/2 inch thick and slightly wider than your slider buns – remember, beef tends to shrink as it cooks. A little trick I always use is to press a small dimple in the center of each patty with your thumb. This prevents the patties from puffing up into a dome shape while cooking, ensuring a flat surface for our cheese and toppings on our Cowboy Sliders. Arrange these formed patties on a plate or another baking sheet.
- Cook the Bacon to Crispy Perfection: Lay the bacon slices in a single layer on your prepared baking sheet. Pop it into the preheated oven and bake for 15-20 minutes, or until the bacon is beautifully crispy and golden brown to your liking. The exact time will depend on the thickness of your bacon and your oven’s temperament. Once done, remove the bacon from the oven and transfer it to a plate lined with paper towels to drain any excess grease. We want that bacon super crispy for the best texture contrast in our Cowboy Sliders! Once cooled slightly, break or chop each strip into 2-3 pieces – ideally, pieces that will fit nicely on top of our slider patties. Set aside.
Building the Flavor Layers for Your Cowboy Sliders
-
Cook the Slider Patties: You have a couple of options here, depending on your preference.
- Stovetop Method (My Preferred for a Great Sear): Heat a large skillet (cast iron works wonderfully here!) over medium-high heat. Add a tablespoon of neutral oil (like canola or vegetable oil) if your skillet isn’t non-stick. Once the oil is shimmering, carefully place the slider patties into the hot pan, making sure not to overcrowd it. Cook for 3-4 minutes per side for medium doneness, or adjust according to your preferred level of doneness. You’re looking for a beautiful, caramelized crust on both sides. This searing step is crucial for developing deep, savory flavors for your Cowboy Sliders.
- Oven Method (For Less Mess): If you prefer to avoid stovetop splatters, you can also cook the patties on a separate baking sheet in your preheated 375°F (190°C) oven for about 12-15 minutes, flipping halfway through. While this method is convenient, you might miss out on that intense, crispy sear that the stovetop provides.
- Melt the Cheese onto the Patties: Once the patties are almost cooked through (about 1 minute before they’re done, whether on the stovetop or in the oven), place half a slice of cheddar cheese on top of each patty. Continue to cook for another minute or so, allowing the cheese to gently melt and get wonderfully gooey. If you’re using the stovetop, you can place a lid over the skillet for the last minute to help the cheese melt faster and more evenly. This perfectly melted cheese is an essential component of our delicious Cowboy Sliders!
- Prepare the Slider Buns: While the patties are cooking, take your package of slider buns. Most come connected, which is perfect for this recipe. Using a large serrated knife, carefully slice the entire block of rolls horizontally in half, creating a top section and a bottom section. Try to keep them as intact as possible. Place the bottom halves of the rolls into a 9×13 inch baking dish (or a similar size that comfortably fits all 12 rolls in a single layer). This dish will become the home for our magnificent Cowboy Sliders during their final bake.
- Brush and Season the Top Buns: In a small bowl, melt 2 tablespoons of unsalted butter. Using a pastry brush, generously brush the tops of the separated slider buns with this melted butter. If you’re feeling fancy and want to add another layer of flavor and visual appeal, sprinkle a pinch of sesame seeds or everything bagel seasoning over the buttered tops. Set the top halves aside for now.
Assembling and Baking the Ultimate Cowboy Sliders
- Layer on the BBQ Sauce: This is where the flavor profile of our Cowboy Sliders truly begins to take shape. Take your favorite BBQ sauce and generously spread about half of it (1/4 cup) evenly over the bottom halves of the rolls in the baking dish. Don’t be shy here; this layer provides a fantastic foundation of sweet, smoky, and tangy notes that will permeate every bite.
- Arrange the Slider Patties: Carefully place each cheesy, cooked slider patty on top of the BBQ sauce-coated bottom buns. Try to distribute them evenly across the rolls. It’s okay if they touch; remember, these are meant to be a cohesive block of deliciousness that we’ll cut later.
- Add the Crispy Bacon: Next, distribute the crispy bacon pieces over the tops of the cheesy patties. Aim for about two half-slices per slider. The salty, smoky crunch of the bacon is absolutely essential for the “Cowboy” character of these sliders.
- Pile on the Crispy Fried Onions: Now, for another signature “Cowboy” element! Evenly sprinkle the crispy fried onions (or onion straws) over the bacon and patties. I like to be pretty generous here, as they add an incredible crunch and a savory, slightly sweet onion flavor that ties everything together. This is a texture powerhouse for our Cowboy Sliders.
- Add More BBQ Sauce: Drizzle the remaining 1/4 cup of BBQ sauce over the layer of crispy onions. This extra touch of sauce ensures that every single component of these Cowboy Sliders is infused with that classic BBQ tang.
- Place the Top Buns: Carefully place the buttered top halves of the slider buns back onto the assembled bottoms, ensuring they line up nicely. You’ve almost built your masterpiece of Cowboy Sliders!
- Final Bake for Melty Goodness: Cover the baking dish loosely with aluminum foil. This helps to steam the buns slightly, making them soft and ensuring everything heats through beautifully without over-browning the tops. Place the dish into your preheated 375°F (190°C) oven. Bake for 15-20 minutes, or until the cheese is wonderfully gooey, the buns are lightly toasted, and everything is heated through.
- Uncover and Brown (Optional but Recommended): For the last 5 minutes of baking, you can remove the aluminum foil. This allows the tops of the buns to get a little extra golden-brown and slightly crispy, enhancing their texture. Keep a close eye on them to prevent burning.
Serving Suggestions and Enjoying Your Cowboy Sliders
- Rest and Slice: Once your Cowboy Sliders are out of the oven, let them rest in the baking dish for about 5 minutes. This brief resting period allows the flavors to meld and makes them easier to cut without falling apart. Then, using a large sharp knife, slice the entire block of sliders along the pre-scored lines of the rolls to separate them into individual portions. You can also make your own cuts if the rolls are not clearly defined.
- Garnish and Serve: Arrange your magnificent Cowboy Sliders on a serving platter. If you’re using optional pickles or pickled jalapeños, tuck a slice or two into each slider as you serve, or offer them on the side so everyone can customize their bite.
- Pair with Sides: These Cowboy Sliders are incredibly satisfying on their own, but they pair wonderfully with classic barbecue sides. Think creamy coleslaw, a tangy potato salad, crispy french fries, or even some sweet corn on the cob. They are perfect for game day, family gatherings, or just a fun weeknight meal. I often find myself making a double batch because they disappear so quickly! Enjoy every savory, crunchy, and absolutely delicious bite of your homemade Cowboy Sliders!
Conclusion:
Okay, so we’ve journeyed through the steps of crafting what I truly believe are some of the most satisfying little sandwiches you’ll ever make. These aren’t just any sliders; they’re an experience. I’ve poured my heart into perfecting this recipe because I know how much joy a truly good meal can bring, especially when it’s something that can feed a crowd and spark conversation. There’s an undeniable charm to a dish that’s both comforting and exciting, and I genuinely feel this recipe embodies that perfect balance. It’s a testament to simple ingredients coming together to create something truly extraordinary, proving that you don’t need to be a gourmet chef to whip up something incredibly delicious and memorable for your family and friends. The anticipation of that first bite, the satisfied smiles around the table – that’s what cooking is all about for me.
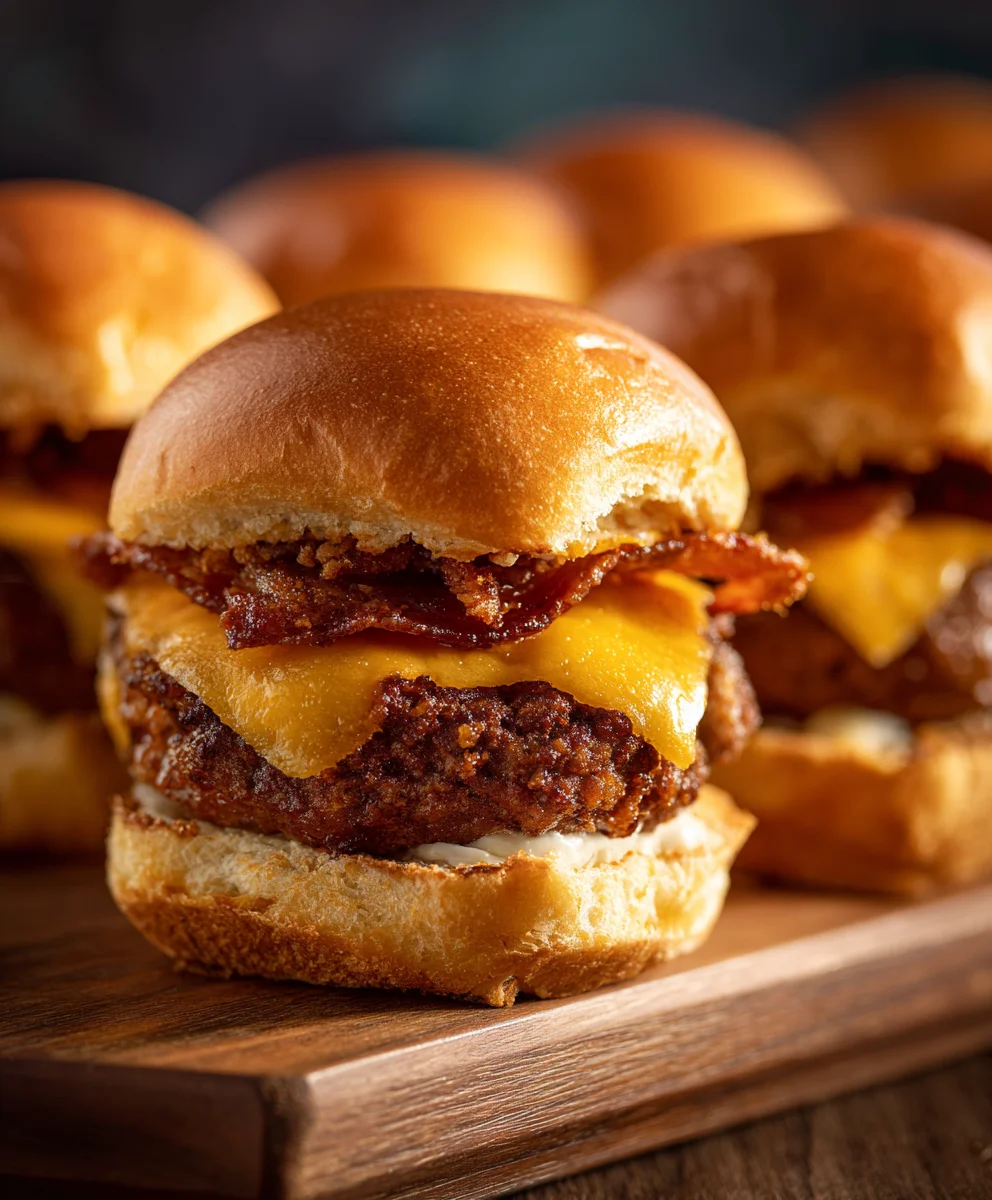
Why are these Cowboy Sliders an absolute must-try? Simple. They hit all the right notes. Imagine sinking your teeth into tender, perfectly seasoned ground beef, expertly melded with rich, tangy BBQ sauce, and a hint of smoky goodness, all nestled in a soft, golden bun. The interplay of textures – the slight crisp of the bun, the juicy, flavorful filling, the gooey melted cheese – it’s just chef’s kiss. They’re robust enough to satisfy even the hungriest cowboy (or cowgirl!) after a long day, yet approachable enough for any palate, even the pickiest eaters seem to fall in love with them. I’ve found that they consistently disappear faster than any other appetizer I bring to a party. Their convenient size makes them ideal for snacking, but their hearty flavor profile means they can easily stand alone as a light meal. They’re quick to prepare in batches, making them ideal for game days, casual potlucks, celebratory gatherings, or even a fun family dinner when you want something a bit more exciting than your usual weeknight fare. The ingenious blend of spices and savory elements makes them incredibly addictive, and trust me, one is truly never enough! They carry a delightful nostalgic, comforting vibe while still feeling fresh and exciting, a true crowd-pleaser that will have everyone asking for the recipe.
Now, let’s talk about making these your own. While the basic recipe for these incredible sliders is fantastic as is, I always encourage you to experiment and personalize! For serving, I love pairing them with a simple side of crispy sweet potato fries, which adds a lovely sweetness, or a vibrant, tangy coleslaw to cut through the richness with its refreshing crunch. A hearty loaded potato salad also makes for an excellent companion, turning your casual slider experience into a full-blown feast. And don’t forget the pickles on the side – their sharp acidity is a perfect contrast to the savory sliders, offering a palate cleanser that makes you want to reach for another one.
Creative Serving & Variation Ideas to Make Them Yours:
- Cheese Choices: While a sharp cheddar is a classic and wonderful choice, don’t be afraid to branch out! Try swapping in some Pepper Jack for a little delightful kick, smoked gouda for an extra layer of deep, nutty flavor, or even provolone for a milder, incredibly creamy melt. Each cheese brings its own unique character to the party.
- Topping Twists: Elevate your sliders with imaginative toppings. Sweet and savory caramelized onions add a beautiful depth, while crispy bacon strips elevate the smoky flavor even further, adding a fantastic textural contrast. For those who love a bit of heat, a few slices of pickled jalapeños or a generous drizzle of sriracha mayo would be absolutely phenomenal. And for the ultimate indulgence, why not crown them with a perfectly fried egg? Now you’re talking brunch sliders, ready to conquer any time of day!
- Sauce Swaps: The world of BBQ sauces is vast and exciting! Experiment with different varieties. A spicy habanero BBQ sauce would give them a real fiery kick, or a sweet and smoky bourbon BBQ sauce could add another layer of sophisticated complexity. You could even introduce a garlic aioli, a zesty chipotle mayo, or a cool ranch drizzle for a completely different and equally delicious flavor profile.
- Bun Varieties: While Hawaiian rolls are my personal go-to for their slight sweetness and incredibly soft texture, which complements the savory filling so well, feel free to explore other options. Brioche buns would offer a richer, buttery experience, making the sliders feel even more gourmet. Pretzel buns could add a fun, chewy element and a distinct salty flavor that pairs wonderfully with the beef and cheese.
- Meat Alternatives: If you’re looking for a leaner option, ground turkey or chicken can be seasoned similarly for a lighter, yet still incredibly flavorful, take on these sliders. Or, for a truly decadent and over-the-top experience, consider slow-cooked pulled pork or tender brisket as the base, piled high with the same delicious toppings and sauces. The possibilities are truly endless!
Ultimately, my biggest hope is that you’ll dive into your kitchen and give these fantastic sliders a try. I promise you, the smiles they bring to the faces of your family and friends will be well worth the minimal effort. Cooking is an act of love, a way to connect with others, and sharing delicious food is truly one of life’s greatest pleasures. So, whip up a batch, gather your loved ones around the table, and create some wonderful, tasty memories together. These sliders aren’t just food; they’re an invitation to good times and great company.
Once you’ve experienced the magic of these sliders, I would absolutely love to hear about it! Did you stick to the recipe, or did you put your own unique, creative spin on them? What were your favorite variations? Did you discover a new topping combination that became an instant hit? Please, don’t hesitate to share your culinary triumphs in the comments section below! Your feedback and creativity truly inspire me, and I always enjoy seeing how you make these recipes your own, adding your personal touch to create something uniquely special. So go forth, cook with passion, share generously, and enjoy every single delightful bite of these truly unforgettable sliders! Happy cooking!
Epic Cowboy Sliders
I love how these sliders combine so many amazing flavors in one perfect bite. That combination of sweet rolls, spicy jalapeños, and savory beef just works magic together. Every time I make them people literally hover around the oven waiting for them to come out.
Ingredients
-
1.5 lbs ground beef (80/20 chuck)
-
1 tbsp Worcestershire sauce
-
1 tsp smoked paprika
-
1/2 tsp garlic powder
-
1/2 tsp onion powder
-
1/2 tsp black pepper
-
1/2 tsp salt
-
8-10 slices thick-cut beef bacon
-
12 Hawaiian sweet rolls or slider buns
-
6 slices cheddar cheese (cut in half)
-
1 cup crispy fried onions
-
1/2 cup BBQ sauce
-
2 tbsp unsalted butter, melted
-
Optional: Sliced dill pickles
-
Optional: Pickled jalapeños
-
Optional: Sesame seeds or everything bagel seasoning
Instructions
-
Step 1
Preheat oven to 375°F (190°C). Line a baking sheet. In a bowl, gently mix ground beef with Worcestershire sauce, smoked paprika, garlic powder, onion powder, black pepper, and salt. Divide into 12 equal portions, form into 1/2-inch thick patties slightly wider than buns, and press a small dimple in the center of each. -
Step 2
Lay beef bacon on the lined baking sheet and bake for 15-20 minutes until beautifully crispy. Drain on paper towels and break into 2-3 pieces. Set aside. -
Step 3
Cook patties on a hot skillet over medium-high heat for 3-4 minutes per side for medium doneness, or bake in the oven at 375°F for 12-15 minutes, flipping halfway. During the last minute of cooking, place half a slice of cheddar cheese on each patty and cook until melted and gooey. -
Step 4
Slice the entire block of slider rolls horizontally. Place the bottom halves in a 9×13 inch baking dish. Brush the tops of the separated buns with 2 tablespoons of melted butter. Optionally, sprinkle with sesame seeds or everything bagel seasoning. -
Step 5
Spread 1/4 cup of BBQ sauce evenly over the bottom buns. Place the cheesy slider patties on top. Distribute the crispy beef bacon pieces, then sprinkle with crispy fried onions. Drizzle the remaining 1/4 cup of BBQ sauce over the onions. Finally, place the buttered top buns onto the assembled sliders. -
Step 6
Cover the baking dish loosely with aluminum foil and bake at 375°F (190°C) for 15-20 minutes, or until cheese is melted and everything is heated through. For a golden-brown top, remove foil for the last 5 minutes. Let rest for 5 minutes, then slice into individual sliders. Garnish with optional sliced dill pickles or pickled jalapeños and serve warm.
Important Information
Nutrition Facts (Per Serving)
It is important to consider this information as approximate and not to use it as definitive health advice.
Allergy Information
Please check ingredients for potential allergens and consult a health professional if in doubt.


Leave a Comment