

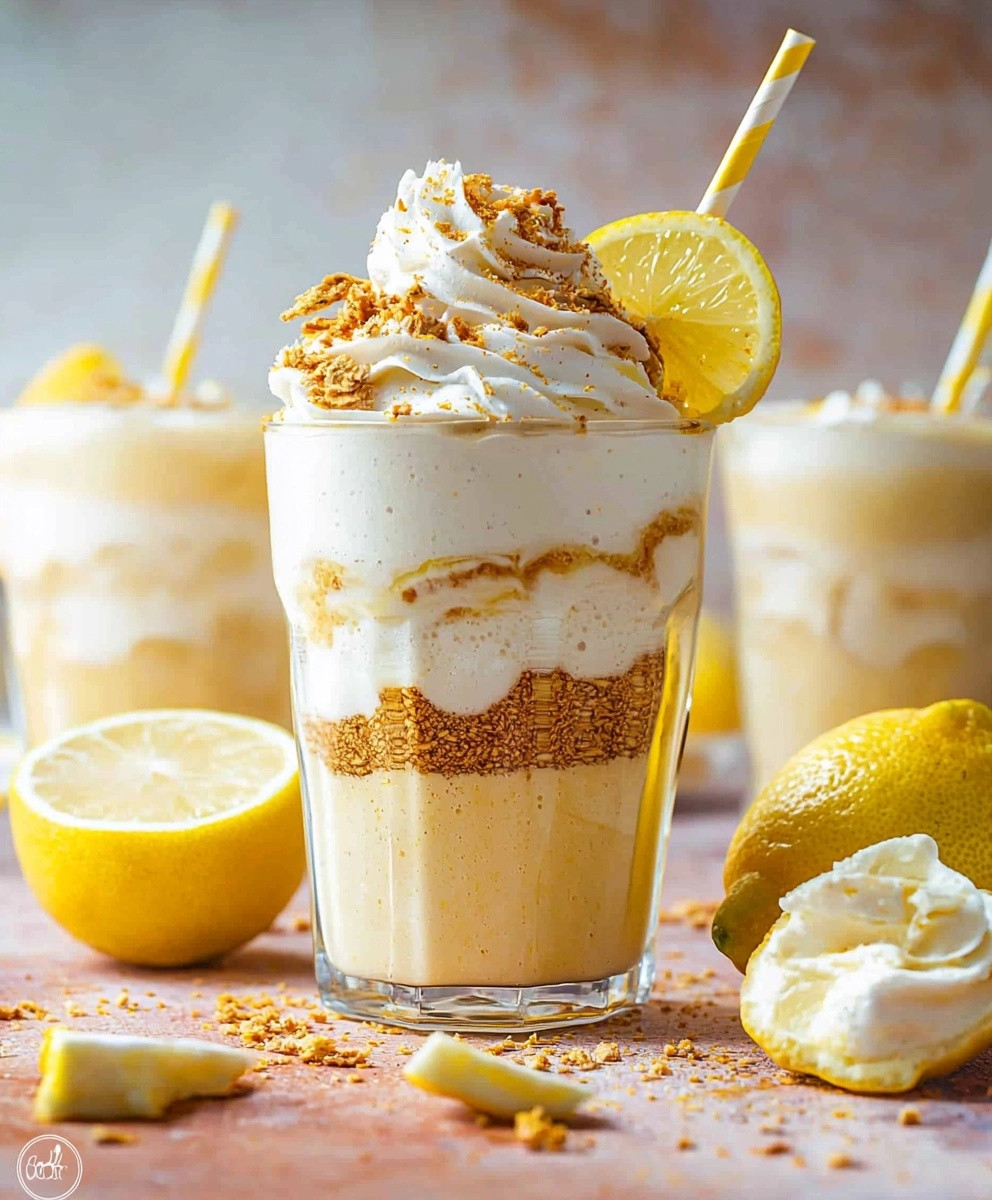
Lemonade Milkshake Dairy-Free is a refreshing twist on two classic favorites that will tantalize your taste buds and brighten your day. Imagine the zesty tang of lemonade combined with the creamy texture of a milkshake, all while being completely dairy-free! This delightful concoction not only quenches your thirst but also offers a nostalgic nod to summer days spent sipping lemonade on the porch.
As someone who has always loved the vibrant flavors of summer, I can tell you that this Lemonade Milkshake Dairy-Free is a crowd-pleaser. The combination of sweet and tart creates a perfect balance, making it an ideal treat for warm weather gatherings or a simple afternoon pick-me-up. People adore this dish not just for its unique flavor profile, but also for its conveniencewhipping it up takes mere minutes! So, lets dive into this delicious recipe thats sure to become a staple in your home.

Ingredients:
- 2 cups dairy-free vanilla ice cream (coconut, almond, or cashew-based)
- 1 cup unsweetened almond milk (or any dairy-free milk of your choice)
- 1/2 cup freshly squeezed lemon juice (about 3-4 lemons)
- 1/4 cup maple syrup or agave nectar (adjust to taste)
- 1 teaspoon lemon zest (for extra flavor)
- 1/2 teaspoon vanilla extract
- Ice cubes (optional, for a thicker consistency)
- Fresh mint leaves (for garnish)
- Thin lemon slices (for garnish)
Preparing the Base
To start off, I like to gather all my ingredients and tools. It makes the process smoother and more enjoyable. Heres how I prepare the base for my lemonade milkshake:
- First, I squeeze the lemons to get that fresh lemon juice. I usually roll the lemons on the counter with my palm to make them easier to juice. Then, I cut them in half and use a juicer or my trusty hand juicer to extract the juice. I aim for about 1/2 cup of juice, but I always taste it to see if I want to add a bit more for that zesty kick.
- Next, I zest one of the lemons. I find that using a microplane grater gives me the finest zest, which really enhances the flavor of the milkshake. I set the zest aside for later.
- Now, I measure out my dairy-free vanilla ice cream. I usually let it sit out for about 5-10 minutes to soften slightly, making it easier to blend.
- In a measuring cup, I pour out 1 cup of unsweetened almond milk. If I want a thicker milkshake, I might use a little less milk or add a few ice cubes later on.
Blending the Ingredients
Once I have everything prepped, its time to blend! This is where the magic happens:
- I grab my blender and add the softened dairy-free vanilla ice cream first. This helps it blend more smoothly with the other ingredients.
- Next, I pour in the freshly squeezed lemon juice. The tartness of the lemon is what makes this milkshake so refreshing!
- Then, I add the almond milk. If Im feeling adventurous, I might substitute some of the almond milk with coconut milk for a creamier texture.
- Now, I drizzle in the maple syrup or agave nectar. I usually start with 1/4 cup, but I always taste the mixture before blending to see if I want it sweeter.
- I sprinkle in the lemon zest and add the vanilla extract. The vanilla adds a lovely depth of flavor that complements the lemon perfectly.
- If I want a thicker milkshake, I toss in a handful of ice cubes at this point. Its all about personal preference!
- With everything in the blender, I secure the lid and blend on high for about 30-60 seconds. I stop to scrape down the sides if needed, ensuring everything is well combined. I want a smooth, creamy consistency.
Tasting and Adjusting
After blending, I pour a small amount into a glass to taste. This is my favorite part!
- I take a sip and assess the flavor. If its too tart, I might add a little more maple syrup. If its too sweet, I can always add a splash more lemon juice.
- If I want it a bit thicker, I can blend in more ice cubes or a bit more ice cream. I blend again for a few seconds until I reach my desired consistency.
Serving the Lemonade Milkshake
Now that my lemonade milkshake is perfectly blended, its time to serve it up!
- I grab my favorite tall glasses. I love to use clear glasses so I can show off the beautiful, creamy texture of the milkshake.
- I pour the milkshake into the glasses, filling them about three-quarters full. I like to leave some room at the top for garnishes.
- For a fun
Conclusion:
In summary, this Dairy-Free Lemonade Milkshake is an absolute must-try for anyone looking to indulge in a refreshing and unique treat. The combination of zesty lemon and creamy dairy-free alternatives creates a delightful balance that is both invigorating and satisfying. Whether you’re enjoying it on a hot summer day or as a fun dessert for a gathering, this milkshake is sure to impress your friends and family. For serving suggestions, consider garnishing your milkshake with a slice of lemon or a sprig of fresh mint for an extra pop of color and flavor. You can also experiment with variations by adding a scoop of your favorite dairy-free ice cream or blending in some fresh berries for a fruity twist. The possibilities are endless! I encourage you to give this Dairy-Free Lemonade Milkshake a try and share your experience with me. I would love to hear how you made it your own and any creative twists you added. So grab your blender, whip up this delicious treat, and let the refreshing flavors take you on a delightful journey! Print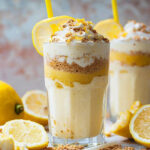
Lemonade Milkshake Dairy-Free: Refreshing Recipe for a Guilt-Free Treat
- Total Time: 15 minutes
- Yield: 2 servings
Description
This refreshing Lemonade Milkshake combines creamy and zesty flavors, making it a perfect treat for warm days. Easy to make and dairy-free, it’s a delightful blend that satisfies sweet and tangy cravings. Garnished with fresh mint and lemon, it’s as beautiful as it is delicious!
Ingredients
- Lemonade
- Dairy-free ice cream
- Maple syrup or agave nectar
- Fresh mint leaves
- Thin slice of lemon
Instructions
- Garnish each glass with a few fresh mint leaves and a thin slice of lemon on the rim.
- Serve the lemonade milkshake immediately with a straw or a spoon.
- Enjoy the delightful combination of creamy and zesty flavors!
Notes
- Feel free to adjust the sweetness by adding more or less maple syrup/agave nectar according to your taste preference.
- This recipe can easily be doubled or halved depending on the number of servings you need.
- For a fun twist, try adding a handful of fresh berries or a scoop of your favorite fruit-flavored dairy-free ice cream for a fruity variation!
- Prep Time: 15 minutes
- Cook Time: 0 minutes

Leave a Comment