

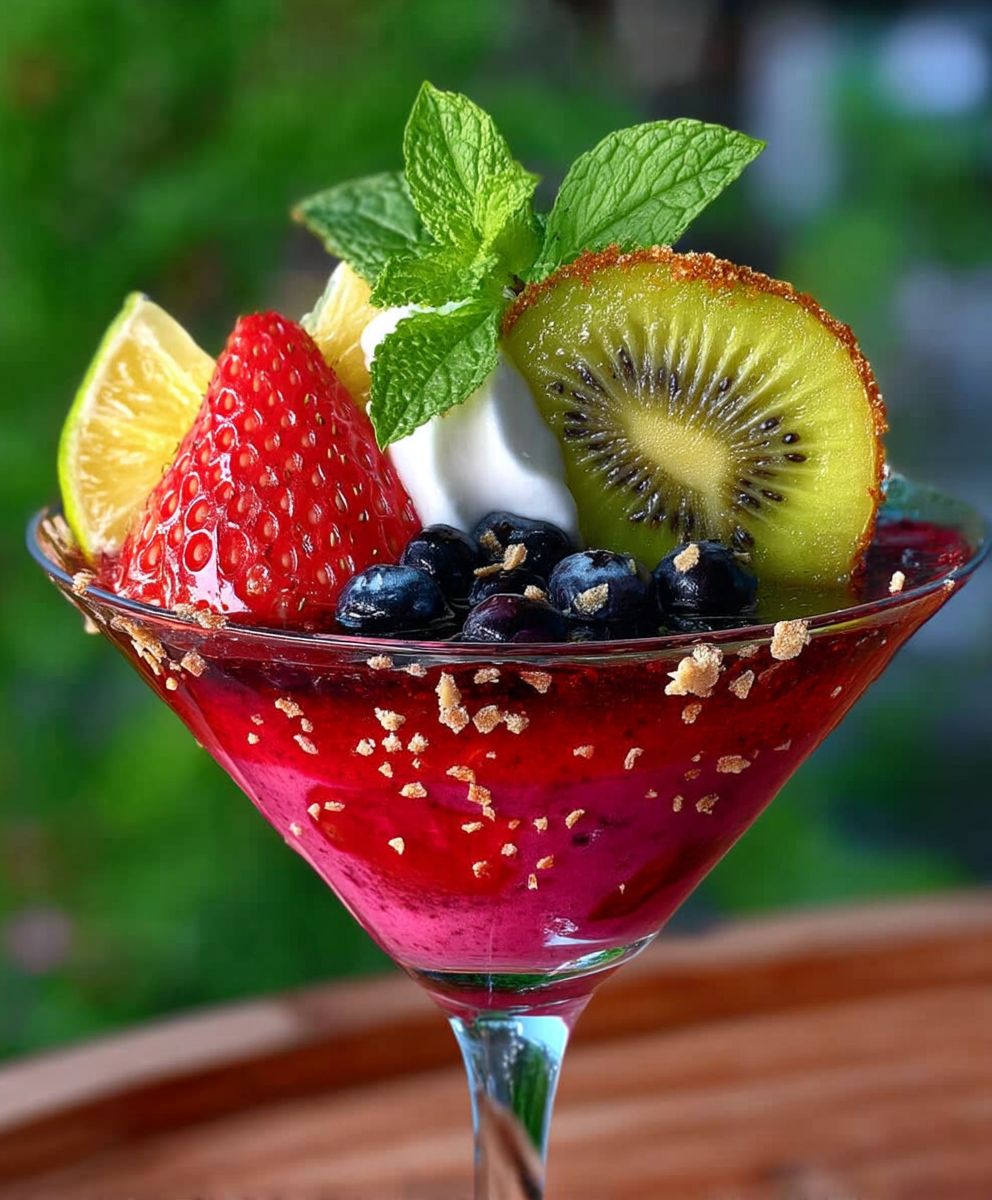
Key Lime Pie Cups: Prepare to be transported to a tropical paradise with every single bite! Imagine the tangy zest of fresh key limes mingling with a creamy, smooth filling, all nestled in a perfectly crisp, buttery crust. These aren’t just desserts; they’re miniature vacations for your taste buds!
Key lime pie, in its full-sized glory, boasts a rich history rooted in the Florida Keys. Legend has it that resourceful cooks in the early 20th century, lacking access to traditional baking ingredients, discovered the magic of the uniquely tart key limes growing abundantly in the region. They combined these limes with sweetened condensed milk (a shelf-stable marvel!) and eggs, creating a dessert that was both simple and sublime.
But let’s be honest, sometimes we crave that iconic flavor without the fuss of slicing and serving a whole pie. That’s where these adorable Key Lime Pie Cups come in! People adore this dish for its perfect balance of sweet and tart, its incredibly smooth texture, and the sheer convenience of individual servings. They are ideal for parties, potlucks, or simply a delightful treat for yourself after a long day. Get ready to experience the taste of sunshine in every single, perfectly portioned cup!

Ingredients:
- For the Crust:
- 1 ½ cups graham cracker crumbs (about 12 full graham crackers)
- 5 tablespoons (70g) unsalted butter, melted
- ¼ cup (50g) granulated sugar
- Pinch of salt
- For the Key Lime Filling:
- 1 (14 ounce) can sweetened condensed milk
- ½ cup (120ml) Key lime juice, freshly squeezed (about 15-20 Key limes)
- 4 large egg yolks
- 1 teaspoon Key lime zest
- For the Whipped Cream Topping (Optional):
- 1 cup (240ml) heavy cream, cold
- 2 tablespoons (25g) powdered sugar
- ½ teaspoon vanilla extract
- Key lime slices or zest, for garnish
Preparing the Graham Cracker Crust:
Okay, let’s get started with the crust! This is the foundation of our delicious Key Lime Pie Cups, so we want to make sure it’s nice and sturdy.
- Preheat your oven: First things first, preheat your oven to 350°F (175°C). This will ensure the crust bakes evenly.
- Combine the dry ingredients: In a medium bowl, combine the graham cracker crumbs, granulated sugar, and a pinch of salt. Make sure everything is well mixed. I like to use a whisk to break up any clumps in the graham cracker crumbs.
- Add the melted butter: Pour the melted butter into the dry ingredients. Stir until the mixture is evenly moistened and resembles wet sand. You should be able to press it together and it holds its shape. If it’s too dry, add a tiny bit more melted butter, a teaspoon at a time.
- Press into muffin tins: Now, grab your muffin tin. I recommend using a standard 12-cup muffin tin. Spoon about 2 tablespoons of the graham cracker mixture into each muffin cup. Use the bottom of a measuring cup or a small glass to firmly press the crumbs into an even layer at the bottom and slightly up the sides of each cup. The firmer you press, the better the crust will hold its shape.
- Bake the crusts: Place the muffin tin in the preheated oven and bake for 8-10 minutes, or until the crusts are lightly golden brown and fragrant. Keep a close eye on them, as they can burn quickly.
- Cool completely: Once baked, remove the muffin tin from the oven and let the crusts cool completely in the tin. This is important because the crusts need to firm up before we add the filling. If you try to add the filling while they’re still warm, they might crumble.
Making the Key Lime Filling:
Now for the star of the show the Key Lime filling! This is where the magic happens, and the tangy, sweet flavor comes to life.
- Prepare the Key lime juice: If you’re using fresh Key limes (and I highly recommend it!), you’ll need about 15-20 Key limes to get ½ cup of juice. Key limes are smaller and more tart than regular limes, so they really make a difference in the flavor. Squeeze the juice and strain it to remove any seeds or pulp.
- Combine the ingredients: In a medium bowl, whisk together the sweetened condensed milk, Key lime juice, egg yolks, and Key lime zest. Make sure everything is well combined and smooth. The mixture will thicken slightly as you whisk.
- Pour into the crusts: Once the graham cracker crusts are completely cool, carefully spoon the Key lime filling into each crust, filling them almost to the top.
- Bake the pies: Place the muffin tin back in the oven and bake for 15-17 minutes, or until the filling is set but still slightly jiggly in the center. The edges should be set, but the center will still have a little wiggle.
- Cool completely: Remove the muffin tin from the oven and let the Key Lime Pie Cups cool completely in the tin. Then, cover the tin with plastic wrap and refrigerate for at least 2 hours, or preferably overnight. This allows the filling to set completely and the flavors to meld together.
Preparing the Whipped Cream Topping (Optional):
While the Key Lime Pie Cups are chilling, you can prepare the whipped cream topping. This is totally optional, but it adds a lovely creamy sweetness that complements the tartness of the Key lime filling perfectly.
- Chill your equipment: Before you start, make sure your mixing bowl and whisk attachment (or beaters) are well chilled. This will help the cream whip up faster and hold its shape better. I like to put them in the freezer for about 15 minutes before I start.
- Combine the ingredients: In the chilled mixing bowl, combine the heavy cream, powdered sugar, and vanilla extract.
- Whip the cream: Using a whisk attachment or electric beaters, whip the cream on medium speed until stiff peaks form. Be careful not to overwhip, or the cream will turn grainy. You’ll know it’s ready when you lift the whisk or beaters and the cream forms stiff peaks that hold their shape.
- Pipe or spoon onto the pies: Once the Key Lime Pie Cups are completely chilled and set, you can either pipe the whipped cream onto each cup using a piping bag fitted with a decorative tip, or simply spoon it on top.
- Garnish and serve: Garnish the Key Lime Pie Cups with Key lime slices or a sprinkle of Key lime zest. Serve immediately, or keep them refrigerated until ready to serve.
Tips and Tricks for Perfect Key Lime Pie Cups:
Here are a few extra tips and tricks to help you make the best Key Lime Pie Cups ever!
- Use fresh Key lime juice: I can’t stress this enough! Fresh Key lime juice makes a huge difference in the flavor. Bottled Key lime juice just doesn’t have the same zing.
- Don’t overbake the filling: Overbaking the filling will result in a dry, cracked pie. You want the filling to be set but still slightly jiggly in the center.
- Chill thoroughly: Chilling the Key Lime Pie Cups for at least 2 hours (or overnight) is crucial for the filling to set properly and for the flavors to meld together.
- Make ahead: These Key Lime Pie Cups are perfect for making ahead of time. You can make the crusts and filling a day or two in advance and store them in the refrigerator. Then, just add the whipped cream topping right before serving.
- Variations: Feel free to get creative with your Key Lime Pie Cups! You can add a layer of chocolate ganache to the bottom of the crusts, or sprinkle the whipped cream topping with toasted coconut flakes.
- Crust alternative: If you don’t have graham crackers, you can use other cookies like vanilla wafers or shortbread cookies for the crust. Just make sure to adjust the amount of sugar accordingly.
- Egg yolk substitute: While I highly recommend using egg yolks for the rich flavor and texture they provide, you can try using a cornstarch slurry as a substitute if you have dietary restrictions. Mix 1 tablespoon of cornstarch with 2 tablespoons of cold water and whisk it into the filling mixture. This will help thicken the filling.
- Preventing a soggy crust: To prevent the crust from becoming soggy, you can brush it with a thin layer of melted chocolate after it has cooled. The chocolate will create a barrier between the crust and the filling.
- Serving suggestions: These Key Lime Pie Cups are delicious on their own, but they’re also great served with a scoop of vanilla ice cream or a dollop of raspberry sauce.
Storage Instructions:
To store leftover Key Lime Pie Cups, cover them tightly with plastic wrap or place them in an airtight container and refrigerate for up to 3 days. The whipped cream topping may soften slightly over time, but the pies will still taste delicious.
Troubleshooting:
- Crust is too crumbly: If your graham cracker crust is too crumbly, add a little more melted butter, a teaspoon at a time, until the mixture holds together better.
- Filling is too runny: If your Key lime filling is too runny, it could be because you didn’t bake it long enough, or because you didn’t use enough Key lime juice. Make sure to bake the pies until the filling is set but still slightly
Conclusion:
So there you have it! These Key Lime Pie Cups are truly a must-try recipe, and I’m confident they’ll become a new favorite in your household. Why? Because they deliver that classic, tangy Key lime pie flavor we all crave, but in a perfectly portioned, utterly adorable, and surprisingly easy-to-make package. Forget wrestling with a whole pie these cups are individual servings of sunshine, ready to brighten any day.
The creamy, tart filling, combined with the buttery, crumbly graham cracker crust, is a match made in dessert heaven. Plus, they’re incredibly versatile!
Looking for serving suggestions? These Key Lime Pie Cups are fantastic on their own, chilled straight from the fridge. But if you want to elevate them even further, consider a dollop of freshly whipped cream or a sprinkle of toasted coconut flakes. A few fresh raspberries or a lime wedge would also add a beautiful pop of color and flavor. For a truly decadent experience, drizzle a little white chocolate ganache over the top.
And speaking of variations, the possibilities are endless! If you’re feeling adventurous, try adding a pinch of lime zest to the graham cracker crust for an extra burst of citrus. You could also experiment with different types of crusts a shortbread crust would be equally delicious. For a dairy-free version, use a vegan cream cheese alternative and coconut cream in the filling. You can even make mini versions using mini muffin tins for bite-sized treats perfect for parties.
Another fun variation is to layer the filling with crushed pineapple for a tropical twist. Or, if you’re a chocolate lover, add a thin layer of melted dark chocolate to the bottom of the crust before adding the filling. The bittersweet chocolate will complement the tartness of the lime beautifully.
These Key Lime Pie Cups are also a great make-ahead dessert. You can prepare them a day or two in advance and store them in the refrigerator until you’re ready to serve. This makes them perfect for entertaining or for those times when you need a quick and easy dessert option.
I truly believe that anyone can make these Key Lime Pie Cups, regardless of their baking experience. The recipe is straightforward, the ingredients are readily available, and the results are simply divine. It’s a guaranteed crowd-pleaser that will have everyone asking for seconds (and the recipe!).
So, what are you waiting for? Gather your ingredients, preheat your oven, and get ready to create some magic in the kitchen. I’m so excited for you to try this recipe and experience the joy of homemade Key Lime Pie Cups.
And most importantly, I want to hear about your experience! Did you make any variations? What did your family and friends think? Share your photos and stories with me in the comments below. I can’t wait to see your creations and hear all about your Key Lime Pie Cup adventures. Happy baking!
Key Lime Pie Cups: Easy Recipe & Perfect Dessert
Tangy and sweet Key Lime Pie Cups with a buttery graham cracker crust and optional whipped cream topping. A perfect individual dessert!
Ingredients
- 1 ½ cups graham cracker crumbs (about 12 full graham crackers)
- 5 tablespoons (70g) unsalted butter, melted
- ¼ cup (50g) granulated sugar
- Pinch of salt
- 1 (14 ounce) can sweetened condensed milk
- ½ cup (120ml) Key lime juice, freshly squeezed (about 15-20 Key limes)
- 4 large egg yolks
- 1 teaspoon Key lime zest
- 1 cup (240ml) heavy cream, cold
- 2 tablespoons (25g) powdered sugar
- ½ teaspoon vanilla extract
- Key lime slices or zest, for garnish
Instructions
- Prepare the Graham Cracker Crust:
- Preheat oven to 350°F (175°C).
- In a medium bowl, combine graham cracker crumbs, granulated sugar, and salt.
- Add melted butter and stir until evenly moistened and resembles wet sand.
- Spoon about 2 tablespoons of the mixture into each muffin cup (12-cup muffin tin).
- Press firmly into an even layer at the bottom and slightly up the sides.
- Bake for 8-10 minutes, or until lightly golden brown and fragrant.
- Cool completely in the tin.
- Make the Key Lime Filling:
- Squeeze ½ cup of fresh Key lime juice (about 15-20 Key limes). Strain to remove seeds and pulp.
- In a medium bowl, whisk together sweetened condensed milk, Key lime juice, egg yolks, and Key lime zest until smooth.
- Spoon the filling into the cooled graham cracker crusts, filling almost to the top.
- Bake for 15-17 minutes, or until the filling is set but still slightly jiggly in the center.
- Cool completely in the tin. Then, cover and refrigerate for at least 2 hours, or preferably overnight.
- Prepare the Whipped Cream Topping (Optional):
- Chill mixing bowl and whisk attachment (or beaters).
- In the chilled bowl, combine heavy cream, powdered sugar, and vanilla extract.
- Whip on medium speed until stiff peaks form. Be careful not to overwhip.
- Pipe or spoon onto the chilled Key Lime Pie Cups.
- Garnish with Key lime slices or zest. Serve immediately or keep refrigerated.
Notes
- Use fresh Key lime juice for the best flavor.
- Don’t overbake the filling; it should be set but slightly jiggly.
- Chill thoroughly for the filling to set properly.
- Make ahead: Crusts and filling can be made a day or two in advance.
- Variations: Add a layer of chocolate ganache to the bottom of the crusts, or sprinkle the whipped cream topping with toasted coconut flakes.
- Crust alternative: If you don’t have graham crackers, you can use other cookies like vanilla wafers or shortbread cookies for the crust. Just make sure to adjust the amount of sugar accordingly.
- Egg yolk substitute: While I highly recommend using egg yolks for the rich flavor and texture they provide, you can try using a cornstarch slurry as a substitute if you have dietary restrictions. Mix 1 tablespoon of cornstarch with 2 tablespoons of cold water and whisk it into the filling mixture. This will help thicken the filling.
- Preventing a soggy crust: To prevent the crust from becoming soggy, you can brush it with a thin layer of melted chocolate after it has cooled. The chocolate will create a barrier between the crust and the filling.
- Serving suggestions: These Key Lime Pie Cups are delicious on their own, but they’re also great served with a scoop of vanilla ice cream or a dollop of raspberry sauce.
- Storage: Store leftover Key Lime Pie Cups, cover them tightly with plastic wrap or place them in an airtight container and refrigerate for up to 3 days.
- Crust is too crumbly: If your graham cracker crust is too crumbly, add a little more melted butter, a teaspoon at a time, until the mixture holds together better.
- Filling is too runny: If your Key lime filling is too runny, it could be because you didn’t bake it long enough, or because you didn’t use enough Key lime juice. Make sure to bake the pies until the filling is set but still slightly
Leave a Comment