

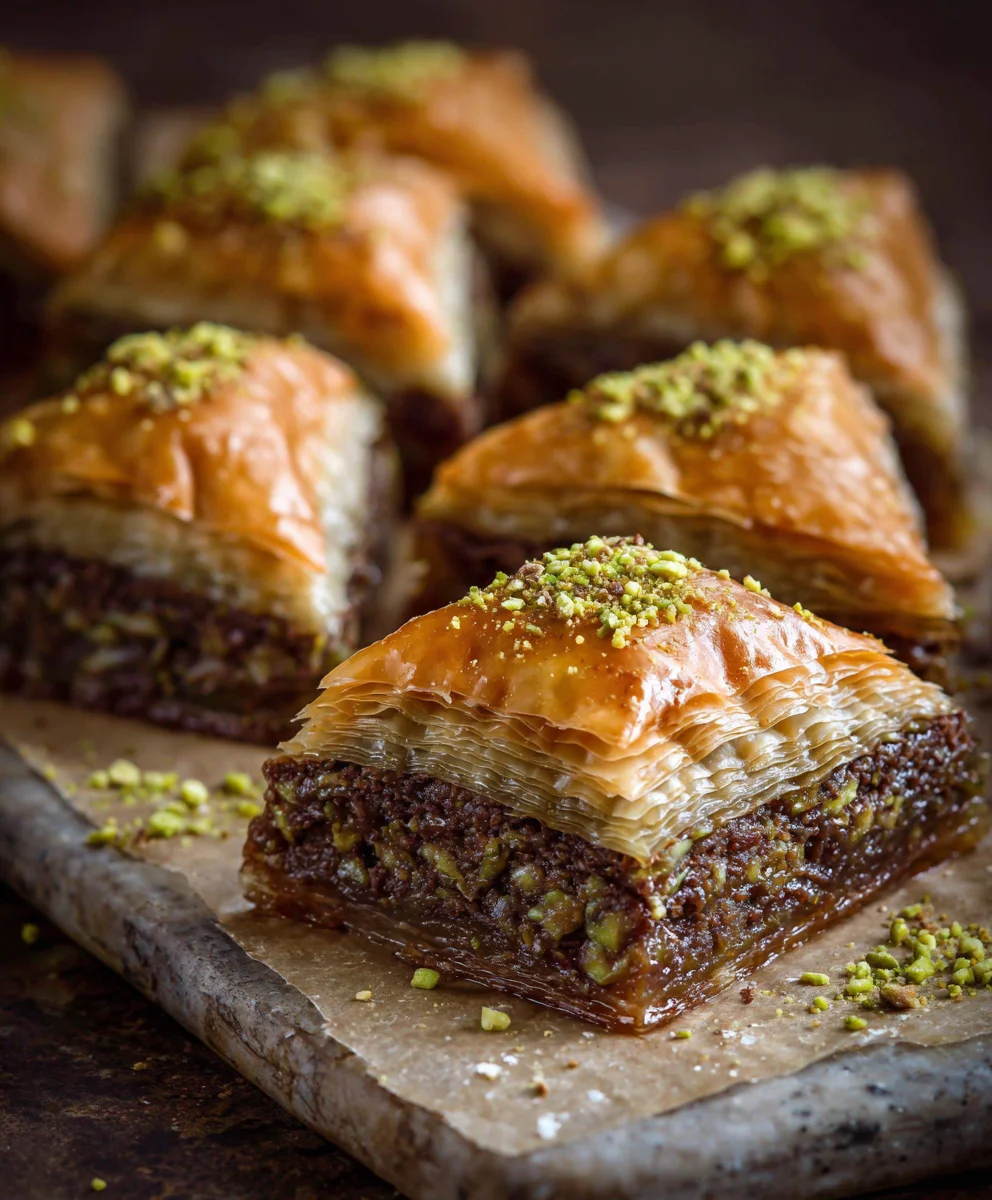
Nutella Baklava. The very name evokes a symphony of flavors, a delightful marriage of two beloved dessert traditions. I’m absolutely thrilled to share a recipe that takes the ancient, revered pastry known as baklava and infuses it with a modern, universally adored spread: Nutella.
Traditional baklava, with its delicate layers of phyllo dough, chopped nuts, and sweet syrup, boasts a history as rich and intricate as its flavor, tracing its roots back to the Ottoman Empire and beyond. It’s a dessert that has graced tables for centuries, celebrating special occasions and bringing families together across the Mediterranean and Middle East.
But what happens when you introduce the creamy, hazelnut-chocolate perfection of Nutella to this classic? You get an entirely new level of decadence.
This Nutella Baklava offers the best of both worlds: the satisfying crunch of golden, buttered phyllo, the aromatic sweetness of a honey-citrus syrup, and at its heart, the irresistible, gooey surprise of warm, melted Nutella. It’s a dish people adore because it transforms a familiar comfort into an extraordinary experience, offering a texture and taste profile that is both nostalgic and excitingly new. Get ready to fall in love with this sensational twist on a timeless treat!

Ingredients:
- 1 pound (about 450g) Fresh or Thawed Phyllo Dough: I always make sure to get the thinnest sheets I can find. Remember, handling phyllo requires a gentle touch and keeping it covered to prevent drying out.
- 1 ¾ cups (about 400g) Unsalted Butter, melted and clarified (Ghee): This golden liquid is crucial for that crispy, flaky texture. Clarifying it removes the milk solids, which helps prevent burning and yields a clearer, more delicate flavor. You can buy ghee or easily make your own by gently melting butter and skimming off the foam, then pouring off the clear yellow liquid, leaving the white solids behind.
- 2 cups Mixed Chopped Nuts: I love a blend of finely chopped pistachios (for color and classic flavor), walnuts (for earthy depth), and sometimes a few hazelnuts (to complement the Nutella). Ensure they are unsalted and roasted if you prefer a deeper flavor, but raw works perfectly fine too.
- 1 ½ cups (about 450g) Nutella: This is our star! Make sure it’s at room temperature so it’s easy to spread. If it’s a bit stiff, you can gently warm it in the microwave for 10-15 seconds, stirring well.
For the Simple Syrup:
- 2 cups Granulated Sugar: The foundation of our sweet syrup.
- 1 ½ cups Water: To dissolve the sugar and create the perfect consistency.
- 1 tablespoon Fresh Lemon Juice: This isn’t just for flavor; it helps prevent the sugar from crystallizing, ensuring a smooth, clear syrup.
- 1 teaspoon Vanilla Extract: A beautiful aromatic addition that enhances the overall sweetness. You can also add a cinnamon stick or a few cardamom pods for an extra layer of warmth if you like.
Preparing the Simple Syrup
- Combine Ingredients: In a medium saucepan, I combine the granulated sugar and water. I give it a gentle stir just to moisten all the sugar, but I try not to over-stir at this stage as it can encourage crystallization.
- Bring to a Boil: I place the saucepan over medium-high heat and bring the mixture to a rolling boil. It’s important to let it come to a full boil without stirring, allowing the sugar to fully dissolve.
- Reduce and Simmer: Once it’s boiling, I reduce the heat to medium-low and let it simmer gently for about 10-12 minutes. The goal here is for the syrup to thicken slightly, reaching a consistency that coats the back of a spoon. You don’t want it too thick like caramel, but definitely not watery.
- Add Flavorings: After the simmering time, I remove the saucepan from the heat. Now is the time to stir in the fresh lemon juice and the vanilla extract. The lemon juice is truly key for preventing crystallization, which can make your baklava gritty.
- Cool Completely: This step is non-negotiable for a perfect “Nutella Baklava.” I transfer the syrup to a heatproof bowl or jug and set it aside to cool completely to room temperature. It is crucial that the syrup is cold when it meets the hot-from-the-oven baklava. This temperature difference is what allows the phyllo to absorb the syrup beautifully without becoming soggy, yielding that delightful sticky crispness. I often make the syrup an hour or two in advance, or even the day before, to ensure it’s perfectly chilled.
Prepping Our Nuts and Phyllo
- Chop the Nuts: While the syrup is cooling, I turn my attention to the nuts. I take my mixed nuts (pistachios, walnuts, hazelnuts) and give them a good chop. I prefer them to be finely chopped but not quite a powder – you want to still have a bit of texture when you bite into the “Nutella Baklava.” You can use a food processor for this, just be careful not to over-process and turn them into nut butter. A quick pulse or two usually does the trick!
- Prepare the Phyllo Dough: If your phyllo dough is frozen, remember to thaw it properly in the refrigerator overnight, or at room temperature for a few hours, before you plan to use it. This prevents it from cracking when you unroll it. Once thawed, I gently unroll the phyllo and lay it flat on my clean countertop. I immediately cover the stack of phyllo sheets with a damp, clean kitchen towel or plastic wrap. This is an absolute must! Phyllo dries out incredibly quickly, becoming brittle and impossible to work with if exposed to air for too long. I only uncover the sheets as I need them.
- Clarify the Butter (if not using ghee): If I’m not using pre-made ghee, I take this time to clarify my unsalted butter. I melt the butter slowly in a small saucepan over low heat. As it melts, a foamy layer will rise to the top – I gently skim this off. The milk solids will also settle at the bottom. Once melted and clear, I carefully pour the golden, clear butter into a separate bowl, leaving the milk solids behind. This clarified butter (ghee) gives the baklava its pure, buttery flavor and helps it become extra crispy without burning. I always make sure to have my melted clarified butter ready and a pastry brush nearby.
Assembling the Nutella Baklava
- Preheat Oven and Prepare Pan: I preheat my oven to 350°F (175°C). Then, I generously brush a 9×13-inch (23×33 cm) baking pan with some of my melted clarified butter. Ensuring the bottom and sides are well-buttered helps prevent sticking and contributes to an even golden-brown crust.
- Start the Base Layers: I begin by carefully taking two sheets of phyllo dough from my covered stack. I lay them flat in the prepared baking pan. Using my pastry brush, I gently but thoroughly brush the entire surface of the top phyllo sheet with the melted clarified butter. I ensure every corner and edge is coated – this is what creates those distinct, flaky layers.
- Continue Building the Base: I repeat step 10, adding two more sheets of phyllo, and brushing them with butter. I do this until I have about 10-12 sheets (5-6 buttered layers of two sheets each) forming the base of our “Nutella Baklava.” This creates a sturdy foundation for our delicious filling.
- First Nutella Layer: Now for the star! I take about half of my room-temperature Nutella and gently spread it evenly over the top layer of buttered phyllo. I try to get it as close to the edges as possible without tearing the delicate phyllo. If your Nutella is a bit stiff, you can microwave it for a few seconds to make it more spreadable, but be careful not to overheat it.
- First Nut Layer: Over the Nutella, I sprinkle about half of my finely chopped nuts. This adds a wonderful crunch and balances the sweetness of the Nutella.
- Adding More Phyllo Layers: I now add another layer of two phyllo sheets, brushing it thoroughly with butter. I repeat this process, laying two sheets, buttering, for about 8-10 more sheets (4-5 buttered layers). This creates a middle section of crispy phyllo within the “Nutella Baklava.”
- Second Nutella and Nut Layer: It’s time for the second layer of glorious Nutella! I spread the remaining half of the Nutella evenly over the buttered phyllo, followed by the remaining chopped nuts. This ensures every bite is packed with flavor.
- Top Layers: To finish our “Nutella Baklava,” I carefully place the remaining phyllo sheets on top. Again, I use two sheets at a time, brushing generously with melted clarified butter after each pair, until all the phyllo is used up. This usually means another 10-12 sheets (5-6 buttered layers of two sheets each). Make sure the top layer is particularly well-buttered for that beautiful golden finish.
- Trim and Press (Optional but Recommended): If any phyllo edges are significantly hanging over the sides of the pan, I carefully trim them with a sharp knife. Then, I gently press down on the entire surface of the baklava to ensure all the layers are somewhat compact and even.
- Scoring the Baklava: This step is critical for both presentation and even baking. Before baking, I use a very sharp knife to cut the baklava into desired shapes – diamonds, squares, or rectangles. I cut all the way through the layers to the bottom of the pan. For diamonds, I first make diagonal cuts in one direction across the pan, and then make intersecting diagonal cuts in the opposite direction. For squares, I just make straight cuts. This scoring prevents the phyllo from puffing up unevenly and ensures the syrup can penetrate all the layers after baking. It also makes it much easier to serve later.
- Final Buttering: I give the surface of the scored “Nutella Baklava” one final, generous brush with any remaining melted clarified butter. This helps achieve that beautiful golden-brown color and irresistible crispness.
Baking Our Golden Nutella Baklava
- Bake to Perfection: I carefully place the baking pan into my preheated oven (350°F/175°C). The initial baking time will be around 30 minutes. During this first stage, the phyllo will begin to puff up and turn a light golden color.
- Reduce Heat and Continue Baking: After 30 minutes, I usually reduce the oven temperature to 300°F (150°C). This slower, lower-temperature baking allows the “Nutella Baklava” to cook through completely, crisp up beautifully, and develop a rich golden-brown hue without burning the top. I continue baking for another 30-45 minutes, or until the top is deeply golden brown and the edges appear very crispy. Every oven is a little different, so I keep a close eye on it. If it starts to brown too quickly, I might loosely tent it with aluminum foil. The key is to achieve a consistent, gorgeous golden color across the entire surface.
- Remove from Oven: Once it’s perfectly golden and bubbly, I carefully remove the pan from the oven. The aroma filling my kitchen at this point is absolutely incredible!
Finishing Touches and Serving
- Spoon Over Cold Syrup: This is the magic moment for “Nutella Baklava.” Immediately after removing the hot baklava from the oven, I take my completely cooled simple syrup and slowly, carefully spoon or pour it evenly over the entire hot surface of the baklava. You will hear a wonderful sizzling sound as the hot phyllo eagerly absorbs the cold syrup. Don’t rush this step; take your time to ensure even distribution. The syrup will seep into all the cuts, coating every delicious layer.
- Allow to Cool Completely: This is arguably the hardest part of making “Nutella Baklava” – waiting! I leave the baklava in the pan, uncovered, at room temperature to cool completely. This process can take several hours, or even overnight. Resist the urge to cut into it early! Allowing it to cool undisturbed is essential for the syrup to fully penetrate and for the layers to set properly, resulting in that iconic crisp-yet-syrupy texture that we all adore. As it cools, the baklava will become less sticky and easier to handle.
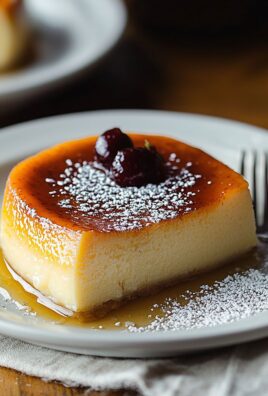
- Garnish (Optional): Once fully cooled, if I want to add an extra touch of elegance, I sometimes sprinkle the top with a handful of extra finely chopped pistachios or a light dusting of powdered sugar. This not only adds visual appeal but also a fresh textural contrast.
- Serve and Store: When ready to serve, I use a sharp knife to re-cut along the pre-scored lines to separate the pieces. “Nutella Baklava” is absolutely divine on its own, perhaps with a strong cup of coffee or tea. It stores beautifully at room temperature in an airtight container for up to a week. I find that the flavor often deepens and improves after a day or two. Enjoy every flaky, chocolatey, nutty bite of your homemade “Nutella Baklava”!
Conclusion:
And there you have it, my fellow dessert enthusiasts! We’ve journeyed through the creation of what I firmly believe is not just a dessert, but an experience – a truly unforgettable fusion of beloved flavors that will absolutely elevate your sweet cravings. This isn’t just another recipe; it’s a testament to how traditional delights can embrace modern indulgence, creating something utterly spectacular. If you’ve ever felt intimidated by the delicate layers of phyllo or the intricate process of baklava, I promise you, this recipe is designed to guide you every step of the way, transforming what might seem daunting into an incredibly rewarding culinary adventure. The sheer satisfaction of pulling a tray of this golden-brown, aromatic pastry from your oven is unparalleled, filling your home with an aroma that signals pure joy.
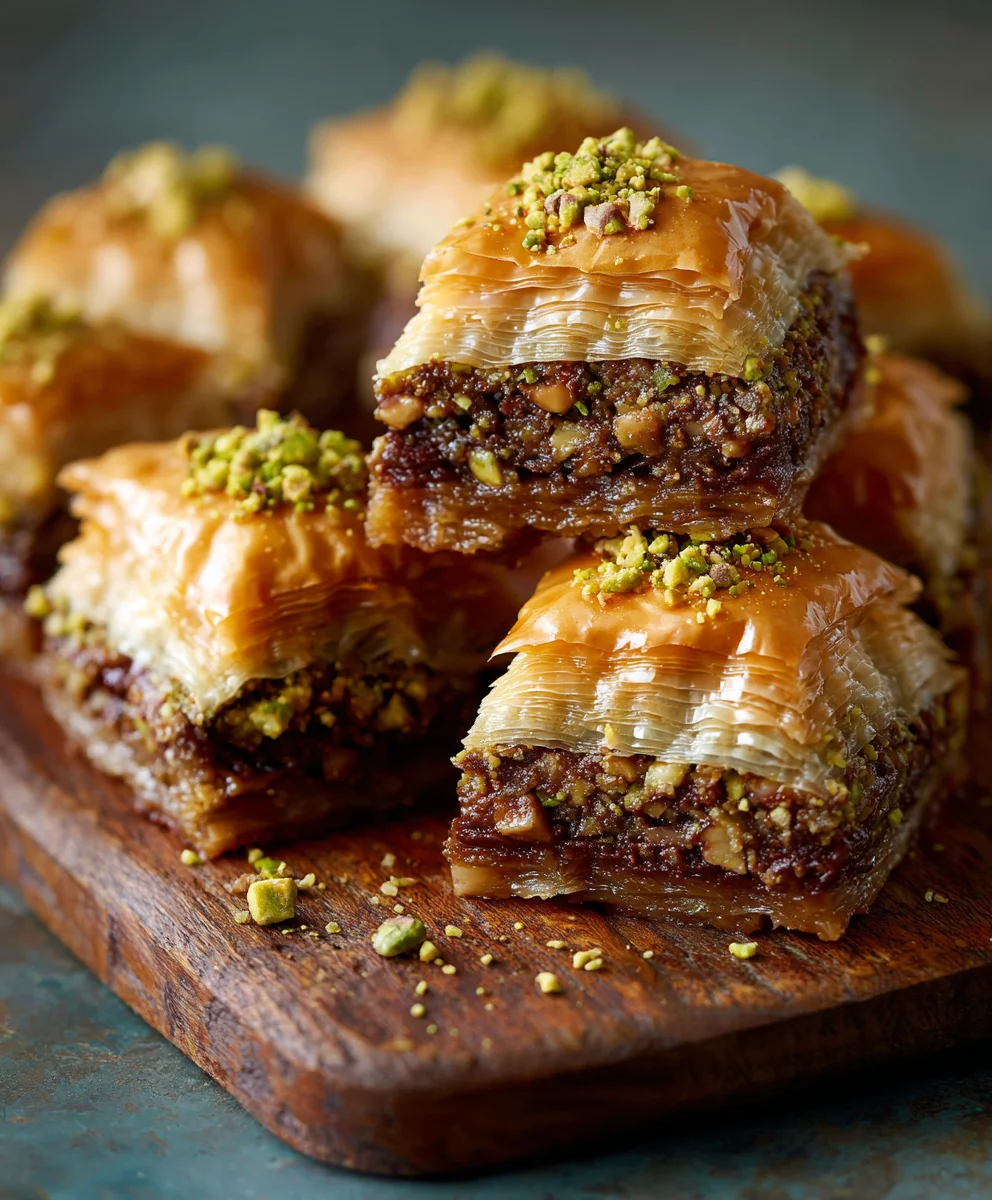
The reason this particular version stands head and shoulders above the rest lies in its ingenious combination of textures and tastes. Imagine: the delicate, almost imperceptible crunch of perfectly baked phyllo, each paper-thin layer shattering with the slightest touch, revealing a generous, gooey core of warm, melted Nutella. It’s a symphony of sensations – the crisp, the soft, the sweet, the nutty, all harmonizing in a way that truly sings on your palate. It’s an instant crowd-pleaser, capable of turning any ordinary gathering into an extraordinary celebration. This is more than just a sweet treat; it’s a moment of pure bliss, a comfort food that feels incredibly luxurious, yet surprisingly achievable in your own kitchen. I’ve seen faces light up, eyes widen, and heard exclamations of delight from everyone who has ever tried a piece, and I am so excited for you to experience that same reaction yourself.
Why This Nutella Baklava Is a Must-Try:
Firstly, it’s the ultimate fusion dessert. It takes the time-honored tradition of baklava, with its exquisite flaky layers and sweet syrup, and injects it with a playful, utterly irresistible twist of rich, hazelnut-chocolate spread. This innovative approach makes it accessible and appealing to a broader audience, including those who might not typically gravitate towards traditional Middle Eastern sweets. Secondly, despite its gourmet appearance, it’s remarkably forgiving. Don’t worry if your phyllo tears a little; the layers are so numerous, any imperfections will be delightfully hidden. The beauty of this dessert is that even if it’s not absolutely perfect, it will still taste absolutely divine. The generous filling of Nutella ensures a moist, decadent interior that contrasts beautifully with the crisp outer shell. Lastly, the aroma alone is worth the effort. As it bakes, your kitchen will be filled with the intoxicating scent of toasted nuts, warm chocolate, and a hint of sweet syrup – it’s an experience for all the senses, long before the first bite.
Serving Suggestions & Creative Twists:
Now, let’s talk about how to truly make this dessert shine. While it’s utterly divine on its own, especially when served slightly warm, here are a few suggestions to elevate your experience. I love serving a slice with a generous scoop of good quality vanilla bean ice cream – the cold, creamy ice cream melting into the warm, crispy Nutella Baklava is a match made in heaven. Another fantastic pairing is with a dollop of thick, unsweetened Greek yogurt or clotted cream, which provides a lovely tangy contrast to the sweetness. For an authentic touch, a small cup of strong Turkish coffee or a refreshing glass of mint tea cuts through the richness beautifully.
Feeling adventurous? Consider these variations:
- Nutty Boost: Fold finely chopped pistachios, walnuts, or hazelnuts directly into the melted Nutella before spreading for an extra layer of texture and flavor.
- Citrus Zest: Add a pinch of orange or lemon zest to your syrup for a bright, aromatic lift that complements the chocolate beautifully.
- Spiced Syrup: Infuse your simple syrup with a cinnamon stick, a few cardamom pods, or a star anise while it simmers for a more complex flavor profile. Remove them before pouring over the baklava.
- White Chocolate Drizzle: After it’s cooled, a delicate drizzle of melted white chocolate over the top adds an elegant finish and another layer of sweetness.
- Individual Portions: For easy serving, you can assemble smaller versions in muffin tins, creating adorable, bite-sized baklava cups.
- A Touch of Salt: A tiny sprinkle of flaky sea salt over the finished product before serving will enhance the chocolate-hazelnut flavor significantly.
Your Culinary Journey Awaits!
I genuinely hope this recipe sparks joy in your kitchen and at your table. This is more than just cooking; it’s about creating memories, sharing delicious food with loved ones, and perhaps even discovering a new favorite dessert. Don’t just read about it; make it your own! Dive in, have fun with the process, and savor every single step. Trust me, the effort is incredibly worth it. There’s a special kind of pride that comes with serving something so beautiful and utterly delicious that you made with your own hands.
Once you’ve tried your hand at this sensational Nutella Baklava, I would absolutely love to hear about your experience! What were your favorite parts? Did you try any of the variations? Did you serve it warm or cold? Please don’t hesitate to share your thoughts, your photos, and your triumphs! Your feedback and stories inspire me and others in our shared culinary community. Let’s celebrate the joy of baking and the magic of a truly extraordinary dessert together. Go forth, bake some magic, and prepare to delight everyone who takes a bite!
Irresistible Nutella Baklava
A decadent fusion of classic baklava with creamy Nutella. Golden, crispy phyllo layers are filled with a hazelnut-chocolate center and chopped nuts, then drenched in a sweet lemon-vanilla syrup for an irresistible sweet treat.
Ingredients
-
1 lb (450g) Phyllo Dough, fresh or thawed
-
1 ¾ cups (400g) Unsalted Butter (clarified/ghee), melted
-
2 cups Mixed Chopped Nuts (pistachios, walnuts, hazelnuts)
-
1 ½ cups (450g) Nutella, room temperature
-
2 cups Granulated Sugar (for syrup)
-
1 ½ cups Water (for syrup)
-
1 tbsp Fresh Lemon Juice (for syrup)
-
1 tsp Vanilla Extract (for syrup)
Instructions
-
Step 1
Combine 2 cups granulated sugar and 1 ½ cups water in a saucepan; bring to a boil. Reduce heat and simmer for 10-12 minutes until slightly thickened. Remove from heat, stir in 1 tbsp fresh lemon juice and 1 tsp vanilla extract. Cool syrup completely to room temperature (essential). -
Step 2
Finely chop 2 cups mixed nuts. Thaw 1 lb phyllo dough, then unroll and immediately cover with a damp cloth to prevent drying. Clarify 1 ¾ cups unsalted butter to make ghee (if not using pre-made); keep melted and ready. -
Step 3
Preheat oven to 350°F (175°C). Generously grease a 9×13-inch baking pan with melted ghee. Layer 10-12 phyllo sheets (2 at a time), brushing generously with ghee between each pair, to form the base. -
Step 4
Spread half of the room-temperature Nutella evenly over the phyllo base, then sprinkle with half of the chopped nuts. Add another 8-10 phyllo sheets (2 at a time), brushing with ghee between each pair. Spread the remaining Nutella, then sprinkle with the remaining chopped nuts. -
Step 5
Top with the final 10-12 phyllo sheets (2 at a time), brushing each pair generously with ghee. Trim any excess phyllo and gently press down. Score the baklava into diamonds or squares, cutting all the way to the bottom. Brush the entire surface with any remaining ghee. -
Step 6
Bake at 350°F (175°C) for 30 minutes. Reduce oven to 300°F (150°C) and bake for 30-45 minutes more, or until deeply golden brown and crispy. Remove from oven. -
Step 7
Immediately pour the completely cooled simple syrup evenly over the hot baklava. Let cool completely in the pan at room temperature for several hours or overnight to allow syrup to fully absorb and layers to set properly. -
Step 8
Garnish with extra chopped pistachios or a light dusting of powdered sugar, if desired. Re-cut along scored lines to separate pieces. Serve and store in an airtight container at room temperature for up to 1 week.
Important Information
Nutrition Facts (Per Serving)
It is important to consider this information as approximate and not to use it as definitive health advice.
Allergy Information
Please check ingredients for potential allergens and consult a health professional if in doubt.
Leave a Comment