

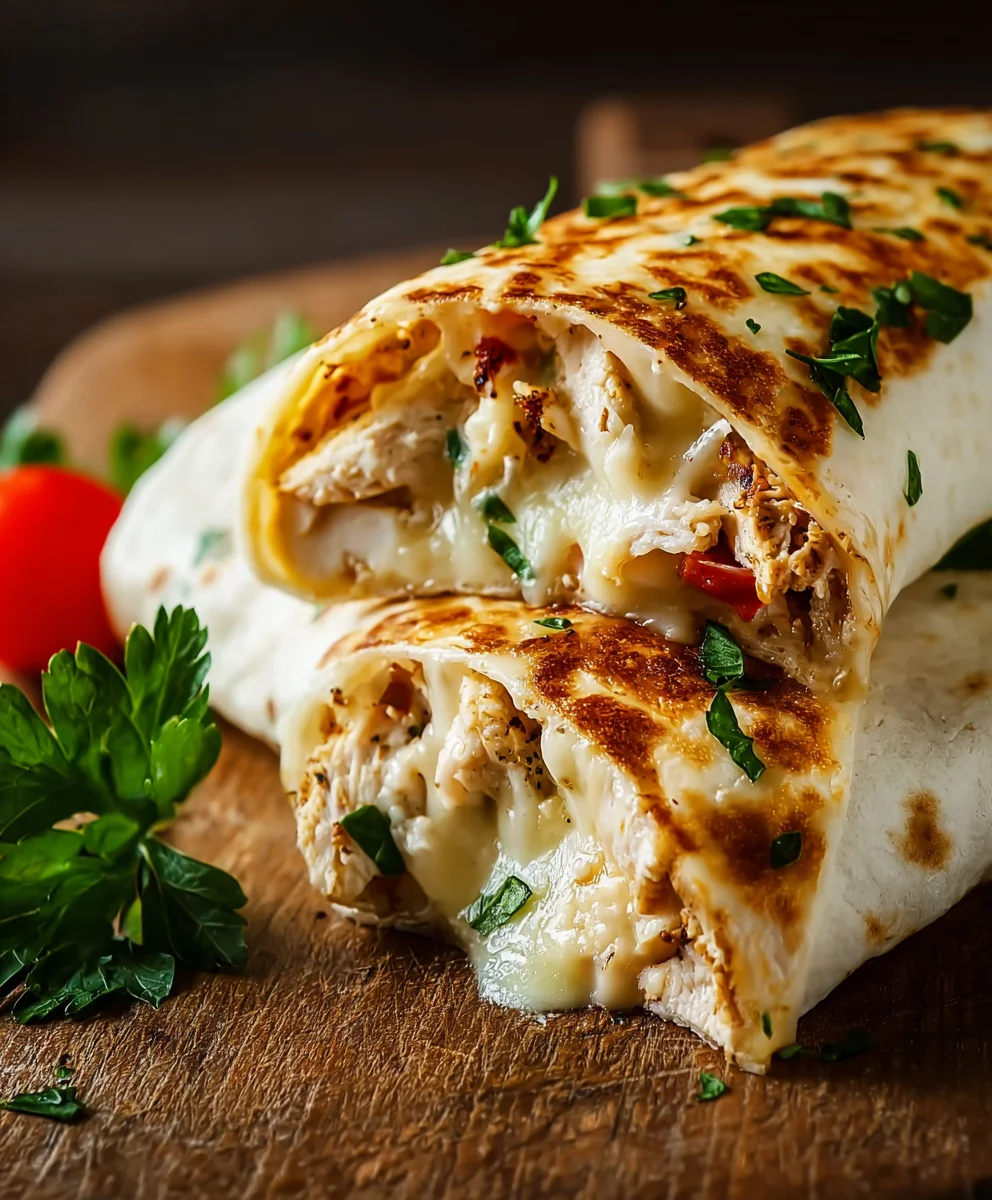
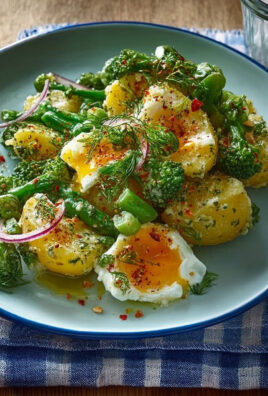
Cheesy Garlic Chicken Wraps are more than just a quick meal; they are a delightful culinary experience I am genuinely thrilled to introduce to you today. Imagine sinking your teeth into succulent, tender chicken, perfectly seasoned and coated in a rich, aromatic garlic sauce, all beautifully complemented by a generous layer of creamy, melted cheese. This delectable filling is then lovingly wrapped in a warm, soft tortilla, creating a symphony of flavors and textures that promises to captivate your palate from the very first bite.
A Modern Classic with Universal Appeal
While the exact origins of this specific “wrap” combination are a testament to contemporary culinary innovation, its roots tap into a global appreciation for its core components. The comforting embrace of bread, the irresistible allure of tender chicken, the bold fragrance of garlic, and the satisfying richness of cheese have been cherished in diverse cuisines across centuries. This dish brilliantly melds these timeless elements into a convenient, incredibly satisfying format, explaining why I find it has resonated so deeply with food lovers everywhere.
I absolutely adore how Cheesy Garlic Chicken Wraps offer such an amazing blend of incredible taste and surprising ease of preparation. They are the ultimate comfort food, providing a deeply satisfying meal that’s perfect for a busy weeknight or a relaxed weekend lunch. Their universal appeal lies in their irresistible flavor profile and the sheer joy they bring to the table. Prepare to discover your new favorite!

Ingredients:
-
For the Irresistibly Juicy Chicken:
- 2 large (or 3 medium) boneless, skinless chicken breasts (about 1.5 – 2 pounds total), cut into 1/2-inch thick strips or bite-sized cubes.
- 2 tablespoons olive oil (extra virgin is great for flavor).
- 1 tablespoon fresh lemon juice (about half a medium lemon, adds brightness).
- 4 cloves garlic, minced very finely (fresh is non-negotiable here for the ultimate garlic kick).
- 1 teaspoon dried oregano (classic Mediterranean herb, pairs wonderfully with chicken).
- 1 teaspoon smoked paprika (for a hint of smoky depth and beautiful color).
- 1/2 teaspoon onion powder (enhances overall savory flavor).
- 1/2 teaspoon salt (or to taste, essential for seasoning).
- 1/4 teaspoon black pepper (freshly ground, of course).
- A pinch of cayenne pepper (optional, if you like a very subtle warmth without true heat).
-
For the Creamy, Dreamy Cheesy Garlic Spread:
- 8 ounces cream cheese, full-fat and softened to room temperature (this is key for a smooth spread).
- 1/4 cup good quality mayonnaise (adds richness and a silky texture).
- 4 cloves garlic, minced very finely (yes, more garlic! It’s for a reason, trust me).
- 1/2 cup shredded Parmesan cheese (freshly grated is best for flavor and melt).
- 1/2 cup shredded mozzarella cheese (low-moisture, part-skim works well for meltiness).
- 2 tablespoons fresh chives or parsley, finely chopped (for freshness and a pop of color).
- 1/4 teaspoon salt (or to taste, always season in layers).
- 1/8 teaspoon black pepper.
- 1-2 tablespoons milk or cream (optional, to achieve your desired spreadable consistency).
-
For Assembling Your Cheesy Garlic Chicken Wraps:
- 8-10 large flour tortillas (10-inch size, soft and pliable is paramount).
- 1 cup extra shredded mozzarella cheese (for layering inside the wraps, ensuring peak cheesiness).
- Optional fresh fillings for crunch and freshness:
- 1/2 cup shredded crisp lettuce (iceberg or romaine are great).
- 1/4 cup thinly sliced red onion.
- 1/2 cup diced ripe tomatoes.
- Sliced pickled jalapeños (if you crave a tangy kick).
-
Cooking Essentials:
- 1 tablespoon olive oil (for cooking the chicken).
Phase 1: Preparing and Marinating the Flavorful Chicken for Your Cheesy Garlic Chicken Wraps
This first phase is crucial for building the foundational flavor of your Cheesy Garlic Chicken Wraps. A well-seasoned and perfectly cooked chicken filling makes all the difference, transforming a simple wrap into something truly extraordinary. Don’t rush this step!
-
Prepare the Chicken:
First things first, let’s get our chicken ready for its flavorful journey. Take your boneless, skinless chicken breasts and pat them thoroughly dry with paper towels. This step might seem minor, but it’s incredibly important. Removing excess moisture allows the chicken to sear beautifully and absorb the marinade more effectively, ensuring every bite of your Cheesy Garlic Chicken Wraps is packed with flavor. Once dry, place the chicken on a clean cutting board. You have a couple of options here: you can either slice the chicken breasts into 1/2-inch thick strips, which makes for easy layering in the wraps, or cut them into bite-sized cubes if you prefer a more contained filling. Both options work wonderfully, so choose what suits your preference for the ultimate Cheesy Garlic Chicken Wraps.
-
Whisk Up the Marinade:
In a medium-sized bowl, it’s time to create the aromatic marinade that will infuse our chicken with incredible taste. Combine the 2 tablespoons of olive oil, 1 tablespoon of fresh lemon juice (the acidity helps tenderize the chicken and brightens the flavors), 4 cloves of finely minced garlic (the more, the merrier for these Cheesy Garlic Chicken Wraps!), 1 teaspoon of dried oregano, 1 teaspoon of smoked paprika, 1/2 teaspoon of onion powder, 1/2 teaspoon of salt, 1/4 teaspoon of black pepper, and the optional pinch of cayenne pepper. Use a small whisk or a fork to mix everything together until it’s well combined. Take a moment to smell this mixture – it’s already promising great things for your Cheesy Garlic Chicken Wraps!
-
Marinate for Maximum Flavor:
Now, add your prepared chicken pieces (strips or cubes) to the bowl with the marinade. Use a spatula or your clean hands to toss the chicken, ensuring every single piece is thoroughly coated in the fragrant mixture. Once coated, cover the bowl tightly with plastic wrap or transfer the chicken and marinade to a resealable plastic bag. Place it in the refrigerator to marinate. For optimal flavor penetration, I recommend marinating for at least 30 minutes. However, if you have the luxury of time, marinating for 2-4 hours will yield even juicier and more flavorful results, making your Cheesy Garlic Chicken Wraps truly stand out. You can even marinate it overnight for maximum impact, but be careful not to marinate for much longer than 12 hours, as the lemon juice can start to break down the chicken’s texture too much.
-
Cook the Marinated Chicken to Perfection:
Once your chicken has soaked up all that delicious marinade, it’s time to cook it. Remove the chicken from the refrigerator about 15-20 minutes before cooking to bring it closer to room temperature, which helps it cook more evenly. Heat 1 tablespoon of olive oil in a large skillet or frying pan over medium-high heat. You want the pan to be nice and hot but not smoking. Once the oil is shimmering, add the marinated chicken in a single layer, being careful not to overcrowd the pan. If necessary, cook the chicken in batches to ensure proper searing and even cooking. Overcrowding can lower the pan temperature and cause the chicken to steam instead of brown, which we definitely don’t want for our Cheesy Garlic Chicken Wraps.
Cook the chicken for 3-5 minutes per side, depending on the thickness of your strips or cubes, until it’s beautifully golden brown and cooked through. You’ll know it’s done when the internal temperature reaches 165°F (74°C) on an instant-read thermometer and the juices run clear. Once cooked, transfer the chicken to a clean plate or cutting board and tent it loosely with foil. Allow the chicken to rest for at least 5 minutes before slicing or using it in your wraps. This resting period is crucial; it allows the juices to redistribute throughout the meat, ensuring your chicken remains incredibly tender and juicy inside your Cheesy Garlic Chicken Wraps. If you skipped this, the juices would just run out onto your cutting board, leaving you with dry chicken.
Phase 2: Crafting the Irresistible Cheesy Garlic Spread
This is where the “cheesy garlic” magic truly happens for our Cheesy Garlic Chicken Wraps. This spread is the heart and soul of the dish, providing a rich, creamy, and intensely flavorful base that ties everything together. It’s incredibly simple to make but delivers a powerful punch of flavor.
-
Soften the Cream Cheese:
The first and most important step for a smooth, lump-free spread is to ensure your cream cheese is at room temperature and well softened. If you try to mix cold cream cheese, you’ll end up with a lumpy mess that’s hard to spread evenly. To soften it quickly, you can unwrap it and microwave it for 15-30 seconds on low power, or simply leave it out on the counter for about 30-60 minutes before you plan to start cooking. Place the softened cream cheese in a medium-sized mixing bowl.
-
Combine the Creamy Ingredients:
To the softened cream cheese, add the 1/4 cup of good quality mayonnaise. The mayonnaise adds another layer of creaminess and a subtle tang that balances the richness of the cream cheese perfectly. Then, introduce the second dose of finely minced fresh garlic – yes, another 4 cloves! This abundance of garlic is what makes these Cheesy Garlic Chicken Wraps truly live up to their name. Add the 1/2 cup of shredded Parmesan cheese and the 1/2 cup of shredded mozzarella cheese. These cheeses will melt beautifully later, but for now, they contribute to the spread’s texture and flavor profile. Finally, sprinkle in the 2 tablespoons of finely chopped fresh chives or parsley, along with 1/4 teaspoon of salt and 1/8 teaspoon of black pepper. The fresh herbs are key for brightness and visual appeal.
-
Mix Thoroughly to Achieve Creamy Perfection:
Using a sturdy spatula, a wooden spoon, or even an electric hand mixer on low speed, mix all the ingredients together until they are thoroughly combined and the mixture is smooth and creamy. You want to ensure there are no lumps of cream cheese remaining and that the garlic, herbs, and cheeses are evenly distributed throughout the spread. This step might require a bit of vigorous stirring, especially if your cream cheese wasn’t perfectly soft. Keep scraping down the sides of the bowl to ensure everything gets incorporated.
-
Adjust Seasoning and Consistency:
Once you have a uniform spread, take a small taste. Now is the time to adjust the seasoning to your preference. Do you want a little more salt? A pinch more pepper? Perhaps another tiny bit of minced garlic if you’re a true garlic enthusiast? Adjust as needed. If the spread feels too thick or a bit stiff, you can add 1-2 tablespoons of milk or cream, a little at a time, mixing well after each addition until you reach your desired easy-to-spread consistency. Remember, you want it spreadable but not runny, as it needs to hold its shape within the Cheesy Garlic Chicken Wraps.
-
Chill (Optional but Recommended):
While you can use the spread immediately, allowing it to chill in the refrigerator for 15-30 minutes can actually improve its texture and allow the flavors to meld together even further. Cover the bowl with plastic wrap and pop it in the fridge while you prepare the tortillas and other fillings. This little step can make a big difference in the overall harmony of your Cheesy Garlic Chicken Wraps.
Phase 3: Assembling Your Delicious Cheesy Garlic Chicken Wraps
This is the fun part – bringing all the components together to create your spectacular Cheesy Garlic Chicken Wraps! Assembly is an art, and with a few simple techniques, you’ll be rolling perfect wraps every time.
-
Warm the Tortillas for Ultimate Pliability:
Before you even think about spreading or filling, it’s absolutely essential to warm your flour tortillas. Cold tortillas are stiff and prone to cracking when folded, leading to messy, uncooperative wraps. Warming them makes them soft, pliable, and much easier to work with. Here are a few reliable methods:
- Microwave Method: Stack 3-4 tortillas together and wrap them in a damp paper towel. Microwave for 20-30 seconds, or until warm and flexible. Repeat with remaining tortillas.
- Skillet Method: Heat a dry, non-stick skillet over medium heat. Place one tortilla at a time in the hot skillet for about 15-20 seconds per side, just until it puffs slightly and becomes soft. Stack them on a plate and cover with a clean kitchen towel to keep warm. This method often yields the best flavor and texture.
- Oven Method: Wrap a stack of tortillas in aluminum foil and warm them in a preheated oven at 300°F (150°C) for about 10-15 minutes.
Ensure your tortillas are warm and soft before proceeding, as this is a non-negotiable step for successful Cheesy Garlic Chicken Wraps.
-
Spread the Cheesy Garlic Goodness:
Lay a warm tortilla flat on a clean work surface. Take a generous tablespoon or two of your creamy, dreamy Cheesy Garlic Spread and spread it evenly across the entire surface of the tortilla, leaving a small border (about 1/2 inch) around the edges. This garlic spread is the soul of our Cheesy Garlic Chicken Wraps, so don’t be shy!
-
Layer the Flavorful Chicken:
Next, arrange a portion of your perfectly cooked and rested marinated chicken strips or cubes down the center of the tortilla, over the garlic spread. Be generous but avoid overfilling, which can make the wrap difficult to roll. Aim for a substantial, satisfying amount of chicken that will be present in every bite.
-
Add Extra Cheese and Optional Fillings:
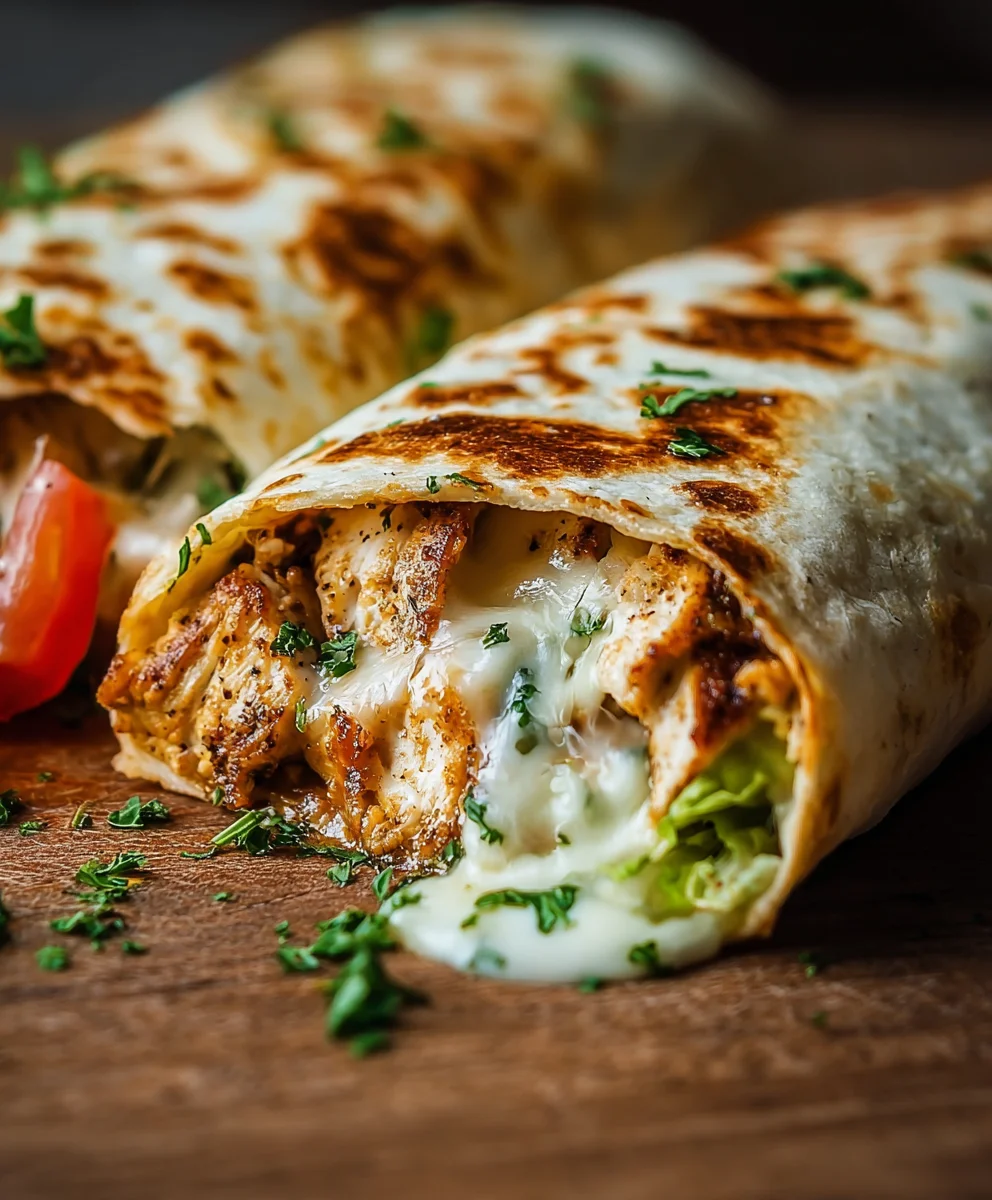
Sprinkle about 1-2 tablespoons of the extra shredded mozzarella cheese over the chicken. This additional layer of cheese will melt beautifully, adding extra gooeyness and a lovely stretch to your Cheesy Garlic Chicken Wraps. Now is the time to add any of your chosen optional fresh fillings: a sprinkle of shredded lettuce for crunch, a few slices of red onion for a zesty bite, some diced tomatoes for freshness, or pickled jalapeños for a tangy kick. These additions aren’t just for texture; they provide a fantastic contrast to the rich chicken and cheese.
-
Master the Art of Folding and Rolling:
This step is crucial for creating a neat, secure Cheesy Garlic Chicken Wrap that won’t fall apart. To fold, first, fold in the two opposite sides of the tortilla (the left and right edges) inward over the filling, by about 1-2 inches. This creates a barrier to keep the fillings inside. Then, starting from the bottom edge (the one closest to you), tightly fold the tortilla up and over the filling. As you roll, tuck the ingredients in firmly and continue rolling upwards, maintaining a tight cylinder. The key is to roll it as tightly as possible without tearing the tortilla. A tightly rolled wrap holds its shape and prevents fillings from escaping.
-
Briefly Toast or Heat for Perfection (Optional but Highly Recommended):
While you can certainly enjoy your Cheesy Garlic Chicken Wraps as is, lightly toasting them takes them to a whole new level of deliciousness. This step warms the fillings, melts the cheeses into a glorious gooey state, and gives the tortilla a lovely golden crispness. You have a couple of options:
- Skillet Method: Heat a dry skillet (or lightly buttered for extra richness) over medium heat. Place the rolled wraps seam-side down in the skillet. Cook for 2-3 minutes per side, or until the tortilla is golden brown and crispy, and the cheese inside is visibly melted and gooey. This is my preferred method for a perfectly toasted exterior.
- Panini Press Method: If you have a panini press, this is an excellent tool! Simply place the wraps in the preheated press and cook for 3-5 minutes, or until golden brown and heated through. The press creates beautiful grill marks and ensures even heating.
- Oven/Toaster Oven Method: For multiple wraps, preheat your oven to 375°F (190°C). Place the rolled wraps on a baking sheet and bake for 8-12 minutes, or until the tortillas are lightly crisped and the cheese is melted.
This final heating step truly elevates the texture and flavor, making your Cheesy Garlic Chicken Wraps an unforgettable experience.
Phase 4: Serving Your Perfect Cheesy Garlic Chicken Wraps
You’ve done all the hard work, and now it’s time for the delicious payoff! Serving your Cheesy Garlic Chicken Wraps is the final step to culinary delight.
-
Slice and Serve Immediately:
Once your Cheesy Garlic Chicken Wraps are toasted (if you chose to do so), remove them from the heat. For a professional presentation and easier eating, slice each wrap in half diagonally using a sharp knife. This reveals all the glorious layers of chicken, cheese, and the creamy garlic spread, making them incredibly appealing. Arrange the halves on a platter or individual plates. These wraps are best enjoyed immediately while they are still warm and the cheese is wonderfully melted and gooey. The warmth really brings out the full aroma and flavor of the garlic.
-
Serving Suggestions and Pairings:
These Cheesy Garlic Chicken Wraps are incredibly satisfying on their own, making for a perfect quick lunch or a hearty snack. However, if you’re serving them as part of a larger meal, they pair beautifully with a variety of simple sides. Consider a crisp green salad with a light vinaigrette to cut through the richness, a bowl of homemade tomato soup, some crunchy potato chips, or even a side of roasted vegetables like asparagus or broccoli. For an extra touch, you could offer additional small bowls of the creamy garlic spread for dipping, or a spicy sriracha mayo if you want to add a little extra kick. A refreshing iced tea or sparkling lemonade would complement the flavors perfectly.
-
Storage and Reheating Tips for Leftovers:
If you happen to have any leftover Cheesy Garlic Chicken Wraps (a rare occurrence, I know!), they can be stored in an airtight container in the refrigerator for up to 2-3 days. For best results when reheating, I recommend using a dry skillet over medium-low heat or a toaster oven. This will help crisp up the tortilla again and prevent it from becoming soggy. Avoid the microwave if possible, as it tends to make the tortilla chewy and can dry out the chicken. However, if the microwave is your only option, reheat briefly on a low power setting until just warmed through. Be aware that the texture might not be as ideal as when fresh, but the flavors will still be delightful.
Enjoy every single mouthwatering bite of your homemade Cheesy Garlic Chicken Wraps!
Conclusion:
Well, we’ve come to the end of our culinary journey for today, and I truly hope you’re feeling as excited as I am about trying out these incredible Cheesy Garlic Chicken Wraps. If there’s one thing I want you to take away from this recipe, it’s that delicious, satisfying meals don’t have to be complicated or time-consuming. These wraps are a testament to that principle, combining incredible flavors with straightforward preparation, making them an absolute must-try for any home cook, regardless of your experience level. Imagine succulent, perfectly seasoned chicken, bathed in a rich, garlicky sauce, then embraced by melted, gooey cheese, all tucked into a warm, soft tortilla. It’s a symphony of textures and tastes that hits all the right notes every single time, promising a comforting and incredibly satisfying experience that will have everyone at your table asking for more.
What makes these Cheesy Garlic Chicken Wraps truly stand out in my kitchen is their unparalleled ability to deliver maximum flavor with minimal fuss. They’re savory, they’re cheesy, they’re packed with that irresistible garlic aroma that wafts through your home, promising a comforting and incredibly satisfying meal. I’ve found them to be a total game-changer on busy weeknights when I’m short on time but refuse to compromise on taste. They’re also fantastic for lunch, dinner, or even as a more substantial snack when you’re craving something hearty and flavorful. The ease with which they come together is almost deceptive, considering the gourmet-level taste they deliver. Trust me, once you make these, they’ll quickly become a staple in your meal rotation, just as they have in mine, proving that convenience and exceptional flavor can absolutely go hand-in-hand.
Now, let’s talk about making these already fantastic wraps even more versatile for your table. For serving, while they are absolutely perfect on their own, I love pairing them with a crisp, refreshing side salad. Think mixed greens, cherry tomatoes, and a light vinaigrette to cut through the richness and add a fresh element. Another wonderful option is a bowl of warm, creamy tomato soup, which offers a delightful contrast in texture and temperature, creating a comforting duo. If you’re feeling indulgent, a side of golden, crispy sweet potato fries or a generous portion of roasted seasonal vegetables like asparagus or broccoli florets can elevate the entire meal into a more wholesome and satisfying plate. Don’t forget the dipping sauces! A dollop of cool ranch dressing, a drizzle of spicy sriracha mayo, or even an extra side of that luscious garlic aioli we used in the recipe can take each bite to a whole new level of deliciousness. They also make an excellent platter for casual gatherings – just slice them into smaller rounds for easy finger food that disappears quickly!
Endless Possibilities for Customization!
And the beauty of these wraps doesn’t stop there! They are incredibly adaptable, allowing you to unleash your culinary creativity and tailor them to your personal preferences or what you have on hand. Want to try a different protein? Go for it! Swap out the chicken for thinly sliced beef, tender pork loin, succulent shrimp, or even firm tofu or mushrooms for a fantastic vegetarian option that is equally flavorful. Feel free to experiment with the cheese as well. While mozzarella and provolone work wonders, Monterey Jack, sharp cheddar, a smoky gouda, or a pepper jack for a little kick would all be absolutely divine, each adding its own unique character. Boost your veggie intake by adding sautéed bell peppers, caramelized onions, fresh spinach, corn, or even black beans into the mix before wrapping, enhancing both flavor and nutritional value.
If you like a little heat, a few slices of fresh jalapeño or a sprinkle of red pepper flakes can provide a fantastic zing that awakens the palate. You can even change up the vessel! While flour tortillas are classic, try whole wheat tortillas for a healthier twist, or even large lettuce cups for a low-carb alternative that still delivers all the robust flavors. For a fun twist, bake the assembled wraps in the oven for 10-15 minutes until golden and crispy, giving them a delightful crunch that’s utterly satisfying. Another great idea is to serve the cheesy garlic chicken mixture over a bed of fluffy rice or quinoa, transforming it into a hearty bowl meal that’s perfect for meal prepping. The possibilities are truly endless, and that’s what makes this recipe so incredibly special to me – it’s a foundation for so many wonderful variations and culinary adventures.
Your Turn to Create and Share!
So, now it’s your turn! I sincerely encourage you to give these Cheesy Garlic Chicken Wraps a try in your own kitchen. Don’t just take my word for how amazing they are; experience the joy of making them and the delight of tasting them for yourself. I promise, your taste buds will thank you, and your family will be asking for them again and again. When you do, I would absolutely love to hear about your experience. Did you stick to the original recipe, or did you put your own unique spin on it? What were your favorite serving suggestions or variations? Please feel free to share your thoughts, your successes, and even your creative modifications in the comments below. Sharing our culinary adventures is one of the best parts of cooking, and I can’t wait to see what delicious creations you come up with. Happy cooking, everyone!
Cheesy Garlic Chicken Wraps
A delightful culinary experience featuring succulent, tender cooked chicken, perfectly complemented by a rich, aromatic garlic aioli and a generous layer of creamy, melted cheddar cheese, all wrapped in a warm, soft tortilla. This dish brilliant melds timeless elements into a convenient, incredibly satisfying format.
Ingredients
-
2 cups cooked chicken (shredded)
-
1/2 cup garlic aioli
-
1 cup cheddar cheese (shredded)
-
4 large tortillas
-
Salt to taste
-
Pepper to taste
Instructions
-
Step 1
Warm tortillas in a microwave, skillet, or oven until soft and pliable. -
Step 2
Lay a warm tortilla flat. Spread garlic aioli evenly, leaving a small border. Layer with shredded cooked chicken, then shredded cheddar cheese. Season with salt and pepper. -
Step 3
Fold in the two opposite sides of the tortilla over the filling. Starting from the bottom, tightly fold the tortilla up and over, rolling into a secure cylinder. -
Step 4
For best results, toast the rolled wraps seam-side down in a dry skillet or panini press over medium heat for 2-3 minutes per side, until golden and the cheese is melted. -
Step 5
Slice each wrap in half diagonally and serve immediately while warm.
Important Information
Nutrition Facts (Per Serving)
It is important to consider this information as approximate and not to use it as definitive health advice.
Allergy Information
Please check ingredients for potential allergens and consult a health professional if in doubt.
Leave a Comment