

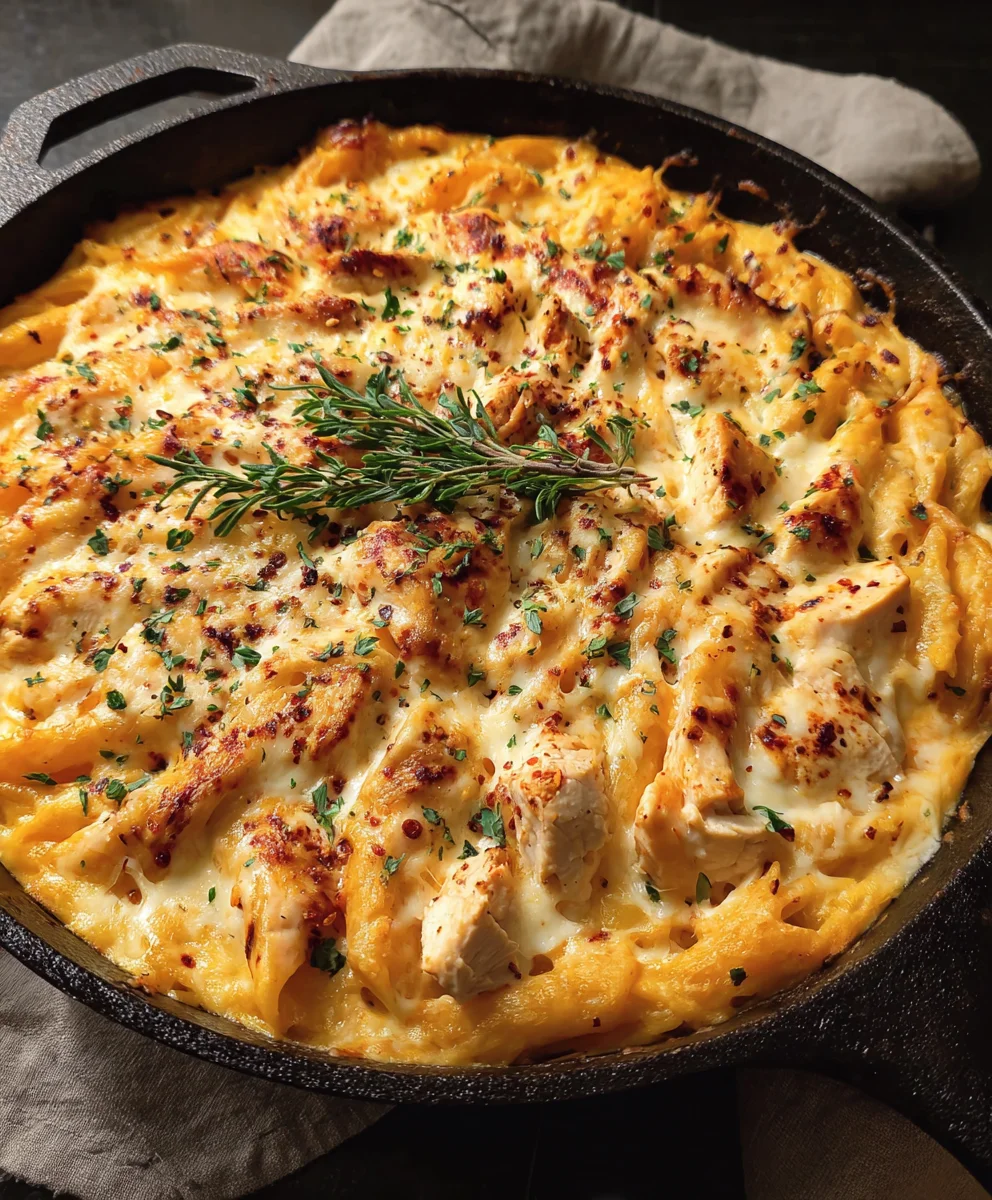
Cheesy Skillet Creamy Dream is more than just a recipe; it’s an invitation to pure, unadulterated comfort, a culinary embrace that promises to soothe your soul and tantalize your taste buds with every delightful forkful.
Have you ever craved a meal that feels both deeply luxurious and wonderfully unpretentious? A dish that brings everyone to the table with anticipation, a vibrant centerpiece of flavor and texture? That’s precisely the magic we’re exploring today. While its name might suggest a modern invention, the spirit of this dish harks back to generations of home cooks who perfected the art of creating profoundly satisfying skillet meals with simple, wholesome ingredients. It’s a testament to the cherished tradition of one-pan wonders, born from a desire for hearty sustenance and shared joy.
Why Everyone Adore This Dreamy Dish
People absolutely adore this Cheesy Skillet Creamy Dream for a multitude of reasons. Firstly, its taste profile is simply unforgettable: a harmonious blend of rich, gooey, melted cheeses enveloping tender, perfectly cooked components, all bound together by a lusciously creamy sauce. The texture is equally compelling – soft, yielding ingredients complemented by that irresistible, slightly browned cheese crust you can only achieve in a skillet. Beyond its phenomenal flavor and mouthfeel, its incredible convenience makes it a weeknight hero. Imagine a delicious, chef-quality meal with minimal cleanup, allowing you more time to savor the moment with loved ones. It’s truly a dish that delivers on every front, offering warmth, satisfaction, and ease in equal measure.

Ingredients:
- For the Chicken:
- 2 large (about 1.5 – 2 lbs total) boneless, skinless chicken breasts or 4 boneless, skinless chicken thighs. I often prefer thighs for their juiciness, but breasts work beautifully too!
- 1 tablespoon olive oil, for searing.
- 1 teaspoon smoked paprika. This adds a lovely depth that complements the cheesy sauce.
- ½ teaspoon garlic powder.
- ½ teaspoon onion powder.
- ¼ teaspoon black pepper, freshly ground is always best!
- ½ teaspoon salt, or to taste.
- For the Pasta:
- 12 ounces (about 340g) medium pasta, such as penne, rotini, or orecchiette. Something with nooks and crannies to really hold onto that glorious sauce is ideal.
- 1 tablespoon olive oil, for the pasta water (optional, but it helps prevent sticking).
- 1 teaspoon salt, for the pasta water.
- For the Bacon:
- 6-8 slices thick-cut bacon. This crispy, salty addition is a non-negotiable for me in this “Cheesy Skillet Creamy Dream”!
- For the Creamy Dream Sauce:
- 2 tablespoons unsalted butter.
- 2 cloves garlic, minced. Don’t be shy with the garlic!
- ½ medium yellow onion, finely diced.
- ¼ cup all-purpose flour. This is our trusty thickening agent for the rich sauce.
- 2 cups whole milk, warmed. Warming the milk slightly helps prevent lumps when adding it to the roux.
- 1 cup chicken broth, low sodium.
- 8 ounces (about 2 cups) sharp cheddar cheese, freshly shredded. Please, please, please shred your own cheese! Pre-shredded cheese contains anti-caking agents that can make your sauce gritty.
- 4 ounces (about 1 cup) Monterey Jack cheese, freshly shredded. This adds another layer of melty goodness.
- 2 ounces (about ½ cup) cream cheese, softened. This is a secret ingredient for extra creaminess and a subtle tang that makes the sauce truly dreamy.
- 1 teaspoon Dijon mustard. Just a touch to enhance the cheese flavor without making the sauce taste like mustard.
- ½ teaspoon salt, or to taste.
- ¼ teaspoon black pepper, or to taste.
- Pinch of nutmeg (optional, but it really elevates a cheese sauce).
- For the Topping & Garnish:
- ½ cup additional sharp cheddar cheese, freshly shredded, for topping.
- ¼ cup fresh parsley, chopped, for garnish.
- Optional: Red pepper flakes for a little kick.
Preparing the Chicken:
- First things first, let’s get our chicken ready for this delightful “Cheesy Skillet Creamy Dream.” If you’re using chicken breasts, you might want to slice them horizontally to create thinner cutlets, which will cook more evenly and quickly. Pat your chicken dry with paper towels; this is a crucial step for achieving a beautiful sear. Dry chicken browns, wet chicken steams!
- In a small bowl, combine the smoked paprika, garlic powder, onion powder, black pepper, and salt. Sprinkle this seasoning mixture generously over both sides of the chicken, ensuring it’s thoroughly coated. Really rub it in there – we want every bite of chicken to be flavorful.
- Heat 1 tablespoon of olive oil in a large oven-safe skillet (preferably cast iron, but any heavy-bottomed skillet will do) over medium-high heat. You want the oil to shimmer, indicating it’s hot enough to create that gorgeous crust. Once hot, carefully place the seasoned chicken breasts or thighs into the skillet.
- Sear the chicken for about 4-6 minutes per side, until it develops a deep golden-brown crust and is cooked through. The internal temperature should reach 165°F (74°C) when measured with a meat thermometer. If your chicken is thicker, you might need to reduce the heat slightly after the initial sear and continue cooking for a few more minutes, or even pop it into a preheated oven (which we will use later for the final dish) to finish cooking without burning the exterior. Don’t overcrowd the pan; cook in batches if necessary.
- Once cooked, transfer the chicken to a clean cutting board and let it rest for at least 5-10 minutes. This resting period is vital; it allows the juices to redistribute throughout the meat, resulting in incredibly tender and moist chicken. While it’s resting, we can move on to other components. After resting, dice the chicken into bite-sized pieces. Set aside.
Crisping the Bacon:
- While the chicken is resting, or even before you start the chicken, crisp up your bacon. In the same skillet you used for the chicken (if it’s clean enough, or a separate skillet to save on cleanup), lay out the bacon slices in a single layer over medium heat. Don’t rush this process; low and slow is key for perfectly crispy bacon.
- Cook the bacon, turning occasionally, until it’s beautifully crispy and golden-brown. This usually takes about 8-12 minutes depending on the thickness of your bacon. You’ll notice the fat rendering out, which we’ll partially use for our sauce base – flavor gold!
- Once crispy, remove the bacon from the skillet and place it on a plate lined with paper towels to drain any excess grease. Once cooled slightly, crumble the bacon into small pieces. Set aside, trying not to eat it all before it makes it into our “Cheesy Skillet Creamy Dream”!
- Carefully pour out most of the bacon grease from the skillet, leaving about 1 tablespoon behind. This reserved grease will add an incredible smoky depth to our creamy sauce. If you don’t have enough, supplement with a tiny bit of olive oil or butter.
Cooking the Pasta:
- Now, let’s get our pasta bubbling. Bring a large pot of generously salted water to a rolling boil. I always say, your pasta water should taste like the sea, so don’t be shy with that salt! Add 1 tablespoon of olive oil to the water, if using; this is optional but I find it helps prevent the pasta from sticking together.
- Add your chosen pasta (penne, rotini, or orecchiette work wonderfully here) to the boiling water. Stir occasionally to prevent sticking. Cook the pasta according to the package directions, but aim for al dente – meaning it should be firm to the bite, not mushy. We’ll be finishing it in the sauce, so it’s okay if it has a little chew left.
- Before draining the pasta, reserve about 1 cup of the starchy pasta water. This liquid is liquid gold for our sauce; it helps to emulsify and thicken it beautifully while adding extra flavor. Trust me on this one!
- Drain the cooked pasta thoroughly in a colander. Do not rinse the pasta, as this washes away the starches that help the sauce cling to it. Set the drained pasta aside. Now we’re ready to bring all these delicious components together for our “Cheesy Skillet Creamy Dream.”
Building the Creamy Dream Sauce:
- Using the same oven-safe skillet where you cooked the bacon (with that delicious tablespoon of reserved bacon grease, or add butter/oil to reach that amount), melt 2 tablespoons of unsalted butter over medium heat. If you’ve used a separate pan for bacon, now is the time to transfer to your oven-safe skillet or start fresh in it. This skillet is where our glorious Cheesy Skillet Creamy Dream will come to life!
- Add the finely diced onion to the skillet and sauté for 3-5 minutes until it softens and becomes translucent. Stir occasionally to ensure even cooking. Then, add the minced garlic and cook for another minute until fragrant. Be careful not to burn the garlic – burnt garlic can taste bitter.
- Sprinkle the ¼ cup of all-purpose flour over the softened onions and garlic. Stir continuously for 1-2 minutes, creating a roux. This step is crucial for thickening our sauce. The flour should cook out and turn a light golden color, smelling a bit like popcorn. This ensures there’s no raw flour taste in your final sauce.
- Gradually whisk in the warm whole milk, about half a cup at a time, ensuring no lumps form. Keep whisking vigorously until each addition is fully incorporated and the sauce begins to thicken. It’s important to warm the milk slightly beforehand as it helps prevent shocking the roux and creating lumps. After the milk, slowly whisk in the chicken broth. Continue to whisk and cook over medium heat until the sauce comes to a gentle simmer and has thickened to your desired consistency – it should coat the back of a spoon beautifully.
- Reduce the heat to low. Now for the star of the show: the cheese! Add the freshly shredded sharp cheddar, Monterey Jack, and the softened cream cheese to the sauce. Stir constantly until all the cheeses are completely melted and the sauce is smooth, creamy, and utterly luxurious. The cream cheese is key to that extra dreamy texture!
- Stir in the Dijon mustard, salt, black pepper, and the pinch of nutmeg (if using). Taste the sauce and adjust seasonings as needed. This is your moment to make it perfect for your palate. If the sauce is too thick, you can thin it out with a little bit of that reserved pasta water or a splash of milk. If it’s too thin, let it simmer gently for a few more minutes, stirring, until it reaches your preferred consistency. This sauce is the heart of our “Cheesy Skillet Creamy Dream.”
Combining and Finishing the Cheesy Skillet Creamy Dream:
- Preheat your oven broiler to high (or conventional oven to 400°F / 200°C if you prefer a gentler bake for the topping). We’re getting close to enjoying this amazing “Cheesy Skillet Creamy Dream”!
- Add the cooked and diced chicken pieces and the crumbled bacon (reserving a tiny bit for garnish if you wish) directly into the skillet with the creamy cheese sauce. Stir gently to combine, ensuring every piece of chicken and bacon is lovingly coated in that rich, dreamy sauce.
- Next, add the drained, al dente pasta to the skillet. Gently fold everything together until the pasta is completely coated in the decadent cheese sauce. If the mixture seems a little dry, or you prefer a looser sauce, now is the time to add a tablespoon or two of that reserved pasta water, stirring it in until you reach your ideal consistency. This extra starchiness from the pasta water truly makes a difference in the sauce’s texture and ability to cling to the pasta.
- Ensure the pasta and chicken mixture is evenly distributed in the skillet. Sprinkle the remaining ½ cup of shredded sharp cheddar cheese evenly over the top of the dish. This extra layer of cheese will melt and bubble into a glorious golden crust under the broiler.
- Carefully transfer the skillet to the preheated oven. If using the broiler, watch it very closely! Broil for 2-4 minutes, or until the cheese topping is melted, bubbly, and beautifully golden brown with some crispy edges. If using a conventional oven, bake for 10-15 minutes, or until heated through and the cheese is melted and lightly golden. Every oven is different, so keep an eye on it to prevent burning.
- Once the “Cheesy Skillet Creamy Dream” emerges from the oven, allow it to rest for a few minutes before serving. This brief rest helps the sauce settle and prevents you from burning your mouth on the molten cheese!
Serving Suggestions & Tips for Your Cheesy Skillet Creamy Dream:
- To serve, ladle generous portions of this incredible “Cheesy Skillet Creamy Dream” directly from the skillet onto plates. I absolutely love serving it family-style, allowing everyone to dig in. Garnish each serving with a sprinkle of fresh chopped parsley for a pop of color and freshness. If you like a little heat, a pinch of red pepper flakes would be a fantastic addition to really round out the flavors.
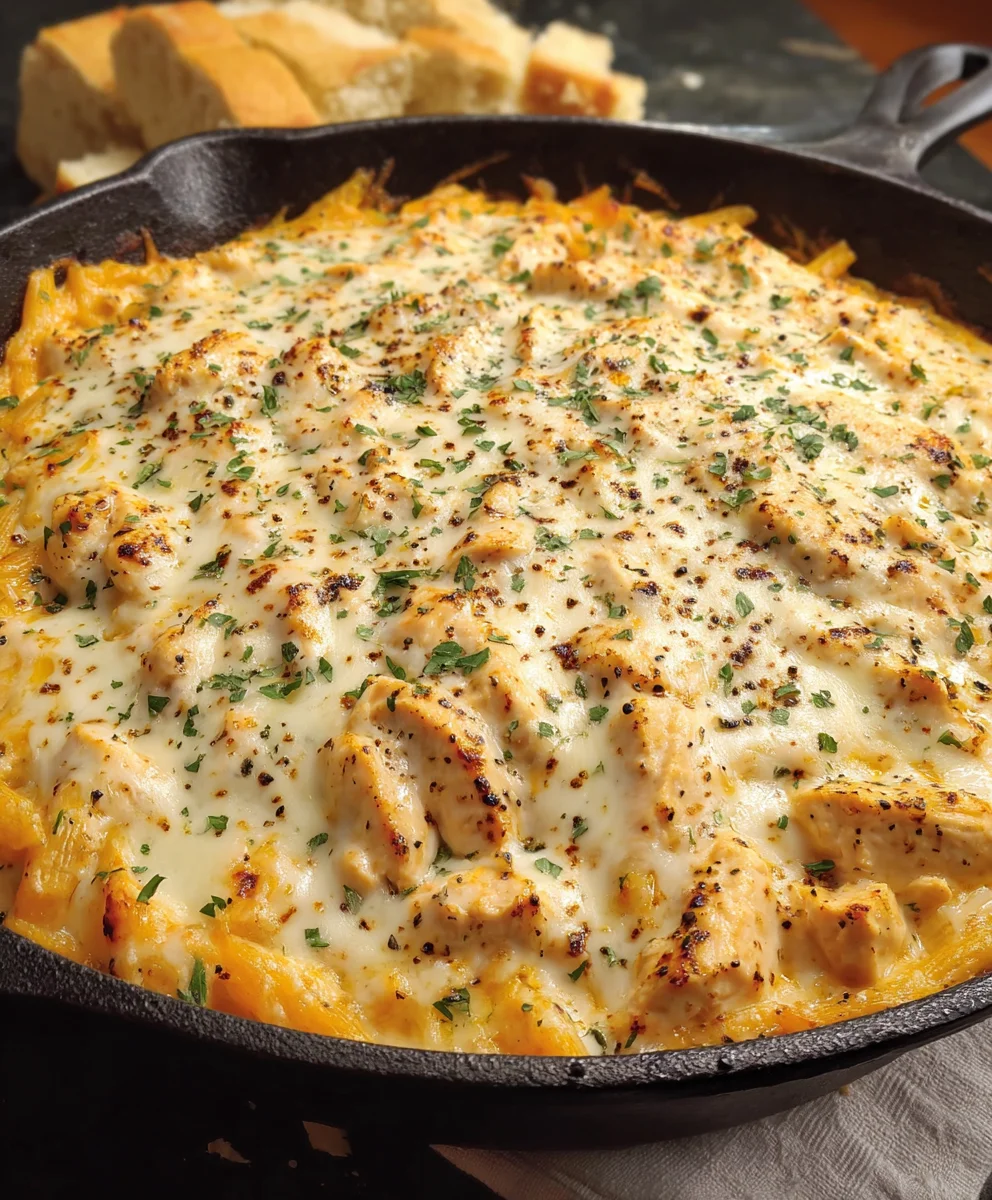
- Pairing Perfection: This rich and satisfying dish pairs wonderfully with a simple green salad dressed with a light vinaigrette. The brightness of the salad cuts through the richness of the cheese and pasta, creating a perfectly balanced meal. A side of crusty garlic bread is also never a bad idea for soaking up any extra sauce!
- Make-Ahead Tips: You can prepare the chicken and bacon ahead of time and store them in the refrigerator for up to 3 days. The cheese sauce can also be made ahead; simply store it in an airtight container in the fridge. When reheating the sauce, you might need to add a splash of milk or broth to bring it back to its creamy consistency. This dish is truly a “Cheesy Skillet Creamy Dream” that can be adapted to make your life easier.
- Storage & Reheating: Leftovers of this “Cheesy Skillet Creamy Dream” store beautifully in an airtight container in the refrigerator for up to 3-4 days. To reheat, you can use the microwave, or for best results, warm it gently in a skillet on the stovetop over medium-low heat, adding a splash of milk or chicken broth to help restore its creamy texture. You can also reheat individual portions in the oven, covered with foil, at 300°F (150°C) until heated through.
- Flavor Variations: Feel free to experiment with different cheeses – a touch of smoked gouda or Gruyere could add another layer of complexity. You could also stir in some sautéed mushrooms, spinach, or roasted red peppers along with the chicken and pasta for added vegetables and texture. For a little extra protein boost, feel free to add some cooked shrimp alongside the chicken in the last few minutes of cooking. This recipe is incredibly versatile, so don’t be afraid to make it your own personal “Cheesy Skillet Creamy Dream.” Enjoy every decadent bite!
- Achieving Ultimate Creaminess: A trick I often employ to ensure the sauce remains extra creamy, even when reheating, is to use good quality whole milk and ensure your cream cheese is at room temperature before adding. This helps it melt seamlessly into the sauce without leaving any lumps. Also, remember that reserved pasta water is your best friend for adjusting consistency and adding that velvety finish.
- The Importance of Freshly Shredded Cheese: I cannot stress this enough – freshly shredding your cheese makes an enormous difference. Pre-shredded varieties often contain cellulose or other anti-caking agents that can give your beautiful, creamy sauce a slightly grainy or powdery texture. For the ultimate “Cheesy Skillet Creamy Dream” experience, take the extra minute to shred your own. It melts smoother and integrates into the sauce much better, creating that truly irresistible consistency we’re aiming for.
- Skillet Choice Matters: While any large, heavy-bottomed skillet can work, an oven-safe cast iron skillet is truly the MVP for this recipe. It distributes heat incredibly evenly, ensures a fantastic sear on the chicken and bacon, and transitions seamlessly from stovetop to oven for that bubbly, golden-brown cheese topping. If you don’t have one, a sturdy stainless steel skillet will also do the trick, just ensure it’s oven-safe before you put it under the broiler!
Conclusion:
Well, my friends, we’ve reached the grand finale, and I truly hope you’re as excited as I am about what we’ve created here. This isn’t just another dish; it’s an experience. If you’ve been searching for that perfect balance of effortless preparation and utterly irresistible flavor, then this recipe, our very own Cheesy Skillet Creamy Dream, is unequivocally your answer. I promise you, it delivers on every single promise its name implies. It’s the kind of meal that wraps you in a warm hug after a long day, a glorious symphony of rich, gooey cheese and unbelievably smooth, decadent creaminess, all brought together in one convenient skillet. Imagine the sighs of contentment around your dinner table when this masterpiece makes its appearance! It’s quick enough for a weeknight, yet impressive enough to steal the show at any casual gathering. The simplicity of its method belies the profound depth of flavor you’ll achieve, making it a true kitchen hero in my book.
Now that you’re practically salivating, let’s talk about taking this culinary journey even further. One of the many brilliant aspects of this Cheesy Skillet Creamy Dream is its incredible versatility. While it’s absolutely divine on its own, a simple side can elevate it to new heights. I often find myself pairing it with a crisp, vibrant green salad dressed with a light vinaigrette. The refreshing crunch and tang of the salad provide a beautiful contrast to the richness of the skillet, cleansing the palate and encouraging you to dive back in for more. Another fantastic accompaniment is a warm, crusty baguette or some garlic bread, perfect for mopping up every last drop of that glorious, creamy sauce – trust me, you won’t want to waste a single bit!
Elevate Your Experience with These Serving Ideas:
- For the Veggie Lovers: Feel free to gently fold in some steamed broccoli florets, sautéed spinach, or even roasted cherry tomatoes during the last few minutes of cooking. Not only does this add a nutritional boost, but it also introduces lovely textures and vibrant colors.
- Protein Power-Up: Transform this side dish into a hearty main by incorporating your favorite protein. Cooked, shredded chicken, browned ground beef or turkey, or even pan-fried shrimp would all be magnificent additions. Just stir them in after the creamy base is established, ensuring they are heated through.
- Spice It Up: If you enjoy a bit of a kick, consider adding a pinch of red pepper flakes with your seasonings, or even a dash of your favorite hot sauce at the table. A finely diced jalapeño could also be sautéed with your aromatics for a bolder flavor profile.
- Herbaceous Twist: Fresh herbs are always a winner. A sprinkle of fresh parsley, chives, or even a hint of dill can brighten the flavors considerably right before serving.
- Different Cheeses, Different Dreams: While the core cheese blend is perfect, don’t be afraid to experiment! A smoky gouda, a sharp cheddar, or even a creamy fontina could offer unique twists to the ‘cheesy’ element. Just ensure they melt well!
- A Touch of Earthiness: Sautéed mushrooms would be an absolutely wonderful addition, offering an umami depth that complements the creaminess beautifully.
- Make it a Meal Prep Star: This dish reheats beautifully! Divide it into individual portions for delicious and comforting lunches throughout the week. Just add a little extra milk or cream when reheating if it’s too thick.
Don’t be afraid to make this recipe your own, adapting it to suit your cravings and the ingredients you have on hand. It’s truly a forgiving and adaptable creation, designed to inspire culinary creativity.
Your Culinary Adventure Awaits!
So, what are you waiting for? I wholeheartedly encourage you to roll up your sleeves and dive into creating this spectacular Cheesy Skillet Creamy Dream for yourself. Trust me, the aroma alone will be enough to win over anyone in your household, and the taste? Pure bliss. Once you’ve experienced the magic, I would absolutely love to hear about it! Please, share your culinary triumphs, your personal twists, and your serving suggestions with me. Did you add something unexpected that worked wonderfully? Did your family rave about it? Your feedback and shared experiences are what truly make this cooking community so vibrant and inspiring. Go forth, cook, and savor every single creamy, cheesy bite!
Incredible Cheesy Skillet Creamy Beef Dream Dinner
One-pan creamy pasta loaded with buffalo chicken, cheddar, mozzarella, and cream cheese. Ready in 30 minutes with easy cleanup.
Ingredients
-
2 large (1.5 – 2 lbs total) boneless, skinless chicken breasts or 4 boneless, skinless chicken thighs
-
1 tablespoon olive oil (for searing chicken)
-
1 teaspoon smoked paprika
-
½ teaspoon garlic powder
-
½ teaspoon onion powder
-
¼ teaspoon black pepper
-
½ teaspoon salt
-
12 ounces (340g) medium pasta (penne, rotini, or orecchiette)
-
1 tablespoon olive oil (for pasta water, optional)
-
1 teaspoon salt (for pasta water)
-
6-8 slices thick-cut beef bacon
-
2 tablespoons unsalted butter
-
2 cloves garlic, minced
-
½ medium yellow onion, finely diced
-
¼ cup all-purpose flour
-
2 cups whole milk, warmed
-
1 cup low sodium chicken broth
-
8 ounces (2 cups) sharp cheddar cheese, freshly shredded
-
4 ounces (1 cup) Monterey Jack cheese, freshly shredded
-
2 ounces (½ cup) cream cheese, softened
-
1 teaspoon Dijon mustard
-
½ teaspoon salt (for sauce)
-
¼ teaspoon black pepper (for sauce)
-
Pinch of nutmeg (optional)
-
½ cup additional sharp cheddar cheese, freshly shredded (for topping)
-
¼ cup fresh parsley, chopped (for garnish)
-
Optional: Red pepper flakes
Instructions
-
Step 1
Pat chicken dry and slice breasts horizontally if using. Combine smoked paprika, garlic powder, onion powder, black pepper, and salt; season chicken thoroughly. Heat 1 tbsp olive oil in a large oven-safe skillet over medium-high heat. Sear chicken 4-6 minutes per side until golden brown and cooked through (165°F/74°C). Transfer chicken to a cutting board, let rest 5-10 minutes, then dice into bite-sized pieces. Set aside. -
Step 2
In the same skillet or a separate one, cook beef bacon slices over medium heat until crispy (8-12 minutes). Remove bacon, drain on paper towels, then crumble into small pieces. Reserve about 1 tablespoon of beef bacon grease in the skillet, discarding the rest. -
Step 3
Bring a large pot of generously salted water to a rolling boil (add 1 tbsp olive oil if desired). Add pasta and cook according to package directions until al dente. Reserve 1 cup of starchy pasta water before draining thoroughly. Do not rinse pasta. Set aside. -
Step 4
Using the oven-safe skillet with reserved beef bacon grease (supplement with butter if needed), melt 2 tbsp unsalted butter over medium heat. Sauté finely diced onion for 3-5 minutes until translucent. Add minced garlic and cook for 1 minute until fragrant. Sprinkle in ¼ cup all-purpose flour; stir for 1-2 minutes to create a roux. -
Step 5
Gradually whisk in the warm whole milk, then the chicken broth, ensuring no lumps. Continue whisking and cook over medium heat until the sauce gently simmers and thickens to coat the back of a spoon. -
Step 6
Reduce heat to low. Add shredded sharp cheddar, Monterey Jack, and softened cream cheese to the sauce. Stir constantly until all cheeses are completely melted and the sauce is smooth and creamy. Stir in Dijon mustard, ½ tsp salt, ¼ tsp black pepper, and optional pinch of nutmeg. Taste and adjust seasonings. Thin with reserved pasta water or milk if too thick. -
Step 7
Preheat oven broiler to high (or conventional oven to 400°F/200°C). Add diced chicken and crumbled beef bacon (reserving some for garnish if desired) to the cheese sauce in the skillet. Stir gently. Add drained pasta, folding everything together until fully coated. If needed, add 1-2 tbsp reserved pasta water for desired consistency. Evenly distribute mixture in the skillet. -
Step 8
Sprinkle the remaining ½ cup shredded sharp cheddar cheese over the dish. Carefully transfer skillet to the oven. Broil for 2-4 minutes, or bake for 10-15 minutes, until cheese is melted, bubbly, and golden brown. Allow to rest for a few minutes before serving. Garnish with fresh chopped parsley and optional red pepper flakes.
Important Information
Nutrition Facts (Per Serving)
It is important to consider this information as approximate and not to use it as definitive health advice.
Allergy Information
Please check ingredients for potential allergens and consult a health professional if in doubt.


Leave a Comment