

Homemade Apple Pie Filling is a delightful way to capture the essence of autumn in a jar. There’s something truly magical about the aroma of cinnamon and baked apples wafting through the kitchen, evoking memories of family gatherings and cozy evenings. This recipe not only celebrates the classic flavors of a beloved dessert but also pays homage to the rich history of apple pie, which dates back to the 14th century in England. People adore this dish for its perfect balance of sweet and tart flavors, along with its comforting, warm texture that makes every bite feel like a hug. Plus, making your own filling is incredibly convenient, allowing you to whip up a delicious pie whenever the craving strikes. Join me as we dive into the world of Homemade Apple Pie Filling, and discover how easy it is to create this timeless treat right in your own kitchen!

Ingredients:
- 6 to 8 medium-sized apples (I prefer a mix of Granny Smith and Honeycrisp for the perfect balance of tart and sweet)
- 1 cup granulated sugar (adjust based on the sweetness of your apples)
- 2 tablespoons lemon juice (freshly squeezed for the best flavor)
- 1 teaspoon ground cinnamon (or more if you love that warm spice)
- 1/4 teaspoon ground nutmeg (optional, but it adds a lovely depth)
- 1/4 teaspoon salt (to enhance the flavors)
- 2 tablespoons cornstarch (for thickening the filling)
- 1 tablespoon unsalted butter (to add richness)
- 1 teaspoon vanilla extract (for a hint of sweetness)
Preparing the Apples
- Start by washing the apples thoroughly under cold water to remove any dirt or wax.
- Peel the apples using a vegetable peeler. I find it easier to hold the apple in one hand and peel with the other.
- Once peeled, core the apples using an apple corer or a knife. Cut them into thin slices, about 1/4 inch thick. This helps them cook evenly.
- As you slice the apples, place them in a large mixing bowl. To prevent browning, drizzle the lemon juice over the sliced apples and toss them gently to coat.
Mixing the Filling
- In a separate bowl, combine the granulated sugar, ground cinnamon, ground nutmeg (if using), salt, and cornstarch. Mix these dry ingredients well to ensure even distribution.
- Sprinkle the sugar mixture over the sliced apples. Gently toss the apples with the sugar mixture until they are evenly coated. I like to use my hands for this, but a spatula works just as well.
- Let the apple mixture sit for about 10-15 minutes. This allows the apples to release some of their juices, which will help create a delicious filling.
Cooking the Filling
- In a large skillet or saucepan, melt the unsalted butter over medium heat. I love the smell of butter melting; its the start of something delicious!
- Once the butter is melted, add the apple mixture to the skillet. Stir gently to combine the apples with the melted butter.
- Cook the apples for about 5-7 minutes, stirring occasionally. You want them to soften slightly but not become mushy. The goal is to have them tender yet still holding their shape.
- As the apples cook, youll notice the juices starting to thicken. This is where the cornstarch works its magic! If you find the mixture too thick, you can add a splash of water to loosen it up.
- Once the apples are tender and the juices have thickened, remove the skillet from the heat. Stir in the vanilla extract for that extra layer of flavor.
- Let the filling cool for about 10-15 minutes before using it in your pie or storing it. This cooling period helps the filling set up a bit more.
Assembling the Pie (Optional)
- If youre using this filling for a pie, preheat your oven to 425°F (220°C).
- Roll out your pie crust on a floured surface. I usually make my own crust, but store-bought works just fine if youre short on time.
- Place the bottom crust in a 9-inch pie pan, making sure it fits snugly. Trim any excess dough hanging over the edges.
- Pour the cooled apple filling into the pie crust, spreading it evenly. I like to mound it slightly in the center for a nice presentation.
- Dot the filling with small pieces of butter for added richness.
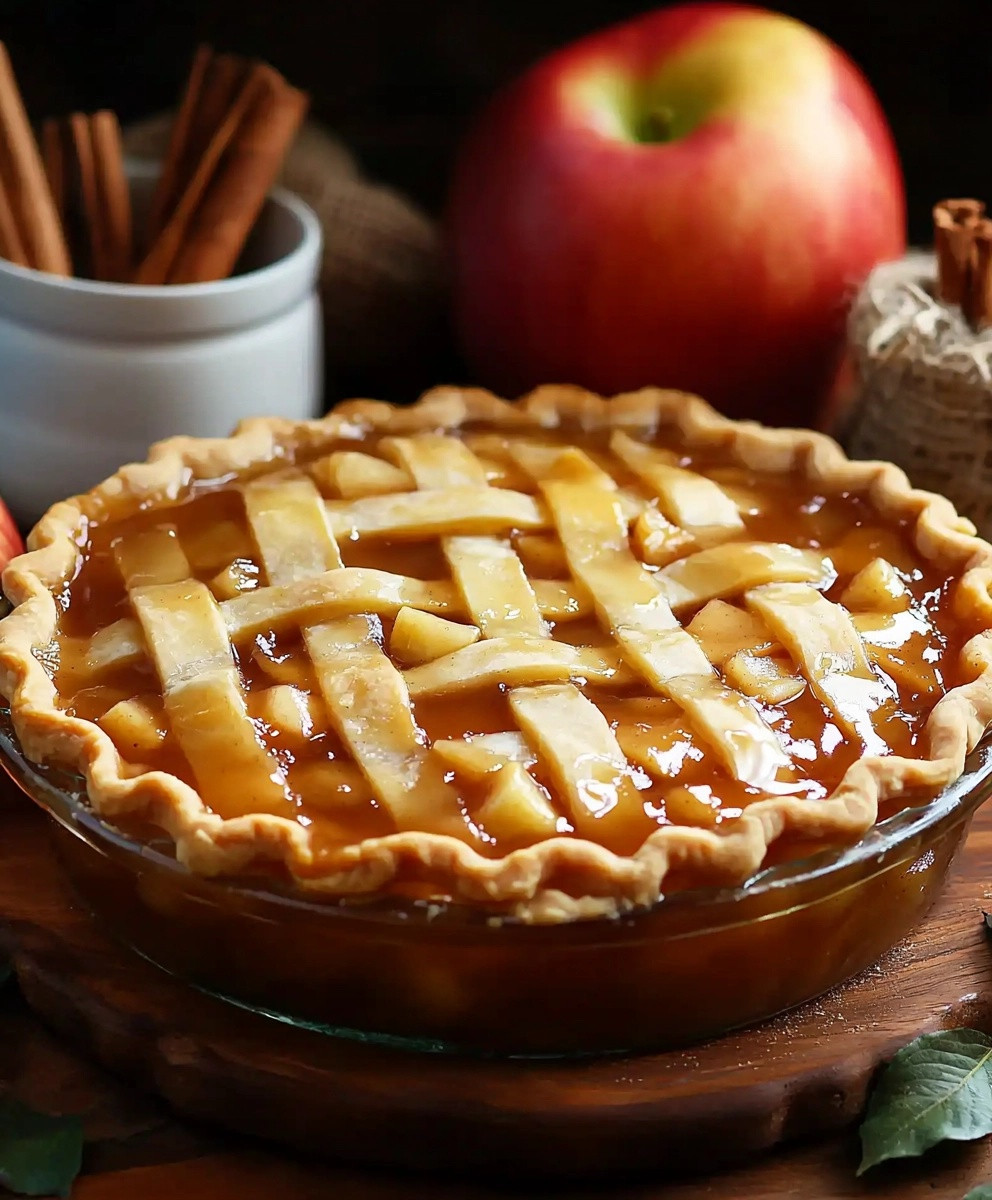
- Roll out the top crust and place it over the filling. You can either cut slits for a lattice top or simply cover it with a whole crust. If using a whole crust, make sure to cut a few slits for steam to escape.
- Trim and crimp the edges of the pie crust to seal it. I usually use
Conclusion:
In conclusion, this homemade apple pie filling is truly a must-try for anyone who loves the comforting flavors of fall. The combination of sweet, tart apples with warm spices creates a deliciously rich filling that elevates any dessert. Whether youre using it to make a classic apple pie, a crisp, or even as a topping for pancakes and waffles, this recipe is versatile enough to suit any occasion. Feel free to experiment with different apple varieties or add in some dried cranberries or nuts for an extra twist. You can also adjust the sweetness to your liking, making it perfect for both traditionalists and those who prefer a little less sugar. I encourage you to give this homemade apple pie filling a try and share your experience with friends and family. Id love to hear how it turned out for you and any creative variations you came up with! Trust me, once you taste this delightful filling, youll want to keep it on hand for all your baking adventures. Happy cooking! Print
Homemade Apple Pie Filling: The Ultimate Guide to Perfecting Your Recipe
- Total Time: 35 minutes
- Yield: 1 pie (serves 8)
Description
This delicious apple pie filling combines tart Granny Smith apples with sweet Honeycrisp, enhanced by warm spices and a hint of vanilla. It’s perfect for your favorite pie or as a delightful topping for desserts!
Ingredients
- Granny Smith apples
- Honeycrisp apples
- Sugar
- Brown sugar (optional)
- Cinnamon
- Nutmeg
- Vanilla extract
- Lemon juice
Instructions
- Bake the pie in the preheated oven for 45-50 minutes, or until the crust is golden brown and the filling is bubbling.
- Once baked, remove the pie from the oven and let it cool for at least 2 hours before slicing. This allows the filling to set properly.
Notes
- Feel free to adjust the sugar based on the sweetness of your apples.
- For a more complex flavor, consider adding a tablespoon of brown sugar to the filling.
- This filling can also be used for apple crisps or as a topping for pancakes and waffles!
- Prep Time: 20 minutes
- Cook Time: 50 minutes


Leave a Comment