

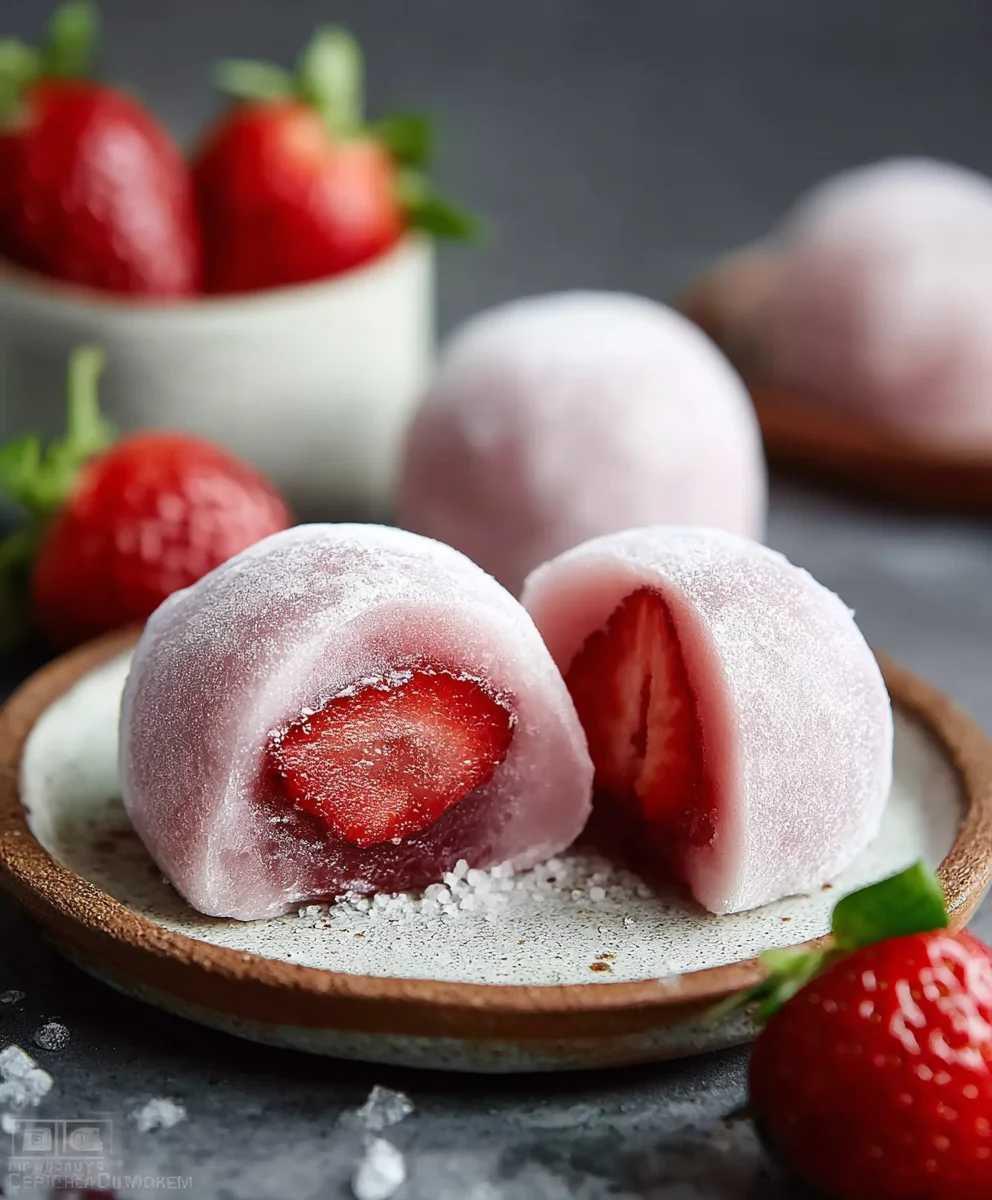
Healthy Strawberry Mochi In Minutes is truly a game-changer for anyone seeking a delightful, guilt-free indulgence that doesn’t demand hours in the kitchen. Imagine sinking your teeth into a perfectly soft, subtly sweet mochi exterior, giving way to the vibrant juiciness of a fresh strawberry – all crafted with your well-being in mind. This isn’t just another recipe; it’s an invitation to experience the exquisite balance of traditional flavors and modern convenience.
Embrace the Sweetness: A Modern Take on a Beloved Classic
While mochi holds a cherished place in Japanese culinary traditions, often symbolizing good fortune and enjoyed during special occasions and celebrations, our rendition respectfully adapts this classic for today’s busy, health-conscious individual. People worldwide have fallen in love with mochi for its unique, satisfying chewiness, but when you combine that with the natural sweetness and slight tartness of fresh, ripe strawberries, it’s an unparalleled sensation that delights the palate. Furthermore, the “healthy” aspect means we’re focusing on wholesome ingredients, allowing you to enjoy this treat without compromise. Prepare to be amazed as we guide you through creating this incredible Healthy Strawberry Mochi In Minutes, making it the perfect impromptu dessert, a clever snack, or a surprisingly effortless showstopper for your next gathering. It’s time to discover how simple and rewarding homemade healthy treats can be, proving that deliciousness and wellness can indeed go hand-in-hand.

Ingredients:
- For the Mochi Dough:
- 1 cup (120g) glutinous rice flour (also known as sweet rice flour – this is crucial, regular rice flour will not work!)
- ¼ cup (50g) granulated sugar (you can adjust this to your personal sweetness preference for a healthier option, reducing it slightly)
- ¾ cup (180ml) cold water
- ½ teaspoon vanilla extract (optional, but I find it adds a lovely subtle aroma)
- A few drops of natural red or pink food coloring (optional, to give your mochi a pretty strawberry hue)
- For the Filling and Dusting:
- 10-12 medium-sized fresh strawberries, washed and hulled
- ½ cup potato starch or cornstarch, for dusting (this is absolutely essential to prevent sticking!)
Preparation of the Mochi Dough: The Heart of Your Healthy Strawberry Mochi
Creating the perfect mochi dough might seem a little daunting at first, but with a microwave, it truly lives up to the “In Minutes” part of our “Healthy Strawberry Mochi In Minutes” focus. Trust me, it’s easier than you think, and the texture is wonderfully chewy and soft.
- Combine Dry Ingredients: In a medium-sized, microwave-safe bowl, combine your glutinous rice flour and granulated sugar. I always like to give these a good whisk together first to ensure there are no lumps and that the sugar is evenly distributed. This step is key for a smooth mochi texture later on. You’re aiming for a perfectly uniform mixture before any liquids are introduced.
- Introduce Wet Ingredients: Gradually pour in the cold water, stirring continuously with a whisk or a rubber spatula. As you add the water, the mixture will start to form a thick, paste-like batter. Keep stirring until the batter is completely smooth and free of any flour lumps. Patience here is a virtue! Lumps in your batter will translate to a less appealing texture in your final mochi. If you’re using vanilla extract, stir it in now. If you’re opting for food coloring to get that lovely pink hue, add a few drops and mix thoroughly until you achieve your desired shade. Remember, a little goes a long way, especially with concentrated colors.
- First Microwave Interval: Cover the bowl loosely with plastic wrap. You can poke a few small holes in the plastic wrap with a knife or fork to allow steam to escape. Microwave on high for 1 minute. When the timer goes off, carefully remove the bowl (it will be hot!) and give the mixture a vigorous stir with your spatula. You’ll notice that the edges of the dough are starting to become opaque and slightly firm, while the center might still be quite liquidy. This is exactly what we want to see.
- Second Microwave Interval: Re-cover the bowl and microwave for another 1 minute on high. Again, remove and stir thoroughly. You’ll observe more of the dough transforming. It will be thicker and stickier, and more of it will have taken on that translucent, gel-like quality we associate with cooked mochi. It might look a little lumpy at this stage, but don’t worry, we’ll get there.
- Third (and often Final) Microwave Interval: Cover once more and microwave for a final 30-60 seconds on high. The exact time can vary depending on your microwave’s wattage. The goal here is for the entire dough to become translucent, sticky, and incredibly elastic. When you stir it, it should pull away from the sides of the bowl as a cohesive, very sticky mass. It should no longer have any white, opaque, floury spots. This transformation is magical to watch! If it still looks a bit uncooked, microwave in 15-second increments, stirring after each, until it reaches that perfect translucent, stretchy state.
- Cooling the Dough: Once your mochi dough is perfectly cooked, carefully transfer it directly from the hot bowl onto a generously floured (with potato or cornstarch) surface. I usually use a large cutting board or a clean countertop. Be careful, the dough is incredibly hot at this stage! Dust the top of the hot dough lightly with more potato or cornstarch. This dusting is absolutely critical to prevent the incredibly sticky dough from adhering to everything, including your hands and tools. Allow the dough to cool for about 10-15 minutes. It needs to be cool enough to handle comfortably, but still warm and pliable. This cooling period is important because it allows the dough to firm up slightly, making it much easier to work with.
- Gentle Kneading (Optional but Recommended): Once cooled enough to touch, gently knead the dough for a minute or two on your heavily starched surface. This step helps to smooth out any remaining lumps and further develop its elasticity, resulting in an even more perfect texture for your “Healthy Strawberry Mochi In Minutes”. Just be sure your hands are well-dusted with starch to avoid sticking.
Preparing Your Fresh Strawberry Filling for “Healthy Strawberry Mochi In Minutes”
The star of our “Healthy Strawberry Mochi In Minutes” is, of course, the strawberry! Fresh, ripe strawberries offer a burst of flavor and a lovely textural contrast to the soft mochi. Selecting the right strawberries is key to making this dessert truly shine.
- Selecting and Washing: Choose strawberries that are firm, brightly colored, and free of bruises or mold. Size matters here; opt for medium-sized strawberries that will fit nicely within your mochi without being too bulky. Give them a thorough wash under cool running water to remove any dirt or residue.
- Hulling: Use a paring knife or a strawberry huller to carefully remove the green tops (the hull) and any white core. You want to remove as little of the red flesh as possible, preserving the strawberry’s natural sweetness and shape.
- Thorough Drying: This step is critical! After washing and hulling, it is absolutely essential to dry your strawberries completely. Gently pat each strawberry thoroughly with paper towels. Any residual moisture on the strawberries can cause your mochi to become watery and soft internally, affecting both texture and shelf life. Don’t skip this part! I often let mine air dry on a clean paper towel for an additional 10 minutes to be extra sure.
- Optional (for extra sweetness/texture, though we’re focusing on healthy and quick here): While traditional daifuku mochi often encase the strawberry in a thin layer of red bean paste (anko), for a quicker, healthier, and more fruit-forward “Healthy Strawberry Mochi In Minutes” experience, we are skipping that step. This allows the natural sweetness and tartness of the strawberry to truly be the star. However, if you wanted to add a touch of sweetness and texture, you could roll the dry strawberries in a tiny bit of granulated sugar or a very thin layer of whipped cream cheese (if not too wet) before encasing them, though this would slightly deviate from the “healthy” and “minutes” aspects.
Assembling Your Delicious Healthy Strawberry Mochi
Now comes the fun part – transforming your soft mochi dough and fresh strawberries into beautiful, bite-sized treats! This stage requires a bit of finesse and a generous amount of potato or cornstarch to keep things from getting sticky.
- Prepare Your Workspace: Ensure your workspace is still heavily dusted with potato or cornstarch. Also, make sure your hands are generously coated with starch. This is not just a suggestion; it’s a necessity when working with mochi dough! It will prevent the dough from sticking to everything it touches. Have extra starch nearby for re-dusting as needed.
- Divide the Dough: Using a bench scraper or a knife, divide your cooled mochi dough into 10-12 equal portions. The number of portions will depend on the size of your strawberries and your desired mochi size. I find that using a kitchen scale for this step ensures perfectly uniform mochi, which makes for a prettier presentation. Each piece should be about the size of a golf ball, or slightly smaller, depending on the strawberry.
- Flatten Each Portion: Take one portion of dough and, on your starched surface, gently flatten it into a circular disc. I usually start by pressing it with my palm and then gently stretch the edges with my fingertips. You’re aiming for a circle about 3-4 inches (7-10 cm) in diameter, and relatively thin – about ⅛ inch (3-4 mm) thick – but not so thin that it tears easily. Remember to keep dusting your hands and the dough as you work to prevent sticking. The edges can be slightly thinner than the center for easier sealing.
- Position the Strawberry: Place one of your perfectly dried strawberries, pointy side up, in the center of the flattened mochi disc. The pointy end pointing upwards helps to create that classic mochi shape once sealed.
- Enclose and Seal the Mochi: Carefully bring the edges of the mochi dough up and around the strawberry, gathering them at the top. Think of it like wrapping a small gift. Gently pinch and press the dough together at the top to completely enclose the strawberry and seal all the seams. Work slowly and patiently. The key is to make sure there are no gaps or open seams where the dough meets. Pinching firmly but gently creates a smooth, seamless ball. If you find the dough resisting, a tiny bit of water on your finger can help it adhere, but use sparingly.
- Shape and Dust: Once sealed, gently cup the mochi in your hands and roll it a little to smooth out any bumps and create a perfectly round or slightly conical shape. Give it a final light dusting of potato or cornstarch to prevent it from sticking to itself or other mochi pieces, and also to give it that traditional matte finish. Transfer the finished mochi to a clean plate or tray that has also been lightly dusted with starch.
- Repeat: Continue this process with the remaining dough portions and strawberries until all your “Healthy Strawberry Mochi In Minutes” are beautifully assembled.
Tips for Perfecting Your Healthy Strawberry Mochi In Minutes
Making mochi at home, especially for the first time, can come with a few learning curves. These tips will help you achieve perfectly soft, chewy, and delicious mochi every single time, making your “Healthy Strawberry Mochi In Minutes” a true success.
- The Importance of Glutinous Rice Flour: I cannot stress this enough – you must use glutinous rice flour (or sweet rice flour). Regular rice flour will not give you the desired chewy, elastic texture of mochi; it will result in a crumbly, unappealing dough. Always double-check your packaging!
- Don’t Be Shy with Starch: Seriously, use more potato or cornstarch than you think you need. Mochi dough is incredibly sticky, especially when warm. Dust your surface, your hands, your tools, and even the finished mochi generously. This prevents frustration and makes the assembly process much smoother. You can always brush off excess starch from the finished mochi.
- Microwave Wattage Varies: Keep in mind that microwave wattages differ. The cooking times provided are a guideline. Pay attention to the dough’s transformation – it should become translucent, shiny, and very elastic. If it still looks opaque or powdery, give it another 15-30 seconds. It’s better to cook in short bursts than to overcook.
- Working with Warm Dough: While you need to let the dough cool enough to handle, don’t let it get completely cold. Slightly warm dough is much more pliable and easier to stretch and seal around the strawberries. If it gets too cold, it can become stiff and prone to tearing.
- Fresh and Dry Strawberries: Always use the freshest, ripest strawberries you can find. Their natural sweetness is key, especially since we’re keeping the mochi dough less sweet for a healthier option. And remember to dry them meticulously! Any moisture will compromise the mochi’s integrity and shelf life.
- Experiment with Sweetness: The sugar amount in the dough can be adjusted. If you prefer a less sweet dessert, feel free to reduce the sugar to 3 tablespoons or even 2. The sweetness of the strawberry will provide a lovely contrast.
- Clean Cuts for Division: When dividing the dough, a sharp, starch-dusted bench scraper or knife works best. This creates clean cuts and prevents the dough from sticking and stretching unnecessarily.
- Handling Sticky Hands: If your hands start to get too sticky during assembly, don’t try to peel the dough off – just re-dust them thoroughly with more starch. You can even keep a small bowl of starch right next to you for easy re-coating.
- For a Steamed Version (Alternative to Microwave): If you don’t have a microwave or prefer steaming, you can achieve similar results. Place the covered bowl of mochi batter in a steamer basket over simmering water. Steam for 15-20 minutes, stirring every 5-7 minutes, until the dough is fully translucent and elastic. The principles of cooling and starching remain the same.
Storage and Enjoyment
Once you’ve gone through the delightful process of making your “Healthy Strawberry Mochi In Minutes,” you’ll want to ensure you enjoy them at their best!
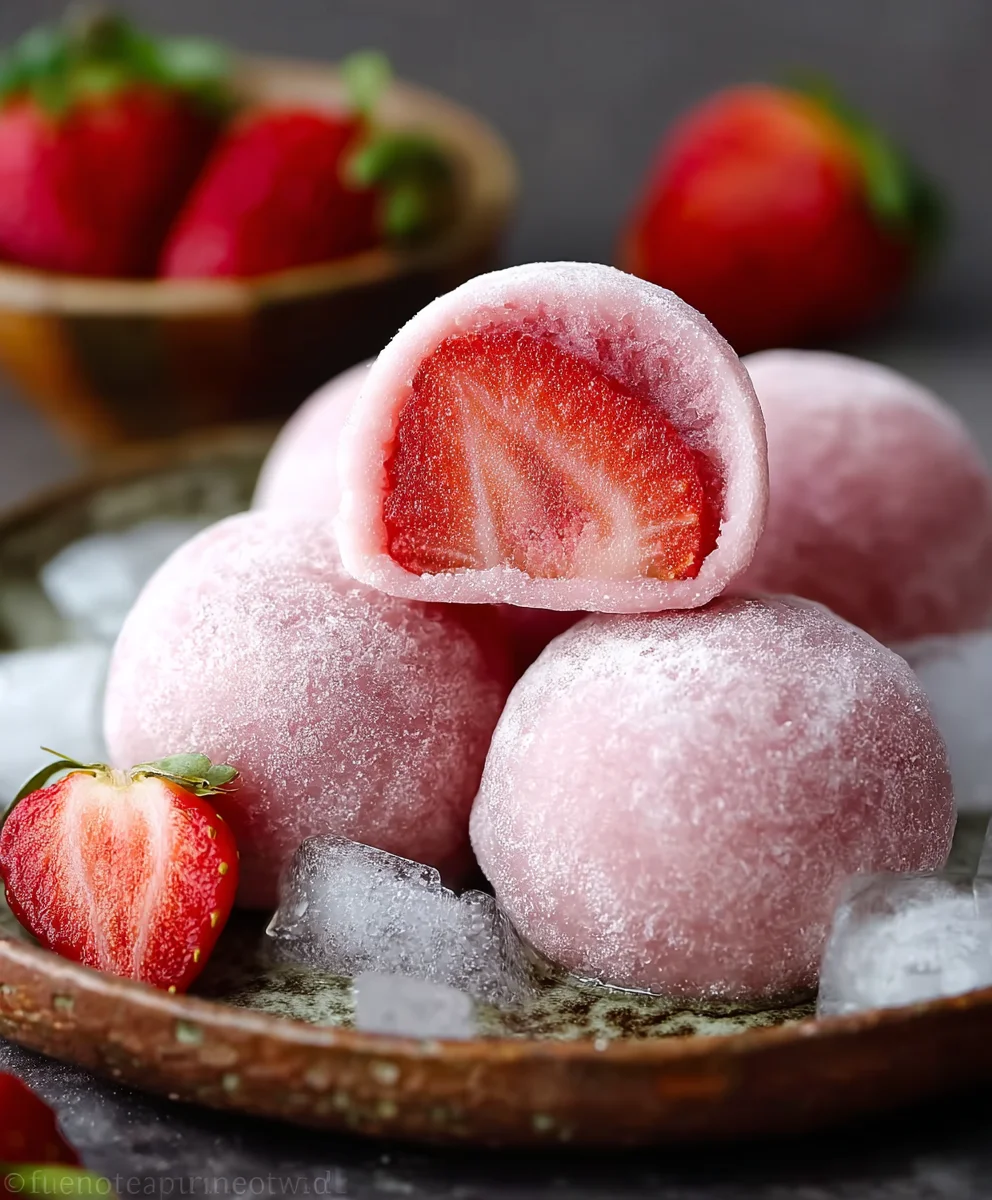
Immediate Enjoyment is Best: Mochi, especially when filled with fresh fruit, is truly best enjoyed on the day it’s made. The texture of the mochi is at its peak—super soft, chewy, and perfectly pliable. The strawberry is also at its freshest and most vibrant. This is when your “Healthy Strawberry Mochi In Minutes” will taste the most divine.
Short-Term Storage: If you happen to have any leftovers (which, let’s be honest, is rare with something this delicious!), you can store them in an airtight container at room temperature for up to 1 day. Place a piece of parchment paper or wax paper between layers of mochi if stacking them, to prevent sticking. It’s important to keep them away from direct sunlight or excessive heat.
Why Not Refrigerate? I strongly advise against refrigerating mochi. The cold temperature tends to make the mochi dough harden and lose its signature soft, chewy texture. The glutinous rice flour becomes stiff and less pleasant to eat. Additionally, the moisture from the strawberry can sometimes make the mochi soggy if kept in the fridge for too long.
Freezing is Not Recommended: Similarly, freezing mochi, especially fruit-filled mochi, is not recommended. The freezing and thawing process significantly alters the texture of both the mochi and the strawberry, leaving you with a less-than-ideal eating experience. The mochi can become gummy or crumbly, and the strawberry can turn mushy.
Serving Suggestions: Serve your “Healthy Strawberry Mochi In Minutes” as a delightful snack, a light dessert after a meal, or even as a unique treat for a gathering. They pair wonderfully with a cup of green tea or a refreshing iced beverage. The combination of the subtly sweet, chewy mochi and the juicy, slightly tart strawberry is simply irresistible. I sometimes like to present them with a tiny dusting of matcha powder on the side for an extra visual touch, though it’s entirely optional.
So, gather your ingredients, follow these detailed steps, and get ready to impress yourself and your loved ones with these incredibly satisfying and relatively “Healthy Strawberry Mochi In Minutes”!
Conclusion:
I truly hope you’re as excited about this recipe as I am, because it’s a game-changer in the world of delightful desserts. We’ve just embarked on a journey to create something truly special, a treat that marries the delicate chewiness of traditional mochi with the vibrant, fresh burst of ripe strawberries. What makes this particular recipe stand head and shoulders above the rest isn’t just its irresistible flavor profile or its charming, picture-perfect appearance; it’s the sheer simplicity and speed with which you can bring it to life. Forget hours slaving away in the kitchen; this is about achieving gourmet results with minimal fuss. Think about it: a dessert that’s not only incredibly satisfying but also aligns beautifully with a mindful eating approach. This isn’t just another sweet treat; it’s a testament to how incredible homemade desserts can be when they prioritize both taste and well-being. The delicate sweetness, the subtle tang of the strawberries, and that uniquely satisfying mochi texture all come together in a harmonious bite that you’ll crave long after the last piece is gone. It’s the kind of recipe that empowers you to whip up something truly impressive, even on your busiest days. The beauty of this recipe lies in its elegant simplicity, making it accessible to even the most novice of home cooks, while still offering a gourmet experience that will impress seasoned foodies. This is why I wholeheartedly declare that this recipe is an absolute culinary gem, a delightful discovery you simply must add to your repertoire. It redefines what ‘quick dessert’ can mean, elevating it to an art form.
And here’s the best part, the real magic: this recipe delivers on its promise of creating Healthy Strawberry Mochi In Minutes. Yes, you read that right. In mere moments, you can transform simple ingredients into a sophisticated, light, and utterly delicious dessert that truly satisfies. It’s perfect for those spontaneous cravings or when you need a speedy yet impressive sweet ending to a meal. This recipe truly champions the idea that healthy doesn’t mean sacrificing flavor or fun; in fact, it enhances it, allowing the natural goodness of the ingredients to shine through beautifully. I promise you, the satisfaction of making these delightful treats yourself is immense!
Once you’ve mastered the basic technique, the world of mochi creativity truly opens up! While these strawberry delights are absolutely divine on their own, served simply on a beautiful plate, don’t hesitate to get adventurous. Imagine presenting them as part of a charming afternoon tea spread, perhaps alongside a fragrant cup of green tea or a delicate floral infusion – the complementary flavors are simply exquisite. They also make an incredibly elegant and unique dessert after a special dinner, offering a light and refreshing alternative to heavier options. For a truly decadent experience, consider serving them lightly chilled, perhaps with a dusting of extra powdered sugar or a delicate drizzle of a homemade berry coulis for an extra layer of fruity goodness. They are also fantastic as a portable snack, perfect for packing in a lunchbox or taking on a picnic, providing a burst of refreshing flavor on the go.
But why stop there? The versatility of this mochi recipe is one of its most exciting aspects. For a delightful twist, consider experimenting with different fruit fillings. Picture vibrant mango mochi, tart blueberry mochi, or even a mixed berry medley for an explosion of flavors. You could also play with the coating: instead of just powdered sugar, try rolling some in toasted coconut flakes for an exotic crunch, or in a fine cocoa powder for a rich, sophisticated finish that pairs wonderfully with the sweet strawberries. If you’re feeling particularly adventurous, a tiny dollop of sweetened cream cheese or a sliver of dark chocolate could be gently nestled inside with the strawberry, creating a delightful surprise with every bite. For a more intense flavor profile, a tiny pinch of cardamom or a drop of vanilla extract could be added to the mochi dough itself, elevating its aromatic qualities. The possibilities are truly endless, and each variation offers a chance to personalize this wonderful treat to your exact preferences, making it truly your own signature dessert. Don’t be afraid to let your culinary imagination soar; that’s where the real fun begins!
So, my dear readers, I implore you: don’t just read about this incredible Healthy Strawberry Mochi In Minutes; experience it. There’s a profound satisfaction that comes from creating something so beautiful and delicious with your own hands, especially when it’s as surprisingly simple and quick as this. I promise you, the moment you bite into that first piece, experiencing the tender chew and the sweet, juicy strawberry, you’ll understand exactly why I’m so passionate about sharing this recipe. It’s more than just a recipe; it’s an invitation to bring a little bit of joy and culinary magic into your everyday life, a delightful escape from the ordinary.
I genuinely believe that this recipe is not just a treat for your taste buds, but also a rewarding project for your spirit. It’s an opportunity to create something truly special without feeling overwhelmed, fostering a sense of accomplishment that is incredibly gratifying. So, gather your ingredients, set aside a few precious minutes, and embark on this delightful culinary adventure. I am absolutely certain you will be thrilled with the results.
Once you’ve made your batch of these delightful mochi, I would absolutely love to hear all about your experience! Did you stick to the classic strawberry, or did you get creative with a new fruit filling or coating? What was your favorite part of the process? Did you serve them at a special occasion or simply enjoy them as a well-deserved personal treat? Your stories, your tips, and your photos truly inspire me and the entire community of home bakers and dessert enthusiasts. So, please, don’t be shy! Share your culinary triumphs and tag me – I can’t wait to see your stunning creations and hear about the joy they brought you. Let’s build a delicious conversation around this amazing recipe and inspire even more people to try their hand at making these utterly irresistible, speedy, and healthy strawberry mochi. Happy cooking, and even happier eating!
Healthy Strawberry Mochi in Minutes
Enjoy guilt-free indulgence with this quick and easy Healthy Strawberry Mochi. Perfectly soft mochi exterior with the vibrant juiciness of fresh strawberries, crafted with your well-being in mind for a delightful dessert in minutes.
Ingredients
-
1 cup (120g) glutinous rice flour
-
¼ cup (50g) granulated sugar
-
¾ cup (180ml) cold water
-
½ tsp vanilla extract (optional)
-
Red/pink food coloring (optional)
-
10-12 medium fresh strawberries
-
½ cup potato starch or cornstarch, for dusting
Instructions
-
Step 1
In a microwave-safe bowl, whisk glutinous rice flour and granulated sugar. -
Step 2
Gradually add cold water, whisking until smooth. Stir in vanilla extract and food coloring (if using). -
Step 3
Cover bowl loosely with plastic wrap (poke holes). Microwave on high for 1 minute, then stir vigorously. -
Step 4
Re-cover and microwave for another 1 minute, then stir thoroughly. -
Step 5
Cover and microwave for a final 30-60 seconds (or 15-second increments) until dough is translucent, sticky, and elastic. -
Step 6
Transfer hot dough to a generously starch-dusted surface. Lightly dust top. Cool for 10-15 minutes until warm and pliable. -
Step 7
(Optional) Gently knead dough for 1-2 minutes on starched surface to smooth. -
Step 8
Wash, hull, and thoroughly dry 10-12 medium fresh strawberries. -
Step 9
Dust workspace and hands heavily with potato/cornstarch. -
Step 10
Divide dough into 10-12 equal portions. -
Step 11
Flatten one dough portion into a 3-4 inch (7-10 cm) disc (⅛ inch/3-4 mm thick). -
Step 12
Place one dried strawberry (pointy side up) in the center. -
Step 13
Bring dough edges up around the strawberry, gathering and pinching firmly at the top to seal completely. -
Step 14
Gently shape the mochi, then dust lightly with starch. Transfer to a lightly dusted plate. -
Step 15
Repeat for remaining dough and strawberries.
Important Information
Nutrition Facts (Per Serving)
It is important to consider this information as approximate and not to use it as definitive health advice.
Allergy Information
Please check ingredients for potential allergens and consult a health professional if in doubt.


Leave a Comment