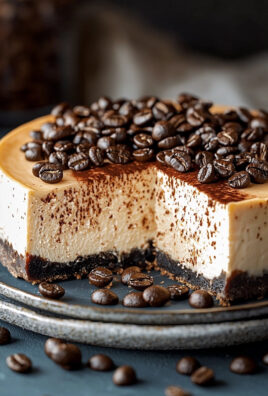
Hawaiian Poke Cake is a delightful dessert that transports you straight to the sunny shores of Hawaii with every bite. This vibrant cake, infused with tropical flavors, is not just a treat for the taste buds but also a feast for the eyes. Originating from the Hawaiian tradition of poke, which means “to pierce,” this cake is designed to be poked and soaked in a luscious mixture of coconut and pineapple, creating a moist and flavorful experience that is simply irresistible.
People love Hawaiian Poke Cake for its unique combination of textures and flavors. The light, fluffy cake contrasts beautifully with the creamy topping and the juicy bursts of pineapple, making it a perfect dessert for any occasion. Whether you’re hosting a summer barbecue or celebrating a special event, this cake is not only easy to prepare but also a crowd-pleaser that will leave your guests asking for seconds. Join me as we dive into the world of Hawaiian Poke Cake and discover how to create this tropical delight in your own kitchen!
Ingredients:
- 1 box of yellow cake mix (15.25 oz)
- 1 cup of water
- 1/3 cup of vegetable oil
- 3 large eggs
- 1 cup of sweetened shredded coconut
- 1 cup of crushed pineapple, drained
- 1 cup of sweetened condensed milk
- 1 cup of whipped topping (like Cool Whip)
- 1/2 cup of maraschino cherries, halved
- 1/2 cup of chopped macadamia nuts (optional)
- 1/4 cup of toasted coconut flakes (for garnish)
Preparing the Cake
- Preheat your oven to 350°F (175°C). Grease and flour a 9×13 inch baking pan to ensure the cake doesnt stick.
- In a large mixing bowl, combine the yellow cake mix, water, vegetable oil, and eggs. Using an electric mixer, beat the mixture on medium speed for about 2 minutes until its smooth and well combined.
- Pour the batter into the prepared baking pan, spreading it evenly with a spatula. Bake in the preheated oven for 30-35 minutes, or until a toothpick inserted into the center comes out clean.
- Once baked, remove the cake from the oven and let it cool in the pan for about 10 minutes. Then, transfer it to a wire rack to cool completely.
Preparing the Toppings
- While the cake is cooling, prepare the poke filling. In a medium bowl, combine the sweetened condensed milk and crushed pineapple. Mix well until fully combined.
- Once the cake has cooled completely, use the handle of a wooden spoon or a skewer to poke holes all over the top of the cake, about 1 inch apart. Make sure to poke deep enough to allow the filling to seep in.
- Pour the pineapple and condensed milk mixture evenly over the top of the cake, ensuring it fills the holes. Use a spatula to spread it gently if needed. Allow the cake to sit for about 30 minutes to let the filling soak in.
Assembling the Cake
- After the filling has soaked in, its time to add the whipped topping. Spread the whipped topping evenly over the top of the cake, covering it completely.
- Next, sprinkle the sweetened shredded coconut over the whipped topping. This adds a delightful texture and enhances the tropical flavor.
- If youre using macadamia nuts, sprinkle them evenly over the coconut layer for an extra crunch. This step is optional, but I highly recommend it for that authentic Hawaiian touch!
- Finally, garnish the cake with halved maraschino cherries, placing them strategically across the top for a pop of color and sweetness.
- For an extra touch, sprinkle some toasted coconut flakes on top. To toast coconut, simply place it in a dry skillet over medium heat, stirring frequently until golden brown. Keep a close eye on it, as it can burn quickly!
Chilling and Serving
- Once assembled, cover the cake with plastic wrap or aluminum foil and refrigerate for at least 2 hours, or overnight if you have the time. Chilling allows the flavors to meld beautifully and makes the cake even more refreshing.
- When youre ready to serve, remove the cake from the refrigerator. Use a sharp knife to cut it into squares, making sure to get a piece of the delicious filling in each slice.
- Serve the Hawaiian poke cake chilled, and watch as your friends and family dive into this tropical delight. Its perfect for summer gatherings, potlucks, or any occasion where you want to bring a taste of the islands to your table!
Storage Tips
- If you have any leftovers (which is rare!), store the cake in an airtight container in the refrigerator. It will keep well for up to 3-4 days.
- For best results, avoid freezing the cake, as the whipped topping may not maintain its texture once thawed.
Conclusion:
In summary, this Hawaiian Poke Cake is an absolute must-try for anyone looking to bring a taste of the tropics to their dessert table. With its moist, flavorful layers soaked in a delightful blend of coconut and pineapple, every bite transports you to a sunny beach paradise. The combination of texturesfrom the fluffy cake to the creamy toppingcreates a dessert experience that is both satisfying and refreshing. For serving suggestions, consider pairing this cake with a scoop of vanilla ice cream or a dollop of whipped cream for an extra indulgent treat. You can also experiment with variations by adding fresh fruit like sliced bananas or strawberries on top, or even incorporating macadamia nuts for a delightful crunch. The possibilities are endless, and I encourage you to get creative! I truly believe that once you try this Hawaiian Poke Cake, it will become a favorite in your household. So, gather your ingredients, whip up this delicious dessert, and share your experience with friends and family. I would love to hear how it turns out for you! Dont forget to take a moment to savor each bite and enjoy the tropical vibes. Happy baking! Print
Hawaiian Poke Cake: A Delicious Tropical Dessert Recipe You Must Try
- Total Time: 175 minutes
- Yield: 12 servings 1x
Description
Experience a taste of the tropics with this Hawaiian Poke Cake! Moist yellow cake is filled with a delightful blend of pineapple and sweetened condensed milk, then topped with whipped cream, shredded coconut, and maraschino cherries. Ideal for summer parties or any festive occasion, this refreshing dessert is sure to impress!
Ingredients
- 1 box of yellow cake mix (15.25 oz)
- 1 cup of water
- 1/3 cup of vegetable oil
- 3 large eggs
- 1 cup of sweetened shredded coconut
- 1 cup of crushed pineapple, drained
- 1 cup of sweetened condensed milk
- 1 cup of whipped topping (like Cool Whip)
- 1/2 cup of maraschino cherries, halved
- 1/2 cup of chopped macadamia nuts (optional)
- 1/4 cup of toasted coconut flakes (for garnish)
Instructions
- Preheat your oven to 350°F (175°C). Grease and flour a 9×13 inch baking pan to ensure the cake doesnt stick.
- In a large mixing bowl, combine the yellow cake mix, water, vegetable oil, and eggs. Using an electric mixer, beat the mixture on medium speed for about 2 minutes until its smooth and well combined.
- Pour the batter into the prepared baking pan, spreading it evenly with a spatula. Bake in the preheated oven for 30-35 minutes, or until a toothpick inserted into the center comes out clean.
- Once baked, remove the cake from the oven and let it cool in the pan for about 10 minutes. Then, transfer it to a wire rack to cool completely.
- While the cake is cooling, prepare the poke filling. In a medium bowl, combine the sweetened condensed milk and crushed pineapple. Mix well until fully combined.
- Once the cake has cooled completely, use the handle of a wooden spoon or a skewer to poke holes all over the top of the cake, about 1 inch apart. Make sure to poke deep enough to allow the filling to seep in.
- Pour the pineapple and condensed milk mixture evenly over the top of the cake, ensuring it fills the holes. Use a spatula to spread it gently if needed. Allow the cake to sit for about 30 minutes to let the filling soak in.
- After the filling has soaked in, its time to add the whipped topping. Spread the whipped topping evenly over the top of the cake, covering it completely.
- Next, sprinkle the sweetened shredded coconut over the whipped topping. This adds a delightful texture and enhances the tropical flavor.
- If youre using macadamia nuts, sprinkle them evenly over the coconut layer for an extra crunch. This step is optional, but I highly recommend it for that authentic Hawaiian touch!
- Finally, garnish the cake with halved maraschino cherries, placing them strategically across the top for a pop of color and sweetness.
- For an extra touch, sprinkle some toasted coconut flakes on top. To toast coconut, simply place it in a dry skillet over medium heat, stirring frequently until golden brown. Keep a close eye on it, as it can burn quickly!
- Once assembled, cover the cake with plastic wrap or aluminum foil and refrigerate for at least 2 hours, or overnight if you have the time. Chilling allows the flavors to meld beautifully and makes the cake even more refreshing.
- When youre ready to serve, remove the cake from the refrigerator. Use a sharp knife to cut it into squares, making sure to get a piece of the delicious filling in each slice.
- Serve the Hawaiian poke cake chilled, and watch as your friends and family dive into this tropical delight. Its perfect for summer gatherings, potlucks, or any occasion where you want to bring a taste of the islands to your table!
Notes
- For best results, use fresh ingredients and ensure the cake is completely cooled before adding the filling and toppings.
- Feel free to customize the toppings based on your preferences; other fruits or nuts can be added for variation.
- Prep Time: 20 minutes
- Cook Time: 35 minutes


Leave a Comment