

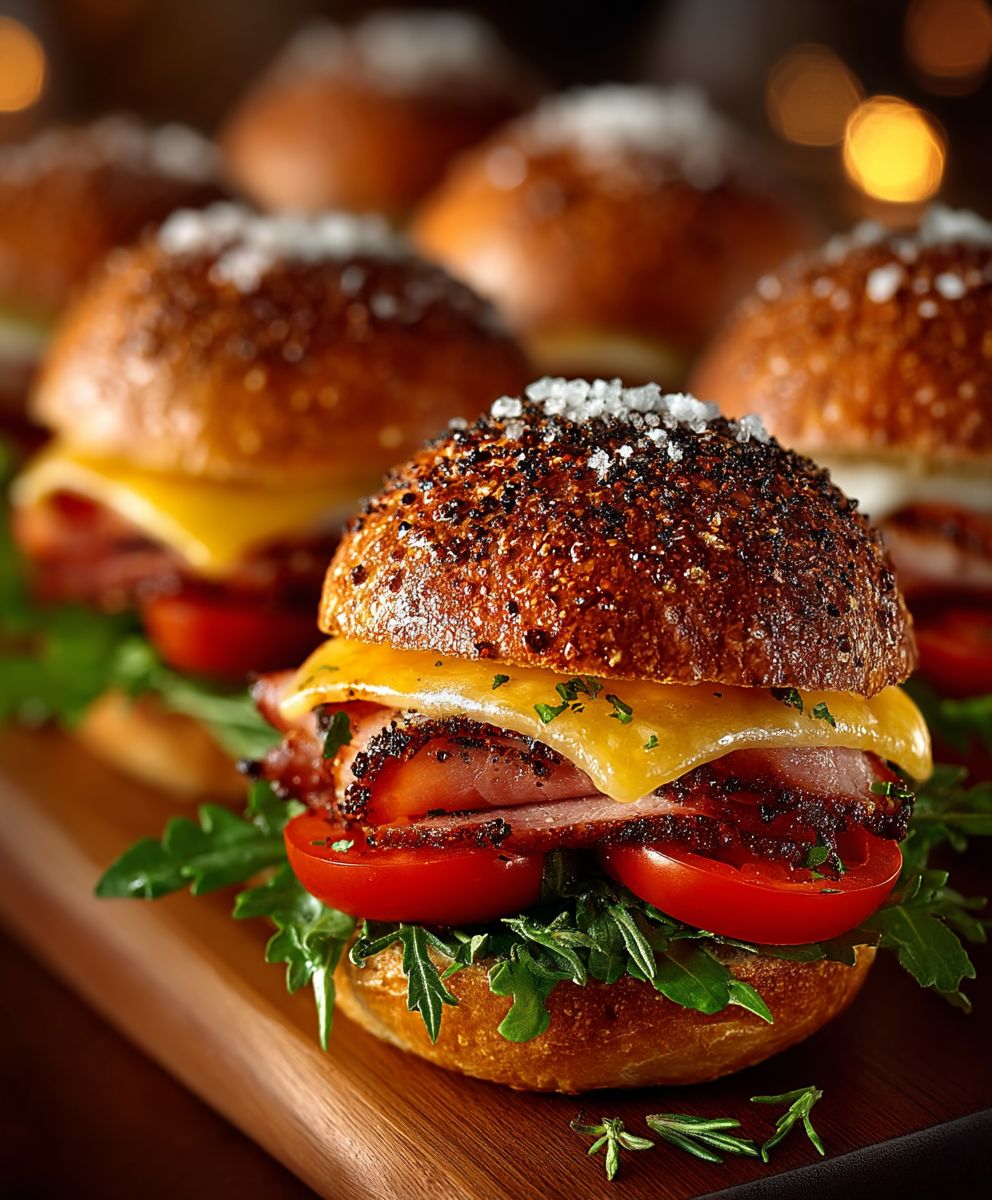
Ham and Cheese Sliders: Prepare to meet your new favorite party appetizer (or quick weeknight dinner!). These aren’t just any mini sandwiches; they’re a symphony of savory ham, melted cheese, and a hint of sweetness, all nestled in soft, pillowy rolls. Trust me, they disappear faster than you can say “seconds!”
The concept of a “slider,” a small, easily manageable sandwich, has roots that stretch back to the early 20th century. While the exact origin is debated, many believe the term originated with White Castle, who used the term to describe their small hamburgers. Our Ham and Cheese Sliders take that classic concept and elevate it with a delicious combination of flavors that’s both comforting and craveable.
What makes these sliders so irresistible? It’s the perfect balance of salty and sweet, the gooey cheese melting into the savory ham, and the soft, slightly sweet rolls that hold it all together. They’re incredibly easy to make, requiring minimal prep time, which makes them ideal for busy weeknights or impromptu gatherings. Plus, who can resist a warm, cheesy, handheld delight? Whether you’re hosting a game day party, need a quick lunchbox addition, or simply want a satisfying snack, these Ham and Cheese Sliders are guaranteed to be a crowd-pleaser. Get ready to experience slider perfection!

Ingredients:
- 12 Hawaiian sweet rolls
- 1 pound sliced ham (I prefer Black Forest)
- 1 pound sliced Swiss cheese (or your favorite cheese, like provolone or cheddar)
- 1/2 cup (1 stick) unsalted butter, melted
- 2 tablespoons Dijon mustard
- 1 tablespoon Worcestershire sauce
- 1 tablespoon poppy seeds
- 1 tablespoon dried minced onion
- 1 teaspoon garlic powder
- Optional: Everything bagel seasoning for topping
Preparing the Sauce:
Okay, let’s get started! The first thing we’re going to do is make that delicious buttery sauce that really elevates these sliders. This sauce is what makes them so flavorful and keeps them nice and moist while baking.
- In a small bowl, whisk together the melted butter, Dijon mustard, and Worcestershire sauce. Make sure everything is well combined. You want a smooth, emulsified sauce.
- Add the poppy seeds, dried minced onion, and garlic powder to the bowl. Stir until everything is evenly distributed throughout the sauce. This mixture is going to add a fantastic savory flavor to our sliders.
- Taste the sauce! This is important. Adjust the seasonings to your liking. If you want a little more tang, add a touch more Dijon. If you prefer a stronger garlic flavor, add a pinch more garlic powder. Remember, you’re the chef!
Assembling the Sliders:
Now comes the fun part putting these bad boys together! This is where you can really customize them to your liking. Don’t be afraid to get creative with your cheese and ham choices.
- Preheat your oven to 350°F (175°C). This is crucial! You want the oven nice and hot so the cheese melts beautifully and the rolls get golden brown.
- Lightly grease a 9×13 inch baking dish. This will prevent the sliders from sticking and make cleanup a breeze. I usually use cooking spray, but you can also use a little bit of butter.
- Using a large serrated knife, carefully slice the entire slab of Hawaiian sweet rolls horizontally, keeping the tops and bottoms connected. Think of it like opening a giant sandwich. This is important to do carefully so you don’t tear the rolls.
- Place the bottom half of the rolls into the prepared baking dish.
- Layer the ham evenly over the bottom half of the rolls. Don’t be shy! We want a good amount of ham in each slider. I usually use about 4-5 slices of ham per slider, depending on the size of the slices.
- Next, layer the Swiss cheese over the ham. Make sure the cheese covers the entire surface of the ham. Again, don’t be afraid to use a generous amount of cheese. The melted cheese is what holds everything together and adds that delicious gooeyness.
- Carefully place the top half of the rolls back on top of the cheese. Make sure they line up properly with the bottom half.
Applying the Sauce and Baking:
This is where the magic happens! The sauce is going to soak into the rolls and create a flavor explosion. And the baking process will melt the cheese and toast the rolls to perfection.
- Using a pastry brush, evenly brush the prepared butter sauce over the top of the rolls. Make sure you get every nook and cranny! The sauce is what gives the sliders their signature flavor and keeps them moist.
- If desired, sprinkle the top of the rolls with everything bagel seasoning. This is optional, but it adds a nice textural element and extra flavor.
- Cover the baking dish with aluminum foil. This will prevent the tops of the rolls from browning too quickly and ensure that the cheese melts evenly.
- Bake in the preheated oven for 20 minutes.
- Remove the foil and bake for an additional 5-10 minutes, or until the tops of the rolls are golden brown and the cheese is melted and bubbly. Keep a close eye on them during this step to prevent them from burning.
- Remove the sliders from the oven and let them rest for a few minutes before serving. This will allow the cheese to set up slightly and make them easier to slice.
Serving and Enjoying:
Finally, the moment we’ve all been waiting for! It’s time to slice, serve, and devour these delicious ham and cheese sliders. They’re perfect for parties, game days, or a quick and easy weeknight meal.
- Using a sharp knife, carefully slice the sliders along the seams of the rolls.
- Serve immediately and enjoy! These sliders are best served warm, when the cheese is still melted and gooey.
Tips and Variations:
Here are a few extra tips and ideas to customize your ham and cheese sliders:
- Cheese Variations: Feel free to experiment with different types of cheese. Provolone, cheddar, Monterey Jack, or even pepper jack would all be delicious.
- Ham Variations: You can also use different types of ham, such as honey ham, smoked ham, or even turkey.
- Add Veggies: Add a layer of thinly sliced onions, pickles, or bell peppers for extra flavor and texture.
- Spice it Up: Add a pinch of red pepper flakes to the butter sauce for a little bit of heat.
- Make it Ahead: You can assemble the sliders ahead of time and store them in the refrigerator until you’re ready to bake them. Just add a few extra minutes to the baking time.
- Garlic Lovers: For an even stronger garlic flavor, add a clove of minced garlic to the butter sauce.
- Herb Infusion: Add some fresh herbs like thyme or rosemary to the butter sauce for a more sophisticated flavor.
- Sweet and Savory: A drizzle of honey or maple syrup over the ham before adding the cheese can add a delightful sweet and savory element.
- Different Buns: While Hawaiian rolls are classic, you can use other types of slider buns. Brioche buns would add richness, while pretzel buns would offer a salty, chewy texture.
- Leftovers: If you happen to have any leftovers (which is unlikely!), store them in an airtight container in the refrigerator. Reheat them in the oven or microwave.
Why These Sliders Are So Good:
These ham and cheese sliders are a crowd-pleaser for a reason. They’re easy to make, incredibly flavorful, and perfect for any occasion. The combination of the sweet Hawaiian rolls, savory ham and cheese, and that delicious buttery sauce is simply irresistible. Plus, they’re so customizable, you can easily adapt them to your own tastes and preferences.
Troubleshooting:
- Rolls are burning: If the tops of the rolls are browning too quickly, reduce the oven temperature slightly or cover them with foil for a longer period of time.
- Cheese isn’t melting: Make sure the oven is properly preheated and that the sliders are covered with foil during the first part of the baking process.
- Sliders are dry: Make sure you’re using enough butter sauce and that you’re not overbaking them.
I hope you enjoy making and eating these ham and cheese sliders as much as I do! They’re a guaranteed hit at any party or gathering. Happy baking!
Conclusion:
Well, there you have it! These Ham and Cheese Sliders are truly a game-changer for any occasion. From weeknight dinners to potlucks and game-day gatherings, they’re always a crowd-pleaser. But why are they a must-try? It’s simple: the perfect balance of savory ham, melted cheese, and that irresistible buttery, slightly sweet topping creates an explosion of flavor in every single bite. They are incredibly easy to make, require minimal ingredients, and are ready in under 30 minutes. What’s not to love?
These aren’t just any sliders; they’re an experience!
But the fun doesn’t stop there! Feel free to get creative with your serving suggestions and variations. For a heartier meal, serve them alongside a crisp green salad or a bowl of creamy tomato soup. They also pair perfectly with potato salad, coleslaw, or even just a simple bag of chips.
Looking to spice things up? Try adding a layer of Dijon mustard or horseradish sauce before assembling the sliders for a tangy kick. Or, for a sweeter twist, brush a thin layer of honey mustard on the rolls before adding the ham and cheese.
Here are a few more ideas to get your culinary creativity flowing:
Variations to Explore:
* **Hawaiian Ham and Cheese Sliders:** Add a slice of grilled pineapple to each slider for a tropical twist.
* **Spicy Ham and Cheese Sliders:** Incorporate sliced jalapeños or a dash of hot sauce into the cheese mixture.
* **Italian Ham and Cheese Sliders:** Use provolone cheese and add a sprinkle of Italian seasoning to the butter topping.
* **Turkey and Swiss Sliders:** Substitute ham with sliced turkey breast and cheddar cheese with Swiss for a lighter option.
* **Vegetarian Option:** Use plant-based ham and cheese alternatives to cater to vegetarian guests.
Don’t be afraid to experiment with different cheeses, meats, and toppings to create your own signature slider combination. The possibilities are endless!
The key to truly amazing Ham and Cheese Sliders is using high-quality ingredients. Opt for your favorite brand of sliced ham and a cheese that melts well, such as cheddar, provolone, or Swiss. And don’t skimp on the butter topping! It’s what gives the sliders that golden-brown crust and irresistible flavor.
I truly believe that once you try this recipe, it will become a staple in your household. It’s the perfect solution for busy weeknights, unexpected guests, or any time you’re craving a delicious and satisfying meal.
So, what are you waiting for? Gather your ingredients, preheat your oven, and get ready to experience the magic of these Ham and Cheese Sliders. I’m confident that you and your loved ones will absolutely adore them.
And most importantly, I want to hear about your experience! Did you try any of the variations? Did you add your own special touch? Share your photos and comments below. I can’t wait to see what you create! Happy cooking!
Ham and Cheese Sliders: The Ultimate Recipe for Easy Entertaining
Savory-sweet Hawaiian roll sliders with ham and Swiss, brushed with buttery sauce and baked until golden. Perfect for parties or quick meals!
Ingredients
- 12 Hawaiian sweet rolls
- 1 pound sliced ham (Black Forest preferred)
- 1 pound sliced Swiss cheese (or provolone, cheddar, etc.)
- 1/2 cup (1 stick) unsalted butter, melted
- 2 tablespoons Dijon mustard
- 1 tablespoon Worcestershire sauce
- 1 tablespoon poppy seeds
- 1 tablespoon dried minced onion
- 1 teaspoon garlic powder
- Optional: Everything bagel seasoning for topping
Instructions
- Prepare the Sauce: In a small bowl, whisk together the melted butter, Dijon mustard, and Worcestershire sauce until smooth. Add poppy seeds, dried minced onion, and garlic powder. Stir to combine. Taste and adjust seasonings as desired.
- Assemble the Sliders: Preheat oven to 350°F (175°C). Lightly grease a 9×13 inch baking dish.
- Slice the slab of Hawaiian sweet rolls horizontally, keeping the tops and bottoms connected.
- Place the bottom half of the rolls into the prepared baking dish.
- Layer the ham evenly over the bottom half of the rolls.
- Layer the Swiss cheese over the ham, covering the entire surface.
- Carefully place the top half of the rolls back on top of the cheese.
- Apply Sauce and Bake: Brush the prepared butter sauce evenly over the top of the rolls.
- If desired, sprinkle the top of the rolls with everything bagel seasoning.
- Cover the baking dish with aluminum foil.
- Bake in the preheated oven for 20 minutes.
- Remove the foil and bake for an additional 5-10 minutes, or until the tops of the rolls are golden brown and the cheese is melted and bubbly.
- Remove from oven and let rest for a few minutes before serving.
- Serve: Slice the sliders along the seams of the rolls. Serve immediately and enjoy!
Notes
- Cheese Variations: Provolone, cheddar, Monterey Jack, or pepper jack can be used.
- Ham Variations: Honey ham, smoked ham, or turkey can be used.
- Add Veggies: Thinly sliced onions, pickles, or bell peppers can be added.
- Spice it Up: Add a pinch of red pepper flakes to the butter sauce.
- Make it Ahead: Assemble ahead of time and store in the refrigerator until ready to bake. Add a few extra minutes to the baking time.
- Garlic Lovers: Add a clove of minced garlic to the butter sauce.
- Herb Infusion: Add fresh herbs like thyme or rosemary to the butter sauce.
- Sweet and Savory: Drizzle honey or maple syrup over the ham before adding the cheese.
- Different Buns: Brioche or pretzel buns can be used.
- Rolls are burning: Reduce oven temperature or cover with foil.
- Cheese isn’t melting: Ensure oven is preheated and sliders are covered with foil.
- Sliders are dry: Use enough butter sauce and don’t overbake.


Leave a Comment