

Roasted Russet Potatoes are arguably the quintessential side dish, capable of elevating any meal from ordinary to extraordinary. There’s something undeniably magical about taking a simple russet potato and transforming it into a culinary marvel: impossibly crispy on the outside, yielding to a cloud-like, fluffy interior. It’s this delightful contrast in textures, coupled with a rich, savory flavor, that makes them a beloved staple across countless tables. While the humble potato has been a food source for millennia, the art of roasting it to perfection has become a cherished culinary tradition, an essential component of comfort food worldwide. People adore this dish not just for its incredible taste and satisfying texture, but also for its remarkable versatility and the heartwarming comfort it brings to any gathering. This guide is dedicated to perfecting your next batch of Roasted Russet Potatoes, ensuring every bite is a testament to simple culinary excellence.

Ingredients:
- 2.5 – 3 pounds Russet Potatoes: I always opt for Russet potatoes when I’m aiming for that ideal fluffy interior and super crispy exterior. Their high starch content is key to achieving this perfect texture. When selecting them, look for firm, unblemished potatoes without any green spots or sprouts. Organic or conventional, both work beautifully, just ensure they are of good quality.
- 1/4 cup Extra Virgin Olive Oil: This is my go-to for roasting, providing a wonderful flavor and helping the potatoes crisp up beautifully. You can also use other high-heat oils like avocado oil, grapeseed oil, or even melted butter or a combination for a different flavor profile. The key is to choose an oil with a relatively high smoke point for best results.
- 1.5 – 2 teaspoons Kosher Salt: I prefer kosher salt for its coarser texture and ability to evenly coat the potatoes without over-salting, though fine sea salt can also be used. Adjust to your taste, but a good amount is crucial for seasoning these Roasted Russet Potatoes properly from the inside out.
- 1/2 teaspoon Freshly Ground Black Pepper: Freshly ground pepper adds a punchier flavor than pre-ground. Adjust the amount based on your preference for a subtle warmth.
- 1 teaspoon Garlic Powder: This is my secret weapon for adding a savory depth without the risk of fresh garlic burning during the long roasting process. It melds seamlessly with the potatoes.
- 1/2 teaspoon Paprika (optional, but highly recommended): For a subtle smoky flavor and a beautiful golden-red hue, paprika is fantastic. You can use sweet, smoked, or even a touch of hot paprika if you like a little kick.
- 1 tablespoon Fresh Rosemary or Thyme, chopped (optional, for finishing): Adding fresh herbs towards the end of the roasting process or right after they come out of the oven elevates the aroma and flavor significantly. Rosemary and thyme are classic companions to Roasted Russet Potatoes.
Preparation: Transforming Russet Potatoes into Roasting Perfection
Achieving truly spectacular Roasted Russet Potatoes is all about the preparation. This isn’t just about chopping; it’s about setting the stage for that irresistible crispy exterior and fluffy, tender interior. Trust me, these steps are worth every moment.
- Wash and Peel (or don’t!): First, I thoroughly scrub the Russet potatoes under cold running water to remove any dirt. Whether you peel them or not is entirely a matter of personal preference. I often choose to peel them for a smoother texture, but leaving the skin on can add a rustic charm and extra fiber, plus a little more crispiness. If you do leave the skin on, ensure they are very well scrubbed.
- Cut for Even Cooking: This is a critical step for uniform results. I start by cutting each potato lengthwise, then into thick planks, and finally into roughly 1-inch to 1.5-inch cubes or wedges. The key here is consistency; try your best to make all the pieces similar in size and shape. This ensures they cook at the same rate, preventing some pieces from being undercooked while others are burnt. If you have some smaller ends, try to tuck them in with larger pieces to avoid them overcooking too quickly.
- Rinse Thoroughly to Remove Starch: Once all your potatoes are cut, place them in a large bowl or colander and rinse them under cold water. I like to let the water run over them for a good minute or two, tossing them around, until the water runs mostly clear. This step is crucial for removing excess surface starch, which is one of the biggest secrets to achieving ultimate crispiness. Less starch on the surface means more direct contact for the oil to work its magic.
- The Starch-Removal Soak (Optional, but highly recommended for peak crispiness): For truly transcendent Roasted Russet Potatoes, I often go an extra step. After rinsing, I’ll place the cut potatoes into a large bowl and submerge them in cold water. I let them soak for at least 30 minutes, or even up to a few hours. This allows even more starch to leach out, leading to an even crispier exterior and a wonderfully fluffy interior. If you’re short on time, even a 15-minute soak will make a noticeable difference. If soaking for longer, you can change the water once or twice.
-
The Par-Boil: The Master Stroke for Perfect Texture: This is where the magic truly happens for achieving that coveted fluffy interior and impossibly crispy exterior for your Roasted Russet Potatoes.
- After soaking (or rinsing), drain the potatoes very well.
- Transfer the drained potatoes to a large pot and cover them with cold water. Add about 1 teaspoon of salt to the water – this seasons the potatoes from the inside out during the par-boil.
- Bring the water to a rolling boil over medium-high heat. Once boiling, reduce the heat slightly and let them simmer gently for about 6-8 minutes. I look for them to be just tender enough that a paring knife can pierce them with slight resistance, but not so soft that they are falling apart. They should definitely not be fully cooked through at this stage. This pre-cook gelatinizes the starches just below the surface, which will help them crisp up dramatically in the oven.
- Carefully drain the par-boiled potatoes in a colander. This step is delicate, as the potatoes are now more fragile.
- Rough Up for Extra Crispiness: Here’s another fantastic trick: Once drained, return the hot potatoes to the empty pot. Put the lid back on and gently shake the pot back and forth for about 30 seconds. The steam trapped inside, combined with the motion, will cause the edges of the potatoes to “rough up” and become slightly floury. These roughed-up edges are prime real estate for crisping in the oven, creating countless tiny nooks and crannies that will turn wonderfully golden and crunchy. Be gentle but firm enough to create that desired texture.
- Thoroughly Dry the Potatoes: This might be the single most important step for crispy Roasted Russet Potatoes, even more so than the par-boil for some methods. Moisture is the enemy of crispiness. I spread the roughed-up potatoes in a single layer on a clean kitchen towel or several layers of paper towels. Then, I take another towel and gently pat them completely dry. You want to remove as much surface moisture as possible. You can even let them air dry for 10-15 minutes if you have the time. Any lingering water will steam in the oven instead of crisping the potato.
Seasoning and Initial Roast Preparation: Building Layers of Flavor
Now that our potatoes are perfectly prepared and dried, it’s time to season them generously and get them ready for their journey in the oven. This is where we infuse them with the classic flavors that make Roasted Russet Potatoes so universally loved.
- Preheat Your Oven: I always preheat my oven to a high temperature, typically 400°F (200°C), before anything even goes in. A hot oven is crucial for immediate browning and crisping. For maximum crispiness, some even go as high as 425°F (220°C). I usually place a large, heavy-duty baking sheet (preferably light-colored to prevent over-browning on the bottom) in the oven as it preheats. Heating the pan with the oven ensures the potatoes hit a scorching hot surface, which helps prevent sticking and promotes even browning from the start.
-
Season and Toss: Transfer the thoroughly dried and roughed-up potatoes to a large mixing bowl. Drizzle them with the 1/4 cup of olive oil. Now, sprinkle in the kosher salt, freshly ground black pepper, garlic powder, and paprika (if using). Using your hands (which I find works best) or a large spoon, toss the potatoes vigorously until every single piece is evenly coated in oil and spices. You want a consistent layer of seasoning on all sides. Don’t be shy with the salt; potatoes love salt, and it helps draw out moisture for crisping.
- Tip for Even Coating: If you find the oil isn’t coating perfectly, you can add another tablespoon, but generally, 1/4 cup is sufficient for this amount of potatoes. The roughed-up surface created during the par-boil and shaking helps the oil and spices cling better.
- Herb Integration (Later Stage): I typically hold off on adding fresh herbs like rosemary or thyme at this stage because their delicate leaves can burn during the initial high-heat roasting. I prefer to add them towards the end or after the potatoes are cooked for maximum aromatic impact.
- Arrange on the Hot Baking Sheet: Carefully remove the preheated baking sheet from the oven. This pan will be extremely hot, so use oven mitts! Immediately spread the seasoned potatoes in a single layer across the hot baking sheet. This “single layer” rule is non-negotiable for crispy Roasted Russet Potatoes. If the potatoes are overcrowded, they will steam instead of roast, resulting in soggy, unappealing spuds. If you have too many potatoes for one sheet, use two sheets, ensuring ample space between each piece. Giving them their personal space is key for browning.
The Roasting Process: Achieving Golden Perfection
With the preparation done and seasoning applied, the oven takes over to transform these humble Russet potatoes into a culinary masterpiece. Patience and periodic checks are essential for that perfect golden, crispy finish.
- Initial Roast: Place the baking sheet with the single layer of potatoes back into the preheated 400°F (200°C) oven. Let them roast undisturbed for 20-25 minutes. During this initial phase, the potatoes begin to soften on the inside and develop a lovely golden crust on the bottom. Avoid peeking too often or moving them around, as you want that bottom crust to form properly.
-
Flip and Continue Roasting: After the initial 20-25 minutes, carefully remove the baking sheet from the oven. Using a sturdy metal spatula or tongs, flip each potato piece to expose a new surface to the hot pan. You should see a beautiful golden-brown crust on the underside. Return the pan to the oven and continue roasting for another 20-25 minutes.
- The Art of Flipping: I try to flip each piece individually to ensure maximum contact with the hot pan for consistent browning on all sides. If you have a lot, you can gently scrape and toss them, but individual flipping yields the best results.
- Maintaining Heat: Try to work quickly when flipping to minimize heat loss from the oven.
-
Final Roasting and Crisping: After the second roasting period, your Roasted Russet Potatoes should be looking quite golden and tender. Now, I often reduce the temperature slightly to 375°F (190°C) or keep it at 400°F (200°C), depending on how quickly they are browning, and continue roasting for an additional 10-20 minutes, or until they reach your desired level of crispiness and deep golden-brown color. I might flip them one more time during this phase, just to ensure all sides get a chance to crisp up.
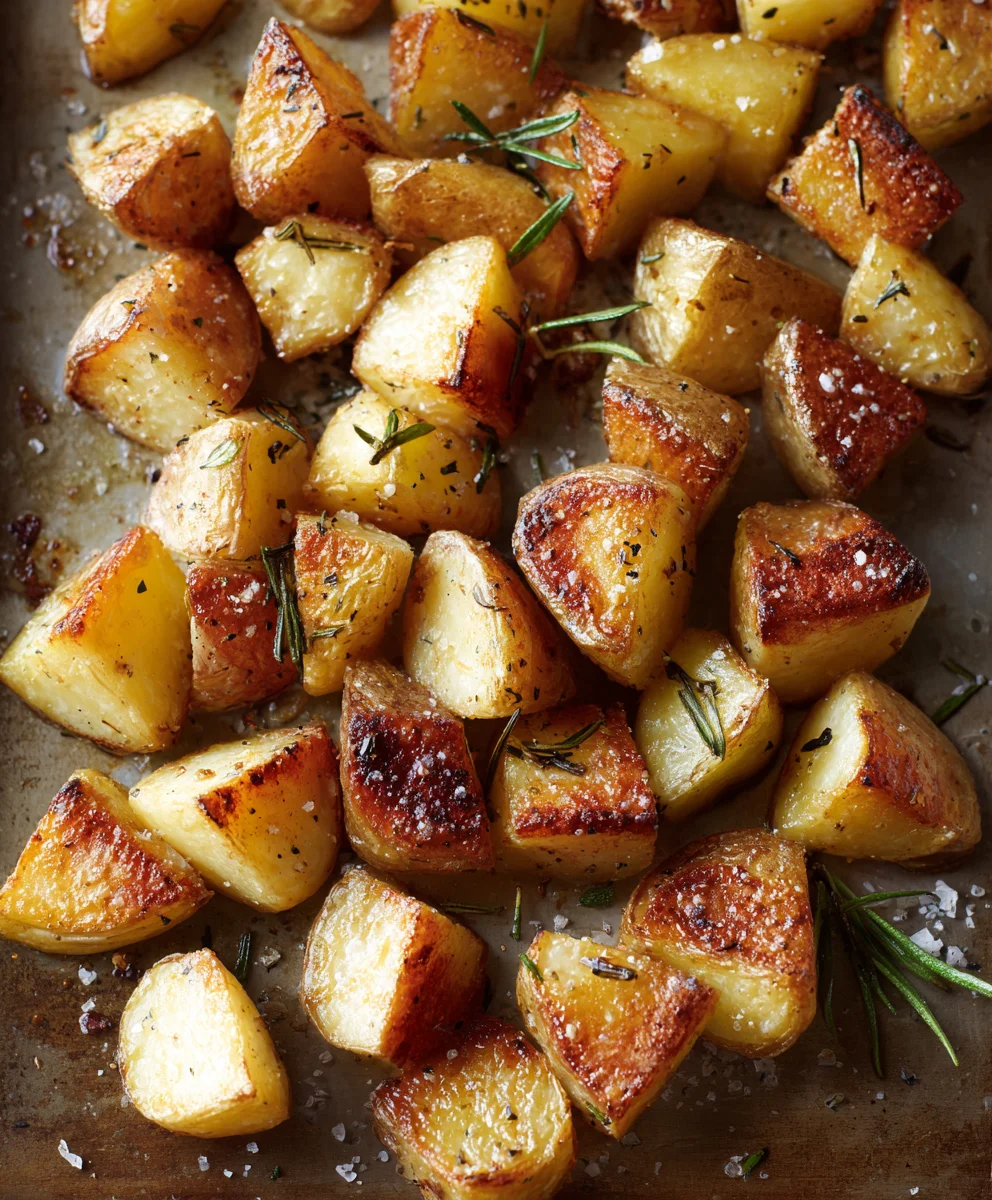
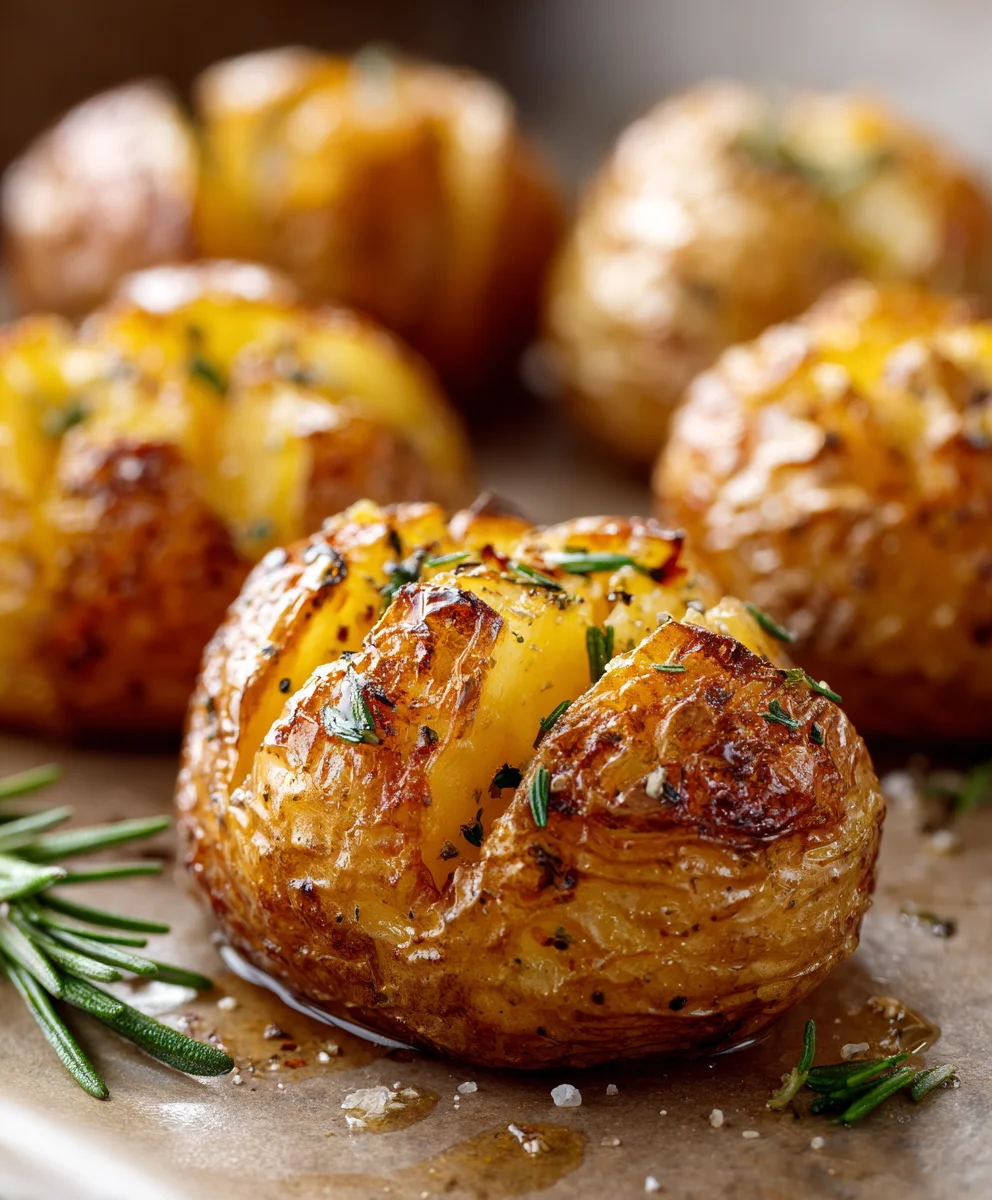
- Visual Cues for Doneness: The potatoes should be deeply golden brown, with some edges turning almost mahogany. When pierced with a fork, they should be very tender on the inside, almost melting. The exterior should be audibly crisp when tapped.
- Troubleshooting: If your potatoes aren’t as crispy as you’d like, ensure they were dry enough before roasting and not overcrowded on the pan. Sometimes, a few extra minutes at a slightly higher temperature (e.g., 425°F/220°C) at the very end can give them that final burst of crispiness.
Finishing Touches and Serving: The Grand Finale
Once your Roasted Russet Potatoes have achieved that perfect golden hue and irresistible crisp, it’s time for the final flourishes that elevate them from good to truly unforgettable.
- Add Fresh Herbs (if using): Once the potatoes are beautifully roasted and out of the oven, this is the perfect time to sprinkle them with your chopped fresh rosemary or thyme. The residual heat will gently warm the herbs, releasing their fragrant oils without burning them. Toss gently to combine. If you prefer, you can add the herbs for the last 5-10 minutes of roasting, but keep a close eye on them to prevent scorching.
- Taste and Adjust Seasoning: Give one of your glorious Roasted Russet Potatoes a quick taste test. This is your last chance to adjust the seasoning. Sometimes, they might need a final pinch of salt, especially if you didn’t salt the par-boiling water, or another grind of black pepper. A tiny splash of good quality apple cider vinegar or lemon juice can also brighten the flavors beautifully.
-
Serve Immediately: Roasted Russet Potatoes are always best served hot, straight from the oven. Their crispiness is at its peak immediately after roasting.
- Serving Suggestions: These versatile potatoes are the perfect side dish for almost any meal. I love them alongside roasted chicken, a juicy steak, pan-seared fish, or even simply with scrambled eggs for a hearty breakfast. They are also fantastic tossed into a warm salad or served with a dollop of sour cream and chives.
- Storage: While best fresh, leftover Roasted Russet Potatoes can be stored in an airtight container in the refrigerator for up to 3-4 days. To reheat, spread them on a baking sheet and warm them in a 375°F (190°C) oven until heated through and re-crisped, about 10-15 minutes. Avoid the microwave, as it will make them soggy.
Conclusion:
So, after all is said and done, what makes this recipe for crispy, fluffy, and utterly delicious roasted potatoes an absolute must-try in your kitchen? It’s more than just a simple side dish; it’s an experience. I’ve spent countless hours perfecting the technique, and I can confidently say that these aren’t just any potatoes. They are the epitome of what perfect roasted potatoes should be: incredibly crispy on the outside, with that satisfying shatter when you bite into them, revealing a wonderfully soft and airy interior that practically melts in your mouth. This isn’t just about cooking; it’s about transforming humble Russet potatoes into something truly extraordinary with minimal effort but maximum flavor.
I genuinely believe that once you try this method, you’ll never go back to your old ways. The secret lies in a few key steps that, while simple, make all the difference, ensuring every single piece gets that glorious golden-brown crust. You’ll find yourself reaching for this recipe again and again because it’s not only foolproof but also incredibly satisfying to achieve such spectacular results. Imagine the aroma filling your home as these beauties bake, a promise of the deliciousness to come. It’s a sensory delight that instantly elevates any meal, making even a weeknight dinner feel like a special occasion. Trust me, the joy of pulling a tray of perfectly golden, steaming hot potatoes from the oven is unparalleled.
Now, let’s talk about the incredible versatility of these gems. While they are a star on their own, complementing virtually any main course, their potential extends far beyond being just a simple accompaniment. Picture them alongside a juicy roasted chicken, a perfectly seared steak, or even a delicate piece of baked salmon – they elevate every bite. But don’t stop there!
Unleash Your Culinary Creativity with Serving Suggestions and Variations!
For breakfast or brunch, imagine adding a handful of these crispy morsels to your plate alongside scrambled eggs and bacon, or incorporating them into a hearty breakfast hash. They can even be chopped up and tossed into a vibrant green salad for added texture and flavor, or used as a delightful topping for a creamy tomato soup.
The beauty of this recipe truly shines in its adaptability. You can easily switch up the flavor profile to suit your mood or the meal you’re serving. For a classic herby approach, think fresh rosemary and thyme, finely chopped and tossed with the potatoes before roasting. If you’re a garlic lover like I am, a generous sprinkle of garlic powder or even a few smashed cloves added to the pan will infuse them with an irresistible aroma. A pinch of smoked paprika can add a wonderful depth and a subtle smoky note, while a dash of red pepper flakes will give them a gentle, warming kick. Don’t be afraid to experiment!
Feeling cheesy? A sprinkle of grated Parmesan in the last 10 minutes of baking will create a crispy, savory crust that’s out of this world. For a touch of elegance, a drizzle of truffle oil right before serving can transform them into a gourmet experience. You can even turn this into a one-pan meal by adding other quick-cooking vegetables like bell peppers, onions, or broccoli florets to the tray in the last 15-20 minutes of roasting. Just make sure not to overcrowd the pan to ensure everything still crisps up beautifully.
I really hope you’re as excited as I am about trying this recipe. It’s incredibly rewarding to master such a fundamental side dish, and I promise you, the results are worth every tiny bit of effort. These Roasted Russet Potatoes are more than just a recipe; they’re a foundation for countless delicious meals and a testament to how simple ingredients can create extraordinary flavors.
Your Turn: Try, Share, and Inspire!
Now it’s your turn! I absolutely encourage you to give this recipe a whirl in your own kitchen. Experience firsthand the joy of producing perfectly crispy, tender roasted potatoes. Once you’ve made them, I would absolutely love to hear about your experience. Did you try a unique seasoning combination? Did you serve them with a special meal? Please don’t hesitate to share your thoughts, tips, and photos in the comments section below! Your culinary adventures inspire me and our entire community. Tag us on social media if you share your creations – I can’t wait to see your perfect spuds! Happy roasting, and get ready to impress everyone at your table, including yourself!
FAQs
What kind of potatoes are best for roasting to get them crispy?
For the absolute crispiest roasted potatoes with a fluffy interior, I highly recommend using Russet potatoes, which this recipe specifically focuses on. Their high starch content helps achieve that desired crisp exterior while keeping the inside light and airy. Yukon Golds are another excellent choice, offering a slightly creamier texture and a beautiful golden color. Red potatoes also work well, especially for smaller, bite-sized pieces, though they tend to be less fluffy inside than Russets.
How do I make my roasted potatoes extra crispy?
Achieving extra crispy roasted potatoes involves a few key steps:
- Roughing them up: After boiling and draining, gently shake the pot with the lid on. This creates a starchy slurry on the surface, which crisps up beautifully in the oven.
- Preheat the pan: Always preheat your baking sheet in the oven with the oil before adding the potatoes. This ensures an immediate sizzle and prevents sticking, promoting an even, crispy crust.
- Don’t overcrowd: Give your potatoes plenty of space on the baking sheet. If they’re too close together, they’ll steam instead of roast, leading to soggy results. Use two trays if necessary!
- High heat: Roasting at a high temperature (around 400-425°F or 200-220°C) is crucial for crispiness.
- Ample fat: Use enough oil to coat all the potato pieces thoroughly. Olive oil, avocado oil, or even a combination of oil and a little butter or duck fat work wonderfully.
Can I prepare roasted potatoes ahead of time?
While roasted potatoes are best enjoyed fresh from the oven for optimal crispiness, you can do some prep work in advance. You can peel and chop the potatoes up to 24 hours ahead of time. Store them submerged in cold water in the refrigerator to prevent browning. Just before roasting, drain them thoroughly and dry them very well with a clean kitchen towel or paper towels – this is critical for crispiness! You can also par-boil them, cool them completely, and store them in the fridge, then rough them up and roast when ready.
What are some good seasoning combinations for roasted Russet potatoes?
The possibilities are endless! Beyond simple salt and black pepper, some of my favorite combinations include:
- Classic Herb: Rosemary, thyme, garlic powder, onion powder, salt, and pepper.
- Spicy Kick: Smoked paprika, chili powder, cayenne pepper, cumin, salt, and pepper.
- Italian Style: Dried oregano, basil, garlic powder, a pinch of red pepper flakes, salt, and pepper.
- Cheesy Garlic: Garlic powder, a little nutritional yeast (for a cheesy flavor without dairy, or for added umami), and grated Parmesan added in the last 10 minutes.
- Lemon Herb: Fresh dill, parsley, a squeeze of lemon juice (added after roasting), salt, and pepper.
Feel free to mix and match to discover your personal favorite!
Why are my roasted potatoes not getting crispy?
There are a few common culprits if your potatoes aren’t crisping up:
- Too much moisture: The potatoes weren’t dried properly after washing or par-boiling. Moisture creates steam, which prevents crisping.
- Overcrowding the pan: If the baking sheet is too full, the potatoes will steam rather than roast. Use two pans if necessary, ensuring each piece has space.
- Not enough fat: A good coating of oil is essential for developing that golden, crispy crust.
- Oven temperature too low: Roasting at too low a temperature won’t provide the intense heat needed for proper browning and crisping.
- Not turning them: While not strictly necessary for every roast, turning the potatoes at least once ensures even browning on all sides.
- Starting with a cold pan: Adding potatoes to a cold pan prevents that immediate sizzle and can lead to sticking and less crisp results. Always preheat the pan and oil.
Golden Roasted Russet Potatoes: Crispy & Tender Perfection
Transform simple russet potatoes into a culinary marvel: impossibly crispy on the outside, yielding to a cloud-like, fluffy interior. This guide perfects your next batch, ensuring every bite is a testament to simple culinary excellence.
Ingredients
-
2.5 – 3 pounds Russet Potatoes
-
1/4 cup Extra Virgin Olive Oil
-
1.5 – 2 teaspoons Kosher Salt
-
1/2 teaspoon Freshly Ground Black Pepper
-
1 teaspoon Garlic Powder
-
1/2 teaspoon Paprika (optional)
-
1 tablespoon Fresh Rosemary or Thyme, chopped (optional, for finishing)
Instructions
-
Step 1
Scrub potatoes clean. Peel or leave skin on. Cut into uniform 1 to 1.5-inch cubes or wedges. -
Step 2
Rinse cut potatoes under cold water until water runs clear to remove surface starch. For extra crispiness, soak in cold water for at least 30 minutes, then drain. -
Step 3
Transfer drained potatoes to a pot, cover with cold water, add 1 tsp salt, and bring to a boil. Simmer for 6-8 minutes until slightly tender. Drain thoroughly. Return to the empty hot pot, cover, and gently shake for 30 seconds to rough up the edges for extra crispiness. -
Step 4
Spread roughed-up potatoes on a clean towel and pat completely dry. This is crucial for crispiness. -
Step 5
Preheat oven to 400°F (200°C) with a large, heavy-duty baking sheet inside. -
Step 6
In a large bowl, toss the dry potatoes with olive oil, kosher salt, black pepper, garlic powder, and paprika (if using) until every piece is evenly coated. -
Step 7
Carefully remove the hot baking sheet from the oven. Immediately spread the seasoned potatoes in a single layer across the hot sheet. Do not overcrowd; use two sheets if necessary. -
Step 8
Roast for 20-25 minutes undisturbed. -
Step 9
Flip each potato piece. Return to oven and continue roasting for another 20-25 minutes. -
Step 10
Continue roasting for an additional 10-20 minutes, or until deeply golden brown and audibly crispy. You may reduce temperature slightly to 375°F (190°C) if browning too quickly. -
Step 11
Once out of the oven, sprinkle with chopped fresh rosemary or thyme (if using). Taste and adjust seasoning as needed. Serve immediately.
Important Information
Nutrition Facts (Per Serving)
It is important to consider this information as approximate and not to use it as definitive health advice.
Allergy Information
Please check ingredients for potential allergens and consult a health professional if in doubt.


Leave a Comment