

Funfetti Cookie Topped Cheesecake is not just a dessert; it’s an experience, a joyful celebration in every single bite. Imagine a world where the rich, velvety decadence of classic cheesecake meets the playful, sprinkle-studded charm of your favorite Funfetti cookie. That world, my friends, is exactly what we’re about to explore!
Uniting Culinary Legacies with Modern Joy
I firmly believe that some of the best culinary creations stem from a desire to elevate familiar comforts, and this recipe is a perfect testament to that philosophy. We all know and adore cheesecake for its elegant simplicity and irresistible creaminess, a dessert with roots tracing back to ancient Greece, evolving through centuries to become the beloved classic it is today. Similarly, the Funfetti cookie, with its vibrant burst of color and delightful vanilla notes, evokes a sense of nostalgia and pure, unadulterated happiness, representing the modern celebration of joy in baking. Combining these two titans of taste results in a dessert that truly has it all.
The beauty of the Funfetti Cookie Topped Cheesecake lies in its magnificent synergy. It offers a fascinating contrast of textures – the smooth, cool, and tangy cheesecake base perfectly complemented by the slightly chewy, sweet, and surprisingly robust cookie layer on top, all punctuated by the satisfying crunch of sprinkles. This isn’t just about combining two desserts; it’s about creating a harmonious masterpiece that delights both the eye and the palate, making every occasion feel a little more special. Prepare to create a dessert that will undoubtedly become a new favorite, earning you rave reviews and requests for more!

Ingredients:
Creating this spectacular Funfetti Cookie Topped Cheesecake is truly a labor of love, but every single ingredient plays a crucial role in delivering that irresistible combination of creamy, crunchy, and wonderfully whimsical flavors. Here’s what you’ll need to gather:
For the Graham Cracker Crust:
- 1 ½ cups (about 180g) graham cracker crumbs (from about 10-12 full sheets of graham crackers, finely crushed)
- ¼ cup (50g) granulated sugar
- 6 tablespoons (85g) unsalted butter, melted
For the Creamy Cheesecake Filling:
- 32 ounces (900g) full-fat cream cheese, softened to room temperature (this is crucial for a smooth filling!)
- 1 ½ cups (300g) granulated sugar
- 2 teaspoons pure vanilla extract
- 1 teaspoon fresh lemon zest (optional, but it brightens the flavor beautifully!)
- ¼ cup (60ml) sour cream or full-fat Greek yogurt, at room temperature
- 4 large eggs, at room temperature
For the Homemade Funfetti Cookie Dough Topping:
- ½ cup (113g) unsalted butter, softened to room temperature
- ½ cup (100g) granulated sugar
- ¼ cup (50g) light brown sugar, packed
- 1 large egg, at room temperature
- 1 teaspoon pure vanilla extract
- 1 ½ cups (180g) all-purpose flour
- ½ teaspoon baking soda
- ¼ teaspoon salt
- ½ cup (approx. 100g) rainbow sprinkles (jimmie-style work best as they don’t bleed color as much during baking)
Optional Garnishes:
- Whipped cream
- Extra rainbow sprinkles
Instructions:
Get ready to embark on a delightful baking adventure! This recipe for a Funfetti Cookie Topped Cheesecake might have a few steps, but I promise you, the end result is absolutely worth every moment of effort. We’re going to tackle this in manageable sections, ensuring each component is perfect before we bring them all together.
Preparing the Funfetti Cookie Dough
We’re going to start with the cookie dough, not just because it needs a little chill time, but because it sets the stage for the “fun” in our Funfetti creation!
- Cream the Wet Ingredients: In a large mixing bowl, using an electric mixer (either hand-held or stand mixer with a paddle attachment), beat the softened butter, granulated sugar, and packed light brown sugar together on medium speed until the mixture is light, fluffy, and pale in color. This usually takes about 2-3 minutes. Proper creaming incorporates air, which contributes to the cookies’ tender texture.
- Add Egg and Vanilla: Beat in the large egg until it is fully incorporated, scraping down the sides of the bowl as needed. Then, mix in the pure vanilla extract. Continue to beat for another minute, ensuring everything is well combined and smooth.
- Combine Dry Ingredients: In a separate medium bowl, whisk together the all-purpose flour, baking soda, and salt. Make sure these are thoroughly combined to ensure even leavening throughout the cookies.
- Gradually Add Dry to Wet: With the mixer on low speed, gradually add the dry ingredient mixture to the wet ingredients, mixing just until combined. Be careful not to overmix at this stage; overmixing can develop the gluten in the flour too much, leading to tough cookies. As soon as you see no more streaks of flour, stop.
- Fold in the Rainbow Sprinkles: Gently fold in the rainbow sprinkles using a spatula. We want these beautiful colors to remain vibrant, so a light hand is best here. Overmixing the sprinkles can cause their colors to bleed into the dough, which isn’t the look we’re going for with a true Funfetti.
- Chill the Dough: Cover the bowl with plastic wrap and refrigerate the cookie dough for at least 30 minutes. Chilling the dough is an important step; it helps the butter firm up, preventing the cookies from spreading too much during baking and intensifying the flavors. While it’s chilling, we can move on to the crust and cheesecake filling.
Prepping the Graham Cracker Crust
A sturdy, buttery crust is the foundation of any great cheesecake, and our Funfetti Cookie Topped Cheesecake is no exception. Let’s get it ready!
- Preheat Oven & Prepare Pan: Preheat your oven to 350°F (175°C). Wrap the outside bottom and sides of a 9-inch springform pan with a double layer of heavy-duty aluminum foil. This is absolutely essential if you plan to use a water bath (which I highly recommend for cheesecakes to prevent cracking), as it protects the crust from water seepage.
- Make the Crumbs: If you’re starting with whole graham crackers, place them in a food processor and pulse until fine crumbs form. Alternatively, you can place them in a large zip-top bag and crush them with a rolling pin.
- Combine Crust Ingredients: In a medium bowl, combine the graham cracker crumbs, granulated sugar, and melted unsalted butter. Mix thoroughly until all the crumbs are moistened and resemble wet sand.
- Press into Pan: Pour the crumb mixture into the prepared springform pan. Use the bottom of a flat glass or your hands to firmly press the mixture evenly across the bottom of the pan and slightly up the sides (about 1 inch high). A well-compacted crust is key to it holding together.
- Pre-Bake the Crust: Bake the crust in the preheated oven for 8-10 minutes. Pre-baking helps to set the crust, making it sturdier and less likely to become soggy once the filling is added. Remove from the oven and set aside to cool slightly while you prepare the cheesecake filling. Reduce the oven temperature to 325°F (160°C) for the cheesecake.
Crafting the Velvety Cheesecake Filling
Now for the star of the show! A perfectly smooth, rich, and creamy cheesecake filling is what makes this dessert truly decadent. Pay close attention to these steps for the best results.
- Ensure Room Temperature Ingredients: This is arguably the most important step for a silky-smooth cheesecake. Make sure your full-fat cream cheese, sour cream (or Greek yogurt), and eggs are all at room temperature. Cold ingredients do not combine smoothly and can result in a lumpy batter, which we definitely want to avoid for our elegant Funfetti Cookie Topped Cheesecake.
- Beat Cream Cheese and Sugar: In a large mixing bowl, using an electric mixer, beat the softened cream cheese on medium speed until it’s completely smooth and free of any lumps, about 2-3 minutes. Gradually add the granulated sugar, continuing to beat until the mixture is light, fluffy, and well combined, another 2-3 minutes. Scrape down the sides of the bowl frequently.
- Add Flavorings: Mix in the pure vanilla extract and, if using, the fresh lemon zest. Beat until just combined.
- Incorporate Sour Cream: Add the room temperature sour cream (or Greek yogurt) to the mixture and beat on low speed until just incorporated. The sour cream adds a lovely tang and extra creaminess, balancing the richness of the cream cheese.
- Add Eggs Gradually: Add the large eggs, one at a time, beating on low speed only until each egg is just incorporated. It is crucial not to overmix once the eggs are added. Overmixing introduces too much air into the batter, which can cause the cheesecake to puff up too much during baking and then crack as it cools. After the last egg is mixed in, give the bowl a final scrape with a spatula to ensure everything is perfectly combined without overworking it.
- Prepare the Water Bath (Bain-Marie): Place the foil-wrapped springform pan into a larger roasting pan. This roasting pan will hold the water bath. Bring a kettle of water to a boil. A water bath creates a moist, even heat environment, which is essential for a perfectly cooked, crack-free cheesecake.
Assembling and Baking the “Funfetti Cookie Topped Cheesecake”
Now for the exciting part where our delicious components come together to form the ultimate Funfetti Cookie Topped Cheesecake!
- Pour Filling into Crust: Carefully pour the cheesecake filling into the pre-baked graham cracker crust. Gently tap the pan on the counter a few times to release any large air bubbles.
- Add the Funfetti Cookie Dough: Retrieve your chilled Funfetti cookie dough. Drop spoonfuls (about 1 tablespoon each) of the dough evenly over the top of the cheesecake filling. You can slightly flatten some pieces if you like, or leave them as rustic dollops. Don’t worry if they sink a little; they’ll bake beautifully into the cheesecake, creating pockets of soft, chewy cookie goodness.
- Place in Water Bath: Carefully transfer the roasting pan with the cheesecake to the preheated 325°F (160°C) oven. Once the pan is on the oven rack, pour the boiling water into the roasting pan until it reaches about halfway up the sides of the springform pan. Be very careful not to splash water into the cheesecake itself.
- Bake the Cheesecake: Bake for 60-75 minutes. The cheesecake is done when the edges are set, but the center (about a 2-inch diameter) still has a slight jiggle when you gently shake the pan. The cookie dough will be golden brown and look perfectly baked. Resist the urge to open the oven door too often, as fluctuating temperatures can also contribute to cracks.
- Cool Slowly in Oven: Once baked, turn off the oven and leave the cheesecake inside with the oven door ajar for 1 hour. This slow cooling process prevents drastic temperature changes that can cause the cheesecake to crack.
- Cool on Counter: After 1 hour, carefully remove the roasting pan from the oven, then lift the springform pan out of the water bath (remove the foil). Place the cheesecake on a wire rack to cool completely to room temperature, which will take another 2-3 hours.
- Chill Thoroughly: Once completely cooled, cover the cheesecake loosely with plastic wrap and refrigerate for at least 6-8 hours, or preferably overnight. This chilling period is absolutely crucial for the cheesecake to fully set, develop its rich flavor, and achieve that perfect creamy texture. Do not skip this step!
Finishing Touches and Serving
The moment of truth! After all that patient waiting, it’s time to reveal and enjoy your magnificent Funfetti Cookie Topped Cheesecake.
- Remove from Pan: Once thoroughly chilled, run a thin knife around the edge of the cheesecake before releasing the springform collar. This helps ensure a clean release and prevents the edges from sticking.
- Decorate (Optional): If desired, you can pipe whipped cream around the top edge or dollop it on individual slices. A final sprinkling of extra rainbow sprinkles over the top truly enhances the “fun” in Funfetti and adds an extra pop of color.
- Slice and Serve: Use a sharp, thin knife to slice the cheesecake. For the cleanest cuts, wipe the knife clean with a damp cloth after each slice. Serve immediately and watch your guests’ eyes light up!
- Storage: Leftover Funfetti Cookie Topped Cheesecake should be covered and stored in the refrigerator for up to 5-7 days. It also freezes beautifully for longer storage; wrap individual slices or the whole cheesecake tightly in plastic wrap and then foil, and freeze for up to 1 month. Thaw in the refrigerator before serving.
Conclusion:
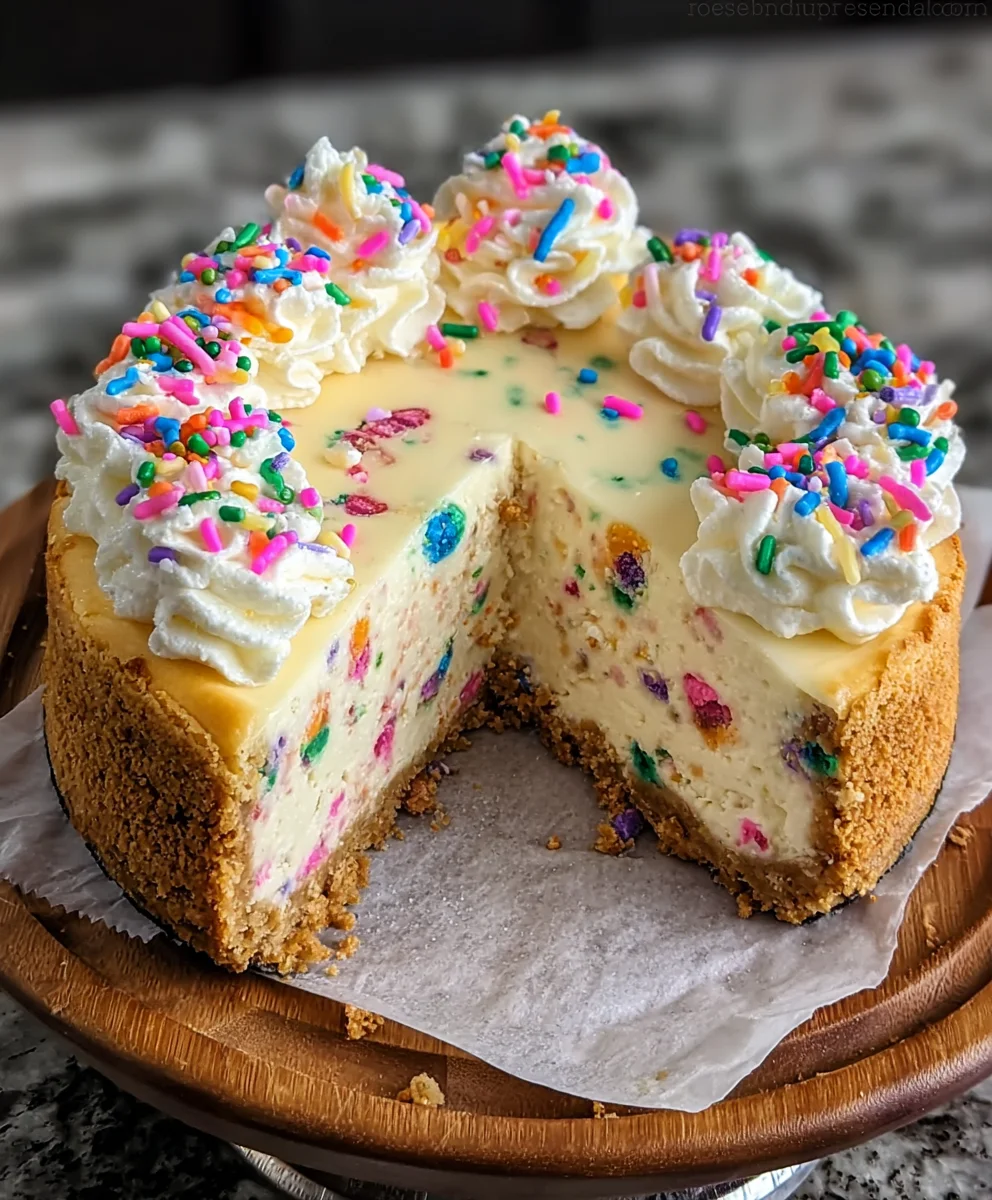
And so, we arrive at the culmination of our dessert journey, a truly magnificent creation that I am absolutely thrilled for you to experience firsthand. I’ve poured my heart into perfecting this recipe, and I genuinely believe it’s destined to become a staple in your celebratory arsenal, or perhaps even a delightful, whimsical treat for a regular Tuesday. This isn’t just another dessert; it’s a declaration of joy, a testament to the fact that sometimes, the most wonderful things in life are born from combining two already perfect elements into something even more extraordinary. Imagine the gasps of delight as you present this show-stopping masterpiece to your friends and family. The vibrant, playful sprinkles of the Funfetti cookies peeking out from atop the creamy, rich cheesecake base create a visual spectacle that promises fun even before the first bite.
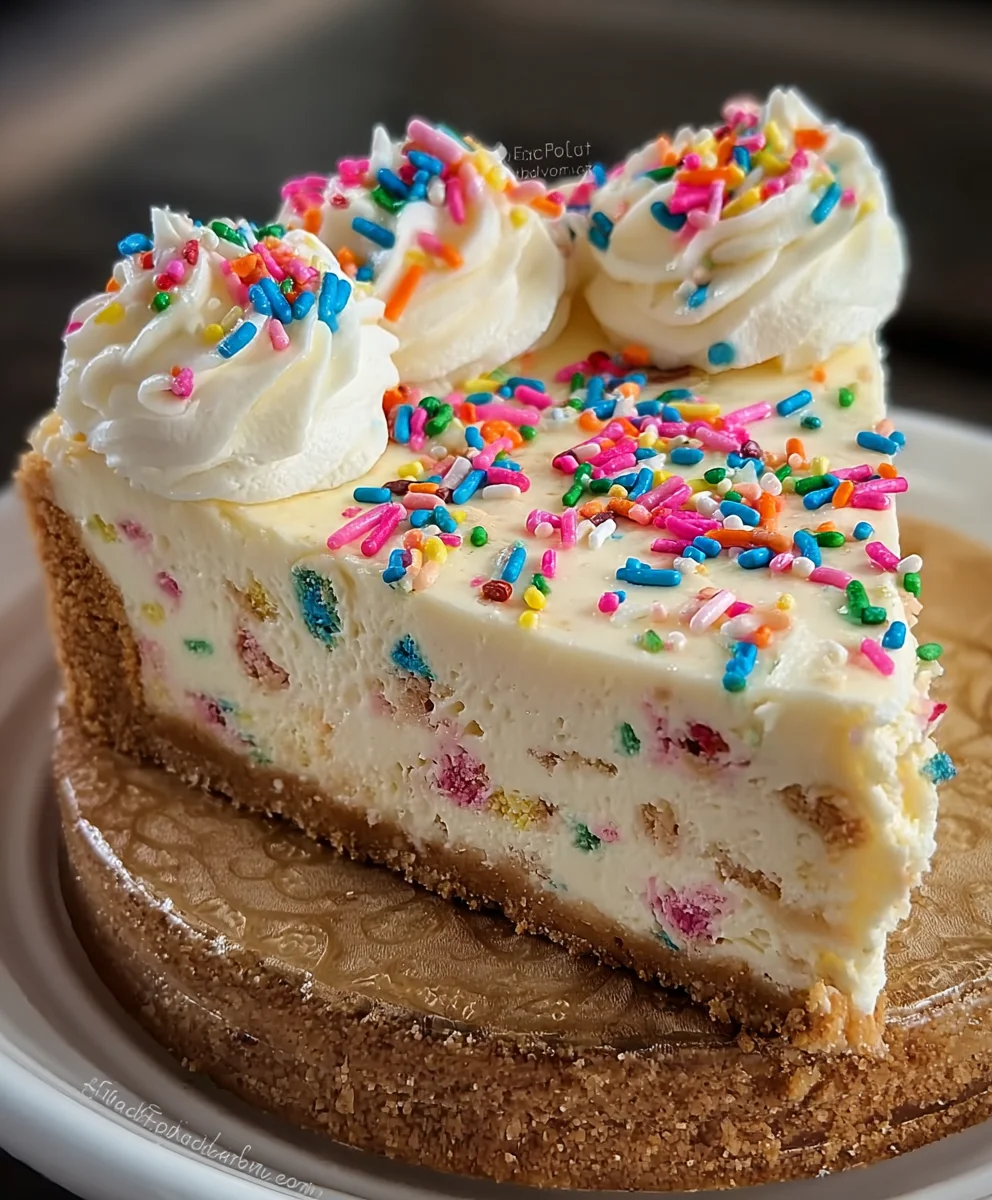
What truly makes this recipe a must-try, in my humble opinion, is the masterful blend of textures and flavors. You get the comforting, familiar chewiness of a classic Funfetti cookie, bursting with those colorful sprinkles that instantly transport you back to childhood birthdays, married harmoniously with the sophisticated, melt-in-your-mouth creaminess of a perfectly baked cheesecake. It’s a textural symphony! The slight tang of the cheesecake beautifully cuts through the sweetness of the cookies, creating a balanced profile that keeps you coming back for another slice, and then another. It’s a dessert that genuinely satisfies on multiple levels – visually, texturally, and, of course, gastronomically. You’re not just making a cheesecake; you’re crafting an edible experience, a conversation starter, and a memory maker.
When it comes to serving, this delightful creation is incredibly versatile. I love to serve individual slices slightly chilled, allowing the flavors to fully develop and the cheesecake to maintain its pristine structure. A simple dusting of powdered sugar can add an elegant touch, or for an extra pop of color and freshness, consider garnishing each slice with a few fresh raspberries or blueberries. Their slight tartness provides a wonderful counterpoint to the dessert’s sweetness. For those special occasions, a small dollop of homemade whipped cream, perhaps infused with a hint of vanilla bean, can elevate each serving into a truly decadent affair. Or, if you’re feeling extra indulgent, a scoop of premium vanilla bean ice cream melting alongside a warm slice (you can gently warm a slice in the microwave for a few seconds!) is pure bliss.
But don’t stop there with your creativity! This recipe is a fantastic canvas for your own culinary explorations. While the classic Funfetti cookie is undoubtedly charming, imagine the possibilities with different cookie variations. You could use mini chocolate chip cookies for a more robust chocolate flavor, or perhaps peanut butter cookies for a salty-sweet twist that would be absolutely divine. For the cheesecake itself, a swirl of raspberry puree or a hint of lemon zest folded into the batter could add an entirely new dimension of flavor. If you’re feeling adventurous, you could even experiment with a different crust – perhaps an Oreo crumb crust for a triple-chocolate explosion, or a shortbread crust for a buttery, delicate base. The beauty of this dessert is its inherent flexibility; it invites you to play and personalize. Imagine a fall version with pumpkin spice cookies, or a winter holiday treat featuring gingerbread cookies on top! The options are genuinely endless, limited only by your imagination.
Ultimately, this isn’t just a dessert; it’s an experience. The sheer delight of creating and serving a Funfetti Cookie Topped Cheesecake is unparalleled, and I wholeheartedly encourage you to embark on this delicious adventure in your own kitchen. Don’t be intimidated by the idea of baking a cheesecake; I’ve designed this recipe to be as straightforward and enjoyable as possible, yielding spectacular results that will impress everyone, including yourself. There’s immense satisfaction in pulling a perfectly golden-brown, beautifully adorned cheesecake from your oven. So, gather your ingredients, put on your favorite tunes, and get ready to create something truly magical. I truly hope you’ll give this recipe a try, and when you do, please don’t keep the deliciousness to yourself! I would absolutely love to hear about your experience. Did you add any unique twists? What did your family and friends think? Share your successes, your serving ideas, and any delightful variations you come up with in the comments below. Your feedback and creativity inspire me and our wonderful community of fellow food enthusiasts. Happy baking, and enjoy every single delightful bite!
Funfetti Cookie Topped Cheesecake: Easy Festive Dessert
Funfetti Cookie Topped Cheesecake is a joyful celebration, uniting the rich, velvety decadence of classic cheesecake with the playful, sprinkle-studded charm of Funfetti cookies. This dessert offers a harmonious blend of creamy and chewy textures, making every occasion feel special.
Ingredients
-
2 cups graham cracker crumbs
-
½ cup unsalted butter, melted
-
2 tbsp granulated sugar (for crust)
-
32 ounces full-fat cream cheese, softened
-
1 cup granulated sugar (for filling)
-
¼ cup sour cream, at room temperature
-
1 tsp pure vanilla extract (for filling)
-
1 tbsp fresh lemon juice (optional)
-
4 large eggs, at room temperature
-
½ cup unsalted butter, softened (for cookie dough)
-
½ cup granulated sugar (for cookie dough)
-
¼ cup light brown sugar, packed
-
1 large egg, at room temperature (for cookie dough)
-
1 tsp pure vanilla extract (for cookie dough)
-
1 ½ cups all-purpose flour
-
½ teaspoon baking soda
-
¼ teaspoon salt
-
½ cup rainbow sprinkles (for cookie dough)
-
1 cup whipped cream
-
1 cup powdered sugar (for icing drizzle)
-
2 tbsp milk (for icing drizzle)
-
Extra rainbow sprinkles (for garnish)
Instructions
-
Step 1
In a large bowl, cream ½ cup softened butter, ½ cup granulated sugar, and ¼ cup light brown sugar until light and fluffy (2-3 min). Beat in 1 egg and 1 tsp vanilla. In a separate bowl, whisk 1 ½ cups flour, ½ tsp baking soda, and ¼ tsp salt. Gradually add dry ingredients to wet, mixing just until combined. Gently fold in ½ cup rainbow sprinkles. Cover and refrigerate for at least 30 minutes. -
Step 2
Preheat oven to 350°F (175°C). Wrap a 9-inch springform pan with a double layer of heavy-duty aluminum foil. Combine 2 cups graham cracker crumbs, 2 tbsp granulated sugar, and ½ cup melted butter. Press firmly into the bottom and slightly up the sides of the prepared pan. Bake for 8-10 minutes. Remove and cool slightly. Reduce oven temperature to 325°F (160°C). -
Step 3
Ensure all filling ingredients are at room temperature. In a large mixing bowl, beat 32 oz softened cream cheese until smooth (2-3 min). Gradually add 1 cup granulated sugar, beating until light and fluffy (2-3 min). Mix in 1 tsp vanilla extract and 1 tbsp lemon juice (if using). Beat in ¼ cup sour cream on low speed until just combined. Add 4 large eggs one at a time, mixing on low speed until just incorporated after each; do not overmix. -
Step 4
Place the foil-wrapped springform pan into a larger roasting pan. Pour cheesecake filling into the pre-baked crust. Gently tap the pan to release air bubbles. Retrieve chilled cookie dough and drop spoonfuls evenly over the top of the cheesecake filling. Carefully transfer the roasting pan to the 325°F (160°C) oven. Pour boiling water into the roasting pan until it reaches halfway up the sides of the springform pan. Bake for 60-75 minutes, until edges are set but the center still slightly jiggles. The cookie dough will be golden brown. -
Step 5
Turn off the oven and leave the cheesecake inside with the door ajar for 1 hour. Remove from water bath, then place on a wire rack to cool completely to room temperature (2-3 hours). Cover loosely and refrigerate for at least 6-8 hours, or preferably overnight, for optimal setting and flavor. -
Step 6
Once thoroughly chilled, run a thin knife around the edge before releasing the springform collar. For the icing drizzle, whisk 1 cup powdered sugar and 2 tbsp milk until smooth. Decorate with 1 cup whipped cream, icing drizzle, and extra rainbow sprinkles, if desired. Slice with a sharp, clean knife, wiping it clean after each cut. Store leftovers covered in the refrigerator for 5-7 days or freeze for up to 1 month.
Important Information
Nutrition Facts (Per Serving)
It is important to consider this information as approximate and not to use it as definitive health advice.
Allergy Information
Please check ingredients for potential allergens and consult a health professional if in doubt.


Leave a Comment