

Cheesy Snack Pockets are truly a culinary marvel, promising to transform your snack time into an occasion of pure delight. Have you ever craved that perfect bite – warm, utterly satisfying, and bursting with gooey, savory goodness, all wrapped up in a convenient, portable package? I know I have, and these pockets deliver precisely that experience!
While the specific iteration of these delightful morsels might be a modern innovation, their spirit resonates with a rich global tradition. Across cultures, from the hearty British pasty to the delectable Italian calzone and the beloved Latin American empanada, the concept of a savory filling encased in a convenient, handheld pastry has been cherished for centuries. Our take on Cheesy Snack Pockets beautifully honors this universal love for accessible, comforting food.
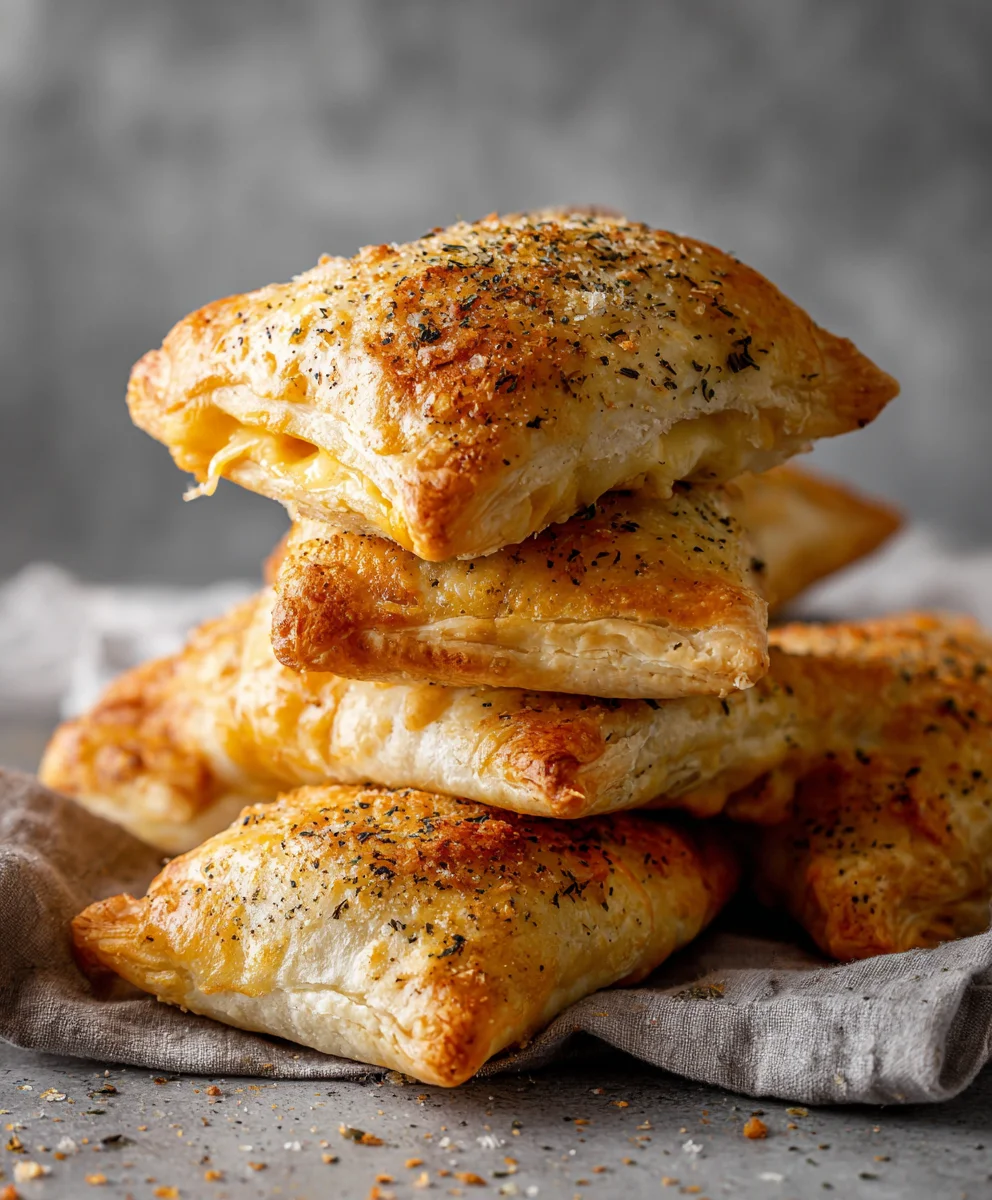
I find that what makes this dish an undeniable crowd-pleaser is its irresistible combination of a golden, flaky crust yielding to a warm, molten cheese interior that stretches with every bite. They are incredibly versatile, perfect for satisfying hungry kids after school, serving as a sophisticated appetizer for adult gatherings, or simply providing a quick, comforting meal on a busy day. I am genuinely excited for you to discover the simple joy and incredible flavor these bring to any table.

Ingredients:
- For the Dough:
- 3 cups (approximately 360g) all-purpose flour, plus more for dusting – I always recommend sifting it for a lighter, airier dough!
- 1 packet (2 ¼ teaspoons or 7g) active dry yeast – make sure it’s fresh for optimal rise!
- 1 tablespoon granulated sugar – this isn’t just for sweetness; it feeds the yeast.
- 1 teaspoon fine sea salt – essential for flavor balance in the dough itself.
- 1 cup (240ml) warm water (between 105-115°F or 40-46°C) – feel it on your wrist; it should be comfortably warm, not hot.
- 2 tablespoons olive oil, plus extra for oiling the bowl – good quality olive oil adds a lovely subtle flavor.
- For the Cheesy Filling:
- 1 ½ cups (approximately 170g) sharp cheddar cheese, freshly grated – I find grating it yourself makes a huge difference in texture and melt!
- 1 ½ cups (approximately 170g) low-moisture, part-skim mozzarella cheese, freshly grated – this provides that essential gooey stretch.
- ½ cup (approximately 60g) Parmesan cheese, finely grated – for a lovely salty, umami kick.
- 2 ounces (approximately 56g) cream cheese, softened – a secret ingredient for extra creaminess and stability in the filling.
- 1 teaspoon garlic powder – gives that wonderful aromatic background.
- ½ teaspoon onion powder – enhances the savory notes beautifully.
- ½ teaspoon dried parsley or dried chives – for a pop of color and herbaceousness.
- ¼ teaspoon black pepper, freshly ground – adjust to your liking!
- Pinch of red pepper flakes (optional, for a touch of heat) – if you like a little kick, this is perfect.
- For Finishing:
- 1 large egg, beaten with 1 tablespoon water or milk (for egg wash) – this gives your pockets that beautiful golden-brown sheen.
- 1 tablespoon sesame seeds or everything bagel seasoning (optional) – for a delightful crunchy topping and added flavor.
Making the Dough for Your Cheesy Snack Pockets
-
Activate the Yeast:
In a large mixing bowl, or the bowl of your stand mixer fitted with the dough hook attachment, combine the warm water and granulated sugar. Give it a gentle stir to dissolve the sugar. Now, sprinkle the active dry yeast over the top of the water. Let it sit undisturbed for about 5 to 10 minutes. This step is crucial! You should see the mixture become foamy and bubbly, indicating that the yeast is alive and ready to work its magic. If it doesn’t foam, your yeast might be old or your water temperature wasn’t right, and it’s best to start over with fresh yeast and properly tempered water.
-
Mix the Dry Ingredients:
Once your yeast is happily activated, add the sifted all-purpose flour and fine sea salt directly into the bowl with the yeast mixture. Also, drizzle in the 2 tablespoons of olive oil. The olive oil will contribute to the dough’s tenderness and flavor, making your Cheesy Snack Pockets even more delightful.
-
Knead the Dough:
If you’re using a stand mixer, begin mixing on low speed until a shaggy dough forms, then increase to medium-low speed and knead for about 7 to 8 minutes. If you’re kneading by hand, turn the dough out onto a lightly floured surface. Knead vigorously for 8 to 10 minutes, pushing the dough away from you with the heels of your hands, folding it back, and rotating. The goal is to develop the gluten. You’ll know it’s ready when the dough becomes smooth, elastic, and springs back when gently poked with your finger. It should feel pliable and no longer sticky.
-
First Rise (Proofing):
Lightly grease a clean large bowl with a little extra olive oil. Place the kneaded dough into the bowl, turning it once to coat the entire surface with oil. This prevents it from drying out. Cover the bowl tightly with plastic wrap or a clean kitchen towel. Place the bowl in a warm, draft-free spot in your kitchen. I often use my oven (turned off, of course!) with the light on, as the gentle warmth helps the dough rise beautifully. Let the dough rise for about 1 to 1 ½ hours, or until it has doubled in size. Patience is a virtue here! A good rise means a light and fluffy texture for your pockets.
Preparing the Irresistible Cheesy Filling
-
Combine the Cheeses:
While your dough is busy rising, you can prepare the incredibly delicious cheesy filling. In a medium-sized bowl, combine the freshly grated sharp cheddar cheese, low-moisture mozzarella cheese, and finely grated Parmesan cheese. I cannot stress enough the importance of grating your own cheese! Pre-shredded cheeses often contain anti-caking agents that can affect how they melt, resulting in a less creamy, less gooey filling. For the ultimate Cheesy Snack Pockets, always go fresh.
-
Add Cream Cheese and Seasonings:
To the grated cheeses, add the softened cream cheese. Make sure it’s truly softened to room temperature, as this will help it blend smoothly without lumps. Next, sprinkle in the garlic powder, onion powder, dried parsley (or chives), freshly ground black pepper, and the optional pinch of red pepper flakes if you’re craving that extra zing. These seasonings elevate the cheese flavor to another level, transforming a simple cheese filling into something truly special.
-
Mix Thoroughly:
Using a sturdy spoon or your clean hands (my preferred method for getting everything thoroughly combined!), mix all the ingredients together until they are very well incorporated. You want an even distribution of all the cheeses and seasonings throughout the mixture. It might feel a bit stiff at first due to the cream cheese, but keep mixing until it forms a cohesive, uniform mass. This ensures every bite of your Cheesy Snack Pockets is packed with flavor and creamy goodness. Cover the bowl and set it aside, or even pop it in the fridge if your kitchen is particularly warm, until your dough is ready.
Assembling Your Delicious Cheesy Snack Pockets
-
Prepare Your Work Surface:
Once the dough has doubled in size, gently punch it down to release the air. This step is satisfying and helps redistribute the yeast. Lightly flour a clean work surface – I like to use a large cutting board or my countertop. Make sure you have extra flour nearby for dusting your rolling pin and hands as needed.
-
Roll Out the Dough:
Turn the dough out onto your floured surface. Using a rolling pin, roll the dough into a large rectangle, aiming for a thickness of about ¼ inch (about 0.6 cm). Try to keep the edges as even as possible. The exact dimensions aren’t critical, but a rectangle of approximately 18×12 inches (45×30 cm) is a good target. The key here is even thickness; this ensures your pockets bake uniformly.
-
Cut the Dough:
Now, using a pizza cutter or a sharp knife, carefully cut the large rectangle into 12 smaller, roughly equal-sized rectangles. I usually aim for rectangles that are about 4×6 inches (10×15 cm). Don’t worry if they’re not perfectly precise; a rustic look adds to the charm of homemade Cheesy Snack Pockets.
-
Fill the Pockets:
Take one of your dough rectangles. Place about 2 to 3 tablespoons of the cheesy filling onto one half of the rectangle, leaving a small border around the edges. Be careful not to overfill! While it’s tempting to cram in as much cheese as possible, overfilling can lead to bursting pockets and a messy bake. Trust me, a well-filled pocket is better than an exploding one.
-
Seal the Pockets:
Fold the other half of the dough over the filling, aligning the edges to form a closed pocket. Gently press down around the edges to seal them. To ensure a really good seal and to add a decorative touch, use the tines of a fork to crimp all around the edges. This creates a pretty pattern and helps prevent any cheese from escaping during baking. Repeat this process for all 12 dough rectangles and the cheesy filling, creating a delightful batch of ready-to-bake Cheesy Snack Pockets.
-
Prepare for Baking:
Line two large baking sheets with parchment paper. This prevents sticking and makes cleanup a breeze. Carefully transfer the assembled Cheesy Snack Pockets to the prepared baking sheets, leaving a little space between each one to allow for expansion during baking. You might need to use two baking sheets to avoid overcrowding.
-
Egg Wash and Topping (Optional):
In a small bowl, whisk together the large egg with 1 tablespoon of water or milk to create your egg wash. Using a pastry brush, gently brush the tops of each snack pocket with the egg wash. This is what will give them that beautiful, glossy golden-brown finish. If you desire, sprinkle a pinch of sesame seeds or everything bagel seasoning over the top of each pocket for extra flavor and texture. This step isn’t just for looks; it adds an incredible aromatic crunch that complements the cheesy interior perfectly.
Baking Your Golden Cheesy Snack Pockets
-
Preheat the Oven:
Preheat your oven to 375°F (190°C). It’s important to give the oven ample time to fully preheat to the correct temperature. A properly preheated oven ensures that your Cheesy Snack Pockets start baking immediately at the right heat, leading to an even rise and a beautifully golden crust.
-
Bake to Perfection:
Place the baking sheets with the snack pockets into the preheated oven. Bake for 18 to 22 minutes, or until the pockets are puffed up, deeply golden brown on the top and bottom, and the cheese filling is bubbly and melted. If you’re using two baking sheets, it’s a good idea to rotate them halfway through the baking time (top to bottom, front to back) to ensure even cooking and browning. Keep an eye on them during the last few minutes, as ovens can vary, and you want that perfect golden hue without burning.
-
Cool Slightly:
Once baked to perfection, carefully remove the baking sheets from the oven. Allow the Cheesy Snack Pockets to cool on the baking sheets for about 5 to 10 minutes before transferring them to a wire rack. The cheese filling will be extremely hot and molten right out of the oven, and a short cooling period allows it to set slightly, preventing molten cheese mishaps and ensuring a more enjoyable first bite. This short rest also helps the crust firm up a bit.
Serving Suggestions and Storage Tips
-
Serving Your Warm Cheesy Snack Pockets:
These Cheesy Snack Pockets are absolutely divine when served warm, straight from the oven. The melted, gooey cheese and soft, savory crust are at their peak. They make an excellent appetizer for gatherings, a fantastic game-day snack, or a delightful addition to lunchboxes. For an even more indulgent experience, I love to serve them with a side of marinara sauce for dipping, a vibrant tomato soup, or even a fresh green salad to balance the richness. Imagine biting into that warm, crispy exterior and being met with a rush of molten, seasoned cheese – truly irresistible! They are hearty enough to be a light meal on their own, especially when paired with something fresh.
-
Storage and Reheating:
If you happen to have any leftover Cheesy Snack Pockets (a rare occurrence in my house, I must admit!), they can be stored in an airtight container at room temperature for up to 1 day, or in the refrigerator for up to 3-4 days. To reheat them, I highly recommend using a toaster oven or a regular oven set to 350°F (175°C) for about 8-12 minutes, or until they are warmed through and the crust has re-crisped. The microwave is an option for quick reheating, but it tends to make the crust softer, so I usually avoid it if I want that fresh-baked texture. These pockets are also freezer-friendly! Once completely cooled, you can wrap them individually in plastic wrap and then store them in a freezer-safe bag for up to 2-3 months. To enjoy from frozen, you can bake them directly in a preheated oven at 375°F (190°C) for about 20-25 minutes, or until thoroughly heated and golden.
-
Variations to Explore:
While these classic Cheesy Snack Pockets are perfect as is, they also serve as a wonderful base for culinary creativity! Feel free to experiment with different cheese combinations – a smoky gouda, a spicy Monterey Jack, or even a creamy Fontina could be delightful additions. You could also mix in other savory ingredients into the cheese filling, such as finely diced cooked ham, crumbled cooked bacon, sautéed mushrooms, caramelized onions, or even some finely chopped jalapeños for an extra kick. A sprinkle of dried herbs like oregano or basil would also enhance the flavor profile. The possibilities are endless, allowing you to tailor these pockets to your personal taste and whatever ingredients you have on hand. It’s all about making them your own and having fun in the kitchen!
Conclusion:
Well, we’ve reached the end of our culinary journey for today, and I truly hope you’re as excited as I am about trying out this incredible recipe. After all the delightful steps we’ve walked through, I’m confident that these aren’t just any snack; they are a guaranteed hit that will bring smiles to faces, young and old. This recipe for homemade Cheesy Snack Pockets is more than just a list of ingredients and instructions; it’s an invitation to experience pure, unadulterated comfort food that’s surprisingly easy to whip up. I’ve always believed that the best food doesn’t have to be complicated, and this dish stands as a testament to that philosophy. The simplicity of preparation combined with the utterly irresistible taste makes this a absolute must-try for anyone looking to add a little extra joy to their meal rotation.
What makes these Cheesy Snack Pockets truly stand out? It’s that perfect harmony of textures and flavors. Imagine: a golden, crispy exterior, giving way to a warm, gooey, molten cheese filling that stretches delightfully with every bite. The savory aroma that fills your kitchen as these bake or fry is an experience in itself, a promise of the deliciousness to come. They’re the ideal pick-me-up for a sluggish afternoon, a fantastic appetizer for an impromptu gathering, or even a clever way to jazz up a weeknight dinner. Trust me, once you make these, you’ll find yourself craving them again and again, and your family and friends will be begging for the recipe. They are incredibly satisfying without being overly heavy, striking that perfect balance for a snack that truly satisfies.
One of the aspects I adore most about this recipe is its incredible versatility. While the classic cheesy filling is undeniably divine, don’t hesitate to get creative and make these pockets your very own. For a fantastic serving suggestion, consider whipping up a batch of homemade marinara sauce for dipping – the tangy tomato perfectly complements the rich cheese. A cool ranch dressing or a zesty sriracha mayo can also add an exciting kick. When it comes to variations, the possibilities are virtually endless! Feeling adventurous? Try adding a sprinkle of cooked, crumbled bacon or finely diced ham to the cheese mix for a meaty twist. For those who love a bit of heat, a pinch of red pepper flakes or some finely chopped jalapeños will elevate the flavor profile beautifully. You could even sneak in some finely chopped spinach or roasted red peppers for a more wholesome option without compromising on flavor. Imagine a Mediterranean-inspired pocket with feta cheese, spinach, and a hint of oregano, or a Mexican-fiesta version with black beans, corn, and a touch of chili powder. These pockets are also amazing with different types of cheese – a sharp cheddar, a creamy mozzarella, a smoky provolone, or even a blend of several cheeses can all bring their unique character to the party. Consider serving them alongside a fresh green salad for a balanced meal, or as part of a larger tapas-style spread for entertaining. They’re also fantastic for school lunchboxes (once cooled, of course!) or as a quick grab-and-go breakfast if you’re feeling indulgent.
So, now it’s your turn! I genuinely encourage you to roll up your sleeves, gather your ingredients, and give this recipe a try. You’ll be amazed at how simple it is to create something so incredibly delicious and satisfying right in your own kitchen. There’s a special kind of pride that comes with making something homemade, and these Cheesy Snack Pockets deliver that satisfaction in spades. Once you’ve experienced the joy of biting into your very own perfectly crafted snack pocket, I’d absolutely love to hear about it! Please don’t hesitate to share your experiences, your creative variations, and perhaps even some mouth-watering photos with me and the rest of our food-loving community. Your feedback is invaluable, and your unique twists might just inspire someone else to try something new. Happy cooking, and get ready to fall in love with your new favorite go-to snack!
People Also Ask:
How long do Cheesy Snack Pockets stay fresh?
For the best taste and texture, these Cheesy Snack Pockets are truly best enjoyed fresh, ideally within a few hours of making them. However, if you have leftovers, you can store them in an airtight container in the refrigerator for up to 2-3 days. Reheating them in an oven or air fryer will help bring back some of their crispiness, though they may not be quite as perfect as fresh.
Can I prepare Cheesy Snack Pockets ahead of time?
Absolutely! You can assemble the Cheesy Snack Pockets completely, right up to the point of cooking, and then store them on a baking sheet lined with parchment paper in the refrigerator for up to 24 hours. Just cover them loosely with plastic wrap to prevent them from drying out. When you’re ready to cook, simply proceed with your chosen cooking method (frying or baking) from chilled, adding a few extra minutes to the cooking time if necessary.
What kind of cheese is best for the filling?
For that classic gooey, stretchy factor, low-moisture mozzarella cheese is generally the top choice. However, feel free to experiment! A blend of mozzarella with a little sharp cheddar, provolone, Monterey Jack, or even some Parmesan can add wonderful depth of flavor. The key is to use cheeses that melt well and have good flavor. Avoid overly watery cheeses as they can make the filling too runny.
Can I bake these Cheesy Snack Pockets instead of frying?
Yes, you absolutely can! Baking is a fantastic alternative for a slightly lighter version. Preheat your oven to 375°F (190°C). Place the assembled pockets on a baking sheet lined with parchment paper. For a golden-brown finish, you can brush them lightly with an egg wash (one egg beaten with a tablespoon of water) before baking. Bake for 18-25 minutes, or until they are puffed up, golden brown, and the filling is bubbly. Flipping them halfway through can help ensure even browning.
Are Cheesy Snack Pockets freezer-friendly?
They certainly are! You can freeze the assembled, uncooked pockets. Place them on a baking sheet and freeze until solid, then transfer them to a freezer-safe bag or container. They can be stored for up to 1-2 months. When you’re ready to cook, you can bake them directly from frozen (adding extra cooking time), or let them thaw in the refrigerator first. Frying from frozen isn’t recommended as it can lead to uneven cooking.
How can I make these snack pockets healthier?
To make them a bit healthier, consider these options:
- Bake them instead of frying (as mentioned above).
- Use whole wheat pastry dough or a lighter puff pastry if available.
- Incorporate finely chopped vegetables into your cheese filling, such as spinach, finely diced bell peppers, or sautéed mushrooms, to boost nutrients.
- Opt for a reduced-fat cheese option, though this might slightly impact the melt and stretch.

Cheesy Snack Pockets
Throw together these cheesy pizza pockets for an easy snack or appetizer. Use crescent or pizza dough, loaded with pizza sauce, stretchy mozzarella, and beef pepperoni slices. Sprinkle garlic powder, Italian seasoning, and Parmesan over the top for a flavor boost. Bake at 12-15 minutes until brown and crisp. Dunk them in extra pizza sauce while they’re warm, and enjoy how customizable they are! Homemade cheese pockets beat frozen ones any day with their crispy outside and gooey inside. They’re perfect when you’re short on time or when everyone wants something different. These little treats taste like they’re from a restaurant but take no real cooking skills to make.
Ingredients
-
1 package (e.g., 8 oz / 226g) crescent roll dough or 1 lb (450g) store-bought pizza dough
-
½ cup (120ml) pizza sauce, plus extra for dipping
-
1 ½ cups (approximately 170g) shredded mozzarella cheese
-
3-4 oz (approximately 85-113g) beef pepperoni slices
-
1 teaspoon garlic powder
-
1 teaspoon Italian seasoning
-
½ cup (approximately 60g) Parmesan cheese, finely grated
-
1 large egg, beaten with 1 tablespoon water or milk (for egg wash)
-
1 tablespoon sesame seeds or everything bagel seasoning (optional)
Instructions
-
Step 1
In a medium bowl, combine shredded mozzarella cheese, beef pepperoni slices, garlic powder, Italian seasoning, and finely grated Parmesan cheese. Mix thoroughly until well combined. -
Step 2
Unroll crescent roll dough or roll out pizza dough into a large rectangle (approximately 18×12 inches / 45×30 cm) on a lightly floured surface. Cut the dough into 12 smaller, roughly equal-sized rectangles (about 4×6 inches / 10×15 cm each). Place about 1-2 tablespoons of pizza sauce and 2-3 tablespoons of the cheesy-beef pepperoni filling onto one half of each dough rectangle, leaving a small border. Fold the other half of the dough over the filling, aligning the edges. Gently press down and then use the tines of a fork to crimp and seal all around the edges. -
Step 3
Line two large baking sheets with parchment paper. Carefully transfer the assembled cheesy snack pockets to the prepared baking sheets, leaving space between them. In a small bowl, whisk together the large egg with 1 tablespoon of water or milk to create an egg wash. Brush the tops of each snack pocket with the egg wash. Optionally, sprinkle a pinch of sesame seeds or everything bagel seasoning over the top of each pocket for extra flavor and texture. -
Step 4
Preheat your oven to 375°F (190°C). Place the baking sheets with the snack pockets into the preheated oven. Bake for 12 to 15 minutes, or until the pockets are puffed up, deeply golden brown, and the cheese filling is bubbly and melted. If using two baking sheets, rotate them halfway through baking for even cooking. -
Step 5
Once baked, carefully remove the baking sheets from the oven. Allow the cheesy snack pockets to cool on the baking sheets for about 5 to 10 minutes before transferring them to a wire rack. Serve warm, with extra pizza sauce for dipping. Store leftover pockets in an airtight container at room temperature for up to 1 day, or in the refrigerator for up to 3-4 days. To reheat, use a toaster oven or regular oven set to 350°F (175°C) for 8-12 minutes. Pockets can be frozen for 2-3 months; bake from frozen at 375°F (190°C) for 20-25 minutes.
Important Information
Nutrition Facts (Per Serving)
It is important to consider this information as approximate and not to use it as definitive health advice.
Allergy Information
Please check ingredients for potential allergens and consult a health professional if in doubt.


Leave a Comment