

Cherry White Chocolate Fudge offers a truly enchanting experience, a symphony of flavors that delights the palate and brightens any occasion. I am absolutely thrilled to guide you through the creation of this exquisite confection, a treat that marries the luscious creaminess of white chocolate with the vibrant, tart burst of cherries. Imagine sinking your teeth into a piece of pure bliss – smooth, sweet, and punctuated by the chewy, fruity gems. While classic fudge boasts a long, cherished history as a beloved American sweet, often a staple at family gatherings and holiday tables, this particular variation elevates the traditional with a modern, sophisticated twist.
Why This Fudge Will Be Your New Favorite Indulgence
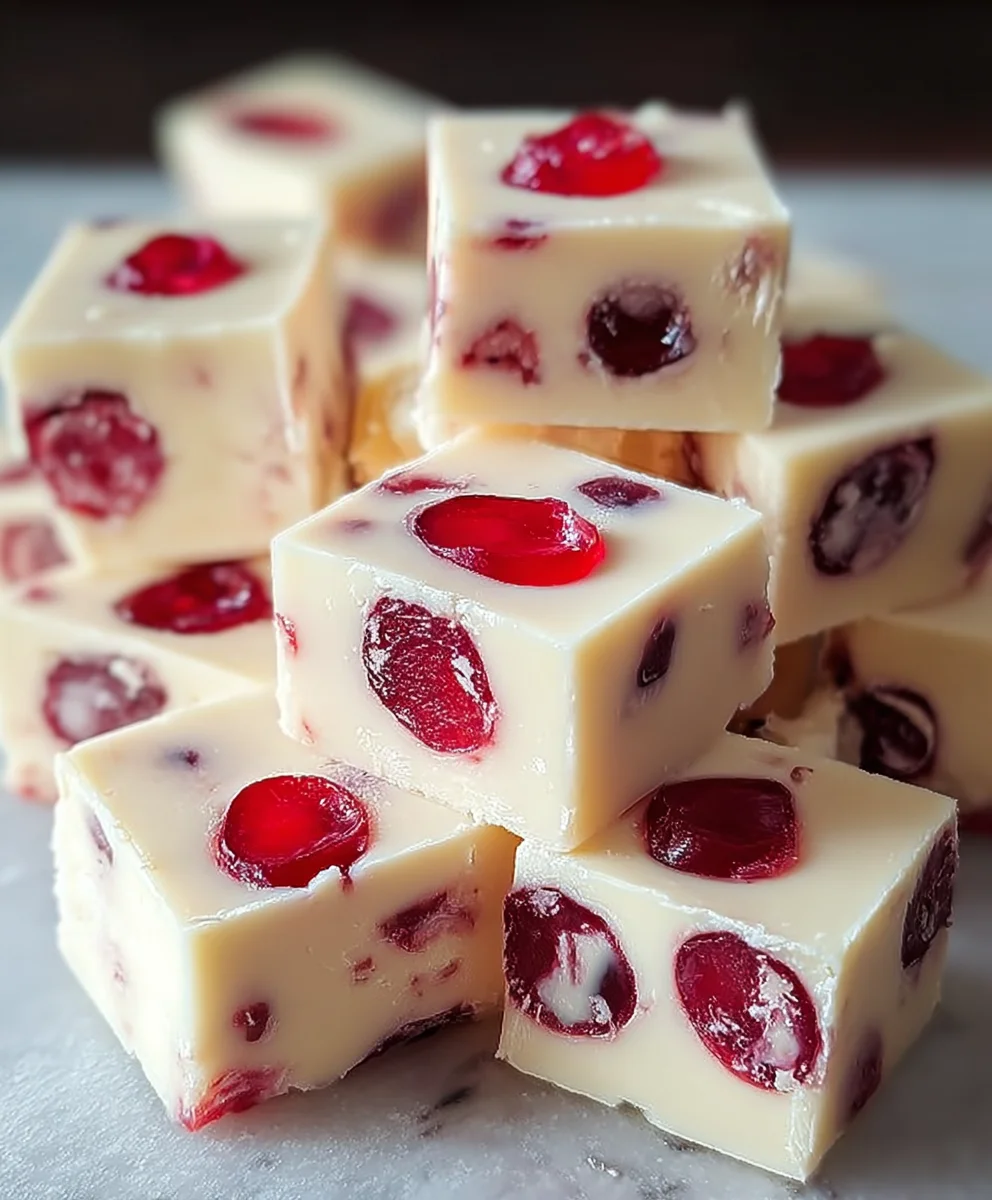
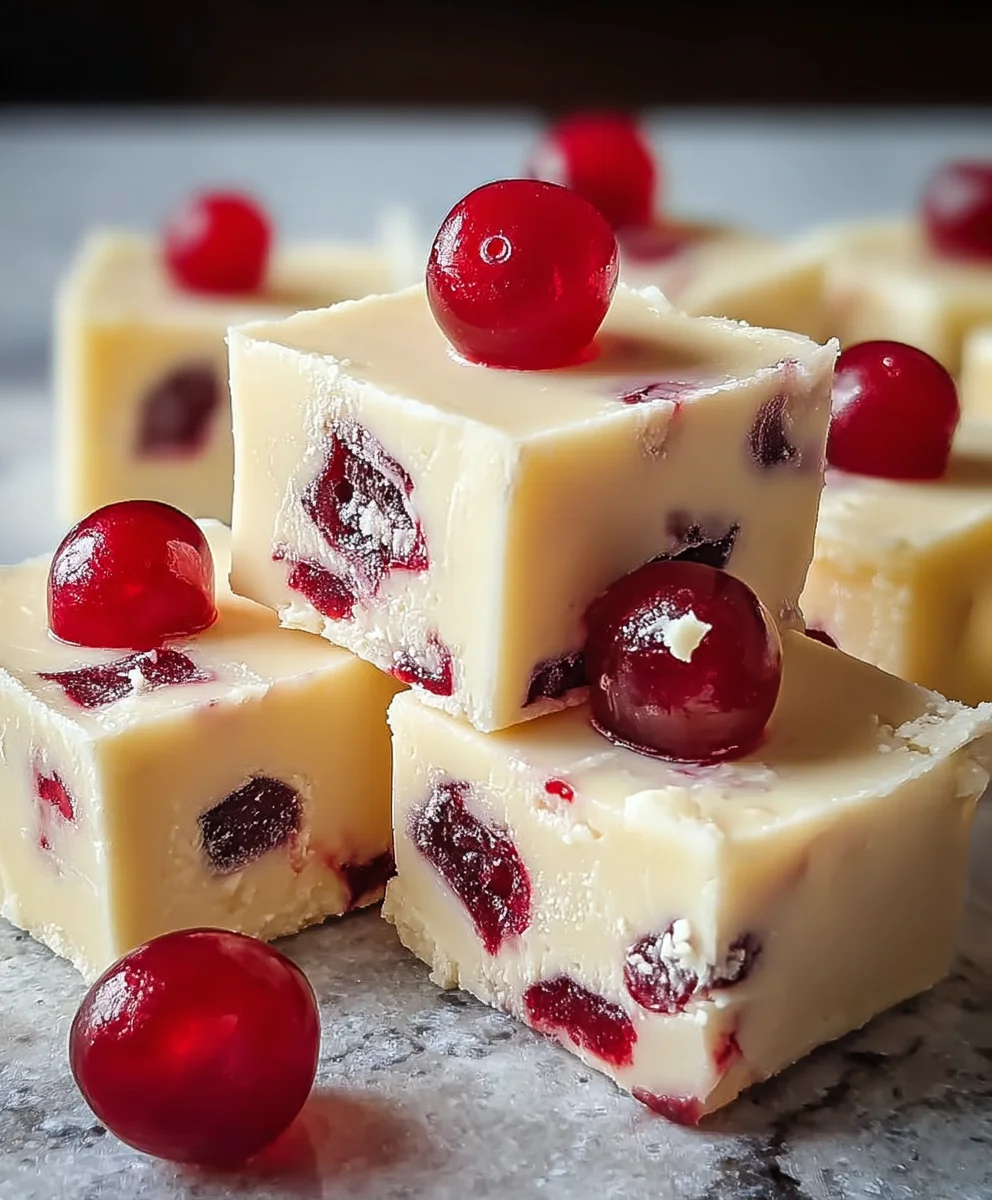
People adore Cherry White Chocolate Fudge not just for its incredible taste and melt-in-your-mouth texture, but also for its stunning visual appeal and the delightful contrast it presents. The vibrant red of the cherries against the pristine white of the fudge makes it a showstopper, perfect for holiday platters, gifting, or simply treating yourself. It’s surprisingly simple to prepare, making it a perfect gift or a luxurious indulgence for yourself without requiring advanced confectionery skills. This recipe is designed to bring joy and a touch of gourmet elegance into your home, proving that some of the most impressive treats can be made with ease. Get ready to impress and delight with every single square!

Ingredients:
- 1 pound (approximately 450g) high-quality white chocolate, either in chip form or finely chopped from bars. I always recommend using a good quality white chocolate for the best flavor and melt.
- 1 can (14 ounces or 397g) sweetened condensed milk. Make sure it’s sweetened condensed milk, not evaporated milk! This is the magical base for our silky fudge.
- 4 tablespoons (1/4 cup or 56g) unsalted butter. A little richness goes a long way.
- 1 teaspoon pure vanilla extract. This adds a lovely depth of flavor that complements the white chocolate and cherries beautifully.
- 1 cup dried cherries, roughly chopped if they are very large. You can use tart cherries for a lovely tang, or sweet cherries for a more indulgent experience. Whichever you choose, they’ll be delightful!
- A tiny pinch of sea salt (about 1/8 teaspoon). This enhances all the sweet flavors and prevents the fudge from being overly cloying.
Equipment You’ll Need:
- An 8×8 inch or 9×9 inch square baking pan. I prefer 8×8 for a thicker fudge, but 9×9 works if you like thinner pieces.
- Parchment paper or aluminum foil. This is crucial for easy removal of your finished fudge.
- A large, heavy-bottomed saucepan. This will help prevent scorching.
- A heat-resistant rubber spatula or wooden spoon for stirring.
- Measuring cups and spoons.
- A sharp knife and cutting board for chopping ingredients and later, the fudge itself.
Preparing for Your Cherry White Chocolate Fudge Adventure:
Before we even think about turning on the stove, a little bit of prep work will make our journey to creating the perfect Cherry White Chocolate Fudge smooth and enjoyable. Trust me, these small steps save a lot of hassle later!
- Prepare Your Pan: First things first, grab your chosen 8×8 or 9×9 inch baking pan. Line it completely with parchment paper, allowing an overhang on two opposite sides. These overhangs will act as little handles, making it incredibly easy to lift the entire slab of fudge out of the pan once it’s set. If you don’t have parchment paper, aluminum foil will work in a pinch, just be sure to grease it very lightly to prevent sticking. A little spray of non-stick cooking spray or a thin smear of butter on the foil can do wonders. This step is absolutely essential for a clean release!
- Measure and Chop Your Ingredients: Next, let’s get all our ingredients ready to go. Measure out your 14-ounce can of sweetened condensed milk – no need to open it yet, but have it at the ready. Measure out your 4 tablespoons of unsalted butter and cut it into smaller pieces; this helps it melt more evenly. Now, for the star of the show, your white chocolate! If you’re using white chocolate bars, chop them into small, uniform pieces. Aim for pieces that are roughly the size of chocolate chips. Smaller pieces will melt much more quickly and evenly, which is what we want for a super smooth fudge. If you’re using white chocolate chips, you can skip the chopping – hooray!
- Prepare the Cherries: Take your cup of dried cherries. If they seem particularly large or clumpy, give them a quick chop. You want pieces that are nicely distributed throughout the fudge without being overwhelmingly big in any one bite. Small, juicy bits of cherry are what we’re aiming for. Have your vanilla extract and pinch of salt ready too.
- Clear Your Workspace: Having everything pre-measured and prepped, often called “mise en place,” means you won’t be scrambling for ingredients while your fudge mixture is bubbling on the stove. This ensures a relaxed and efficient cooking process.
Crafting the Silky Smooth White Chocolate Fudge Base:
Now, for the heart of our Cherry White Chocolate Fudge! This is where all the magic happens, transforming simple ingredients into a rich, luscious base. We want to take our time here, applying gentle heat and plenty of stirring to achieve that perfectly smooth, melt-in-your-mouth texture.
- Combine Butter and Condensed Milk: Place your large, heavy-bottomed saucepan over low to medium-low heat. Add the 4 tablespoons of unsalted butter that you pre-cut into smaller pieces. Let the butter melt completely. Once it’s fully liquid, pour in the entire can of sweetened condensed milk. Use your rubber spatula to scrape out every last drop from the can – we don’t want to waste any of that delicious sweetness! Give the butter and condensed milk a gentle stir, just enough to combine them a little.
- Gradually Add White Chocolate: Now, add your finely chopped white chocolate or white chocolate chips to the saucepan. It’s crucial to do this over a low heat. If the heat is too high, the white chocolate can seize or scorch, leading to a grainy or burnt-tasting fudge, which we definitely want to avoid for our exquisite Cherry White Chocolate Fudge.
- The Gentle Melting and Stirring Process: This is where your patience and constant attention will truly pay off. Continuously stir the mixture with your heat-resistant rubber spatula. Keep the heat low and steady. You’ll notice the white chocolate chips slowly starting to soften and melt into the condensed milk and butter. As you stir, make sure to scrape the bottom and sides of the pan diligently. White chocolate has a tendency to stick and scorch easily if left unattended, and we are aiming for pure, unadulterated smoothness.
- Achieving the Perfect Consistency: Continue stirring until the white chocolate is completely melted and the mixture is smooth, glossy, and uniform. There should be no lumps of chocolate remaining. The mixture will also start to thicken slightly as it heats. This process typically takes about 5 to 8 minutes, but it can vary depending on your stove and the size of your pan. The key is to keep it moving and don’t rush it! Once it reaches this beautifully smooth and thick consistency, remove the saucepan from the heat immediately. Overheating can lead to a crumbly fudge, and we want nothing less than perfection for our homemade Cherry White Chocolate Fudge.
Infusing the Delightful Cherry and Vanilla Flavors:
With our creamy white chocolate base perfectly prepared, it’s time to add the final flourishes that will elevate this treat into a truly memorable Cherry White Chocolate Fudge. The vibrant cherries and aromatic vanilla are what will make each bite sing!
- Stir in Vanilla Extract and Salt: Once the saucepan is off the heat, immediately add your 1 teaspoon of pure vanilla extract and the tiny pinch of sea salt. The vanilla adds a warm, comforting note that beautifully complements the sweet white chocolate, while the salt, though seemingly small in quantity, plays a crucial role in balancing the sweetness and enhancing all the flavors. Stir these in thoroughly until they are fully incorporated into the smooth fudge base. You’ll notice the wonderful aroma of vanilla filling your kitchen!
- Fold in the Dried Cherries: Now, for the glorious dried cherries! Gently add your pre-chopped dried cherries to the fudge mixture. Using your rubber spatula, carefully fold the cherries into the fudge. You want to distribute them evenly throughout the mixture so that every piece of your finished Cherry White Chocolate Fudge boasts those delightful bursts of red fruit. Avoid overmixing, as we just want to combine them without breaking down the cherries too much. A gentle folding motion is perfect. The contrast of the dark red cherries against the creamy white fudge is not only delicious but also visually appealing!
Setting Your Gorgeous Cherry White Chocolate Fudge:
The hard work of cooking is done, and now comes the moment of truth – the setting. Patience is truly a virtue here, as allowing your Cherry White Chocolate Fudge to set properly is crucial for achieving that firm yet tender texture we all adore.
- Pour into the Prepared Pan: Once the cherries are evenly distributed, immediately pour the warm fudge mixture into your parchment-lined baking pan. Use your rubber spatula to scrape out every last bit of that luscious fudge from the saucepan. We don’t want to leave any deliciousness behind!
- Smooth and Level: With the fudge in the pan, gently spread it out evenly using your spatula. You want to create a smooth, level top surface. If you like, you can lightly tap the pan on your counter a few times to release any trapped air bubbles and help settle the fudge into an even layer. This also helps create those beautifully sharp edges when you eventually cut it. For an extra touch, you could sprinkle a few more chopped dried cherries or a few white chocolate chips on top before it sets, pressing them lightly into the surface for a pretty garnish.
- The Cooling Process: Now, the waiting game begins. First, allow the fudge to cool at room temperature for about 30 minutes. This initial cooling helps it begin to firm up gradually. After that, transfer the pan to your refrigerator. This is a critical step for a well-set fudge. Allow the Cherry White Chocolate Fudge to chill in the refrigerator for at least 2 to 4 hours. For the absolute best results, I often recommend chilling it overnight. The longer it chills, the firmer and easier it will be to cut. Resisting the urge to cut into it too soon is perhaps the hardest part of this entire recipe!
Slicing and Storing Your Homemade Cherry White Chocolate Fudge:
The moment you’ve been patiently waiting for! Once your Cherry White Chocolate Fudge is perfectly chilled and firm, it’s time to transform that glorious slab into delightful, bite-sized pieces ready for enjoyment or sharing.
- Lift and Prepare for Cutting: After your fudge has thoroughly chilled and is firm to the touch, use those parchment paper overhangs you wisely left to carefully lift the entire slab of fudge out of the baking pan and transfer it to a clean cutting board. This is where you’ll really appreciate that parchment paper trick! Gently peel the parchment paper away from the sides and bottom of the fudge.
- The Art of Slicing: Now for the cutting! For clean, precise cuts, I have a little trick: get a large, sharp knife and run it under hot water for a few seconds. Wipe the blade completely dry with a clean cloth. The warm, dry blade will glide through the fudge much more easily without dragging or sticking, creating beautiful, neat slices of Cherry White Chocolate Fudge. You can cut the fudge into 1-inch squares, 2-inch squares, or even small rectangles, depending on your preference. I usually start by cutting the slab in half, then cutting each half into smaller rows, and then slicing across those rows to form squares. After each cut, wipe the knife clean and warm it again if needed, especially if the fudge starts to stick. This attention to detail ensures every piece looks as good as it tastes.
- Storage for Freshness: Once all your beautiful pieces of Cherry White Chocolate Fudge are cut, store them in an airtight container. You can layer the pieces between sheets of wax paper or parchment paper to prevent them from sticking together. This fudge will keep well at room temperature for up to a week, though it might soften slightly in very warm climates. If you prefer a firmer texture or want to extend its shelf life, storing it in the refrigerator is a great option; it will last for up to two weeks in the fridge. For longer storage, you can even freeze individual pieces in an airtight freezer-safe container for up to 2-3 months. Just be sure to let them come to room temperature before serving for the best texture and flavor.
- Serving Suggestions: This Cherry White Chocolate Fudge is absolutely perfect on its own as a delightful sweet treat. It’s also wonderful for holiday gift-giving, packing into lunch boxes, or serving at parties. The vibrant red cherries against the creamy white fudge make it especially festive!
Tips for Perfect Cherry White Chocolate Fudge Every Time:
Even though this recipe is relatively straightforward, a few expert tips can ensure your Cherry White Chocolate Fudge turns out absolutely divine on every single attempt. Achieving that perfectly smooth, rich, and flavorful fudge is a matter of understanding a few key principles.
- Quality of Ingredients Matters Immensely: I cannot stress this enough – use high-quality white chocolate! White chocolate is the star here, and a good quality brand will melt smoother and provide a much richer, more nuanced flavor. Cheaper white chocolate chips often contain less cocoa butter and more emulsifiers, which can sometimes lead to a grainier texture or difficulty melting smoothly. Look for brands that list cocoa butter high on their ingredient list. The same goes for your vanilla extract; pure vanilla extract makes a noticeable difference compared to artificial vanilla flavor.
- Don’t Rush the Melting Process: When combining the white chocolate, butter, and condensed milk, keep the heat low and stir constantly. High heat can cause the white chocolate to seize or burn, resulting in a clumpy, gritty, or even scorched-tasting fudge. Patience is your best friend in this step. You want a slow, gentle melt to achieve that signature silky-smooth texture of the perfect Cherry White Chocolate Fudge.
- Accurate Measurements are Key: Fudge is a bit of a science! While we’re not dealing with candy thermometers and specific temperatures in this simplified recipe, consistent and accurate measurements, especially for the condensed milk and white chocolate, will ensure the correct consistency. Using too much or too little of either can result in fudge that is too soft or too hard.
- Don’t Overcook the Mixture: Once the white chocolate is fully melted and the mixture is smooth and glossy, remove it from the heat immediately. Continuing to cook it beyond this point can cause the mixture to become too thick, potentially leading to a dry or crumbly fudge when it sets. We want that delightful chewiness that comes from perfectly cooked fudge.
- The Power of Salt: That small pinch of sea salt isn’t just for show! Salt is a flavor enhancer, and in sweet recipes like this Cherry White Chocolate Fudge, it plays a vital role in balancing the sweetness of the white chocolate and condensed milk. It prevents the fudge from tasting one-dimensionally sweet and helps to bring out the subtle notes of vanilla and the tang of the cherries. Don’t skip it!
- Experiment with Other Dried Fruits: While cherries are truly exceptional in this fudge, feel free to experiment with other dried fruits if you’re feeling adventurous! Dried cranberries or dried blueberries would also pair beautifully with white chocolate. Just ensure they are soft and plump, and chop them if they are very large.
- Add a Nutty Crunch: If you enjoy a textural contrast, consider adding about ½ cup of chopped toasted nuts along with your dried cherries. Pecans, walnuts, or even macadamia nuts would be fantastic additions, adding a lovely crunch to your smooth Cherry White Chocolate Fudge.
- Consider Zest for Brightness: For an extra layer of flavor and brightness, you could stir in a teaspoon of orange or lemon zest along with the vanilla extract. Citrus zest pairs wonderfully with both white chocolate and cherries, adding a fresh, aromatic lift to the richness of the fudge.
- Chilling Time is Non-Negotiable: I know it’s hard to wait, but allowing the fudge to chill for the recommended time (at least 2-4 hours, or preferably overnight in the refrigerator) is crucial for it to firm up properly. Rushing this step will result in sticky, difficult-to-cut fudge that doesn’t hold its shape well. Trust the process, and your perfectly set Cherry White Chocolate Fudge will be your reward!
Welcome to the grand finale of our culinary adventure, where we celebrate the creation of something truly spectacular and utterly irresistible. If you’ve followed along, you already know the magic that awaits in every square of this delightful treat. This isn’t just another fudge recipe; it’s an experience, a delightful journey for your taste buds that I wholeheartedly believe you simply must embark on. The unique combination of creamy, rich white chocolate with the vibrant, tart bursts of dried cherries creates a symphony of flavors and textures that is genuinely unforgettable. It’s incredibly smooth, melting delicately in your mouth, leaving behind a wonderful sweet-tart finish that will have you reaching for just one more piece, time and time again. I crafted this recipe with the intention of bringing a little bit of joy and luxury into your home, effortlessly.
What makes this particular treat a must-try, you ask? Well, beyond the exquisite taste, it’s the simplicity of achieving such a professional, gourmet result right in your own kitchen. You don’t need fancy equipment or a culinary degree to whip up a batch of this fantastic Cherry White Chocolate Fudge. It’s forgiving, fun, and incredibly rewarding. The visual appeal alone, with those beautiful ruby-red cherry pieces speckled throughout the pristine white fudge, makes it a showstopper on any dessert table. It’s perfect for gifting, bringing to a potluck, or simply indulging yourself after a long day. Imagine the smiles when your friends and family take their first bite – that’s the kind of satisfaction this recipe delivers.
Now, let’s talk about how to elevate your fudge experience even further, or how to personalize it to your heart’s content. While perfect on its own, a square of this luscious fudge pairs wonderfully with a strong cup of coffee or a delicate cup of herbal tea, making for an ideal afternoon pick-me-up or a sophisticated after-dinner treat. For a truly decadent dessert experience, try crumbling a few pieces over a scoop of vanilla bean ice cream; the textures and temperatures create an amazing contrast that’s pure bliss. It’s also a fantastic addition to a holiday dessert platter, adding a touch of homemade elegance among cookies and other confections. Think about serving it alongside fresh berries for a refreshing balance!
But the fun doesn’t stop there! I always encourage you to make a recipe your own. If dried cherries aren’t your favorite, feel free to experiment with other dried fruits like cranberries, blueberries, or even finely chopped apricots. For a nutty crunch, consider folding in some toasted pistachios or slivered almonds with the cherries – they add a wonderful textural dimension and a subtle savory note that complements the sweetness beautifully. A tiny pinch of sea salt sprinkled over the top before it sets can enhance all the flavors, bringing out the depth of the white chocolate even more. You could even swirl in a tablespoon of melted dark chocolate at the very end, just before pouring it into the pan, to create a stunning marbled effect that is as delightful to look at as it is to eat. Don’t be afraid to add a hint of almond extract alongside the vanilla for an extra layer of gourmet flavor. The possibilities are truly endless, limited only by your imagination!
So, my fellow home cooks and dessert enthusiasts, now is your moment. Don’t let this incredible recipe simply exist on your screen. I genuinely hope you feel inspired to head into your kitchen and whip up a batch of this phenomenal fudge. Trust me, the joy of creating and then savoring something so utterly delicious and beautiful, made with your own hands, is an unparalleled feeling. It’s a simple pleasure that brings so much warmth and happiness. Once you’ve tried it, please, please come back and share your experience with me! I’d love to hear about your successful batches, your unique variations, and how you chose to serve your magnificent creation. Did you add nuts? Try a different fruit? Gift it to a loved one? Your feedback and stories truly make this community vibrant and inspire us all.
Thank you for joining me on this delicious journey. I am confident that once you make this fudge, it will become a cherished recipe in your collection, bringing smiles and sweet moments for years to come. Happy baking, and happy indulging!
Cherry White Chocolate Fudge
This Cherry White Chocolate Fudge offers a symphony of flavors, combining the luscious creaminess of white chocolate with the vibrant, tart burst of cherries. It’s surprisingly simple to prepare, making it a perfect gift or a luxurious indulgence.
Ingredients
-
1 lb (450g) high-quality white chocolate, chips or finely chopped
-
1 (14 oz / 397g) can sweetened condensed milk
-
4 tbsp (1/4 cup / 56g) unsalted butter
-
1 tsp pure vanilla extract
-
1 cup dried cherries, roughly chopped
-
1/8 tsp sea salt
Instructions
-
Step 1
Line an 8×8 or 9×9 inch baking pan completely with parchment paper, leaving an overhang on two sides for easy lifting. Prepare all ingredients by measuring and chopping white chocolate (if using bars) and dried cherries. -
Step 2
In a large, heavy-bottomed saucepan over low to medium-low heat, melt the 4 tablespoons of unsalted butter. Pour in the entire can of sweetened condensed milk and stir gently. -
Step 3
Add the white chocolate to the saucepan. Continuously stir on low heat, scraping the bottom and sides of the pan, until the white chocolate is completely melted and the mixture is smooth, glossy, and uniform (about 5-8 minutes). Remove from heat immediately to prevent scorching or overcooking. -
Step 4
Immediately stir in the 1 teaspoon of pure vanilla extract and the 1/8 teaspoon of sea salt until fully incorporated. -
Step 5
Gently fold in the 1 cup of roughly chopped dried cherries until they are evenly distributed throughout the fudge mixture. -
Step 6
Pour the warm fudge mixture into the prepared pan. Use a rubber spatula to spread it out evenly, creating a smooth, level top surface. Gently tap the pan on your counter a few times to release any trapped air bubbles. -
Step 7
Allow the fudge to cool at room temperature for about 30 minutes. Then, transfer the pan to the refrigerator and chill for at least 2 to 4 hours, or preferably overnight, until the fudge is completely firm. -
Step 8
Once thoroughly chilled and firm, use the parchment paper overhangs to carefully lift the entire slab of fudge out of the baking pan and transfer it to a clean cutting board. Gently peel the parchment paper away from the fudge. -
Step 9
For clean, precise cuts, use a large, sharp knife. Run the knife under hot water for a few seconds and wipe the blade completely dry. Slice the fudge into desired 1-inch or 2-inch squares. Wipe the knife clean and re-warm it after each cut if needed to maintain smooth edges. -
Step 10
Store the cut Cherry White Chocolate Fudge in an airtight container. It will keep well at room temperature for up to a week, or in the refrigerator for up to two weeks (layer pieces with wax paper to prevent sticking). For longer storage, individual pieces can be frozen in an airtight container for up to 2-3 months; thaw to room temperature before serving.
Important Information
Nutrition Facts (Per Serving)
It is important to consider this information as approximate and not to use it as definitive health advice.
Allergy Information
Please check ingredients for potential allergens and consult a health professional if in doubt.


Leave a Comment