

Colored Deviled Eggs are not just a snack; they are an invitation to experience a classic appetizer reimagined with a dazzling, playful twist. Picture this: a platter of perfectly formed, creamy-filled egg halves, each boasting a vibrant, eye-catching hue that promises both a delightful flavor and an instant conversation starter. While the humble deviled egg has gracefully adorned tables for centuries, with its origins potentially tracing back to ancient Rome and gaining immense popularity as a picnic and party staple in the Western world, our modern interpretation offers an exciting aesthetic upgrade that truly brightens any spread.
I find that the universal appeal of deviled eggs lies in their irresistible blend of textures—the smooth, rich yolk filling contrasted with the tender, firm egg white—and their utterly satisfying savory taste. They are delightfully simple to prepare, yet consistently impress guests of all ages. However, by introducing a spectrum of mesmerizing colors, we transform a beloved comfort food into a true showstopper, perfect for holidays, festive celebrations, or simply adding a touch of whimsy to any gathering. These Colored Deviled Eggs retain all the nostalgic charm and deliciousness of the traditional recipe, while adding an unexpected layer of visual delight that will surely captivate your guests and elevate your culinary presentation from ordinary to extraordinary.

Ingredients:
- 12 large eggs, preferably organic and fresh (fresh eggs can sometimes be harder to peel, but I find the flavor superior!)
- ½ cup mayonnaise (I prefer a good quality, full-fat mayonnaise for the creamiest filling)
- 1 tablespoon Dijon mustard (or yellow mustard if you prefer a classic, milder flavor; I often lean towards Dijon for its subtle tang)
- 1 teaspoon white vinegar or apple cider vinegar (this adds a crucial brightness to the filling, don’t skip it!)
- ¼ teaspoon salt, plus more to taste
- ⅛ teaspoon freshly ground black pepper, plus more to taste
- For Garnish (optional, but highly recommended for that classic look and extra flavor):
- Paprika (sweet or smoked, depending on your preference – I love smoked paprika for a hint of warmth)
- Fresh chives, finely chopped
- Fresh dill sprigs, for a delicate touch
- For Coloring the Egg Whites:
- Food coloring gels (I find gels give the most vibrant, intense colors, but liquid food coloring works too. Think vibrant blues, cheerful yellows, soft pinks, and lush greens!)
- Small bowls or ramekins (one for each color you plan to use)
- White vinegar (about 1-2 teaspoons per coloring bath – this helps the color adhere beautifully)
- Water
Perfectly Boiled Eggs for Your Colored Deviled Eggs
Achieving the perfect hard-boiled egg is the foundation of any great deviled egg, and it’s especially important when you’re making Colored Deviled Eggs, as we want those whites pristine and ready for their vibrant dye bath. I’ve tried many methods over the years, and this is my go-to for consistent results and, crucially, easier peeling.
- First, I carefully place my 12 large eggs in a single layer at the bottom of a large saucepan. It’s important not to overcrowd the pan, as this can lead to uneven cooking. I want them to have enough space to sit comfortably without cracking against each other.
- Next, I fill the saucepan with cold tap water, making sure to cover the eggs by at least an inch. This cold start is key; it allows the eggs to gradually come up to temperature, which helps prevent cracking and makes the whites more tender.
- I then add about a teaspoon of salt to the water. While it doesn’t significantly aid in peeling (despite what some myths suggest), it can help prevent cracks from spreading if an egg does happen to fissure during cooking. It’s a small step, but one I always include.
- Now, I place the saucepan over high heat and bring the water to a rolling boil. I watch it closely, and as soon as I see those big, vigorous bubbles, I immediately turn off the heat.
- Once the heat is off, I cover the saucepan tightly with a lid. This traps the heat inside and allows the eggs to continue cooking gently. I let them sit in the hot water for exactly 10-12 minutes for perfectly firm, yet not rubbery, hard-boiled eggs. For my ideal deviled eggs, I aim for the 10-minute mark to keep the yolks creamy, but if you prefer a firmer yolk, 12 minutes is excellent.
- While the eggs are steeping, I prepare an ice bath. I fill a large bowl with cold water and plenty of ice cubes. This step is absolutely crucial for two reasons: it immediately stops the cooking process, preventing those unsightly green rings around the yolks, and it helps the egg whites contract, making them much easier to peel.
- As soon as the 10-12 minutes are up, I use a slotted spoon to carefully transfer each hot egg from the saucepan directly into the ice bath. I let them sit in the ice bath for at least 5 minutes, or until they are completely cool to the touch. This sudden temperature change is what works wonders for easy peeling, which is paramount for our beautiful Colored Deviled Eggs.
Prepping the Eggs for a Vibrant Dye Bath
This phase requires a gentle touch, as we want smooth, intact egg whites ready to soak up all that wonderful color. Damaged whites won’t hold the dye as evenly, so I really take my time here.
- Once the eggs are completely chilled, I gently tap each egg on a hard surface to crack the shell all over. I find that starting at the wider end of the egg, where the air pocket usually is, often helps. Then, I carefully peel the shell away under cool running water. The running water helps to wash away tiny shell fragments and makes the membrane easier to separate from the white. My secret for truly easy peeling? Peel them in the ice bath itself. The water gets under the membrane and helps lift the shell right off. I aim for perfectly smooth whites, free of any tears or blemishes.
- After peeling all the eggs, I pat them very gently with a paper towel to remove any excess moisture.
- Now, I take a sharp knife and carefully slice each egg in half lengthwise, right down the middle. I try to make this cut as clean and even as possible, as this will be the base for our elegant Colored Deviled Eggs.
- With a small spoon, I gently scoop out the bright yellow yolks from each half. I place all the yolks into a medium-sized mixing bowl – this will be for our creamy filling.
- I then arrange the hollowed-out egg white halves on a clean plate or a baking sheet lined with paper towels. Before moving on, I often take another piece of paper towel and gently dab the inside of each egg white cavity. Removing any residual moisture here will help the dye penetrate more evenly and prevent any uneven patches of color.
Creating Your Beautifully Colored Deviled Eggs
This is where the magic truly happens, transforming ordinary deviled eggs into a stunning, edible rainbow. Get ready for some vibrant fun!
- To prepare my dye baths, I gather several small bowls or ramekins – one for each color I plan to use. For example, if I want blue, pink, and green eggs, I’ll need three bowls.
- Into each bowl, I pour about ½ to ¾ cup of warm water. The warmth helps the food coloring dissolve better and makes the dye more potent.
- Then, I add 1-2 teaspoons of white vinegar to each bowl. The vinegar is essential here; it acts as a mordant, which helps the food coloring adhere to the egg whites more effectively, resulting in deeper, more vibrant hues.
- Now for the color! I add several drops (usually 5-10 drops, or even more for really intense colors) of my chosen food coloring gel to each bowl. I use a spoon to stir each dye bath until the color is completely dissolved and evenly distributed. If I’m aiming for pastel shades, I start with fewer drops and add more if needed. For truly spectacular Colored Deviled Eggs, don’t be shy with the color.
- Carefully, I place the hollowed-out egg white halves into the dye baths, cut-side up. I ensure they are fully submerged in the colored liquid. If they float, I might gently weigh them down with a small clean spoon or ensure there’s enough liquid.
- I let the egg whites soak in the dye for anywhere from 10 to 30 minutes, depending on the desired intensity of the color. For a soft, pastel shade, 10-15 minutes might suffice. For a deep, rich jewel tone, I often let them sit for 20-30 minutes, sometimes even longer if I want a truly dramatic effect. I occasionally check the color by gently lifting an egg white with a spoon to see how it’s progressing.
- Once the egg whites have reached my desired shade, I carefully remove them from the dye baths using a slotted spoon. I try to avoid touching them too much with my fingers at this stage to prevent uneven staining.
- I immediately transfer the colored egg whites to a clean plate or a baking sheet lined with paper towels, cut-side down. This allows any excess dye solution to drain off. It’s crucial to let them air dry completely for at least 15-20 minutes, or even longer. This step is important because any residual moisture will make the filling watery and can dilute the color of the final Colored Deviled Eggs. I want them perfectly dry before adding the creamy filling.
Whipping Up the Irresistible Deviled Egg Filling
While my beautiful egg whites are drying and setting their fabulous colors, I turn my attention to creating the heart and soul of our Colored Deviled Eggs – that rich, creamy, and perfectly seasoned yolk filling. This is where flavor truly shines!
- In the medium-sized bowl where I collected all the egg yolks, I begin by mashing them thoroughly with a fork. I don’t just mash them a little; I keep going until they are as fine and crumbly as possible, almost a powder. This ensures a wonderfully smooth and lump-free filling, which is essential for that luxurious texture.
- Once the yolks are finely mashed, I add the mayonnaise, Dijon mustard, white vinegar, salt, and black pepper to the bowl. I typically start with the amounts listed in the ingredients, but I always taste and adjust later.
- Using the same fork or a small spatula, I mix all the ingredients together thoroughly. I stir and mash until the mixture is completely smooth and creamy, with no streaks of unmixed mayonnaise or visible lumps of yolk. This usually takes a couple of minutes of dedicated mixing. If the mixture seems a little too thick for piping, I might add another half teaspoon of mayonnaise or a tiny splash more of vinegar to achieve the perfect consistency. I want it to be firm enough to hold its shape but soft enough to pipe easily.
- Taste test time! This is perhaps the most important step in perfecting the filling. I take a small spoonful and taste it. Does it need more salt? A pinch more pepper? Perhaps a little extra tang from the vinegar or a touch more mustard for a bolder flavor? Sometimes I even add a tiny pinch of sugar if I feel it needs a slight balance to the acidity, especially if using a very sharp mustard. This is your chance to customize the flavor profile to your exact liking, ensuring your Colored Deviled Eggs are utterly delicious.
- Optional additions for an extra layer of flavor:
- A touch of heat: Sometimes I’ll stir in a tiny dash of my favorite hot sauce, like Tabasco, for a subtle kick.
- Fresh herbs: Finely minced fresh chives or dill can be folded into the filling at this stage for a burst of fresh flavor. If I’m using them as a garnish, I’ll typically keep them separate, but sometimes I love them mixed right in.
- Curry powder: For a more adventurous twist, a tiny pinch of mild curry powder can add a wonderfully aromatic depth.
Assembling and Garnish Your Eye-Catching Colored Deviled Eggs
With our beautifully colored whites ready and our creamy, flavorful filling perfected, it’s time to bring everything together and create those show-stopping Colored Deviled Eggs that will be the highlight of any table!
- Now that the colored egg whites are fully dry and our filling is ready, it’s time to fill them. I have two preferred methods:
- For a rustic look: A small spoon works perfectly. I simply scoop a generous amount of filling into each egg white cavity, mounding it slightly. This is quick and easy, and yields a charming, homemade aesthetic.
- For an elegant presentation: I use a piping bag fitted with a star tip (or any decorative tip you prefer). I carefully spoon all the yolk mixture into the piping bag. Then, holding the bag upright, I pipe the filling into each colored egg white, creating beautiful swirls or rosettes. This method instantly elevates the presentation and makes your Colored Deviled Eggs look incredibly professional and inviting. I find this especially satisfying with the vibrant colors of the whites.
- Once all the egg whites are filled, I move on to garnishing. This adds the finishing touch, both visually and in terms of flavor.
- Classic Paprika: My go-to garnish is a light dusting of paprika. I hold a small sieve or shaker about 6-8 inches above the filled eggs and gently tap it, allowing a fine, even layer of paprika to fall over the filling. I often use sweet paprika for color, or smoked paprika if I want to add a subtle smoky note.
- Fresh Herbs: For an extra pop of color and fresh aroma, I love to sprinkle finely chopped fresh chives or a tiny sprig of fresh dill on top of the paprika. The green against the vibrant colored whites is absolutely stunning and adds a wonderful fresh counterpoint to the rich filling.
- A Touch of Flaky Salt: For a gourmet touch, a very tiny sprinkle of flaky sea salt (like Maldon) over each deviled egg can enhance the flavors and provide a pleasant textural contrast.
- Finally, I arrange my stunning Colored Deviled Eggs on a serving platter. If I’m not serving them immediately, I carefully cover the platter with plastic wrap and refrigerate them.
- Storage: Deviled eggs are best enjoyed within 1-2 days of preparation. I always store them in an airtight container in the refrigerator to keep them fresh and prevent them from drying out.
- Serving Suggestion: For the best flavor and texture, I like to let them sit out of the refrigerator for about 15-20 minutes before serving, allowing them to come slightly closer to room temperature. This really allows the flavors of the filling to sing! Enjoy your beautiful and delicious culinary creations! They are truly a feast for the eyes and the palate.

<h2>Conclusion:</h2>
<p>Well, my friends, we’ve journeyed through the simple, yet utterly delightful, process of transforming a kitchen classic into something truly extraordinary. It’s safe to say that once you’ve tried making these incredible <strong>Colored Deviled Eggs</strong>, you’ll wonder how you ever hosted a gathering without them. What truly makes this recipe a must-try isn’t just the vibrant, eye-popping aesthetics, though they certainly steal the show! It’s the perfect harmony of textures and flavors: the tender, perfectly cooked egg white offering a gentle bite, giving way to an impossibly creamy, savory, and subtly tangy yolk filling. This isn’t just a snack; it’s an experience, a conversation starter, and an instant mood lifter for any table.</p>
<p>I genuinely believe this recipe is more than just a culinary instruction; it’s an invitation to unleash your creativity in the kitchen. Imagine the gasps of delight when your guests first set eyes on a platter adorned with these rainbow-hued beauties. They take a beloved, nostalgic appetizer and elevate it to an art form, proving that a little bit of color can truly transform the mundane into the magnificent. The joy in making them is only surpassed by the joy in watching people savor every bite. It’s a testament to how simple ingredients, combined with a touch of imagination, can create something truly memorable. </p>
<h4>Elevate Your Next Gathering: Serving Suggestions and Creative Twists</h4>
<p>These aren’t just for Easter, though they certainly shine then! The versatility of <strong>Colored Deviled Eggs</strong> makes them perfect for an astonishing array of occasions. Consider them the undisputed star of your next brunch spread, alongside mimosas and a delightful quiche. They’re an absolute game-changer for potlucks, guaranteed to be the first dish to disappear. For a casual backyard BBQ, they offer a refreshing and vibrant counterpoint to grilled meats. And if you’re hosting an elegant dinner party, arrange them artfully on a dark platter to really make those colors pop – they’ll add an unexpected touch of sophisticated whimsy. Think about creating specific color palettes for different holidays: festive reds and greens for Christmas, spooky purples and greens for Halloween, or patriotic red, white, and blue for Fourth of July celebrations. The possibilities are truly endless!</p>
<h5>Unleash Your Inner Chef: Flavorful Variations</h5>
<p>Beyond the visual appeal, there are so many ways you can customize the flavor profile of your deviled eggs. Don’t be afraid to experiment with the yolk mixture! For a smoky kick, add a pinch of smoked paprika or even a touch of chipotle powder. If you like a little heat, a dash of your favorite hot sauce or a tiny bit of cayenne pepper can really awaken the palate. For an herbaceous touch, finely minced fresh dill, chives, or parsley folded into the filling are wonderful additions. A hint of curry powder can transport your taste buds to an entirely different culinary landscape. You could also try finely crumbling some crispy bacon bits or fried shallots into the filling for an extra layer of texture and savory goodness. As for garnishes, beyond the classic sprinkle of paprika or fresh chives, consider tiny sprigs of fresh dill, thinly sliced radishes, a few capers, or even a tiny dollop of salmon roe for an ultra-fancy presentation. Every small tweak allows you to put your unique stamp on this already fantastic recipe.</p>
<p>So, what are you waiting for? I wholeheartedly encourage you to dive in and try making these absolutely stunning <strong>Colored Deviled Eggs</strong> yourself. It’s a surprisingly simple process that yields incredibly rewarding results, both visually and gastronomically. Gather your ingredients, pick your favorite food colors, and get ready to impress everyone who tastes them. I promise you, the joy you’ll experience from creating something so beautiful and delicious will be immense. And please, after you’ve whipped up your batch of these vibrant delights, don’t keep it to yourself! I would absolutely love to hear about your experience. Share your photos, tell me about the color combinations you chose, and let me know which flavor variations became your new favorite. Your culinary adventures inspire me, and I can’t wait to see the incredible creations you come up with. Happy cooking, and may your next gathering be as colorful and delicious as these deviled eggs!</p>
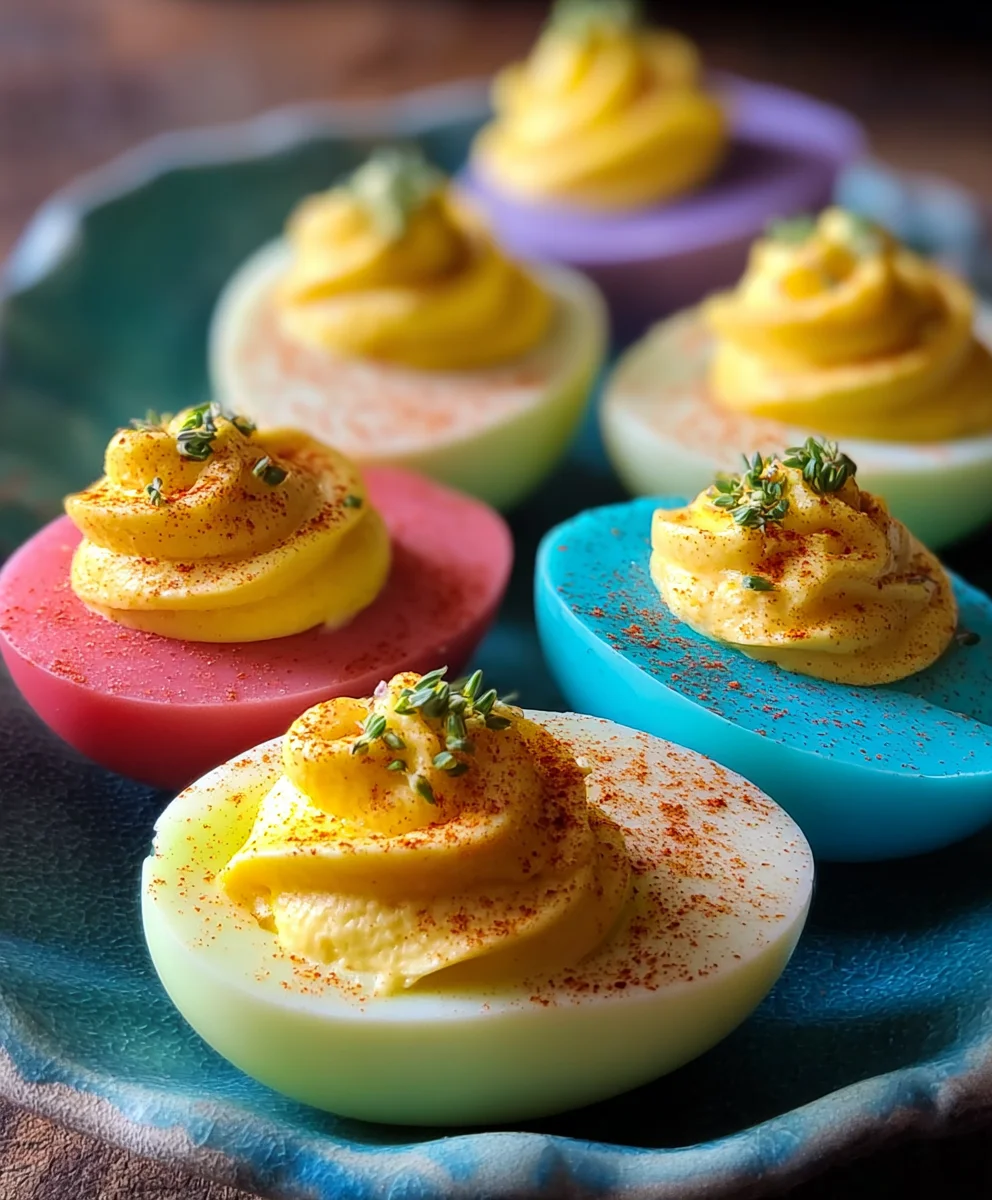
Colored Deviled Eggs: Bright, Fun, & Easy Party Appetizer
A dazzling, playful twist on classic deviled eggs, reimagined with vibrant, eye-catching hues. These show-stopping eggs retain all the nostalgic charm and deliciousness of the traditional recipe, adding an unexpected visual delight perfect for any party or celebration.
Ingredients
-
12 large eggs
-
½ cup mayonnaise
-
1 tablespoon Dijon mustard
-
1 teaspoon white vinegar or apple cider vinegar
-
¼ teaspoon salt, plus more to taste
-
⅛ teaspoon freshly ground black pepper, plus more to taste
-
For Garnish (optional): Paprika (sweet or smoked)
-
For Garnish (optional): Fresh chives, finely chopped
-
For Garnish (optional): Fresh dill sprigs
-
For Coloring the Egg Whites: Food coloring gels (various colors)
-
For Coloring the Egg Whites: Small bowls or ramekins (one per color)
-
For Coloring the Egg Whites: White vinegar (1-2 teaspoons per coloring bath)
-
For Coloring the Egg Whites: Water
Instructions
-
Step 1
Place 12 large eggs in a single layer in a saucepan, cover with cold water by at least an inch, and add 1 teaspoon of salt. Bring to a rolling boil over high heat, then immediately turn off heat, cover tightly, and let sit for 10-12 minutes. -
Step 2
While eggs steep, prepare an ice bath. Immediately transfer cooked eggs to the ice bath and let cool completely for at least 5 minutes. -
Step 3
Once chilled, gently tap and peel eggs, aiming for perfectly smooth whites. Pat dry. Carefully slice each egg in half lengthwise and scoop out yolks into a medium mixing bowl. Arrange hollowed-out whites on a clean plate or baking sheet, patting the cavities dry. -
Step 4
Prepare dye baths: In separate small bowls (one per color), combine ½ to ¾ cup warm water, 1-2 teaspoons white vinegar, and several drops of desired food coloring gel. Stir well. -
Step 5
Submerge egg white halves in the dye baths, cut-side up, for 10 to 30 minutes, or until desired color intensity is reached. Remove with a slotted spoon and transfer cut-side down to a paper towel-lined plate. Let air dry completely for at least 15-20 minutes to remove excess moisture. -
Step 6
Mash reserved egg yolks until fine. Add ½ cup mayonnaise, 1 tablespoon Dijon mustard, 1 teaspoon white vinegar, ¼ teaspoon salt, and ⅛ teaspoon black pepper. Mix thoroughly until smooth and creamy. Taste and adjust seasonings as needed. (Optional: Add hot sauce, minced chives/dill, or curry powder for extra flavor). -
Step 7
Fill the colored egg whites: Use a small spoon for a rustic look or a piping bag fitted with a star tip for an elegant presentation, mounding the filling in each cavity. -
Step 8
Garnish: Lightly dust with paprika (sweet or smoked). Optionally, sprinkle with finely chopped fresh chives or dill sprigs, and/or a tiny pinch of flaky sea salt. -
Step 9
Arrange finished Colored Deviled Eggs on a serving platter. Cover and refrigerate immediately if not serving right away. For best flavor, let them sit out for 15-20 minutes before serving. Enjoy within 1-2 days.
Important Information
Nutrition Facts (Per Serving)
It is important to consider this information as approximate and not to use it as definitive health advice.
Allergy Information
Please check ingredients for potential allergens and consult a health professional if in doubt.


Leave a Comment