

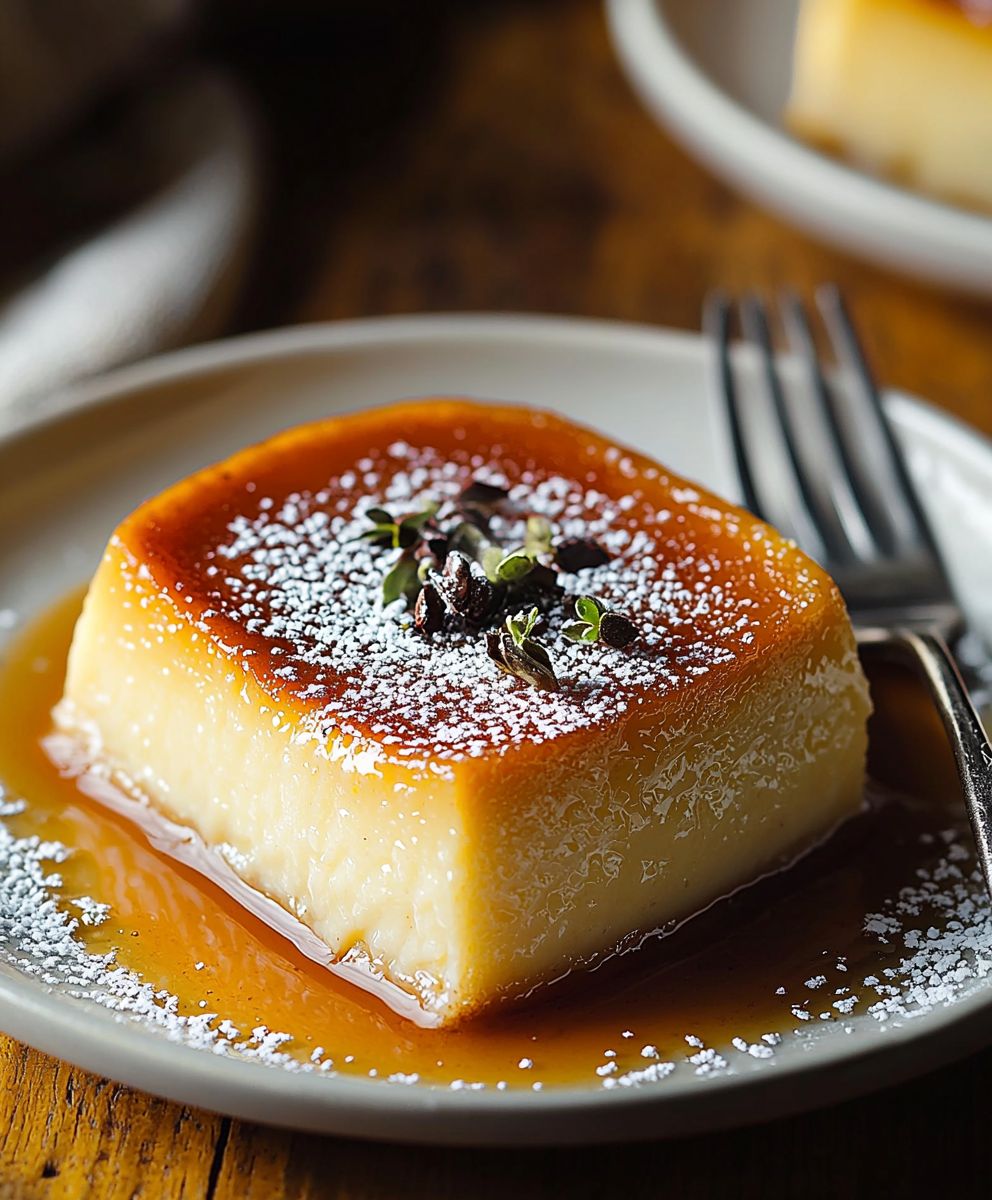
Coconut Flan Antilles, a creamy, dreamy dessert that transports you straight to the sun-kissed shores of the Caribbean with every single bite! Have you ever tasted something so decadent, yet so refreshingly light? This isn’t just flan; it’s an experience, a sweet escape that I’m thrilled to share with you.
Flan, in general, boasts a rich history, tracing its roots back to the Roman Empire. However, Coconut Flan Antilles takes on a unique character, infused with the vibrant flavors and traditions of the French Antilles. The addition of coconut milk transforms the classic custard into something truly special, reflecting the abundance of coconuts in the region and the ingenuity of Caribbean cuisine. Its a testament to how simple ingredients, when combined with cultural flair, can create culinary magic.
What makes this particular flan so irresistible? It’s the perfect balance of textures the smooth, silky custard juxtaposed with the slightly chewy, caramelized top. The taste is equally captivating: the rich sweetness of the caramel, the delicate creaminess of the custard, and the subtle, tropical notes of coconut all harmonize beautifully. Plus, it’s surprisingly easy to make! While it looks impressive, this Coconut Flan Antilles recipe requires minimal effort, making it the perfect dessert for both special occasions and everyday indulgence. Get ready to impress your friends and family with this taste of paradise!

Ingredients:
- 1 can (14 ounces) sweetened condensed milk
- 1 can (13.5 ounces) coconut milk
- 4 large eggs
- 1/2 cup granulated sugar
- 1/4 cup water
- 1 teaspoon vanilla extract
- Pinch of salt
- 1/4 cup shredded coconut, for garnish (optional)
Preparing the Caramel:
Okay, let’s start with the caramel. This is the base of our flan and gives it that beautiful amber color and rich, slightly bitter flavor that balances the sweetness. Don’t be intimidated; it’s easier than you think! Just follow these steps carefully.
- Combine Sugar and Water: In a heavy-bottomed saucepan (stainless steel is best), combine the 1/2 cup of granulated sugar and 1/4 cup of water. Stir gently to moisten all the sugar. Avoid splashing the sugar on the sides of the pan, as this can cause crystallization.
- Cook Over Medium Heat: Place the saucepan over medium heat. Now, this is important: do not stir. Stirring can also cause crystallization. Just let the sugar and water simmer and do their thing.
- Watch for Color Change: As the mixture heats, it will start to bubble and steam. Keep a close eye on it. The color will gradually change from clear to a pale yellow, then to a golden amber, and finally to a rich, deep amber. This process takes time, so be patient.
- Achieve the Right Color: You want the caramel to be a deep amber color, but be careful not to let it burn. Burnt caramel tastes bitter and will ruin the flan. The ideal color is similar to that of maple syrup.
- Remove from Heat Immediately: Once the caramel reaches the desired color, immediately remove the saucepan from the heat. The residual heat will continue to darken the caramel, so it’s better to err on the side of slightly lighter than too dark.
- Pour into Flan Mold: Carefully pour the hot caramel into your flan mold or ramekins. Swirl the mold or ramekins to coat the bottom and sides evenly. Work quickly, as the caramel will harden as it cools. If the caramel starts to harden too quickly, you can briefly warm the bottom of the mold over low heat to soften it.
- Let Cool and Harden: Set the mold or ramekins aside to cool completely. The caramel will harden into a brittle layer. This usually takes about 15-20 minutes.
Preparing the Flan Custard:
Now that our caramel is ready, let’s move on to the heart of the flan: the custard! This is where the creamy, coconutty goodness comes in. This part is super easy, just blend and pour!
- Combine Ingredients in a Blender: In a blender, combine the sweetened condensed milk, coconut milk, eggs, vanilla extract, and salt.
- Blend Until Smooth: Blend the mixture on medium speed until it is completely smooth and well combined. This usually takes about 1-2 minutes. Make sure there are no lumps or streaks of egg yolk.
- Pour Custard Over Caramel: Gently pour the custard mixture over the hardened caramel in the flan mold or ramekins. Pour slowly to avoid disturbing the caramel layer.
Cooking the Flan:
The secret to a perfectly smooth and creamy flan is to cook it gently in a water bath. This ensures even cooking and prevents the custard from curdling.
- Prepare the Water Bath: Preheat your oven to 350°F (175°C). Find a baking pan that is large enough to hold the flan mold or ramekins. Place the flan mold or ramekins inside the baking pan.
- Add Hot Water: Carefully pour hot water into the baking pan, around the flan mold or ramekins. The water should come about halfway up the sides of the mold or ramekins. This is your water bath, also known as a bain-marie.
- Bake the Flan: Carefully transfer the baking pan with the flan and water bath to the preheated oven. Bake for 50-60 minutes, or until the flan is set but still slightly jiggly in the center. The cooking time will vary depending on the size of your mold or ramekins.
- Check for Doneness: To check if the flan is done, gently insert a knife into the center. If the knife comes out clean, the flan is ready. If it comes out with some wet custard clinging to it, bake for a few more minutes and check again.
- Remove from Oven and Water Bath: Once the flan is done, carefully remove the baking pan from the oven. Remove the flan mold or ramekins from the water bath and let them cool on a wire rack.
Chilling and Unmolding:
Patience is key here! Chilling the flan allows it to set completely and makes it easier to unmold. Trust me, it’s worth the wait!
- Cool to Room Temperature: Let the flan cool to room temperature on the wire rack. This usually takes about an hour.
- Refrigerate for at Least 4 Hours: Cover the flan mold or ramekins with plastic wrap and refrigerate for at least 4 hours, or preferably overnight. This allows the flan to chill completely and the flavors to meld together.
- Unmold the Flan: When you’re ready to serve the flan, run a thin knife around the edge of the mold or ramekins to loosen the flan.
- Invert onto a Serving Plate: Place a serving plate over the top of the mold or ramekin. Holding the plate and mold or ramekin firmly together, quickly invert them. The flan should release from the mold and land on the plate with the caramel sauce drizzling over it. If the flan doesn’t release easily, you can briefly dip the bottom of the mold or ramekin in warm water to loosen the caramel.
- Garnish (Optional): If desired, garnish the flan with shredded coconut.
- Serve and Enjoy!: Slice the flan and serve chilled. Enjoy the creamy, coconutty goodness!
Tips for Success:
- Don’t Overcook the Caramel: Burnt caramel is bitter and will ruin the flan. Watch it carefully and remove it from the heat as soon as it reaches a deep amber color.
- Use a Heavy-Bottomed Saucepan for the Caramel: This will help to prevent the sugar from burning.
- Don’t Stir the Caramel While It’s Cooking: Stirring can cause crystallization.
- Use Hot Water for the Water Bath: This will help to ensure even cooking.
- Chill the Flan Completely Before Unmolding: This will make it easier to unmold and prevent it from breaking.
- If the Flan Doesn’t Release Easily, Dip the Bottom of the Mold in Warm Water: This will help to loosen the caramel.
Variations:
- Add a Splash of Rum: For an extra Caribbean flair, add a tablespoon or two of dark rum to the custard mixture.
- Use Different Extracts: Experiment with different extracts, such as almond or orange, to add a unique flavor to the flan.
- Top with Fresh Fruit: Garnish the flan with fresh fruit, such as mango, pineapple, or berries.
- Make Individual Flan: Use ramekins instead of a large mold to make individual flans. Adjust the baking time accordingly.
Conclusion:
This Coconut Flan Antilles recipe isn’t just another dessert; it’s a journey to the sun-kissed shores of the Caribbean, a taste of pure tropical indulgence that you absolutely must experience. The creamy, dreamy texture combined with the rich coconut flavor and the hint of warm spices creates a symphony of sensations that will leave you wanting more. Trust me, once you’ve tasted this flan, you’ll understand why it’s a beloved classic.
But why is this particular recipe a must-try? It’s all about the balance. We’ve carefully crafted this recipe to ensure the perfect ratio of sweetness, coconut flavor, and that signature flan wobble. It’s not overly sweet, allowing the natural coconut to shine through, and the texture is unbelievably smooth and velvety. Plus, it’s surprisingly easy to make! Don’t let the fancy name intimidate you; with our step-by-step instructions, even a novice baker can create a show-stopping dessert.
And the best part? This Coconut Flan Antilles is incredibly versatile. Serve it chilled straight from the refrigerator for a refreshing treat on a hot day. Or, for a more decadent experience, try drizzling it with a homemade caramel sauce or a sprinkle of toasted coconut flakes. For a truly Caribbean twist, add a splash of dark rum to the caramel sauce just be sure to adjust the amount to your liking! You could also experiment with different spices; a pinch of nutmeg or allspice would complement the coconut beautifully. Another delicious variation is to add a layer of pineapple chunks to the bottom of the pan before pouring in the flan mixture. The caramelized pineapple adds a tangy sweetness that pairs perfectly with the coconut.
For a lighter option, you can substitute some of the heavy cream with coconut milk. This will give the flan an even more intense coconut flavor while reducing the richness slightly. If you’re feeling adventurous, try infusing the milk with lemongrass or ginger for a unique and aromatic twist.
Serving suggestions are endless! This flan makes a stunning centerpiece for any dinner party. Garnish it with fresh berries, edible flowers, or a dusting of cocoa powder for an elegant presentation. It’s also perfect for a casual get-together with friends and family. Simply slice it up and serve it with a dollop of whipped cream or a scoop of vanilla ice cream.
I truly believe that this recipe will become a new favorite in your household. It’s a crowd-pleaser, a conversation starter, and a guaranteed way to impress your guests. But more importantly, it’s a delicious and satisfying dessert that you can enjoy any time of year.
So, what are you waiting for? Gather your ingredients, preheat your oven, and get ready to embark on a culinary adventure. I’m confident that you’ll love this Coconut Flan Antilles as much as I do.
And now, for the most important part: I want to hear about your experience! Once you’ve made this recipe, please come back and share your thoughts in the comments section below. Did you make any variations? What did your family and friends think? Any tips or tricks you’d like to share? I’m eager to learn from your experiences and see how you’ve made this recipe your own. Happy baking!
Coconut Flan Antilles: A Taste of the Caribbean
Creamy and decadent coconut flan with a rich caramel base. This classic dessert is surprisingly easy to make and perfect for any occasion.
Ingredients
- 1 can (14 ounces) sweetened condensed milk
- 1 can (13.5 ounces) coconut milk
- 4 large eggs
- 1/2 cup granulated sugar
- 1/4 cup water
- 1 teaspoon vanilla extract
- Pinch of salt
- 1/4 cup shredded coconut, for garnish (optional)
Instructions
- Combine Sugar and Water: In a heavy-bottomed saucepan (stainless steel is best), combine the 1/2 cup of granulated sugar and 1/4 cup of water. Stir gently to moisten all the sugar. Avoid splashing the sugar on the sides of the pan, as this can cause crystallization.
- Cook Over Medium Heat: Place the saucepan over medium heat. Do not stir. Just let the sugar and water simmer.
- Watch for Color Change: The color will gradually change from clear to a pale yellow, then to a golden amber, and finally to a rich, deep amber.
- Achieve the Right Color: You want the caramel to be a deep amber color, similar to maple syrup, but be careful not to let it burn.
- Remove from Heat Immediately: Once the caramel reaches the desired color, immediately remove the saucepan from the heat.
- Pour into Flan Mold: Carefully pour the hot caramel into your flan mold or ramekins. Swirl the mold or ramekins to coat the bottom and sides evenly. Work quickly, as the caramel will harden as it cools. If the caramel starts to harden too quickly, you can briefly warm the bottom of the mold over low heat to soften it.
- Let Cool and Harden: Set the mold or ramekins aside to cool completely. The caramel will harden into a brittle layer. This usually takes about 15-20 minutes.
- Combine Ingredients in a Blender: In a blender, combine the sweetened condensed milk, coconut milk, eggs, vanilla extract, and salt.
- Blend Until Smooth: Blend the mixture on medium speed until it is completely smooth and well combined. This usually takes about 1-2 minutes.
- Pour Custard Over Caramel: Gently pour the custard mixture over the hardened caramel in the flan mold or ramekins. Pour slowly to avoid disturbing the caramel layer.
- Prepare the Water Bath: Preheat your oven to 350°F (175°C). Find a baking pan that is large enough to hold the flan mold or ramekins. Place the flan mold or ramekins inside the baking pan.
- Add Hot Water: Carefully pour hot water into the baking pan, around the flan mold or ramekins. The water should come about halfway up the sides of the mold or ramekins. This is your water bath, also known as a bain-marie.
- Bake the Flan: Carefully transfer the baking pan with the flan and water bath to the preheated oven. Bake for 50-60 minutes, or until the flan is set but still slightly jiggly in the center. The cooking time will vary depending on the size of your mold or ramekins.
- Check for Doneness: To check if the flan is done, gently insert a knife into the center. If the knife comes out clean, the flan is ready. If it comes out with some wet custard clinging to it, bake for a few more minutes and check again.
- Remove from Oven and Water Bath: Once the flan is done, carefully remove the baking pan from the oven. Remove the flan mold or ramekins from the water bath and let them cool on a wire rack.
- Cool to Room Temperature: Let the flan cool to room temperature on the wire rack. This usually takes about an hour.
- Refrigerate for at Least 4 Hours: Cover the flan mold or ramekins with plastic wrap and refrigerate for at least 4 hours, or preferably overnight.
- Unmold the Flan: When you’re ready to serve the flan, run a thin knife around the edge of the mold or ramekins to loosen the flan.
- Invert onto a Serving Plate: Place a serving plate over the top of the mold or ramekin. Holding the plate and mold or ramekin firmly together, quickly invert them. The flan should release from the mold and land on the plate with the caramel sauce drizzling over it. If the flan doesn’t release easily, you can briefly dip the bottom of the mold or ramekin in warm water to loosen the caramel.
- Garnish (Optional): If desired, garnish the flan with shredded coconut.
- Serve and Enjoy!: Slice the flan and serve chilled.
Notes
- Don’t Overcook the Caramel: Burnt caramel is bitter and will ruin the flan. Watch it carefully and remove it from the heat as soon as it reaches a deep amber color.
- Use a Heavy-Bottomed Saucepan for the Caramel: This will help to prevent the sugar from burning.
- Don’t Stir the Caramel While It’s Cooking: Stirring can cause crystallization.
- Use Hot Water for the Water Bath: This will help to ensure even cooking.
- Chill the Flan Completely Before Unmolding: This will make it easier to unmold and prevent it from breaking.
- If the Flan Doesn’t Release Easily, Dip the Bottom of the Mold in Warm Water: This will help to loosen the caramel.


Leave a Comment