

Stuffed Bell Peppers are a culinary delight that beautifully marries vibrant garden-fresh produce with a hearty, satisfying filling. I’ve always been fascinated by how this seemingly simple dish holds a special place in kitchens across the globe, from the Mediterranean to Eastern Europe and right into American homes, a testament to versatile, wholesome cooking that has evolved with local ingredients and family traditions for centuries.
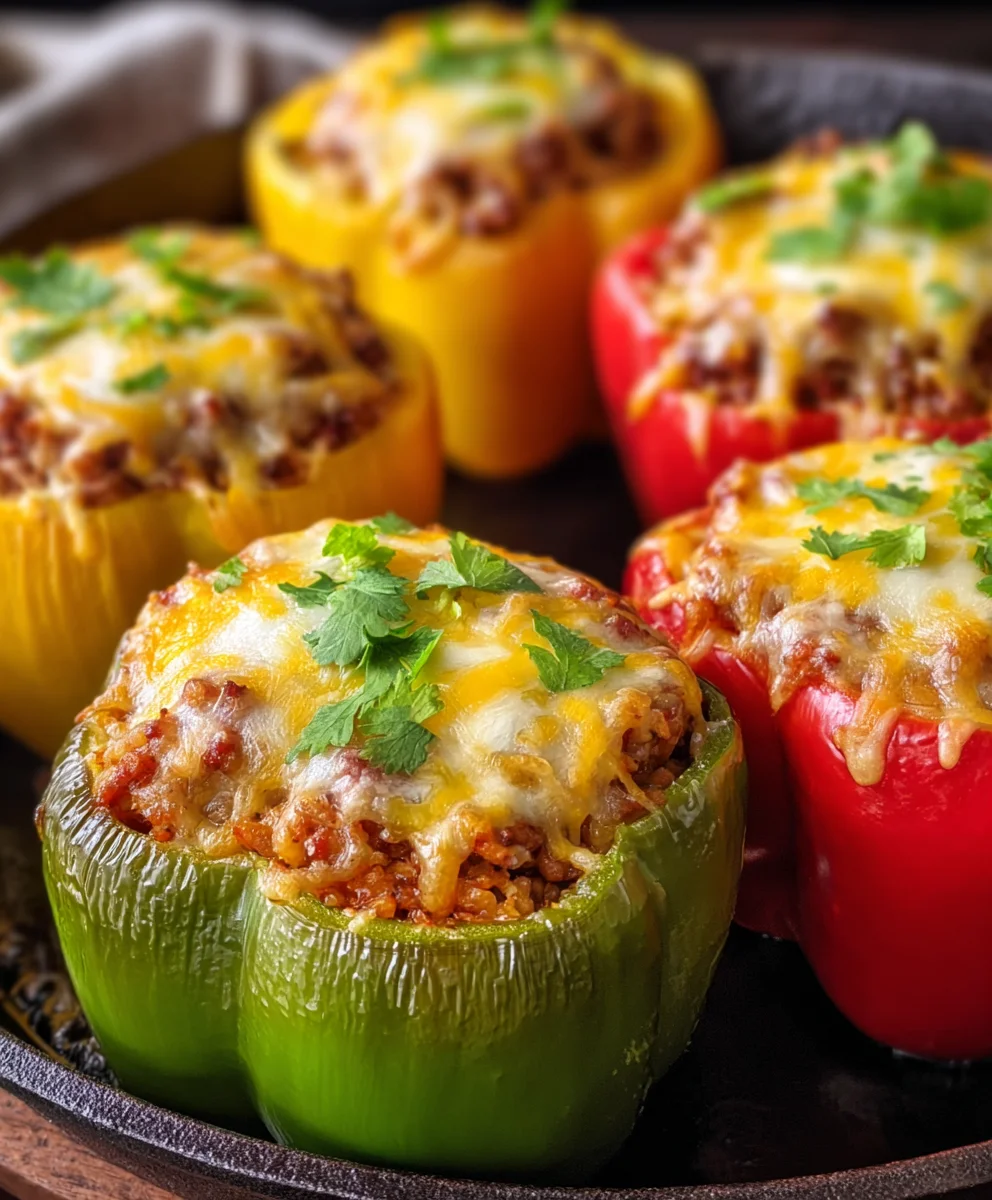
What truly makes Stuffed Bell Peppers a beloved classic, in my opinion, is their irresistible combination of flavors and textures. Imagine the sweet, slightly charred notes of a tender bell pepper perfectly cradling a rich, savory mixture of seasoned ground meat, fluffy rice, and aromatic herbs, often topped with a melted blanket of cheese. Beyond their deliciousness, they offer the wonderful convenience of a complete meal in one colorful, self-contained package, making them ideal for weeknight dinners, meal prepping, or impressing guests with minimal fuss. I’m excited to share my go-to recipe for this comforting staple, promising a dish that is as nourishing as it is flavorful.

Ingredients:
- 6 large bell peppers (any color, though green offers a classic, slightly bitter counterpoint, while red, yellow, and orange are sweeter)
- 1 tablespoon olive oil, plus extra for drizzling
- 1 medium yellow onion, finely diced
- 3 cloves garlic, minced
- 1.5 pounds lean ground beef (or a mix of beef and pork, or ground turkey for a lighter option)
- 1 (14.5 ounce) can crushed tomatoes, undrained
- 1 (8 ounce) can tomato sauce
- 1/2 cup uncooked long-grain white rice (or brown rice, cooked al dente, for a healthier spin)
- 1/2 cup beef broth (or vegetable broth)
- 1 teaspoon dried oregano
- 1 teaspoon dried basil
- 1/2 teaspoon smoked paprika
- 1/4 teaspoon red pepper flakes (optional, for a little kick)
- Salt and freshly ground black pepper to taste
- 1 cup shredded mozzarella cheese (or a cheddar-jack blend), divided
- 1/4 cup fresh parsley, chopped (for garnish, optional)
- For the optional sauce base (if not using canned tomato sauce/crushed tomatoes for the bottom of the dish):
- 1 (15 ounce) can tomato sauce
- 1/2 cup water
- 1/2 teaspoon dried Italian seasoning
Equipment You’ll Need:
- Large mixing bowl
- Large skillet or Dutch oven
- 9×13 inch baking dish (or similar size)
- Sharp knife
- Cutting board
- Measuring cups and spoons
- Spatula or wooden spoon
- Foil
Preparation: Getting Started with Your Stuffed Bell Peppers
Embarking on the journey to create the most delicious Stuffed Bell Peppers starts with careful preparation. This initial phase is crucial for ensuring everything comes together smoothly and efficiently.
- First things first, I like to preheat my oven to 375°F (190°C). Getting the oven ready early means no waiting around once your beautiful Stuffed Bell Peppers are assembled and ready to bake.
- Next, let’s prepare those gorgeous bell peppers. Wash them thoroughly under cool running water. Then, with a sharp knife, carefully slice off the tops of each bell pepper. I usually aim for about half an inch down, just enough to remove the stem. After that, gently scoop out all the seeds and any white membranes from the inside. You want a clean, hollow cavity that’s ready to be packed with our flavorful filling. If any peppers are wobbly, you can slice a tiny bit off the bottom to create a flat surface, ensuring they stand upright in the baking dish. This step is important for presentation and even cooking.
- Now, let’s get our aromatics ready. Finely dice the yellow onion. The goal here is small, consistent pieces that will meld seamlessly into our filling. Next, mince the garlic cloves. I find that freshly minced garlic makes a huge difference in flavor compared to pre-minced varieties.
- If you’re using long-grain white rice that cooks quickly, you can add it uncooked directly to the filling later. However, if you opt for brown rice or a par-cooked rice variety, I recommend cooking it to al dente according to package directions before adding it to the mixture. This ensures the rice is properly cooked by the time our Stuffed Bell Peppers are finished baking.
- For the baking dish, I usually prepare a simple sauce base. If you’re not planning to use the extra can of tomato sauce and water for the base, you can just drizzle a little olive oil on the bottom of the dish to prevent sticking. However, I find that a little sauce on the bottom adds moisture and flavor. Pour the can of tomato sauce (15 oz) into your 9×13 inch baking dish, stir in 1/2 cup of water and 1/2 teaspoon of dried Italian seasoning. Spread it evenly to create a delicious bed for our peppers.
Crafting the Flavorful Filling for Our Stuffed Bell Peppers
This is where the magic truly happens – creating a robust and deeply flavorful filling that will make these Stuffed Bell Peppers absolutely irresistible. Every ingredient plays a vital role in building layers of taste and texture.
- Heat 1 tablespoon of olive oil in a large skillet or Dutch oven over medium-high heat. Once the oil is shimmering, add your finely diced yellow onion. Sauté the onion for about 5-7 minutes, stirring occasionally, until it becomes translucent and softened. You’ll notice a lovely aroma filling your kitchen – that’s the start of something wonderful!
- Add the minced garlic to the skillet with the softened onions. Continue to cook for another minute, stirring constantly, until the garlic is fragrant. Be careful not to let the garlic burn, as burnt garlic can turn bitter.
- Now, it’s time for the ground meat. Add the lean ground beef (or your chosen meat) to the skillet with the onions and garlic. Break up the meat with a spatula or wooden spoon, cooking it until it’s beautifully browned all over. This usually takes about 8-10 minutes. Once browned, drain any excess grease from the skillet. Draining the fat is key for a less greasy, more palatable filling.
- Reduce the heat to medium. Stir in the 1 (14.5 ounce) can of crushed tomatoes (undrained) and the 1 (8 ounce) can of tomato sauce. These tomato products form the rich, savory base for our filling.
- Next come the seasonings! Add the dried oregano, dried basil, smoked paprika, and if you like a little warmth, the red pepper flakes. Season generously with salt and freshly ground black pepper to your taste. I always recommend tasting the mixture at this point and adjusting the seasonings as needed. Remember, this filling needs to be vibrant and flavorful on its own, as it will be encased within the bell peppers.
- Stir in the 1/2 cup of uncooked long-grain white rice (or your pre-cooked brown rice/par-cooked rice). The uncooked rice will absorb the delicious liquids from the tomato mixture and broth as the Stuffed Bell Peppers bake, becoming tender and plump.
- Pour in the 1/2 cup of beef broth. This liquid is essential for ensuring the rice cooks properly and for keeping the filling moist and juicy.
- Bring the mixture to a gentle simmer, then reduce the heat to low and let it cook for about 5-7 minutes, stirring occasionally. This allows the flavors to meld together beautifully and gives the rice a head start in absorbing some of the liquid. The filling should be thick and very fragrant.
- Remove the skillet from the heat. Stir in 1/2 cup of the shredded mozzarella cheese (or cheddar-jack blend) directly into the filling. The cheese will melt slightly and add a wonderful creaminess and extra layer of flavor to our mixture.
Assembling the Stuffed Bell Peppers
With our vibrant filling ready, the next step is bringing our Stuffed Bell Peppers to life. This is where we transform individual ingredients into a cohesive, inviting dish, perfectly poised for baking.
- Carefully take your prepared bell pepper shells. Using a spoon or a small ladle, generously fill each bell pepper with the savory meat and rice mixture. Don’t be shy – pack it in there! I like to heap the filling slightly on top, creating a nice rounded mound. This ensures each bite is packed with flavor and substance.
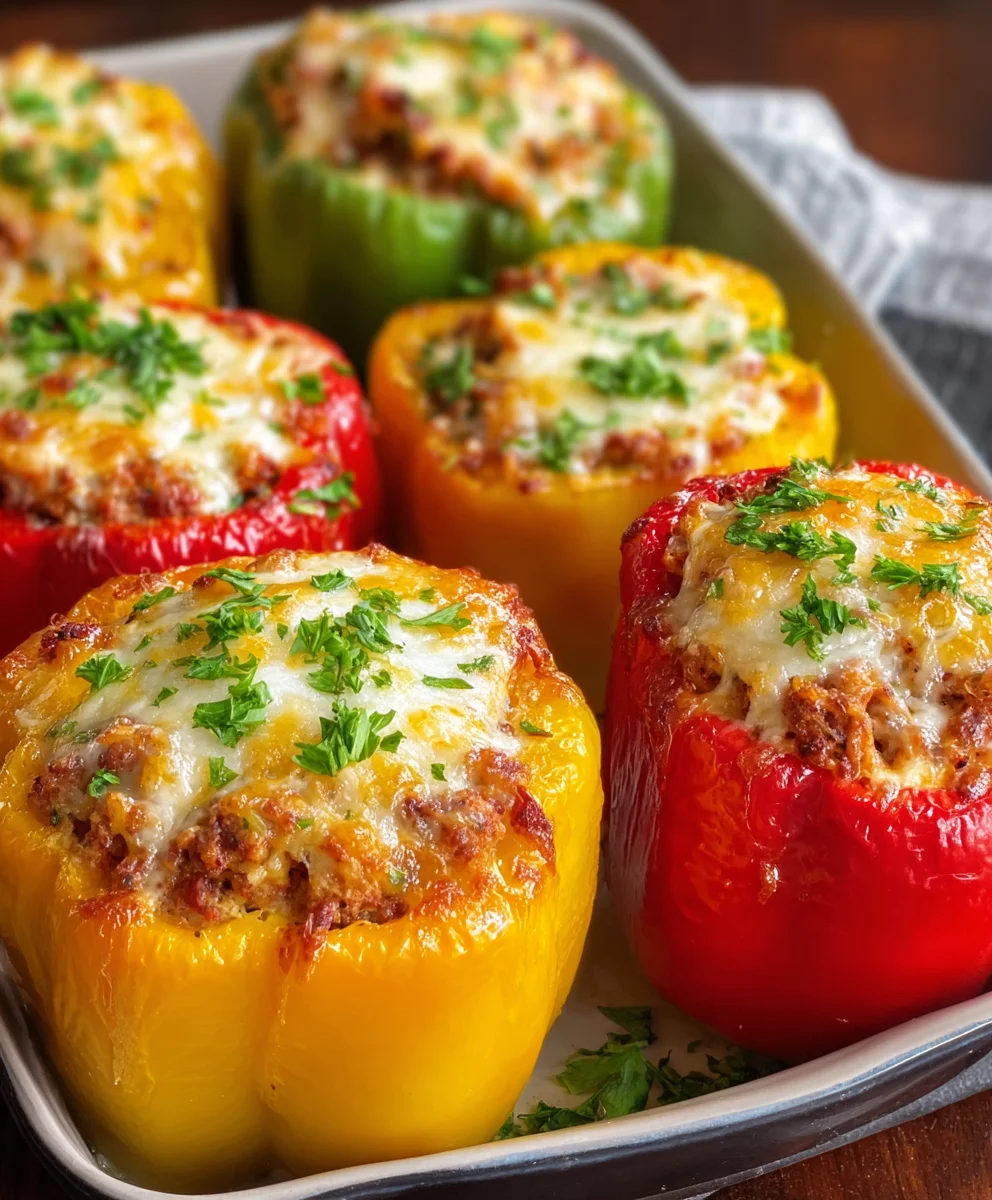
- Once filled, arrange the Stuffed Bell Peppers upright in your prepared 9×13 inch baking dish. They should fit snugly, standing proudly in their bed of tomato sauce. If you prepared a sauce base in step 5, they will sit beautifully in that. If not, just ensure they are arranged closely to support each other during baking.
Baking Your Perfect Stuffed Bell Peppers
Now, for the grand finale – baking! This stage transforms the raw components into tender, bubbling, and aromatic Stuffed Bell Peppers. The oven will do most of the work, infusing the peppers with flavor and cooking the rice to perfection.
- Once all the peppers are filled and arranged in the baking dish, cover the dish tightly with aluminum foil. This helps to steam the bell peppers, ensuring they become wonderfully tender, and it also aids in cooking the rice thoroughly without drying out the filling.
- Carefully place the covered baking dish into your preheated 375°F (190°C) oven. Bake for 45 minutes to 1 hour. The exact time can vary depending on your oven and the thickness of your bell peppers. The goal here is for the bell peppers to be tender when pierced with a fork and for the rice inside to be fully cooked.
- After 45 minutes to an hour, remove the foil from the baking dish. Sprinkle the remaining 1/2 cup of shredded mozzarella cheese evenly over the tops of all the Stuffed Bell Peppers.
- Return the uncovered dish to the oven and continue to bake for another 10-15 minutes, or until the cheese is melted, bubbly, and beautifully golden brown. At this point, the edges of the peppers might start to caramelize slightly, adding another layer of deliciousness. Keep a close eye on them during this final stage to prevent the cheese from burning.
- Once they are golden and bubbly, carefully remove the baking dish from the oven. Let the Stuffed Bell Peppers rest for 5-10 minutes before serving. This resting period allows the filling to set slightly and makes them easier to handle, preventing all that delicious filling from spilling out when you transfer them to plates.
Serving Suggestions for Your Delicious Stuffed Bell Peppers
Your beautifully baked Stuffed Bell Peppers are a complete meal in themselves, but pairing them with a simple side can elevate the dining experience even further. Here are some of my favorite ways to enjoy them:
- Simple Green Salad: A fresh, crisp green salad with a light vinaigrette dressing is the perfect counterpoint to the rich and savory peppers.
- Crusty Bread: A good loaf of crusty bread is ideal for soaking up any extra tomato sauce from the bottom of the dish.
- Steamed Vegetables: Lightly steamed green beans, broccoli, or asparagus offer a healthy and vibrant side dish.
- Mashed Potatoes: For a more comforting and hearty meal, a scoop of creamy mashed potatoes can be delightful.
- Couscous or Quinoa: If you’re looking for an alternative grain side, plain couscous or quinoa can complement the flavors well.
Before serving, I love to sprinkle a generous amount of fresh chopped parsley over the top of each bell pepper. It adds a lovely pop of color and a fresh, herbaceous note that brightens the entire dish.
Tips and Tricks for the Best Stuffed Bell Peppers Every Time
Making delicious Stuffed Bell Peppers is a rewarding culinary endeavor, and with a few extra tips, you can ensure they turn out perfectly every single time. These insights come from my own experience in the kitchen, aiming to make your cooking journey as smooth and enjoyable as possible.
- Choosing Your Bell Peppers: While green bell peppers offer a classic, slightly robust flavor that stands up well to the rich filling, don’t shy away from using red, yellow, or orange bell peppers. They are naturally sweeter and add a beautiful splash of color to your table. A mix of colors creates a visually stunning dish!
- Pre-Cooking Bell Peppers (Optional): If you prefer your bell peppers to be extremely tender, you can blanch them briefly before filling. Bring a large pot of salted water to a boil, then carefully immerse the hollowed-out bell peppers for 3-5 minutes. Immediately transfer them to an ice bath to stop the cooking, then drain thoroughly before filling. This step is entirely optional but ensures maximum tenderness.
- Rice Choices: Uncooked long-grain white rice works best for this recipe as it cooks within the pepper. If using brown rice, wild rice, or other longer-cooking grains, I highly recommend par-cooking them about halfway before adding them to the filling. This ensures they reach the desired tenderness without overcooking the meat or peppers.
- Meat Variations: Feel free to experiment with different ground meats. Ground turkey or chicken can make a lighter version, while a mix of ground beef and Italian sausage can add an extra layer of savory depth. For a vegetarian option, swap the meat for cooked lentils, mushrooms, and extra vegetables like finely diced zucchini or carrots.
- Flavor Boosters: Don’t be afraid to customize the seasonings. A pinch of cayenne pepper, a dash of Worcestershire sauce, or even a tablespoon of balsamic vinegar can add intriguing notes to the filling. Fresh herbs like thyme or rosemary can also be lovely additions.
- Make Ahead: Stuffed Bell Peppers are a fantastic make-ahead meal. You can assemble them completely, cover the baking dish tightly with plastic wrap, and refrigerate for up to 24 hours before baking. When ready to bake, add an extra 10-15 minutes to the initial covered baking time.
- Freezing Instructions: These peppers also freeze beautifully. You can freeze them either before or after baking.
- To freeze unbaked: Fill the peppers, arrange them in a freezer-safe dish, cover tightly with foil and then plastic wrap, and freeze for up to 3 months. Thaw overnight in the refrigerator before baking as directed, adding extra baking time as needed.
- To freeze baked: Allow the cooked peppers to cool completely. Wrap each pepper individually in plastic wrap, then place them in a freezer-safe bag or container. They can be frozen for up to 3 months. Reheat in a preheated oven at 350°F (175°C) until heated through, about 30-40 minutes, covered.
- Don’t Overcook the Peppers: While you want them tender, you don’t want them mushy. The peppers should still retain some structural integrity and a pleasant bite. Overcooking can lead to a watery texture.
- Adjusting Sauce: If you find the sauce in the bottom of your baking dish is getting too thick or drying out during baking, you can always add a splash more broth or water, especially during the uncovered baking stage. Conversely, if it seems too watery, you can uncover it earlier for a longer period to allow some evaporation.
- Cheese, glorious cheese: While mozzarella is a classic choice, don’t hesitate to experiment with other cheeses. Provolone, Monterey Jack, or even a sharp white cheddar can provide delightful variations in flavor and melt beautifully on top of your Stuffed Bell Peppers.
By keeping these tips in mind, you’ll be well on your way to mastering the art of making incredibly delicious and satisfying Stuffed Bell Peppers that your family and friends will rave about.
Conclusion:
So there you have it – my go-to recipe for a truly unforgettable and incredibly satisfying meal. I honestly believe this isn’t just another dish; it’s an experience waiting to happen in your kitchen, promising comfort, flavor, and culinary delight. We’ve journeyed through simple steps, uncovering how everyday ingredients can transform into something truly spectacular with minimal fuss. What makes this recipe an absolute must-try, in my humble opinion, is its perfect blend of hearty satisfaction, vibrant flavors, and surprising simplicity. Each bite delivers a comforting warmth, a delightful interplay of textures from the tender, slightly caramelized exterior of the bell pepper to the rich, savory, and perfectly seasoned filling within. It’s incredibly adaptable, making it suitable for a bustling weeknight dinner, an impressive yet effortless dish for a special gathering, or even a fantastic candidate for meal prepping to enjoy throughout the week. I’ve found it consistently impresses, leaving everyone at the table feeling nourished, deeply content, and already looking forward to the next time. This particular method ensures the flavors meld beautifully during baking, creating a harmonious dish that tastes far more complex and gourmet than the actual effort it demands. Trust me, once you try this specific version, I’m confident it’s destined to become a cherished and frequently requested staple in your culinary repertoire for years to come. It’s truly a testament to the power of thoughtful ingredient combination and gentle cooking.
Now, let’s talk about taking your creation to the next level or personalizing it to your heart’s content. While these magnificent parcels are fantastic and complete on their own, a simple green salad with a light vinaigrette makes for a refreshing and vibrant counterpoint, cutting through the richness beautifully. For something more substantial and absorbing of those delicious juices, I absolutely love serving them alongside fluffy quinoa, a bed of couscous, or a flavorful wild rice pilaf. A thick slice of crusty artisan bread, perhaps a ciabatta or a sourdough, is also a wonderfully comforting addition, perfect for wiping the plate clean of any lingering sauce – a true sign of a well-enjoyed meal! But the real magic, for me, often lies in the endless variations you can explore. If you’re looking to change up the protein, feel free to swap the ground beef for lean ground turkey, savory Italian sausage (mild or spicy, depending on your preference), or even a hearty plant-based crumble for a delicious vegetarian or vegan twist. For my veggie-loving friends, consider a filling based on robust lentils, finely chopped mushrooms, and additional grains like farro or barley, perhaps with a generous sprinkle of nutritional yeast for an extra layer of cheesy, umami goodness. Don’t be afraid to experiment with the spices either – a pinch of smoked paprika, a dash of cayenne pepper, or a hint of cumin can introduce a delightful new dimension, or for a milder profile, stick to classic Mediterranean herbs like dried oregano, basil, and a touch of marjoram. You could even use different cheeses on top; a smoky provolone, a sharp aged cheddar, or even a creamy goat cheese would be equally delicious and provide a unique character in place of mozzarella. And who says it has to be just bell peppers? Larger tomatoes, hollowed-out zucchinis, or even small pumpkins can be prepped and stuffed using the exact same fantastic filling, though cooking times might vary slightly depending on the vegetable’s density and size. The possibilities for making this recipe uniquely yours are truly endless, and that’s precisely what I find so exciting and rewarding about it!
I genuinely hope that reading through this recipe has sparked a creative flame and inspired you to grab your apron and give these delicious Stuffed Bell Peppers a try very soon. Cooking, for me, should always be an adventure, a creative outlet, and most importantly, a source of profound joy and connection. I promise you, the incredible aroma filling your kitchen as these bake is a reward in itself, a delightful prelude to the feast to come! So, please, dive in, enjoy the process, savor the anticipation, and relish every magnificent, flavorful bite of these incredible parcels of goodness. Once you’ve made them, I would absolutely love to hear about your experience. Did you add a unique twist that became a new family favorite? What did your loved ones think? Did you discover a new favorite serving suggestion that you simply must share? Your feedback, your personal stories, and your clever adaptations truly make this cooking community vibrant, inspiring, and wonderfully collaborative. Don’t hesitate to share your photos and tips with me; I’m always eager to see your culinary triumphs and learn from your ingenuity! Let’s spread the deliciousness together, one perfectly baked, perfectly seasoned pepper at a time. Your next unforgettable kitchen adventure starts right now!
Classic Stuffed Bell Peppers: Easy Beef & Rice Recipe
A hearty and satisfying classic, these Stuffed Bell Peppers feature tender bell peppers filled with a rich, savory mixture of seasoned ground beef, fluffy rice, and aromatic herbs, often topped with melted cheese. A complete meal in one colorful package, perfect for weeknight dinners.
Ingredients
-
6 large bell peppers
-
1 tbsp olive oil, plus extra for drizzling
-
1 medium yellow onion, finely diced
-
3 cloves garlic, minced
-
1.5 lbs lean ground beef
-
1 (14.5 oz) can crushed tomatoes
-
1 (8 oz) can tomato sauce (for filling)
-
1 (15 oz) can tomato sauce (for sauce base)
-
1/2 cup uncooked long-grain white rice
-
1/2 cup beef broth
-
1 tsp dried oregano
-
1 tsp dried basil
-
1/2 tsp smoked paprika
-
1/4 tsp red pepper flakes (optional)
-
Salt and freshly ground black pepper to taste
-
1 cup shredded mozzarella cheese, divided
-
1/4 cup fresh parsley, chopped (optional for garnish)
-
1/2 cup water
-
1/2 tsp dried Italian seasoning
Instructions
-
Step 1
Preheat oven to 375°F (190°C). Prepare bell peppers: wash, slice off tops, remove seeds and membranes. Trim bottoms for stability if needed. -
Step 2
Prepare sauce base: In a 9×13 inch baking dish, combine 1 (15 oz) can tomato sauce, 1/2 cup water, and 1/2 tsp dried Italian seasoning. Spread evenly. -
Step 3
For filling: Heat 1 tbsp olive oil in a large skillet over medium-high. Sauté 1 medium diced onion for 5-7 minutes. Add 3 cloves minced garlic; cook 1 minute until fragrant. -
Step 4
Add 1.5 lbs ground beef; break up and cook until browned (8-10 min). Drain excess grease. -
Step 5
Reduce heat to medium. Stir in 1 (14.5 oz) can crushed tomatoes, 1 (8 oz) can tomato sauce, 1 tsp dried oregano, 1 tsp dried basil, 1/2 tsp smoked paprika, and 1/4 tsp red pepper flakes (optional). Season generously with salt and black pepper. -
Step 6
Stir in 1/2 cup uncooked white rice and 1/2 cup beef broth. Bring to a gentle simmer, then reduce heat to low and cook for 5-7 minutes, stirring occasionally. Remove from heat and stir in 1/2 cup shredded mozzarella cheese. -
Step 7
Generously fill each bell pepper with the meat and rice mixture, mounding slightly. Arrange filled peppers upright in the prepared baking dish. -
Step 8
Cover dish tightly with aluminum foil. Bake for 45-60 minutes, or until bell peppers are tender and rice is fully cooked. -
Step 9
Remove foil, sprinkle remaining 1/2 cup shredded mozzarella cheese evenly over peppers. Bake uncovered for another 10-15 minutes, until cheese is melted, bubbly, and golden brown. -
Step 10
Remove from oven and let rest for 5-10 minutes before serving. Garnish with fresh chopped parsley if desired.
Important Information
Nutrition Facts (Per Serving)
It is important to consider this information as approximate and not to use it as definitive health advice.
Allergy Information
Please check ingredients for potential allergens and consult a health professional if in doubt.


Leave a Comment