

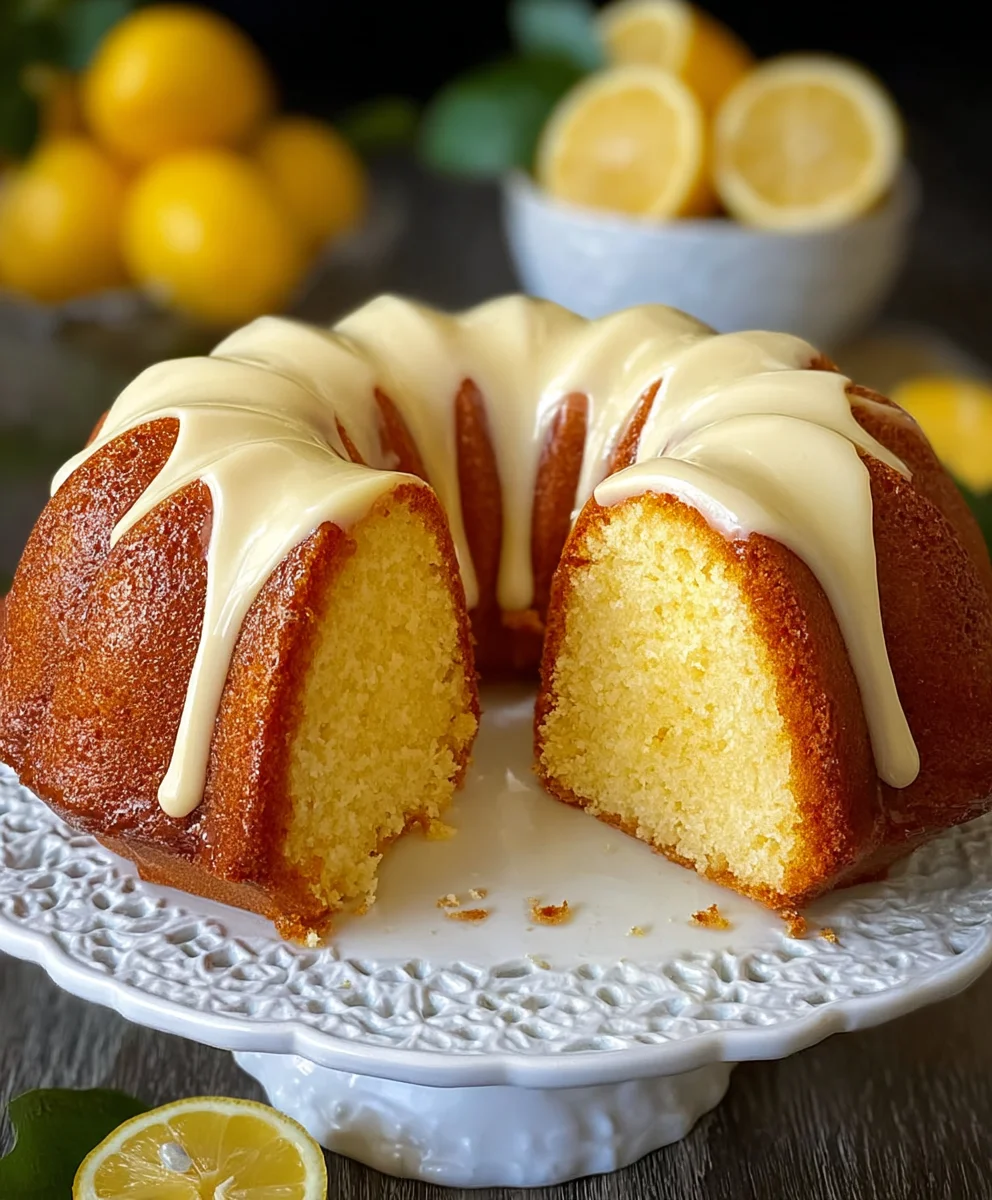
Lemon Bundt Cake is more than just a dessert; it’s a delightful culinary experience, a ray of sunshine on a plate that promises a burst of bright, refreshing flavor with every tender bite. I believe there’s something truly magical about the way its vibrant citrus notes cut through the sweetness, creating a perfectly balanced treat that instantly brightens any occasion, from a casual afternoon tea to a festive gathering. The iconic Bundt shape, inspired by the traditional European Gugelhupf pan, gives this cake an elegant, sophisticated appearance that belies its relatively simple preparation, making it a beloved classic in kitchens worldwide.
What truly makes the Lemon Bundt Cake a perennial favorite, in my opinion, is its irresistible combination of zesty flavor, incredibly moist crumb, and its beautiful, ready-to-serve presentation. It’s the kind of cake that feels special without being overly fussy, offering a comforting yet sophisticated dessert experience that appeals to almost everyone. I particularly adore how effortlessly it adapts, feeling right at home at a spring brunch, a summer picnic, or as a sweet ending to a cozy autumn dinner, always bringing a fresh, uplifting taste to the table.

Ingredients:
- For the Lemon Bundt Cake:
- 3 cups (360g) all-purpose flour, plus extra for dusting the pan
- 1 teaspoon baking powder
- ½ teaspoon baking soda
- ½ teaspoon salt
- 1 cup (226g) unsalted butter, softened to room temperature, plus extra for greasing the pan
- 2 cups (400g) granulated sugar
- 4 large eggs, at room temperature
- 1 cup (240ml) full-fat buttermilk, at room temperature (or homemade: 1 cup milk + 1 tablespoon lemon juice, let sit for 5 minutes)
- ¼ cup (60ml) fresh lemon juice, approximately 2 large lemons
- 2 tablespoons finely grated lemon zest (from about 2-3 large lemons)
- 1 teaspoon pure vanilla extract
- For the Zesty Lemon Glaze:
- 2 cups (240g) powdered sugar (confectioners’ sugar), sifted
- 4-6 tablespoons fresh lemon juice (from 1-2 lemons), depending on desired consistency
- 1 teaspoon finely grated lemon zest (optional, but highly recommended for extra zing)
Preparing the Cake Batter: The Heart of Your Lemon Bundt Cake
- Preheat and Prepare Your Bundt Pan: First things first, my friends, let’s get our oven ready. Preheat your oven to 325°F (160°C). For a Bundt cake, proper pan preparation is absolutely critical to ensure a clean release and preserve that beautiful fluted design. I always recommend using a high-quality 10-12 cup Bundt pan. Generously grease the entire interior of your Bundt pan with softened butter, ensuring every nook and cranny is coated. You can use a pastry brush or even your fingers for this. Once thoroughly greased, dust the pan with a light layer of all-purpose flour. Turn the pan upside down over a sink or trash can and tap it firmly to shake out any excess flour. This creates a non-stick barrier that will save you from a lot of heartache later. Some bakers prefer using a baking spray with flour, which can also work wonders, but I find the butter-and-flour method gives a more reliable result and a slightly crispier crust. Make sure to get into all the grooves!
- Whisk the Dry Ingredients: In a medium bowl, whisk together your 3 cups of all-purpose flour, 1 teaspoon of baking powder, ½ teaspoon of baking soda, and ½ teaspoon of salt. This step is important because it ensures all the leavening agents and salt are evenly distributed throughout the flour, preventing pockets of unmixed ingredients. Set this bowl aside for a moment.
- Cream the Butter and Sugar: In the large bowl of a stand mixer fitted with the paddle attachment, or using a large bowl with a handheld electric mixer, cream together your 1 cup of softened unsalted butter and 2 cups of granulated sugar. Beat on medium-high speed for about 3-5 minutes, or until the mixture is light, fluffy, and pale yellow. This process incorporates air into the butter and sugar, which contributes significantly to the cake’s tender texture and rise. Don’t rush this step; it’s fundamental to a good Bundt cake. Scrape down the sides of the bowl occasionally to ensure everything is well combined.
- Incorporate the Eggs: Add the 4 large eggs to the creamed butter and sugar mixture, one at a time. After each egg, beat well until fully incorporated, scraping down the sides of the bowl as needed. The mixture might look slightly curdled after adding the first few eggs, but don’t worry, it will come together as you continue beating. The eggs add richness, moisture, and structure to our Lemon Bundt Cake, and adding them one by one allows them to emulsify properly with the butter.
- Add the Lemon and Vanilla: Once all the eggs are incorporated, beat in the ¼ cup of fresh lemon juice, 2 tablespoons of finely grated lemon zest, and 1 teaspoon of pure vanilla extract. The aroma alone at this stage is truly delightful! The lemon zest provides an intense burst of fresh lemon flavor that permeates the entire cake, while the juice adds moisture and a tangy brightness.
- Alternate Dry and Wet Ingredients: Now, we’ll gradually add the dry ingredients and the buttermilk to the wet mixture, alternating between them. This method prevents overmixing and helps create a tender crumb. Begin by adding about one-third of the dry ingredient mixture to the wet ingredients, mixing on low speed until just combined. Then, pour in half of the 1 cup of buttermilk, mixing until just incorporated. Repeat this process: add another third of the dry ingredients, then the remaining buttermilk, and finally, the last third of the dry ingredients. Remember, mix on low speed and only until the flour streaks have just disappeared. Overmixing is the enemy of a tender cake, as it develops the gluten too much, leading to a tough texture. A few small lumps are perfectly fine!
- Fill the Bundt Pan: Carefully spoon the cake batter evenly into your prepared Bundt pan. Use a spatula to smooth the top of the batter. Gently tap the pan a couple of times on your countertop to release any trapped air bubbles, which can cause large holes in your finished cake. This also helps the batter settle into all the intricate designs of the Bundt pan.
Baking the Lemon Bundt Cake: Patience and Precision
- Bake to Golden Perfection: Place the filled Bundt pan on the middle rack of your preheated 325°F (160°C) oven. Bake for approximately 60-70 minutes. Baking times can vary slightly depending on your oven and the specific Bundt pan you’re using, so keep an eye on it.
- Check for Doneness: To check if your Lemon Bundt Cake is perfectly baked, insert a long wooden skewer or a toothpick into the deepest part of the cake (usually the center, near the tube). When it comes out clean or with only a few moist crumbs attached, your cake is ready! If it comes out with wet batter, continue baking for another 5-10 minutes and retest. The cake should be beautifully golden brown on top and spring back lightly when gently pressed.
- Cooling in the Pan: This next step is crucial for a Bundt cake. Once removed from the oven, allow the cake to cool in the pan on a wire rack for exactly 10-15 minutes. Do not skip this step, and do not let it cool for too long in the pan. This short cooling period allows the cake to firm up slightly and pull away from the sides of the pan, making it much easier to invert without sticking or breaking. If you try to remove it too soon, it might tear; if you leave it too long, it might get stuck due to condensation.
- Invert and Cool Completely: After the 10-15 minute cooling period, carefully place your wire rack directly over the top of the Bundt pan. Using oven mitts, firmly grasp both the rack and the pan together, and with a confident motion, invert them so the cake is now resting on the wire rack. Gently lift the Bundt pan off the cake. If you’ve prepped your pan properly, your gorgeous Lemon Bundt Cake should slide out effortlessly, revealing its intricate design! Allow the cake to cool completely on the wire rack before applying the glaze. This could take 1-2 hours. It is absolutely essential that the cake is completely cool before glazing; otherwise, the glaze will simply melt and be absorbed into the cake, rather than forming a beautiful, opaque layer.
Crafting the Lemon Glaze: The Zesty Crown
- Prepare Your Glaze Ingredients: While your Bundt cake is cooling, let’s make our incredible lemon glaze. In a medium bowl, measure out your 2 cups of powdered sugar. I always recommend sifting powdered sugar before using it for glazes, as it helps remove any lumps and ensures a super smooth, silky glaze.
- Whisk in Lemon Juice: Gradually add the fresh lemon juice to the sifted powdered sugar, starting with about 4 tablespoons. Whisk continuously until a smooth, pourable consistency is achieved. You’re looking for a glaze that is thick enough to coat the back of a spoon but thin enough to drizzle beautifully over the cake. If the glaze is too thick, add more lemon juice one teaspoon at a time until it reaches your desired consistency. If it becomes too thin (oops, it happens!), you can add a little more sifted powdered sugar, a tablespoon at a time, to thicken it back up.
- Add the Zest (Optional but Recommended): Stir in the 1 teaspoon of finely grated lemon zest. This addition isn’t just for looks; it intensifies the lemon flavor of the glaze and adds tiny flecks of bright yellow, making the glaze even more appealing and reinforcing the vibrant lemon theme of our Bundt cake.
- Taste and Adjust: Give your glaze a quick taste. Does it need more tang? A tiny pinch of salt can sometimes brighten the flavors, too! This is your opportunity to customize it to your preference. I like my lemon glaze quite zesty, so I don’t hold back on the lemon juice and zest.
Glazing and Serving: The Grand Finale
- Ensure Cake is Completely Cool: This cannot be stressed enough: make sure your Lemon Bundt Cake is completely, utterly, thoroughly cool before you even think about applying the glaze. If there’s any residual warmth, the glaze will melt right off, creating a sticky mess instead of a beautiful, glistening shell. Patience is a virtue here, my friends!
- Position for Glazing: Once the cake is cool, you’ll want to place it back on the wire rack. To make cleanup easier and catch any drips, place a baking sheet or a large piece of parchment paper underneath the wire rack. This will save your countertops from becoming sticky.
- Apply the Glaze: Now for the fun part! Slowly drizzle the lemon glaze over the top of the cooled Bundt cake. I usually start by drizzling around the outer edge, letting it cascade down the fluted sides. Then, I move to the inner ring, ensuring all surfaces are beautifully coated. You can use a spoon or a small ladle for this. Some bakers prefer a lighter drizzle, while others like a thicker, more opaque layer of glaze. Adjust the amount to your personal preference. For a truly dramatic effect, you can even apply a second layer of glaze once the first has set slightly.
- Allow Glaze to Set: Let the glazed Lemon Bundt Cake sit at room temperature for at least 15-30 minutes, or until the glaze has fully set and hardened slightly. This makes for easier slicing and serving, and that beautiful sugary shell adds a lovely texture contrast to the soft cake.
- Garnish and Serve: Once the glaze is set, carefully transfer your magnificent Lemon Bundt Cake to a serving platter. If you’re feeling extra fancy, you can garnish it with a few extra wisps of fresh lemon zest, thin lemon slices, or even some fresh berries like raspberries or blueberries for a pop of color. Slice with a sharp, serrated knife and serve this delightful treat to your eager guests (or keep it all for yourself, I won’t tell!). This Lemon Bundt Cake is perfect with a cup of tea, coffee, or as a refreshing dessert after any meal.
- Storage: Store any leftover Lemon Bundt Cake at room temperature, loosely covered, for up to 3-4 days. While it’s best enjoyed fresh, the flavors often deepen beautifully after a day. To keep it moist, you can place a piece of plastic wrap directly over the cut surfaces. Enjoy every zesty, tender bite of your homemade Lemon Bundt Cake!
Conclusion:
As we reach the sweet culmination of our culinary journey, I truly hope you’re feeling inspired and excited to bring this magnificent recipe to life in your own kitchen. This isn’t just another dessert; it’s a celebration of bright, zesty flavors, a perfect balance of tart and sweet that dances on your palate. I’ve poured my heart into perfecting every detail, ensuring that this recipe delivers a consistently moist, tender crumb, coupled with that iconic Bundt shape that makes for an effortlessly elegant presentation. It’s the kind of cake that encourages you to close your eyes and savor every single bite, a true testament to the power of simple, high-quality ingredients transformed into something extraordinary. Imagine the invigorating aroma filling your home as it bakes – that alone, for me, is worth every moment of effort!
I believe this recipe is a must-try because it consistently proves to be a crowd-pleaser, delivering on both stunning visual appeal and exquisite taste without being overly complicated. It’s the kind of reliable recipe you’ll return to again and again, the one friends and family will eagerly request for every gathering, subtly cementing your reputation as a baking virtuoso. This cake truly stands out as a beacon of home baking done right, a comfort food elevated to an art form that speaks volumes without a single complex technique. It’s an accessible luxury, a little slice of sunshine that can brighten any day.
Elevate Your Experience: Serving Suggestions & Variations
Now for the truly exciting part – discovering the myriad ways to enjoy this masterpiece! While it’s utterly delightful and perfectly complete on its own, a few simple additions or creative twists can truly elevate the experience even further:
- Classic Pairing: A generous dollop of freshly whipped cream, perhaps infused with a hint of vanilla bean or even a touch of limoncello, beautifully complements the cake’s vibrant citrus notes.
- Fruity Companions: Fresh berries – think plump raspberries, juicy blueberries, or elegantly sliced strawberries – add a burst of color, a refreshing tang, and a lovely textural counterpoint to the cake’s richness. A simple berry compote, gently warmed, would also be an absolutely divine accompaniment.
- Ice Cream Dream: For an indulgent dessert experience, serve a slice with a scoop of premium vanilla bean ice cream or, for an extra citrusy kick, a scoop of tart lemon sorbet. The delightful contrast of the slightly warm cake and the cold, melting ice cream is always a winning combination.
- Morning Treat: Don’t relegate this only to special occasion desserts! A slice with your morning coffee or a fragrant cup of tea transforms an ordinary breakfast into something truly special and luxurious.
- Seasonal Twists: In autumn, consider dusting the cake with a sprinkle of ground cardamom or nutmeg for a subtle, warm spice note. In the height of summer, you could infuse the glaze with a bit of fresh mint for a surprisingly refreshing twist.
- Glaze Adventures: While our classic lemon glaze is pure perfection, don’t hesitate to experiment! A rich cream cheese glaze offers a different profile, or a simple dusting of powdered sugar can be just right if you prefer a less sweet option. A light drizzle of melted white chocolate ganache could also create a beautiful and delicious visual effect.
- Miniature Marvels: If you happen to own a mini Bundt pan, consider making individual servings! These smaller versions are adorable, equally impressive, and perfect for parties or thoughtful portion control. Just be sure to adjust your baking time accordingly.
- Edible Elegance: For an extra touch of sophistication, especially for spring gatherings or special events, garnish each slice with a few delicate edible flowers like pansies or violas.
Your Baking Adventure Awaits!
I honestly can’t wait for you to experience the magic of this particular Lemon Bundt Cake for yourself. It’s more than just a collection of ingredients and steps; it’s an open invitation to create, to share, and to savor moments of pure culinary delight. Baking, as I’ve always found, can be such a therapeutic and profoundly rewarding experience, and I promise you, the genuine smiles this cake will bring to faces around your table will be all the thanks you truly need. Don’t be shy or hesitant – dive in headfirst! You might just surprise yourself with how easily you master it. I’ve put so much thought into making the instructions as clear, straightforward, and encouraging as possible, meticulously guiding you towards guaranteed success.
Once you’ve successfully pulled that beautiful, golden-brown cake from your oven, once you’ve experienced its intoxicating aroma and seen its perfect form, I truly hope you’ll take a moment to share your journey with me and our wonderful community. Did you decide to add a special, unique twist? What were the immediate reactions from your family and friends? Snap a gorgeous photo, share your honest thoughts in the comments section below, or even spread the word among your fellow baking enthusiasts. Your feedback, your stories, and your unique experiences mean the absolute world to me and consistently inspire me to keep creating and sharing these cherished recipes. Let’s build a vibrant and supportive community of bakers who aren’t afraid to whisk up something truly spectacular, something memorable, something that spreads joy. I have immense faith in your baking prowess, and I know, without a shadow of a doubt, that you will absolutely love making – and enthusiastically devouring – this incredible cake. Happy baking, my friends; let the delicious adventure begin!

Classic Lemon Bundt Cake
A delightful culinary experience, this Lemon Bundt Cake offers a burst of bright, refreshing flavor with every tender bite. Its vibrant citrus notes cut through the sweetness, creating a perfectly balanced, moist, and irresistible treat for any occasion.
Ingredients
-
3 cups (360g) all-purpose flour
-
1 tsp baking powder
-
½ tsp baking soda
-
½ tsp salt
-
1 cup (226g) unsalted butter, softened
-
2 cups (400g) granulated sugar
-
4 eggs
-
1 cup (240ml) buttermilk (or homemade: 1 cup milk + 1 tbsp lemon juice, let sit for 5 minutes)
-
¼ cup (60ml) fresh lemon juice
-
2 tbsp lemon zest
-
1 tsp vanilla extract
-
For the Zesty Lemon Glaze:
-
2 cups (240g) powdered sugar, sifted
-
4-6 tbsp fresh lemon juice
-
1 tsp lemon zest (optional)
Instructions
-
Step 1
Preheat oven to 325°F (160°C). Generously grease and flour a 10-12 cup Bundt pan. -
Step 2
In a medium bowl, whisk together flour, baking powder, baking soda, and salt. -
Step 3
Cream softened butter and granulated sugar in a stand mixer on medium-high speed for 3-5 minutes until light and fluffy. Scrape down sides. -
Step 4
Add eggs one at a time, beating well after each addition until incorporated. Scrape down sides. -
Step 5
Beat in lemon juice, lemon zest, and vanilla extract. -
Step 6
Alternately add dry ingredients and buttermilk to the wet mixture, beginning and ending with dry. Mix on low speed until just combined, avoiding overmixing. -
Step 7
Spoon batter into the prepared Bundt pan and gently tap to release air bubbles. -
Step 8
Bake for 60-70 minutes at 325°F (160°C). -
Step 9
Check for doneness with a skewer inserted into the deepest part of the cake; it should come out clean or with moist crumbs. Cool in the Bundt pan on a wire rack for 10-15 minutes. -
Step 10
Invert cake onto a wire rack and lift off the pan. Cool completely for 1-2 hours before glazing. -
Step 11
For the glaze, sift powdered sugar into a medium bowl. Gradually whisk in 4-6 tablespoons of fresh lemon juice until a smooth, pourable consistency is achieved. Adjust with more sugar or juice as needed. Stir in optional 1 tsp lemon zest. Taste and adjust to your preference. -
Step 12
Ensure cake is completely cool. Place on a wire rack set over parchment paper or a baking sheet to catch drips. Slowly drizzle glaze over the cooled Bundt cake, ensuring all surfaces are coated. Allow glaze to set at room temperature for 15-30 minutes. -
Step 13
Transfer to a serving platter. Garnish with lemon zest, lemon slices, or fresh berries if desired. Slice and serve. Store leftover cake at room temperature, loosely covered, for 3-4 days.
Important Information
Nutrition Facts (Per Serving)
It is important to consider this information as approximate and not to use it as definitive health advice.
Allergy Information
Please check ingredients for potential allergens and consult a health professional if in doubt.


Leave a Comment