

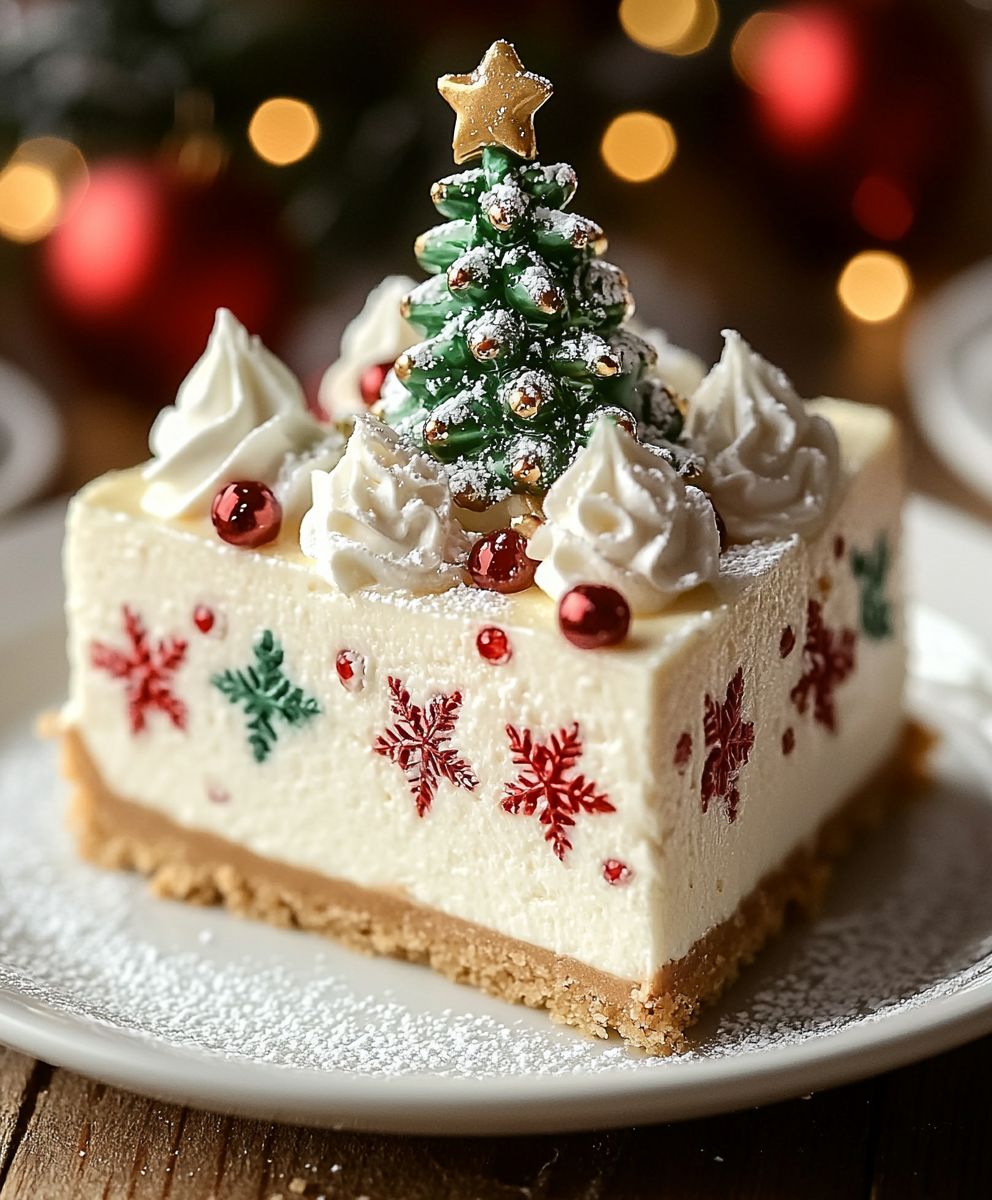
Christmas Tree Cheesecake: Is there anything more festive than a dessert that looks like a miniature Christmas tree? I think not! This show-stopping cheesecake isn’t just a feast for the eyes; it’s a decadent treat that will have everyone reaching for seconds (and maybe thirds!).
While cheesecake itself has a history stretching back to ancient Greece, the modern version we know and love truly took off in America. This Christmas Tree Cheesecake takes that classic dessert and elevates it to a whole new level of holiday cheer. Imagine the creamy, tangy filling, perfectly balanced with a buttery graham cracker crust, all shaped into a delightful Christmas tree. It’s the perfect centerpiece for your holiday dessert table!
People adore cheesecake for its rich, smooth texture and its versatility. You can dress it up with all sorts of toppings and flavors. This Christmas version is especially appealing because it combines the comforting familiarity of cheesecake with the joyful spirit of the holidays. Plus, let’s be honest, who can resist a dessert that’s both delicious and incredibly Instagrammable? Get ready to impress your family and friends with this unforgettable Christmas Tree Cheesecake!

Ingredients:
- For the Crust:
- 1 ½ cups graham cracker crumbs
- 5 tablespoons unsalted butter, melted
- ¼ cup granulated sugar
- ¼ teaspoon ground cinnamon
- For the Cheesecake Filling:
- 32 ounces cream cheese, softened to room temperature
- 1 ½ cups granulated sugar
- 1 teaspoon vanilla extract
- ½ teaspoon almond extract
- 4 large eggs
- ½ cup sour cream
- 2 tablespoons all-purpose flour
- Green food coloring (gel food coloring preferred)
- For the Christmas Tree Decoration:
- 1 cup heavy cream
- ¼ cup powdered sugar
- ½ teaspoon vanilla extract
- Assorted Christmas sprinkles (stars, balls, etc.)
- Candy canes (mini or regular size)
- Green sanding sugar (optional)
- Edible glitter (optional)
Preparing the Graham Cracker Crust
- Combine the ingredients: In a medium bowl, combine the graham cracker crumbs, melted butter, granulated sugar, and ground cinnamon. Mix well until all the ingredients are evenly moistened. I like to use a fork to ensure everything is properly combined.
- Press into the pan: Press the graham cracker mixture into the bottom of a 9-inch springform pan. Use the bottom of a measuring cup or your fingers to firmly and evenly press the crumbs into the pan. This is important for a stable crust!
- Pre-bake the crust: Bake the crust in a preheated oven at 350°F (175°C) for 8-10 minutes. This helps the crust set and prevents it from becoming soggy.
- Cool the crust: Remove the crust from the oven and let it cool completely while you prepare the cheesecake filling. This is a crucial step, so don’t skip it!
Making the Cheesecake Filling
- Cream the cream cheese: In a large bowl (or the bowl of a stand mixer), beat the softened cream cheese with an electric mixer until smooth and creamy. Make sure there are no lumps! This usually takes about 3-5 minutes.
- Add the sugar: Gradually add the granulated sugar to the cream cheese, beating until well combined. Scrape down the sides of the bowl as needed to ensure everything is evenly mixed.
- Incorporate the extracts: Add the vanilla extract and almond extract to the mixture and beat until combined. The almond extract adds a lovely subtle flavor, but you can omit it if you prefer.
- Add the eggs: Add the eggs one at a time, beating well after each addition. Be careful not to overmix at this stage, as overmixing can incorporate too much air into the batter, which can cause the cheesecake to crack.
- Mix in the sour cream and flour: Add the sour cream and all-purpose flour to the batter and beat until just combined. Again, be careful not to overmix. The flour helps to stabilize the cheesecake and prevent cracking.
- Add green food coloring: Add green food coloring to the cheesecake batter, a few drops at a time, until you reach your desired shade of green. I recommend using gel food coloring, as it is more concentrated and won’t thin out the batter as much as liquid food coloring. Stir gently until the color is evenly distributed.
Baking the Christmas Tree Cheesecake
- Pour the filling into the crust: Pour the green cheesecake filling into the cooled graham cracker crust, spreading it evenly.
- Bake in a water bath: Wrap the bottom of the springform pan tightly with aluminum foil to prevent water from seeping in. Place the wrapped pan in a larger roasting pan. Pour hot water into the roasting pan until it reaches about halfway up the sides of the springform pan. This water bath helps to create a moist and even baking environment, which is essential for preventing cracks in the cheesecake.
- Bake the cheesecake: Bake the cheesecake in a preheated oven at 325°F (160°C) for 70-80 minutes, or until the edges are set but the center still jiggles slightly.
- Cool the cheesecake: Turn off the oven and crack the oven door slightly. Let the cheesecake cool in the oven for 1 hour. This gradual cooling process helps to prevent the cheesecake from cracking.
- Refrigerate the cheesecake: Remove the cheesecake from the oven and the water bath. Let it cool completely on a wire rack, then cover it with plastic wrap and refrigerate for at least 6 hours, or preferably overnight. This allows the cheesecake to fully set and develop its flavor.
Decorating the Christmas Tree Cheesecake
- Prepare the whipped cream: In a large bowl, beat the heavy cream with an electric mixer until soft peaks form. Gradually add the powdered sugar and vanilla extract, and continue beating until stiff peaks form. Be careful not to overwhip the cream, as it can turn into butter.
- Pipe the whipped cream: Transfer the whipped cream to a piping bag fitted with a star tip. Pipe the whipped cream onto the cheesecake in a Christmas tree shape, starting with a wide base and gradually narrowing towards the top. You can create different layers of whipped cream to give the tree more dimension.
- Add the sprinkles: Decorate the whipped cream Christmas tree with assorted Christmas sprinkles, such as stars, balls, and other festive shapes. Get creative and have fun with it!
- Add the candy canes: Arrange mini candy canes around the base of the cheesecake to create a “fence” or border. You can also use regular-sized candy canes, broken into smaller pieces, to decorate the tree itself.
- Add sanding sugar and edible glitter (optional): If desired, sprinkle green sanding sugar over the whipped cream tree to give it a shimmering effect. You can also add edible glitter for extra sparkle.
- Chill before serving: Refrigerate the decorated cheesecake for at least 30 minutes before serving to allow the whipped cream to set.
- Serving: Carefully remove the sides of the springform pan before serving. Slice the cheesecake and enjoy! This Christmas Tree Cheesecake is sure to be a showstopper at your holiday gathering.
Conclusion:
This Christmas Tree Cheesecake isn’t just a dessert; it’s a centerpiece, a conversation starter, and a guaranteed crowd-pleaser. From the buttery, crumbly graham cracker crust to the creamy, tangy cheesecake filling, and finally, the festive, vibrant green “tree” adorned with edible ornaments, every element is designed to delight. Its a showstopper that tastes even better than it looks, and trust me, it looks amazing! Why is this a must-try? Because it’s more than just a cheesecake. It’s a fun, creative project that brings the joy of the holiday season right into your kitchen. It’s a delicious way to impress your guests, and it’s surprisingly easier to make than you might think. The step-by-step instructions break down the process into manageable chunks, so even if you’re not a seasoned baker, you can confidently create this stunning dessert. Plus, the combination of textures and flavors the smooth cheesecake, the crunchy crust, and the sweet decorations is simply irresistible. It’s the perfect balance of sweet and tangy, rich and refreshing, making it a dessert that everyone will love. But the best part? It’s completely customizable!Serving Suggestions and Variations:
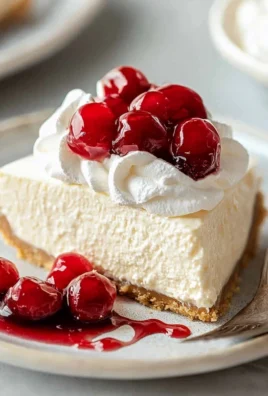
* Serving: Serve chilled, of course! A dollop of whipped cream or a scoop of vanilla ice cream would be a delightful addition. You could also drizzle it with a bit of melted white chocolate or caramel sauce for an extra touch of indulgence. * Flavor Variations: Feel free to experiment with the cheesecake filling. Add a hint of peppermint extract for a more festive flavor, or swirl in some cranberry sauce for a tart and tangy twist. You could even incorporate some chopped nuts, like pecans or walnuts, for added texture and flavor. * Crust Variations: If you’re not a fan of graham crackers, you can use other types of cookies for the crust. Chocolate wafers, shortbread cookies, or even gingerbread cookies would all work well. Just be sure to adjust the amount of butter accordingly. * Decoration Variations: Get creative with your decorations! Use different types of sprinkles, candies, and edible glitter to create your own unique Christmas tree design. You could even use fresh berries, like raspberries or blueberries, for a more natural look. Consider using different shades of green food coloring to create a more realistic tree effect. Perhaps a dusting of powdered sugar to mimic snow? The possibilities are endless! * Individual Cheesecakes: For a fun twist, make individual Christmas Tree Cheesecakes in muffin tins or ramekins. This is a great option for parties or gatherings where you want to offer individual servings. I truly believe that this Christmas Tree Cheesecake will become a cherished holiday tradition in your home. It’s a dessert that’s both beautiful and delicious, and it’s sure to bring smiles to everyone’s faces. So, what are you waiting for? Gather your ingredients, preheat your oven, and get ready to create a masterpiece! I’m confident that you’ll be amazed at how easy and rewarding it is to make this stunning dessert. And most importantly, I want to hear about your experience! Did you try the recipe? Did you make any variations? What did your family and friends think? Share your photos and stories in the comments below. I can’t wait to see your creations and hear about your baking adventures. Happy baking, and happy holidays! Let’s spread some Christmas cheer, one slice of cheesecake at a time! Print
Christmas Tree Cheesecake: A Festive & Delicious Holiday Dessert
- Total Time: 465 minutes
- Yield: 12 servings 1x
Description
Festive Christmas Tree Cheesecake with graham cracker crust, creamy green filling, and whipped cream tree decorated with sprinkles and candy canes.
Ingredients
- 1 ½ cups graham cracker crumbs
- 5 tablespoons unsalted butter, melted
- ¼ cup granulated sugar
- ¼ teaspoon ground cinnamon
- 32 ounces cream cheese, softened to room temperature
- 1 ½ cups granulated sugar
- 1 teaspoon vanilla extract
- ½ teaspoon almond extract
- 4 large eggs
- ½ cup sour cream
- 2 tablespoons all-purpose flour
- Green food coloring (gel food coloring preferred)
- 1 cup heavy cream
- ¼ cup powdered sugar
- ½ teaspoon vanilla extract
- Assorted Christmas sprinkles (stars, balls, etc.)
- Candy canes (mini or regular size)
- Green sanding sugar (optional)
- Edible glitter (optional)
Instructions
- Combine the ingredients: In a medium bowl, combine the graham cracker crumbs, melted butter, granulated sugar, and ground cinnamon. Mix well until all the ingredients are evenly moistened.
- Press into the pan: Press the graham cracker mixture into the bottom of a 9-inch springform pan. Use the bottom of a measuring cup or your fingers to firmly and evenly press the crumbs into the pan.
- Pre-bake the crust: Bake the crust in a preheated oven at 350°F (175°C) for 8-10 minutes.
- Cool the crust: Remove the crust from the oven and let it cool completely while you prepare the cheesecake filling.
- Cream the cream cheese: In a large bowl (or the bowl of a stand mixer), beat the softened cream cheese with an electric mixer until smooth and creamy.
- Add the sugar: Gradually add the granulated sugar to the cream cheese, beating until well combined. Scrape down the sides of the bowl as needed.
- Incorporate the extracts: Add the vanilla extract and almond extract to the mixture and beat until combined.
- Add the eggs: Add the eggs one at a time, beating well after each addition. Be careful not to overmix.
- Mix in the sour cream and flour: Add the sour cream and all-purpose flour to the batter and beat until just combined. Again, be careful not to overmix.
- Add green food coloring: Add green food coloring to the cheesecake batter, a few drops at a time, until you reach your desired shade of green. Stir gently until the color is evenly distributed.
- Pour the filling into the crust: Pour the green cheesecake filling into the cooled graham cracker crust, spreading it evenly.
- Bake in a water bath: Wrap the bottom of the springform pan tightly with aluminum foil. Place the wrapped pan in a larger roasting pan. Pour hot water into the roasting pan until it reaches about halfway up the sides of the springform pan.
- Bake the cheesecake: Bake the cheesecake in a preheated oven at 325°F (160°C) for 70-80 minutes, or until the edges are set but the center still jiggles slightly.
- Cool the cheesecake: Turn off the oven and crack the oven door slightly. Let the cheesecake cool in the oven for 1 hour.
- Refrigerate the cheesecake: Remove the cheesecake from the oven and the water bath. Let it cool completely on a wire rack, then cover it with plastic wrap and refrigerate for at least 6 hours, or preferably overnight.
- Prepare the whipped cream: In a large bowl, beat the heavy cream with an electric mixer until soft peaks form. Gradually add the powdered sugar and vanilla extract, and continue beating until stiff peaks form.
- Pipe the whipped cream: Transfer the whipped cream to a piping bag fitted with a star tip. Pipe the whipped cream onto the cheesecake in a Christmas tree shape, starting with a wide base and gradually narrowing towards the top.
- Add the sprinkles: Decorate the whipped cream Christmas tree with assorted Christmas sprinkles.
- Add the candy canes: Arrange mini candy canes around the base of the cheesecake to create a “fence” or border.
- Add sanding sugar and edible glitter (optional): If desired, sprinkle green sanding sugar over the whipped cream tree and add edible glitter.
- Chill before serving: Refrigerate the decorated cheesecake for at least 30 minutes before serving.
- Serving: Carefully remove the sides of the springform pan before serving. Slice the cheesecake and enjoy!
Notes
- Using gel food coloring is recommended for the cheesecake filling as it’s more concentrated and won’t thin the batter as much as liquid food coloring.
- Be careful not to overmix the cheesecake batter after adding the eggs, sour cream, and flour. Overmixing can incorporate too much air and cause the cheesecake to crack.
- The water bath is crucial for preventing cracks in the cheesecake. Make sure the springform pan is tightly wrapped in aluminum foil to prevent water from seeping in.
- Allowing the cheesecake to cool gradually in the oven helps prevent cracking.
- Refrigerating the cheesecake for at least 6 hours (or overnight) allows it to fully set and develop its flavor.
- Prep Time: 45 minutes
- Cook Time: 80 minutes


Leave a Comment