

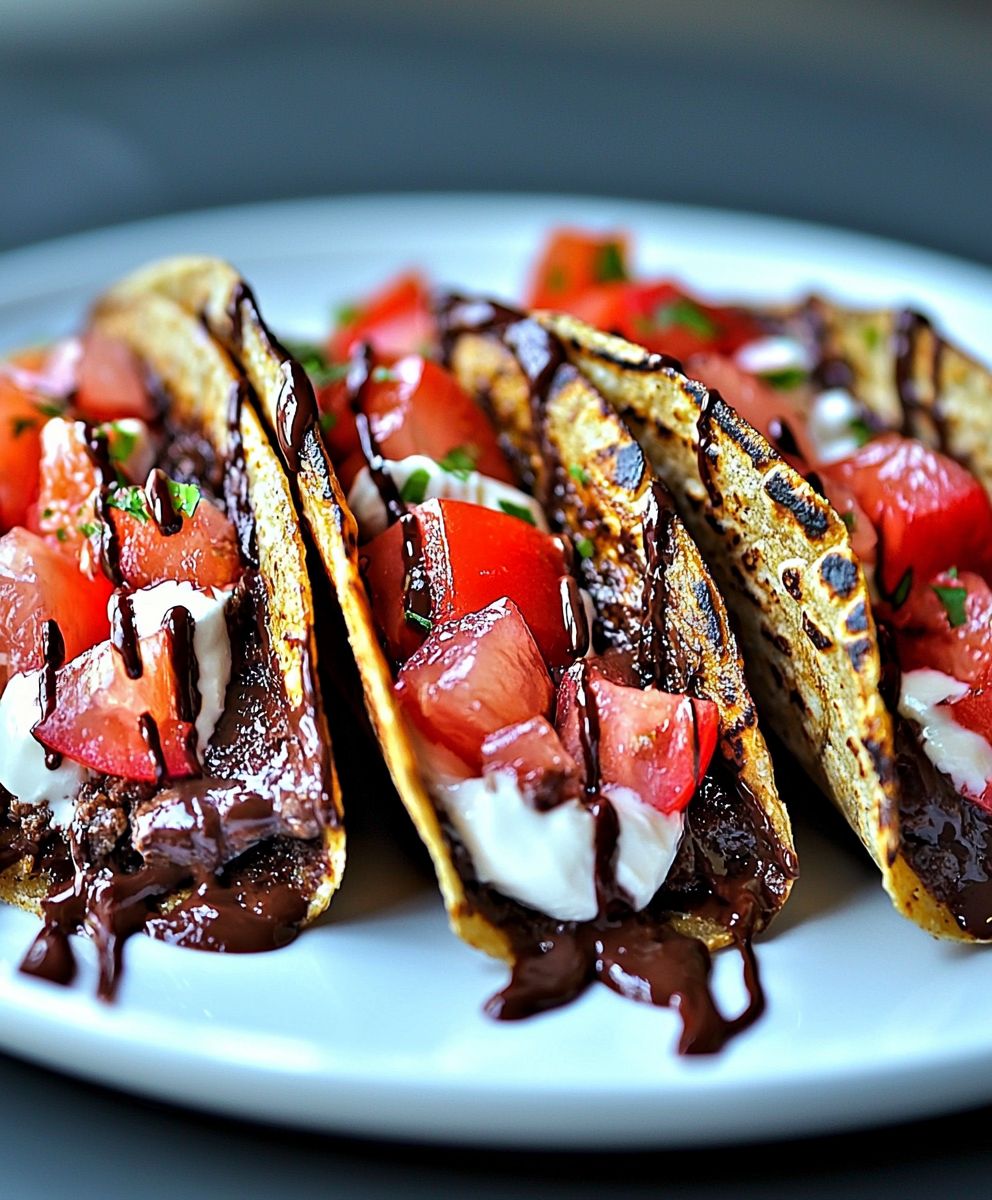
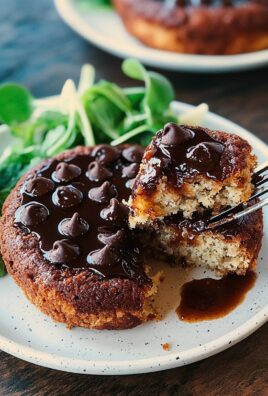
Chocolate tacos, a dessert that sounds almost too good to be true, are ready to revolutionize your dessert game! Forget everything you thought you knew about tacos because this sweet treat is about to redefine your definition of delicious. Imagine a crispy, waffle-cone-like shell cradling a symphony of creamy chocolate filling, topped with your favorite candies, nuts, and drizzles. Are you drooling yet? I know I am!
While not steeped in centuries of tradition like some culinary classics, chocolate tacos have carved their own unique niche in the world of fun and innovative desserts. They represent a playful twist on a beloved savory dish, embracing the spirit of culinary creativity. This delightful dessert gained significant popularity thanks to chains like Taco Bell, who briefly offered a Choco Taco, and now, we’re bringing the magic back to your kitchen!
What’s not to love? The combination of textures the satisfying crunch of the shell, the smooth, rich chocolate filling, and the playful pop of toppings is simply irresistible. Plus, they’re incredibly customizable! Whether you’re a fan of classic milk chocolate, decadent dark chocolate, or even adventurous white chocolate, the possibilities are endless. And let’s be honest, who can resist the sheer novelty and fun of eating a taco for dessert? Get ready to experience a dessert that’s as visually appealing as it is delicious!

Ingredients:
- For the Chocolate Taco Shells:
- 1 cup all-purpose flour
- 1/2 cup unsweetened cocoa powder
- 1/4 teaspoon baking soda
- 1/4 teaspoon salt
- 1/2 cup (1 stick) unsalted butter, softened
- 3/4 cup granulated sugar
- 1 large egg
- 1 teaspoon vanilla extract
- 2-3 tablespoons milk, if needed
- For the Chocolate Filling:
- 1 1/2 cups heavy cream
- 12 ounces semi-sweet chocolate, chopped
- 1/4 cup unsalted butter, softened
- 1 teaspoon vanilla extract
- Pinch of salt
- For the Toppings (Get Creative!):
- Mini chocolate chips
- Shredded coconut
- Chopped nuts (pecans, walnuts, almonds)
- Sprinkles
- Caramel sauce
- Hot fudge sauce
- Whipped cream
- Fresh berries (strawberries, raspberries)
Making the Chocolate Taco Shells:
- Combine Dry Ingredients: In a medium bowl, whisk together the flour, cocoa powder, baking soda, and salt. This ensures everything is evenly distributed and your tacos will have a consistent flavor and texture.
- Cream Butter and Sugar: In a large bowl, cream together the softened butter and granulated sugar until light and fluffy. This usually takes about 3-5 minutes with an electric mixer. The mixture should be pale and airy. This step is crucial for creating a tender taco shell.
- Add Egg and Vanilla: Beat in the egg and vanilla extract until well combined. Make sure to scrape down the sides of the bowl to ensure everything is incorporated.
- Gradually Add Dry Ingredients: Gradually add the dry ingredients to the wet ingredients, mixing on low speed until just combined. Be careful not to overmix, as this can result in tough taco shells. Overmixing develops the gluten in the flour, which we want to avoid.
- Adjust Consistency (If Needed): If the dough seems too dry, add milk, one tablespoon at a time, until it comes together into a smooth, pliable dough. The dough should be easy to handle and not too sticky.
- Chill the Dough: Wrap the dough in plastic wrap and chill in the refrigerator for at least 30 minutes. This allows the gluten to relax and makes the dough easier to roll out. Chilling also prevents the shells from spreading too much during baking.
- Preheat Oven and Prepare Baking Sheet: Preheat your oven to 350°F (175°C). Line a baking sheet with parchment paper or a silicone baking mat. This will prevent the taco shells from sticking.
- Roll Out the Dough: On a lightly floured surface, roll out the dough to about 1/8 inch thickness. Use a 4-inch cookie cutter or a small bowl to cut out circles. You can re-roll the scraps to get more circles.
- Shape the Taco Shells: Gently drape each circle over the bar of an oven rack, creating a taco shell shape. You can also use a taco shell mold if you have one. If you don’t have either, you can carefully fold the circle in half and bake it that way for a more traditional taco shape.
- Bake: Bake for 8-10 minutes, or until the edges are set and the taco shells are firm. Keep a close eye on them, as they can burn easily.
- Cool and Harden: Remove the baking sheet from the oven and let the taco shells cool completely on the baking sheet. As they cool, they will harden and become crispy. Be careful when handling them, as they can be fragile.
Making the Chocolate Filling:
- Heat the Heavy Cream: In a saucepan, heat the heavy cream over medium heat until it just begins to simmer. Do not boil.
- Pour Over Chocolate: Remove the saucepan from the heat and pour the hot cream over the chopped chocolate in a heatproof bowl.
- Let Sit: Let the mixture sit for 1 minute to allow the heat to melt the chocolate.
- Whisk Until Smooth: Whisk the chocolate and cream together until smooth and glossy.
- Add Butter and Vanilla: Stir in the softened butter, vanilla extract, and salt until well combined. The butter will add richness and shine to the filling.
- Chill the Filling: Cover the bowl with plastic wrap, pressing it directly onto the surface of the chocolate filling to prevent a skin from forming. Chill in the refrigerator for at least 2 hours, or preferably overnight, until the filling is firm enough to pipe or scoop. This chilling time is essential for the filling to reach the right consistency.
Assembling the Chocolate Tacos:
- Prepare Your Toppings: Gather all your desired toppings and place them in separate bowls for easy access. This makes the assembly process much smoother and more enjoyable.
- Fill the Taco Shells: Once the chocolate filling is chilled and firm, you can either pipe it into the taco shells using a piping bag fitted with a large tip, or you can simply scoop it in with a spoon. Be generous with the filling!
- Add Toppings: Now comes the fun part! Decorate your chocolate tacos with your favorite toppings. Get creative and have fun with it! Mini chocolate chips, shredded coconut, chopped nuts, sprinkles, caramel sauce, hot fudge sauce, whipped cream, and fresh berries are all great options.
- Serve Immediately: Serve your chocolate tacos immediately and enjoy! They are best enjoyed fresh, as the taco shells can soften over time.
Tips and Variations:
- For a spicier kick: Add a pinch of cayenne pepper to the chocolate filling.
- For a peanut butter flavor: Swirl in some peanut butter into the chocolate filling.
- For a vegan version: Use vegan butter and chocolate, and substitute the heavy cream with coconut cream.
- Make mini tacos: Use a smaller cookie cutter to make mini taco shells for bite-sized treats.
- Add a layer of melted chocolate: Before filling the taco shells, brush the inside with melted chocolate and let it harden for an extra layer of chocolatey goodness.
- Store leftover taco shells: Store leftover taco shells in an airtight container at room temperature for up to 3 days.
- Store leftover filling: Store leftover chocolate filling in an airtight container in the refrigerator for up to 5 days.
Troubleshooting:
- Taco shells are too brittle: You may have overbaked them. Reduce the baking time slightly next time.
- Taco shells are too soft: You may have underbaked them. Increase the baking time slightly next time.
- Chocolate filling is too runny: It may not have been chilled long enough. Chill it for a longer period of time.
- Chocolate filling is too hard: Let it sit at room temperature for a few minutes to soften slightly before filling the taco shells.
Conclusion:
This isn’t just a recipe; it’s an experience! These chocolate tacos are a guaranteed crowd-pleaser, offering a delightful twist on a classic dessert. The combination of the crispy, slightly salty taco shell with the rich, decadent chocolate filling is simply irresistible. It’s the perfect balance of textures and flavors that will leave you wanting more. I promise, once you take that first bite, you’ll understand why I’m so excited about this recipe.
But the best part? It’s incredibly versatile! You can easily customize these chocolate tacos to suit your own taste preferences. For a truly indulgent experience, try adding a scoop of your favorite ice cream vanilla bean, salted caramel, or even a spicy chili chocolate would be amazing. A drizzle of hot fudge sauce or a sprinkle of chopped nuts will elevate them even further.
If you’re looking for a lighter option, consider using a dark chocolate with a higher cocoa percentage. You could also fill the tacos with fresh berries and a dollop of whipped cream for a refreshing and fruity twist. Get creative with your toppings! Think shredded coconut, mini marshmallows, chocolate shavings, or even a dusting of cocoa powder. The possibilities are endless!
Serving these chocolate tacos is just as fun as making them. They’re perfect for parties, potlucks, or even just a special treat for yourself. Arrange them on a platter for a visually stunning presentation, or serve them individually in small bowls. For a fun and interactive experience, set up a taco bar with a variety of fillings and toppings and let your guests create their own masterpieces.
These chocolate tacos are also a fantastic way to get kids involved in the kitchen. They’ll love helping to assemble the tacos and decorate them with their favorite toppings. It’s a fun and delicious activity that the whole family can enjoy together.
I truly believe that this recipe is a must-try for anyone who loves chocolate and wants to add a little bit of fun to their dessert repertoire. It’s easy to make, incredibly delicious, and endlessly customizable. What more could you ask for?
Serving Suggestions and Variations:
* Ice Cream Dream: Fill the tacos with your favorite ice cream flavors.
* Berry Bliss: Add fresh berries and whipped cream for a lighter option.
* Nutty Delight: Sprinkle with chopped nuts for added texture and flavor.
* Spicy Kick: Use a chili-infused chocolate for a surprising twist.
* Mexican Fiesta: Add a sprinkle of cinnamon and a drizzle of cajeta (Mexican caramel).
So, what are you waiting for? Gather your ingredients, put on your apron, and get ready to create some magic in the kitchen. I’m confident that you’ll love these chocolate tacos as much as I do.
And most importantly, I want to hear about your experience! Once you’ve tried this recipe, please come back and share your thoughts in the comments below. Let me know what variations you tried, what toppings you used, and how much you enjoyed them. I’m always looking for new ideas and inspiration, and I love hearing from my readers. Don’t be shy share your chocolate taco creations with the world! I can’t wait to see what you come up with. Happy cooking (and eating)!
Chocolate Tacos: The Ultimate Guide to This Delicious Treat
Decadent homemade chocolate tacos with crispy chocolate shells filled with rich chocolate ganache and topped with your favorite sweet treats! A fun and delicious dessert for any occasion.
Ingredients
- 1 cup all-purpose flour
- 1/2 cup unsweetened cocoa powder
- 1/4 teaspoon baking soda
- 1/4 teaspoon salt
- 1/2 cup (1 stick) unsalted butter, softened
- 3/4 cup granulated sugar
- 1 large egg
- 1 teaspoon vanilla extract
- 2-3 tablespoons milk, if needed
- 1 1/2 cups heavy cream
- 12 ounces semi-sweet chocolate, chopped
- 1/4 cup unsalted butter, softened
- 1 teaspoon vanilla extract
- Pinch of salt
- Mini chocolate chips
- Shredded coconut
- Chopped nuts (pecans, walnuts, almonds)
- Sprinkles
- Caramel sauce
- Hot fudge sauce
- Whipped cream
- Fresh berries (strawberries, raspberries)
Instructions
- Combine Dry Ingredients: In a medium bowl, whisk together the flour, cocoa powder, baking soda, and salt.
- Cream Butter and Sugar: In a large bowl, cream together the softened butter and granulated sugar until light and fluffy (3-5 minutes with an electric mixer).
- Add Egg and Vanilla: Beat in the egg and vanilla extract until well combined. Scrape down the sides of the bowl.
- Gradually Add Dry Ingredients: Gradually add the dry ingredients to the wet ingredients, mixing on low speed until just combined. Do not overmix.
- Adjust Consistency (If Needed): If the dough seems too dry, add milk, one tablespoon at a time, until it comes together into a smooth, pliable dough.
- Chill the Dough: Wrap the dough in plastic wrap and chill in the refrigerator for at least 30 minutes.
- Preheat Oven and Prepare Baking Sheet: Preheat your oven to 350°F (175°C). Line a baking sheet with parchment paper or a silicone baking mat.
- Roll Out the Dough: On a lightly floured surface, roll out the dough to about 1/8 inch thickness. Use a 4-inch cookie cutter or a small bowl to cut out circles. Re-roll the scraps to get more circles.
- Shape the Taco Shells: Gently drape each circle over the bar of an oven rack, creating a taco shell shape. You can also use a taco shell mold if you have one. If you don’t have either, you can carefully fold the circle in half and bake it that way for a more traditional taco shape.
- Bake: Bake for 8-10 minutes, or until the edges are set and the taco shells are firm.
- Cool and Harden: Remove the baking sheet from the oven and let the taco shells cool completely on the baking sheet. As they cool, they will harden and become crispy.
- Heat the Heavy Cream: In a saucepan, heat the heavy cream over medium heat until it just begins to simmer. Do not boil.
- Pour Over Chocolate: Remove the saucepan from the heat and pour the hot cream over the chopped chocolate in a heatproof bowl.
- Let Sit: Let the mixture sit for 1 minute to allow the heat to melt the chocolate.
- Whisk Until Smooth: Whisk the chocolate and cream together until smooth and glossy.
- Add Butter and Vanilla: Stir in the softened butter, vanilla extract, and salt until well combined.
- Chill the Filling: Cover the bowl with plastic wrap, pressing it directly onto the surface of the chocolate filling to prevent a skin from forming. Chill in the refrigerator for at least 2 hours, or preferably overnight, until the filling is firm enough to pipe or scoop.
- Prepare Your Toppings: Gather all your desired toppings and place them in separate bowls for easy access.
- Fill the Taco Shells: Once the chocolate filling is chilled and firm, you can either pipe it into the taco shells using a piping bag fitted with a large tip, or you can simply scoop it in with a spoon.
- Add Toppings: Decorate your chocolate tacos with your favorite toppings.
- Serve Immediately: Serve your chocolate tacos immediately and enjoy!
Notes
- For a spicier kick: Add a pinch of cayenne pepper to the chocolate filling.
- For a peanut butter flavor: Swirl in some peanut butter into the chocolate filling.
- For a vegan version: Use vegan butter and chocolate, and substitute the heavy cream with coconut cream.
- Make mini tacos: Use a smaller cookie cutter to make mini taco shells for bite-sized treats.
- Add a layer of melted chocolate: Before filling the taco shells, brush the inside with melted chocolate and let it harden for an extra layer of chocolatey goodness.
- Store leftover taco shells: Store leftover taco shells in an airtight container at room temperature for up to 3 days.
- Store leftover filling: Store leftover chocolate filling in an airtight container in the refrigerator for up to 5 days.


Leave a Comment