

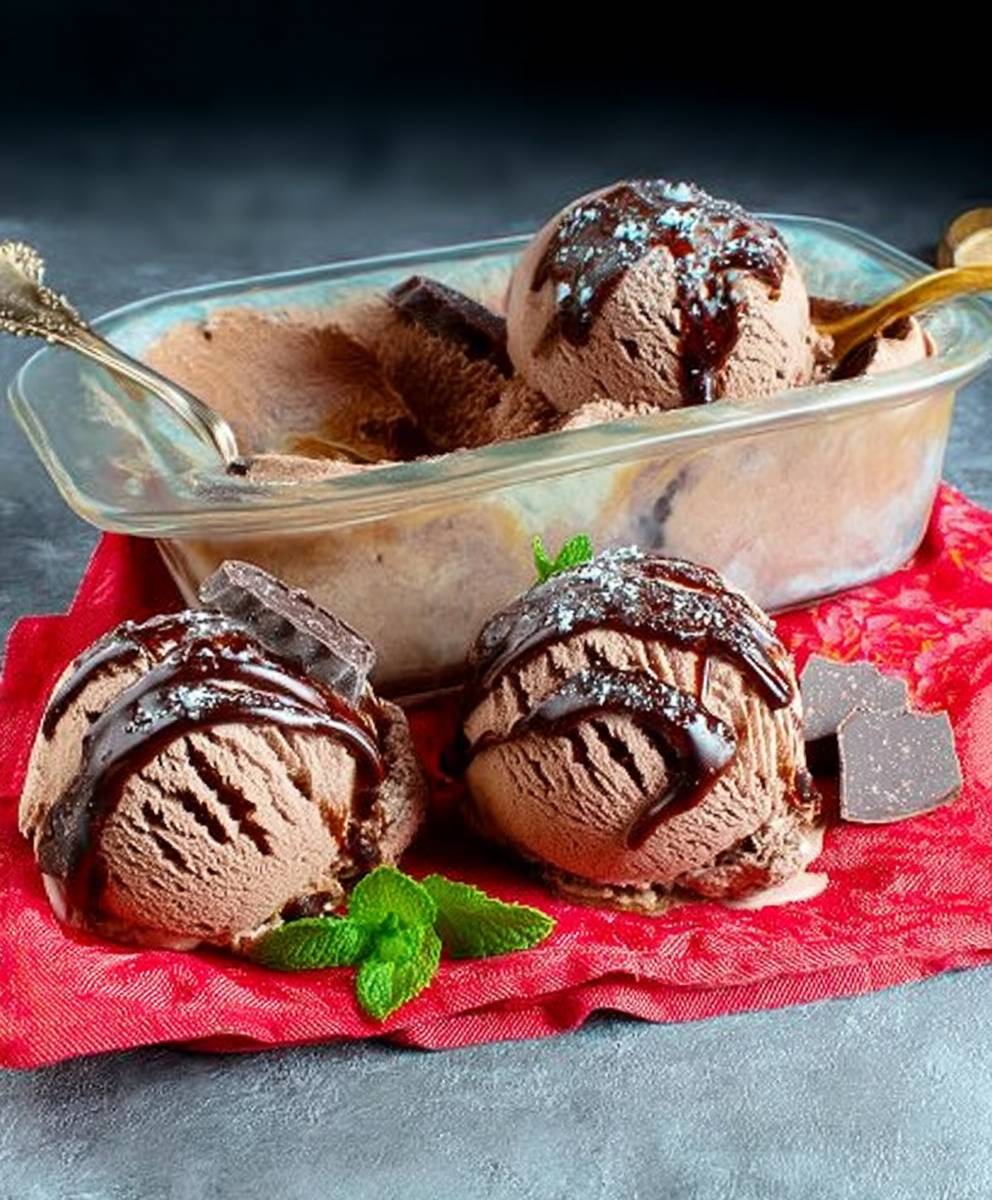
Chocolate Mint Ice Cream, a symphony of cool refreshment and decadent delight, is the perfect homemade treat to invigorate your senses. Imagine a velvety smooth, intensely chocolatey ice cream base, swirled with the invigorating coolness of fresh mint. It’s not just a dessert; it’s an experience!
While the exact origins of combining chocolate and mint are somewhat shrouded in mystery, the pairing gained significant popularity in the early 20th century, quickly becoming a staple in candies and desserts. The refreshing quality of mint perfectly complements the rich, sometimes overwhelming, nature of chocolate, creating a balanced and harmonious flavor profile that has captivated taste buds for generations.
What is it about Chocolate Mint Ice Cream that makes it so irresistible? Perhaps it’s the contrasting temperatures and textures the icy chill against the creamy smoothness. Or maybe it’s the way the mint cuts through the richness of the chocolate, leaving a clean and refreshing finish. Whatever the reason, this classic combination is a guaranteed crowd-pleaser, perfect for a hot summer day or a cozy night in. I find that it is the perfect dessert to end a meal with, leaving you feeling satisfied but not overly full. Get ready to indulge in this easy-to-make, utterly delicious frozen treat!

Ingredients:
- 1 pint (2 cups) heavy cream
- 1 cup whole milk
- ¾ cup granulated sugar
- ? teaspoon salt
- 6 large egg yolks
- 6 ounces bittersweet chocolate, finely chopped
- 1 teaspoon pure vanilla extract
- ½ teaspoon peppermint extract (or more, to taste)
- ½ cup fresh mint leaves, finely chopped (packed)
- Green food coloring (optional, for a more vibrant color)
Preparing the Chocolate Base:
Okay, let’s get started! The first thing we need to do is create a rich, chocolatey base for our ice cream. This involves making a custard, which might sound intimidating, but trust me, it’s easier than you think. We’ll be gentle with the eggs to prevent them from scrambling, and the result will be a smooth, decadent foundation for all that minty goodness.
- Combine Cream, Milk, Sugar, and Salt: In a medium saucepan, whisk together the heavy cream, whole milk, granulated sugar, and salt. We’re doing this to dissolve the sugar and salt into the liquids, which will help create a smoother ice cream texture later on.
- Heat the Mixture: Place the saucepan over medium heat and bring the mixture to just a simmer, stirring occasionally. You’ll see small bubbles forming around the edges of the pan. Be careful not to let it boil, as boiling can change the texture of the cream and affect the final ice cream. Once it’s simmering, remove the pan from the heat.
- Temper the Egg Yolks: This is the most crucial step to prevent scrambled eggs! In a separate medium bowl, whisk the egg yolks until they are light and slightly thickened. This usually takes about a minute or two.
- Slowly Add Hot Cream Mixture to Egg Yolks: Gradually pour about ½ cup of the hot cream mixture into the egg yolks, whisking constantly and vigorously. This is called tempering. The goal is to slowly raise the temperature of the egg yolks so they don’t cook too quickly and curdle. If you add the hot cream too quickly, you’ll end up with scrambled eggs, and nobody wants that!
- Repeat Tempering Process: Continue adding the hot cream mixture to the egg yolks in a slow, steady stream, whisking constantly until about half of the cream mixture has been incorporated.
- Return Mixture to Saucepan: Pour the tempered egg yolk mixture back into the saucepan with the remaining cream mixture.
- Cook the Custard: Place the saucepan back over low heat. Cook, stirring constantly with a heat-resistant spatula or wooden spoon, until the custard thickens enough to coat the back of the spoon. This usually takes about 5-8 minutes. To test for doneness, dip the back of the spoon into the custard and run your finger across the coated spoon. If the line remains distinct and doesn’t run back together, the custard is ready. The temperature should be around 170-175°F (77-79°C) if you’re using a thermometer. Do not let the custard boil! If it starts to boil, remove it from the heat immediately and whisk vigorously to cool it down.
- Strain the Custard: Pour the hot custard through a fine-mesh sieve into a clean bowl. This will remove any cooked egg bits and ensure a perfectly smooth ice cream base.
- Add Chocolate: Add the finely chopped bittersweet chocolate to the strained custard. Let it sit for a minute or two to soften, then stir until the chocolate is completely melted and the mixture is smooth and glossy.
- Stir in Vanilla and Peppermint Extracts: Stir in the vanilla extract and peppermint extract. Start with ½ teaspoon of peppermint extract and taste. You can add more if you want a stronger mint flavor. Remember, you can always add more, but you can’t take it away!
Adding the Mint and Cooling:
Now that we have our delicious chocolate base, it’s time to infuse it with that refreshing mint flavor and get it ready for the ice cream maker. This step is all about maximizing the minty goodness and ensuring the base is properly chilled for optimal freezing.
- Incorporate Fresh Mint: Stir in the finely chopped fresh mint leaves. The warmth of the custard will help release the mint’s essential oils, infusing the base with its flavor.
- Add Green Food Coloring (Optional): If you want a more vibrant green color for your ice cream, add a few drops of green food coloring. Start with a small amount and add more until you reach your desired shade. I personally like a subtle green, but it’s entirely up to you!
- Chill the Base: Cover the bowl with plastic wrap, pressing it directly onto the surface of the custard to prevent a skin from forming. Refrigerate for at least 4 hours, or preferably overnight. This chilling period is crucial for the ice cream to freeze properly and develop the best texture. The colder the base, the smaller the ice crystals will be, resulting in a smoother, creamier ice cream.
Churning and Freezing:
The moment we’ve been waiting for! Now it’s time to transform our chilled chocolate mint base into creamy, dreamy ice cream. This is where the magic happens, and your ice cream maker will do most of the work. Just follow these simple steps, and you’ll be enjoying homemade ice cream in no time.
- Prepare Your Ice Cream Maker: Follow the manufacturer’s instructions for your ice cream maker. If you have a freezer bowl model, make sure the bowl has been frozen solid for at least 24 hours. If you have a compressor model, you can skip this step.
- Pour the Chilled Base into the Ice Cream Maker: Pour the chilled chocolate mint base into the prepared ice cream maker.
- Churn the Ice Cream: Churn the ice cream according to the manufacturer’s instructions. This usually takes about 20-30 minutes, or until the ice cream has reached a soft-serve consistency. You’ll notice the mixture thickening and increasing in volume as it churns.
- Transfer to a Freezer-Safe Container: Once the ice cream has reached the desired consistency, transfer it to a freezer-safe container. I like to use a loaf pan or a plastic container with a tight-fitting lid.
- Harden in the Freezer: Cover the container tightly and freeze for at least 2-3 hours, or until the ice cream is firm enough to scoop. This hardening process allows the ice cream to fully set and develop its final texture.
Serving and Storage:
Congratulations! You’ve made your own delicious chocolate mint ice cream. Now it’s time to enjoy the fruits (or rather, the creams) of your labor. Here are a few tips for serving and storing your homemade ice cream.
- Scoop and Serve: Let the ice cream sit at room temperature for a few minutes before scooping to soften it slightly. This will make it easier to scoop and create those perfect, round scoops.
- Garnish (Optional): Garnish with extra chopped mint leaves, chocolate shavings, or a drizzle of chocolate sauce for an extra touch of elegance.
- Store Properly: Store any leftover ice cream in a tightly sealed container in the freezer. Homemade ice cream tends to melt faster than store-bought ice cream, so it’s best to consume it within a week or two for the best quality. To prevent ice crystals from forming on the surface, press a piece of plastic wrap directly onto the surface of the ice cream before sealing the container.
Conclusion:
So, there you have it! This Chocolate Mint Ice Cream recipe is more than just a dessert; it’s an experience. The rich, decadent chocolate perfectly complements the refreshing coolness of the mint, creating a symphony of flavors that will dance on your taste buds. I truly believe this is a must-try recipe for anyone who appreciates a well-balanced and utterly satisfying treat. It’s the kind of ice cream that makes you close your eyes and savor every single spoonful.
But why is it a must-try? Well, beyond the incredible flavor profile, it’s surprisingly easy to make. You don’t need any fancy equipment or complicated techniques. Just a few simple ingredients and a little bit of patience, and you’ll be rewarded with a homemade ice cream that rivals anything you can buy in the store. Plus, making it yourself means you control the ingredients, so you can use high-quality chocolate and fresh mint for the best possible flavor. And let’s be honest, there’s just something incredibly satisfying about creating something delicious from scratch.
Now, let’s talk about serving suggestions and variations! While this Chocolate Mint Ice Cream is absolutely divine on its own, there are so many ways to elevate the experience. For a classic sundae, try topping it with hot fudge sauce, whipped cream, and a cherry. Or, for a more sophisticated treat, pair it with a warm brownie or a slice of chocolate cake. You could even use it to make an incredible ice cream sandwich with chocolate cookies. The possibilities are endless!
If you’re feeling adventurous, you can also experiment with different variations of the recipe. For a richer, more intense chocolate flavor, use dark chocolate instead of semi-sweet. If you prefer a stronger mint flavor, add a few drops of peppermint extract. You could even stir in some chocolate chips or chopped Andes candies for added texture and flavor. And for those who are dairy-free, you can easily substitute the heavy cream and milk with coconut cream and almond milk for a delicious vegan version. Don’t be afraid to get creative and make it your own!
I’m so excited for you to try this recipe and experience the magic of homemade Chocolate Mint Ice Cream for yourself. I truly believe it will become a new favorite in your household. It’s perfect for a hot summer day, a special occasion, or just a simple treat to brighten your day.
So, what are you waiting for? Gather your ingredients, fire up your ice cream maker (or use the no-churn method!), and get ready to indulge in the most delicious Chocolate Mint Ice Cream you’ve ever tasted. And when you do, please, please, please share your experience with me! I’d love to hear what you think, what variations you tried, and how much you enjoyed it. You can leave a comment below, tag me on social media, or even send me an email. I can’t wait to see your creations and hear your stories. Happy ice cream making!
I’m confident that this recipe will become a staple in your dessert repertoire. It’s a crowd-pleaser, a flavor sensation, and a testament to the simple joy of homemade ice cream. Enjoy!
Chocolate Mint Ice Cream: The Ultimate Guide to Homemade Perfection
Creamy, refreshing homemade ice cream with rich bittersweet chocolate and cool, invigorating fresh mint flavor. Perfect for any occasion.
Ingredients
- 1 pint (2 cups) heavy cream
- 1 cup whole milk
- ¾ cup granulated sugar
- ? teaspoon salt
- 6 large egg yolks
- 6 ounces bittersweet chocolate, finely chopped
- 1 teaspoon pure vanilla extract
- ½ teaspoon peppermint extract (or more, to taste)
- ½ cup fresh mint leaves, finely chopped (packed)
- Green food coloring (optional, for a more vibrant color)
Instructions
- In a medium saucepan, whisk together the heavy cream, whole milk, granulated sugar, and salt.
- Place the saucepan over medium heat and bring the mixture to just a simmer, stirring occasionally. Remove from heat.
- In a separate medium bowl, whisk the egg yolks until light and slightly thickened.
- Gradually pour about ½ cup of the hot cream mixture into the egg yolks, whisking constantly.
- Continue adding the hot cream mixture to the egg yolks in a slow, steady stream, whisking constantly until about half of the cream mixture has been incorporated.
- Pour the tempered egg yolk mixture back into the saucepan with the remaining cream mixture.
- Place the saucepan back over low heat. Cook, stirring constantly with a heat-resistant spatula or wooden spoon, until the custard thickens enough to coat the back of the spoon (about 5-8 minutes). The temperature should be around 170-175°F (77-79°C) if you’re using a thermometer. Do not let the custard boil!
- Pour the hot custard through a fine-mesh sieve into a clean bowl.
- Add the finely chopped bittersweet chocolate to the strained custard. Let it sit for a minute or two to soften, then stir until the chocolate is completely melted and the mixture is smooth and glossy.
- Stir in the vanilla extract and peppermint extract. Start with ½ teaspoon of peppermint extract and taste. You can add more if you want a stronger mint flavor.
- Stir in the finely chopped fresh mint leaves.
- If you want a more vibrant green color for your ice cream, add a few drops of green food coloring.
- Cover the bowl with plastic wrap, pressing it directly onto the surface of the custard to prevent a skin from forming. Refrigerate for at least 4 hours, or preferably overnight.
- Follow the manufacturer’s instructions for your ice cream maker.
- Pour the chilled chocolate mint base into the prepared ice cream maker.
- Churn the ice cream according to the manufacturer’s instructions. This usually takes about 20-30 minutes, or until the ice cream has reached a soft-serve consistency.
- Once the ice cream has reached the desired consistency, transfer it to a freezer-safe container.
- Cover the container tightly and freeze for at least 2-3 hours, or until the ice cream is firm enough to scoop.
- Let the ice cream sit at room temperature for a few minutes before scooping to soften it slightly.
- Garnish with extra chopped mint leaves, chocolate shavings, or a drizzle of chocolate sauce for an extra touch of elegance.
- Store any leftover ice cream in a tightly sealed container in the freezer. Homemade ice cream tends to melt faster than store-bought ice cream, so it’s best to consume it within a week or two for the best quality. To prevent ice crystals from forming on the surface, press a piece of plastic wrap directly onto the surface of the ice cream before sealing the container.
Notes
- Tempering the eggs is crucial to prevent scrambling. Add the hot cream mixture slowly and whisk constantly.
- Do not let the custard boil, as this can cause it to curdle.
- Chilling the base thoroughly is essential for a smooth, creamy texture.
- Adjust the amount of peppermint extract to your preference.
- For best results, use high-quality bittersweet chocolate.


Leave a Comment