Description
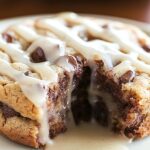
Decadent brownie cookies with a gooey, molten chocolate lava center. A perfect indulgent treat!
Ingredients
Scale
- 1 cup (2 sticks) unsalted butter, melted
- 2 cups granulated sugar
- 1 cup unsweetened cocoa powder
- 1 teaspoon salt
- 1 teaspoon baking powder
- 4 large eggs
- 1 teaspoon vanilla extract
- 1 cup all-purpose flour
- 4 ounces bittersweet chocolate, finely chopped
- 4 tablespoons (1/2 stick) unsalted butter
- 2 large egg yolks
- 2 tablespoons granulated sugar
- 1/4 teaspoon vanilla extract
- Pinch of salt
- Powdered sugar, for dusting
- Sea salt flakes, for sprinkling
- Chocolate shavings
- Vanilla ice cream, for serving
Instructions
- In a heatproof bowl set over a saucepan of simmering water (make sure the bottom of the bowl doesn’t touch the water!), combine the chopped bittersweet chocolate and butter. Stir frequently until completely melted and smooth. Remove from heat.
- In a separate bowl, whisk together the egg yolks and sugar until pale and slightly thickened. This usually takes about a minute or two.
- Slowly drizzle a small amount of the melted chocolate mixture into the egg yolk mixture while whisking constantly. This will gradually raise the temperature of the egg yolks. Continue adding the chocolate in a slow, steady stream until it’s all incorporated.
- Stir in the vanilla extract and a pinch of salt to enhance the flavors.
- Line a small baking sheet with parchment paper. Drop rounded tablespoons of the chocolate mixture onto the parchment paper, spacing them apart. You should get about 8-10 lava centers. Place the baking sheet in the freezer for at least 30 minutes, or until the lava centers are firm enough to handle. This is important so they don’t melt completely during baking. You can even freeze them overnight!
- In a large bowl, melt the butter in the microwave or in a saucepan over low heat. Make sure it’s completely melted but not boiling hot.
- Add the granulated sugar to the melted butter and whisk until well combined. The mixture should be smooth and slightly glossy.
- Sift in the unsweetened cocoa powder, salt, and baking powder. This helps prevent lumps and ensures even distribution. Whisk until everything is well incorporated. The mixture will be quite thick at this point.
- Crack in the eggs one at a time, whisking well after each addition. Make sure each egg is fully incorporated before adding the next. The mixture will become smoother and more emulsified.
- Add the vanilla extract and stir to combine.
- Gradually add the all-purpose flour, mixing until just combined. Be careful not to overmix the dough, as this can result in tough cookies. A few streaks of flour are okay.
- Preheat your oven to 350°F (175°C). Line a baking sheet with parchment paper or a silicone baking mat.
- Using a cookie scoop or a spoon, scoop out a generous tablespoon of brownie cookie dough. Flatten it slightly in your palm.
- Place a frozen lava center on top of the flattened cookie dough.
- Scoop another tablespoon of cookie dough and flatten it. Carefully place it on top of the lava center, gently pressing the edges to seal the lava center inside. Make sure the lava center is completely enclosed in the dough.
- Place the assembled cookies on the prepared baking sheet, spacing them about 2 inches apart.
- Bake for 10-12 minutes, or until the edges of the cookies are set and the centers are still slightly soft. Be careful not to overbake them, as you want the lava center to remain molten.
- Let the cookies cool on the baking sheet for a few minutes before transferring them to a wire rack to cool completely. The lava center will be very hot, so be careful when handling them.
- Dust with Powdered Sugar (Optional): Once the cookies have cooled slightly, dust them with powdered sugar for a beautiful presentation.
- Sprinkle with Sea Salt (Optional): A sprinkle of sea salt flakes adds a delightful salty-sweet contrast.
- Add Chocolate Shavings (Optional): For an extra touch of chocolatey goodness, add some chocolate shavings.
- Serve Warm: These cookies are best served warm, when the lava center is still molten and gooey.
- Pair with Ice Cream (Optional): For the ultimate indulgence, serve the cookies with a scoop of vanilla ice cream. The cold ice cream and warm cookie create a heavenly combination.
- Enjoy! Take a bite and experience the rich, fudgy brownie cookie with the molten chocolate lava center. You deserve it!
Notes
- Don’t Overbake: Overbaking is the enemy of a molten lava center. Keep a close eye on the cookies and remove them from the oven when the edges are set but the centers are still slightly soft.
- Freeze the Lava Centers: Freezing the lava centers is crucial for preventing them from melting completely during baking. Make sure they are firm to the touch before assembling the cookies.
- Use High-Quality Chocolate: The quality of the chocolate will greatly impact the flavor of the cookies. Use a good-quality bittersweet chocolate for the lava centers.
- Don’t Overmix the Dough: Overmixing the dough can result in tough cookies. Mix until just combined.
- Adjust Baking Time: Baking times may vary depending on your oven. Keep a close eye on the cookies and adjust the baking time as needed.
- Storage: Store leftover cookies in an airtight container at room temperature for up to 3 days. Reheat in the microwave for a few seconds to re-melt the lava center.
- Prep Time: 30 minutes
- Cook Time: 10 minutes