

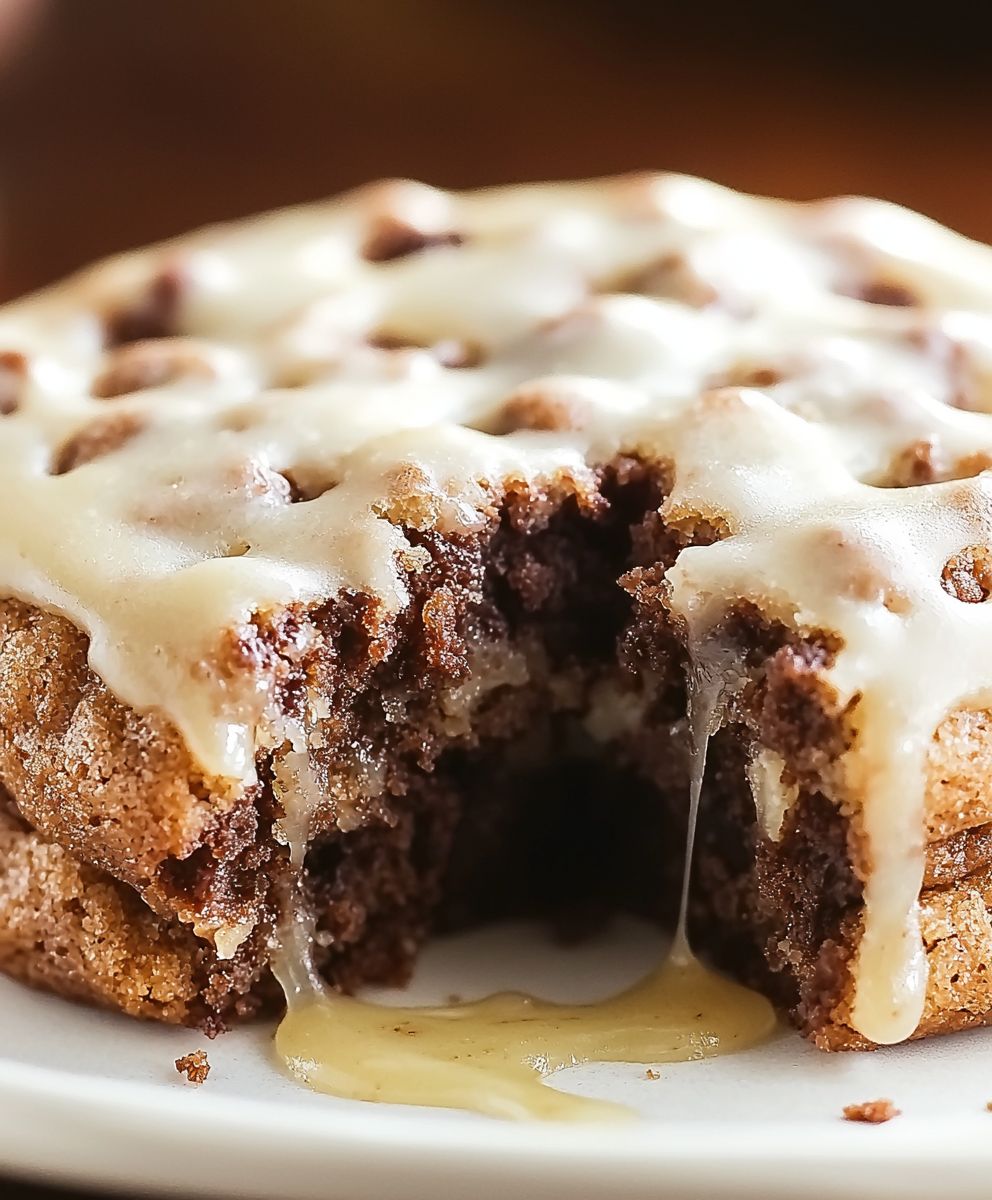
Chocolate Lava Brownie Cookies: Prepare to be amazed! Imagine the fudgy, decadent center of a molten lava cake, perfectly captured within the chewy, satisfying texture of a brownie cookie. Yes, you read that right! These aren’t your average cookies; they’re a symphony of chocolate indulgence in every single bite.
While the exact origins of this delightful hybrid are shrouded in mystery, the concept draws inspiration from two beloved desserts. Brownies, a distinctly American creation, gained popularity in the late 19th century, offering a convenient and portable way to enjoy chocolate cake. Molten lava cakes, with their dramatic oozing centers, emerged later, becoming a restaurant staple for their impressive presentation and rich flavor. Combining these two iconic treats results in a dessert that’s both familiar and excitingly new.
What makes these Chocolate Lava Brownie Cookies so irresistible? It’s the textural contrast! The slightly crisp edges give way to a gooey, intensely chocolatey center that practically melts in your mouth. People adore them because they offer the best of both worlds: the ease and portability of a cookie with the luxurious, decadent experience of a lava cake. Plus, they’re surprisingly easy to make, requiring minimal ingredients and effort for maximum impact. Get ready to impress your friends and family with this unforgettable treat!

Ingredients:
- For the Brownie Base:
- 1 cup (2 sticks) unsalted butter, melted
- 2 cups granulated sugar
- 1 cup unsweetened cocoa powder
- 1 teaspoon salt
- 1 teaspoon baking powder
- 4 large eggs
- 1 teaspoon vanilla extract
- 1 cup all-purpose flour
- For the Lava Center:
- 4 ounces bittersweet chocolate, finely chopped
- 4 tablespoons (1/2 stick) unsalted butter
- 2 large egg yolks
- 2 tablespoons granulated sugar
- 1/4 teaspoon vanilla extract
- Pinch of salt
- Optional Toppings:
- Powdered sugar, for dusting
- Sea salt flakes, for sprinkling
- Chocolate shavings
- Vanilla ice cream, for serving
Preparing the Lava Centers:
Okay, let’s get started with the lava centers. These need to chill, so we’ll tackle them first. Trust me, it’s worth the extra step!
- Melt the Chocolate and Butter: In a heatproof bowl set over a saucepan of simmering water (make sure the bottom of the bowl doesn’t touch the water!), combine the chopped bittersweet chocolate and butter. Stir frequently until completely melted and smooth. Remove from heat.
- Whisk in the Egg Yolks and Sugar: In a separate bowl, whisk together the egg yolks and sugar until pale and slightly thickened. This usually takes about a minute or two.
- Temper the Chocolate Mixture: This is a crucial step to prevent scrambled eggs! Slowly drizzle a small amount of the melted chocolate mixture into the egg yolk mixture while whisking constantly. This will gradually raise the temperature of the egg yolks. Continue adding the chocolate in a slow, steady stream until it’s all incorporated.
- Add Vanilla and Salt: Stir in the vanilla extract and a pinch of salt to enhance the flavors.
- Chill the Lava Centers: Line a small baking sheet with parchment paper. Drop rounded tablespoons of the chocolate mixture onto the parchment paper, spacing them apart. You should get about 8-10 lava centers. Place the baking sheet in the freezer for at least 30 minutes, or until the lava centers are firm enough to handle. This is important so they don’t melt completely during baking. You can even freeze them overnight!
Making the Brownie Cookie Dough:
Now, let’s move on to the brownie cookie dough. This is where the magic really happens!
- Melt the Butter: In a large bowl, melt the butter in the microwave or in a saucepan over low heat. Make sure it’s completely melted but not boiling hot.
- Whisk in the Sugar: Add the granulated sugar to the melted butter and whisk until well combined. The mixture should be smooth and slightly glossy.
- Add the Cocoa Powder, Salt, and Baking Powder: Sift in the unsweetened cocoa powder, salt, and baking powder. This helps prevent lumps and ensures even distribution. Whisk until everything is well incorporated. The mixture will be quite thick at this point.
- Add the Eggs: Crack in the eggs one at a time, whisking well after each addition. Make sure each egg is fully incorporated before adding the next. The mixture will become smoother and more emulsified.
- Stir in the Vanilla Extract: Add the vanilla extract and stir to combine.
- Add the Flour: Gradually add the all-purpose flour, mixing until just combined. Be careful not to overmix the dough, as this can result in tough cookies. A few streaks of flour are okay.
Assembling and Baking the Cookies:
Alright, we’re in the home stretch! Time to assemble and bake these beauties.
- Preheat the Oven: Preheat your oven to 350°F (175°C). Line a baking sheet with parchment paper or a silicone baking mat.
- Scoop the Cookie Dough: Using a cookie scoop or a spoon, scoop out a generous tablespoon of brownie cookie dough. Flatten it slightly in your palm.
- Add the Lava Center: Place a frozen lava center on top of the flattened cookie dough.
- Cover with More Dough: Scoop another tablespoon of cookie dough and flatten it. Carefully place it on top of the lava center, gently pressing the edges to seal the lava center inside. Make sure the lava center is completely enclosed in the dough.
- Place on Baking Sheet: Place the assembled cookies on the prepared baking sheet, spacing them about 2 inches apart.
- Bake the Cookies: Bake for 10-12 minutes, or until the edges of the cookies are set and the centers are still slightly soft. Be careful not to overbake them, as you want the lava center to remain molten.
- Cool Slightly: Let the cookies cool on the baking sheet for a few minutes before transferring them to a wire rack to cool completely. The lava center will be very hot, so be careful when handling them.
Serving and Enjoying:
Finally, the best part! Serving and savoring these decadent treats.
- Dust with Powdered Sugar (Optional): Once the cookies have cooled slightly, dust them with powdered sugar for a beautiful presentation.
- Sprinkle with Sea Salt (Optional): A sprinkle of sea salt flakes adds a delightful salty-sweet contrast.
- Add Chocolate Shavings (Optional): For an extra touch of chocolatey goodness, add some chocolate shavings.
- Serve Warm: These cookies are best served warm, when the lava center is still molten and gooey.
- Pair with Ice Cream (Optional): For the ultimate indulgence, serve the cookies with a scoop of vanilla ice cream. The cold ice cream and warm cookie create a heavenly combination.
- Enjoy! Take a bite and experience the rich, fudgy brownie cookie with the molten chocolate lava center. You deserve it!
Tips for Success:
- Don’t Overbake: Overbaking is the enemy of a molten lava center. Keep a close eye on the cookies and remove them from the oven when the edges are set but the centers are still slightly soft.
- Freeze the Lava Centers: Freezing the lava centers is crucial for preventing them from melting completely during baking. Make sure they are firm to the touch before assembling the cookies.
- Use High-Quality Chocolate: The quality of the chocolate will greatly impact the flavor of the cookies. Use a good-quality bittersweet chocolate for the lava centers.
- Don’t Overmix the Dough: Overmixing the dough can result in tough cookies. Mix until just combined.
- Adjust Baking Time: Baking times may vary depending on your oven. Keep a close eye on the cookies and adjust the baking time as needed.
- Storage: Store leftover cookies in an airtight container at room temperature for up to 3 days. Reheat in the microwave for a few seconds to re-melt the lava center.
Variations:
- Peanut Butter Lava: Substitute peanut butter chips for half of the bittersweet chocolate in the lava center.
- Mint Chocolate Lava: Add a few drops of peppermint extract to the lava center.
- White Chocolate Lava: Use white chocolate instead of bittersweet chocolate for the lava center.
- Espresso Brownie Cookies: Add a teaspoon of instant espresso powder to the brownie cookie dough.
- Nutella Lava: Use Nutella as the lava center. Freeze in small dollops before assembling.
Conclusion:
Okay, friends, let’s be honest you’ve made it this far, and that means you’re seriously considering baking these Chocolate Lava Brownie Cookies. And trust me, you absolutely should! These aren’t just your average cookies; they’re a decadent, fudgy experience that will have everyone begging for more. The combination of the chewy brownie texture with the molten chocolate center is simply irresistible. It’s the kind of treat that elevates any occasion, from a casual weeknight dessert to a special celebration. Why is this recipe a must-try? Because it delivers maximum flavor with minimal effort. We’re talking about a recipe that’s easy enough for beginner bakers but impressive enough to wow even the most discerning palates. The rich, intense chocolate flavor is perfectly balanced by the slightly crisp edges, creating a symphony of textures and tastes that will leave you completely satisfied. Plus, who can resist that warm, gooey chocolate lava that oozes out with every bite? It’s pure chocolate bliss! But the best part? This recipe is incredibly versatile. Want to take it to the next level? Try serving these warm cookies with a scoop of vanilla ice cream and a drizzle of chocolate sauce. The contrast of the warm cookie and cold ice cream is heavenly. Or, for a more sophisticated touch, sprinkle a pinch of sea salt on top before baking to enhance the chocolate flavor. Looking for variations? You could add chopped nuts, like walnuts or pecans, to the batter for a bit of crunch. Or, for a festive twist, incorporate some peppermint extract and crushed candy canes during the holiday season. You could even experiment with different types of chocolate, such as dark chocolate for an even richer flavor or milk chocolate for a sweeter treat. The possibilities are endless! These cookies are also perfect for gifting. Imagine the joy on someone’s face when they receive a batch of these warm, gooey delights. Package them in a cute box or tin, and you’ve got a thoughtful and delicious present that’s sure to be appreciated. I’m telling you, these Chocolate Lava Brownie Cookies are a game-changer. They’re the perfect combination of convenience, indulgence, and pure chocolatey goodness. They are so easy to make, and the result is so rewarding. So, what are you waiting for? Preheat your oven, gather your ingredients, and get ready to experience the magic of these incredible cookies. I promise you won’t regret it. And once you’ve tried them, I’d love to hear about your experience! Share your photos and comments on social media using #ChocolateLavaBrownieCookies. Let me know what variations you tried and how much you loved them. I can’t wait to see your creations and hear your feedback. Happy baking! I am confident that you will find this recipe to be a new favorite. Don’t be afraid to experiment and make it your own. The most important thing is to have fun and enjoy the process. After all, baking is all about creating something delicious and sharing it with the people you love. So go ahead, give these cookies a try, and let the chocolatey goodness melt away your worries. You deserve it! Print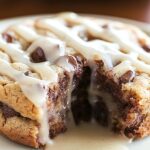
Chocolate Lava Brownie Cookies: The Ultimate Decadent Recipe
- Total Time: 72 minutes
- Yield: 8–10 cookies 1x
Description
Decadent brownie cookies with a gooey, molten chocolate lava center. A perfect indulgent treat!
Ingredients
- 1 cup (2 sticks) unsalted butter, melted
- 2 cups granulated sugar
- 1 cup unsweetened cocoa powder
- 1 teaspoon salt
- 1 teaspoon baking powder
- 4 large eggs
- 1 teaspoon vanilla extract
- 1 cup all-purpose flour
- 4 ounces bittersweet chocolate, finely chopped
- 4 tablespoons (1/2 stick) unsalted butter
- 2 large egg yolks
- 2 tablespoons granulated sugar
- 1/4 teaspoon vanilla extract
- Pinch of salt
- Powdered sugar, for dusting
- Sea salt flakes, for sprinkling
- Chocolate shavings
- Vanilla ice cream, for serving
Instructions
- In a heatproof bowl set over a saucepan of simmering water (make sure the bottom of the bowl doesn’t touch the water!), combine the chopped bittersweet chocolate and butter. Stir frequently until completely melted and smooth. Remove from heat.
- In a separate bowl, whisk together the egg yolks and sugar until pale and slightly thickened. This usually takes about a minute or two.
- Slowly drizzle a small amount of the melted chocolate mixture into the egg yolk mixture while whisking constantly. This will gradually raise the temperature of the egg yolks. Continue adding the chocolate in a slow, steady stream until it’s all incorporated.
- Stir in the vanilla extract and a pinch of salt to enhance the flavors.
- Line a small baking sheet with parchment paper. Drop rounded tablespoons of the chocolate mixture onto the parchment paper, spacing them apart. You should get about 8-10 lava centers. Place the baking sheet in the freezer for at least 30 minutes, or until the lava centers are firm enough to handle. This is important so they don’t melt completely during baking. You can even freeze them overnight!
- In a large bowl, melt the butter in the microwave or in a saucepan over low heat. Make sure it’s completely melted but not boiling hot.
- Add the granulated sugar to the melted butter and whisk until well combined. The mixture should be smooth and slightly glossy.
- Sift in the unsweetened cocoa powder, salt, and baking powder. This helps prevent lumps and ensures even distribution. Whisk until everything is well incorporated. The mixture will be quite thick at this point.
- Crack in the eggs one at a time, whisking well after each addition. Make sure each egg is fully incorporated before adding the next. The mixture will become smoother and more emulsified.
- Add the vanilla extract and stir to combine.
- Gradually add the all-purpose flour, mixing until just combined. Be careful not to overmix the dough, as this can result in tough cookies. A few streaks of flour are okay.
- Preheat your oven to 350°F (175°C). Line a baking sheet with parchment paper or a silicone baking mat.
- Using a cookie scoop or a spoon, scoop out a generous tablespoon of brownie cookie dough. Flatten it slightly in your palm.
- Place a frozen lava center on top of the flattened cookie dough.
- Scoop another tablespoon of cookie dough and flatten it. Carefully place it on top of the lava center, gently pressing the edges to seal the lava center inside. Make sure the lava center is completely enclosed in the dough.
- Place the assembled cookies on the prepared baking sheet, spacing them about 2 inches apart.
- Bake for 10-12 minutes, or until the edges of the cookies are set and the centers are still slightly soft. Be careful not to overbake them, as you want the lava center to remain molten.
- Let the cookies cool on the baking sheet for a few minutes before transferring them to a wire rack to cool completely. The lava center will be very hot, so be careful when handling them.
- Dust with Powdered Sugar (Optional): Once the cookies have cooled slightly, dust them with powdered sugar for a beautiful presentation.
- Sprinkle with Sea Salt (Optional): A sprinkle of sea salt flakes adds a delightful salty-sweet contrast.
- Add Chocolate Shavings (Optional): For an extra touch of chocolatey goodness, add some chocolate shavings.
- Serve Warm: These cookies are best served warm, when the lava center is still molten and gooey.
- Pair with Ice Cream (Optional): For the ultimate indulgence, serve the cookies with a scoop of vanilla ice cream. The cold ice cream and warm cookie create a heavenly combination.
- Enjoy! Take a bite and experience the rich, fudgy brownie cookie with the molten chocolate lava center. You deserve it!
Notes
- Don’t Overbake: Overbaking is the enemy of a molten lava center. Keep a close eye on the cookies and remove them from the oven when the edges are set but the centers are still slightly soft.
- Freeze the Lava Centers: Freezing the lava centers is crucial for preventing them from melting completely during baking. Make sure they are firm to the touch before assembling the cookies.
- Use High-Quality Chocolate: The quality of the chocolate will greatly impact the flavor of the cookies. Use a good-quality bittersweet chocolate for the lava centers.
- Don’t Overmix the Dough: Overmixing the dough can result in tough cookies. Mix until just combined.
- Adjust Baking Time: Baking times may vary depending on your oven. Keep a close eye on the cookies and adjust the baking time as needed.
- Storage: Store leftover cookies in an airtight container at room temperature for up to 3 days. Reheat in the microwave for a few seconds to re-melt the lava center.
- Prep Time: 30 minutes
- Cook Time: 10 minutes

Leave a Comment