

Chocolate Chip Cookies: Is there anything more comforting than the aroma of warm, freshly baked chocolate chip cookies wafting through your home? I think not! These aren’t just cookies; they’re edible hugs, little bites of happiness that instantly transport you back to childhood.
The history of the chocolate chip cookie is surprisingly recent. Ruth Graves Wakefield, of the Toll House Inn in Massachusetts, is credited with inventing them in the 1930s. Legend has it that she was attempting to make chocolate butterscotch nut cookies but ran out of baker’s chocolate. In a pinch, she chopped up a Nestle semi-sweet chocolate bar, expecting it to melt and create a chocolate cookie. Instead, the chocolate chips held their shape, and a legend was born!
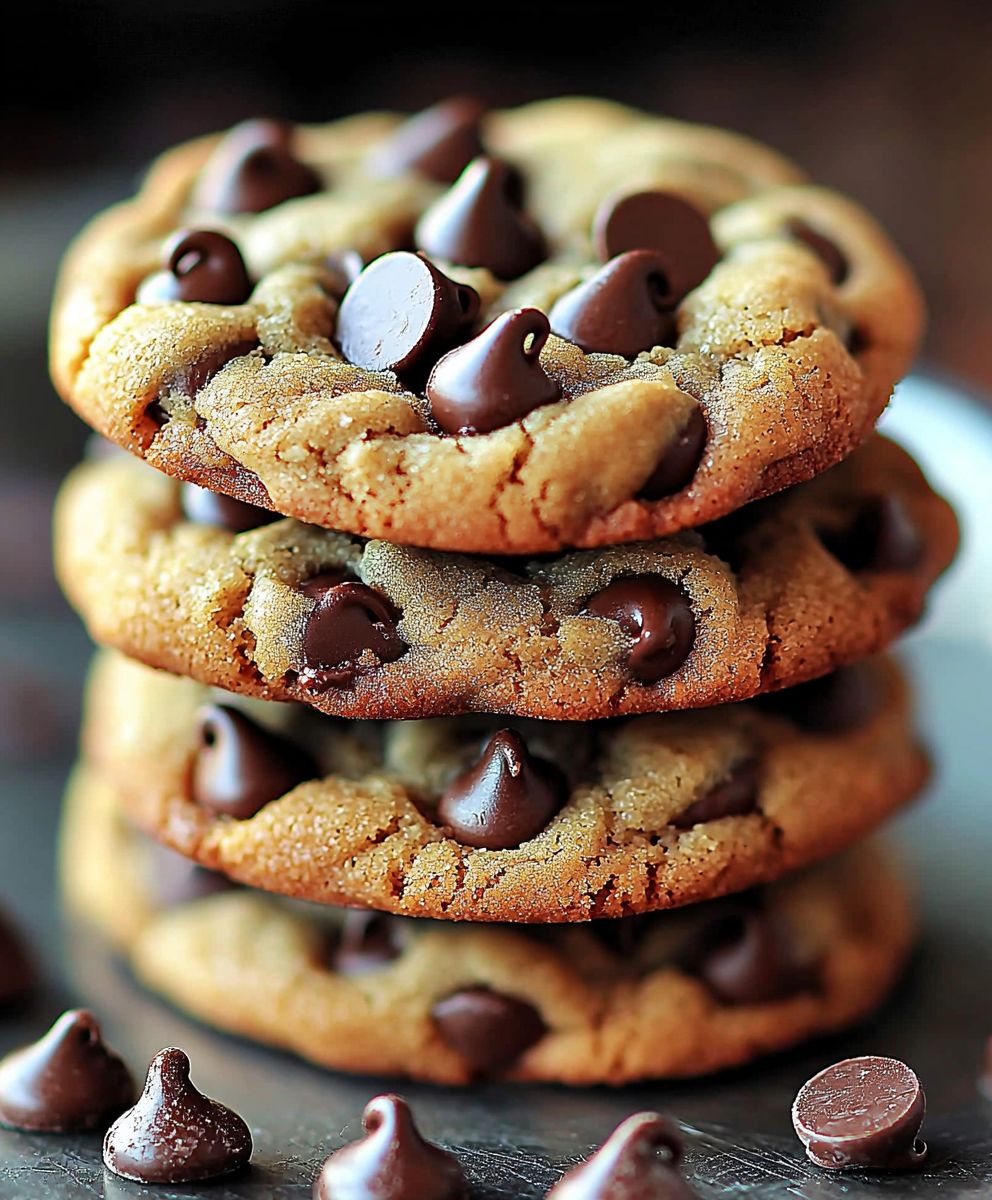
But why are chocolate chip cookies so universally loved? It’s a combination of factors, really. The satisfying crunch of the edges gives way to a soft, chewy center. The rich, buttery flavor is perfectly balanced by the sweet, melty chocolate chips. And let’s be honest, they’re incredibly easy to make! Whether you’re a seasoned baker or a kitchen novice, you can whip up a batch of these delightful treats in no time. So, grab your mixing bowl, preheat your oven, and let’s get baking! I’m going to share my absolute favorite recipe for perfect chocolate chip cookies every single time.

Ingredients:
- 2 1/4 cups all-purpose flour
- 1 teaspoon baking soda
- 1 teaspoon salt
- 1 cup (2 sticks) unsalted butter, softened
- 3/4 cup granulated sugar
- 3/4 cup packed brown sugar
- 1 teaspoon vanilla extract
- 2 large eggs
- 2 cups chocolate chips (semi-sweet or your favorite)
- Optional: 1 cup chopped nuts (walnuts, pecans, or macadamia nuts work well)
Preparing the Dough:
- Combine Dry Ingredients: In a medium bowl, whisk together the flour, baking soda, and salt. This ensures that the baking soda and salt are evenly distributed throughout the flour, which is crucial for proper leavening and flavor. Set this bowl aside for later.
- Cream Butter and Sugars: In a large bowl (or the bowl of your stand mixer), cream together the softened butter, granulated sugar, and brown sugar until light and fluffy. This process incorporates air into the butter and sugar mixture, which contributes to the cookies’ light and airy texture. I usually cream them for about 3-5 minutes on medium speed. Make sure to scrape down the sides of the bowl occasionally to ensure everything is evenly mixed.
- Add Vanilla and Eggs: Beat in the vanilla extract until combined. Then, add the eggs one at a time, beating well after each addition. It’s important to fully incorporate each egg before adding the next. This helps to create a smooth and emulsified batter. Again, scrape down the sides of the bowl as needed.
- Gradually Add Dry Ingredients: Gradually add the dry ingredients to the wet ingredients, mixing on low speed until just combined. Be careful not to overmix! Overmixing can develop the gluten in the flour, resulting in tough cookies. Mix until you see the flour just disappear.
- Stir in Chocolate Chips and Nuts (Optional): Stir in the chocolate chips and nuts (if using) until evenly distributed throughout the dough. I prefer to do this by hand to avoid overmixing.
- Chill the Dough (Important!): Cover the bowl with plastic wrap and chill the dough in the refrigerator for at least 30 minutes, or even better, for 2 hours. Chilling the dough allows the gluten to relax, which results in chewier cookies. It also prevents the cookies from spreading too thin during baking. I often chill mine overnight for the best results.
Baking the Cookies:
- Preheat Oven: Preheat your oven to 375°F (190°C). Make sure your oven rack is positioned in the center of the oven for even baking.
- Prepare Baking Sheets: Line baking sheets with parchment paper or silicone baking mats. This prevents the cookies from sticking to the baking sheets and makes cleanup a breeze. Parchment paper also helps to ensure even browning.
- Scoop Dough: Use a cookie scoop or spoon to drop rounded tablespoons of dough onto the prepared baking sheets, leaving about 2 inches between each cookie. This allows the cookies to spread without running into each other. If you want larger cookies, use a larger scoop.
- Bake: Bake for 9-11 minutes, or until the edges are golden brown and the centers are still slightly soft. The baking time may vary depending on your oven, so keep a close eye on the cookies. Don’t overbake them, or they will be dry.
- Cool: Remove the baking sheets from the oven and let the cookies cool on the baking sheets for a few minutes before transferring them to a wire rack to cool completely. This allows the cookies to firm up slightly and prevents them from breaking when you move them.
Tips and Variations:
- For Chewier Cookies: Use more brown sugar than granulated sugar. Brown sugar contains molasses, which adds moisture and chewiness to the cookies.
- For Crispier Cookies: Use more granulated sugar than brown sugar. Granulated sugar helps the cookies spread and crisp up.
- For Thicker Cookies: Chill the dough for a longer period of time. This will prevent the cookies from spreading too thin during baking. You can also add a tablespoon or two of cornstarch to the dough.
- Add Different Flavors: Experiment with different extracts, such as almond extract or peppermint extract. You can also add spices, such as cinnamon or nutmeg.
- Use Different Chocolate: Try using different types of chocolate chips, such as milk chocolate chips, dark chocolate chips, or white chocolate chips. You can also chop up a chocolate bar and add it to the dough.
- Add Other Mix-Ins: Get creative with your mix-ins! Try adding dried cranberries, raisins, pretzels, or even potato chips.
- Sea Salt: Sprinkle a little bit of sea salt on top of the cookies after they come out of the oven. The salt enhances the sweetness of the chocolate and adds a nice salty-sweet contrast.
- Browning Butter: For a nutty and complex flavor, brown the butter before creaming it with the sugars. To do this, melt the butter in a saucepan over medium heat. Continue cooking, swirling the pan occasionally, until the butter turns a golden brown color and has a nutty aroma. Be careful not to burn the butter. Let the browned butter cool slightly before using it in the recipe.
- Freezing the Dough: You can freeze the cookie dough for later use. Scoop the dough into balls and place them on a baking sheet lined with parchment paper. Freeze for about 30 minutes, or until the dough is firm. Then, transfer the frozen dough balls to a freezer bag or container. The dough can be stored in the freezer for up to 3 months. When you’re ready to bake the cookies, simply bake them from frozen, adding a few extra minutes to the baking time.
- Storing the Cookies: Store the baked cookies in an airtight container at room temperature for up to 3 days. They can also be stored in the freezer for up to 2 months.
Troubleshooting:
- Cookies are too flat: This could be due to several factors, including using softened butter that is too warm, not chilling the dough long enough, or using too much sugar. Make sure your butter is softened but still cool to the touch. Chill the dough for at least 30 minutes, or longer if possible. And double-check your sugar measurements.
- Cookies are too dry: This could be due to overbaking or using too much flour. Be careful not to overbake the cookies. Bake them until the edges are golden brown and the centers are still slightly soft. And make sure you’re measuring your flour correctly. Spoon the flour into the measuring cup and level it off with a knife. Don’t pack the flour into the cup.
- Cookies are too hard: This could be due to overmixing the dough or using too much flour. Be careful not to overmix the dough. Mix until the flour is just combined. And make sure you’re measuring your flour correctly.
- Cookies are not spreading: This could be due to using butter that is too cold or not using enough sugar. Make sure your butter is softened but still cool to the touch. And double-check your sugar measurements.
- Cookies are burning on the bottom: This could be due to using a dark baking sheet or baking the cookies on the bottom rack of the oven. Use a light-colored baking sheet and bake the cookies on the center rack of the oven.
Serving Suggestions:
- Serve warm with a glass of cold milk.
- Enjoy with a scoop of vanilla ice cream.
- Pack them in a lunchbox for a sweet treat.
- Give them as a gift to friends and family.
- Crumble them over yogurt or oatmeal.
Enjoy your homemade chocolate chip cookies!
Conclusion:
So, there you have it! These aren’t just any chocolate chip cookies; they’re the chocolate chip cookies you’ve been searching for. From the perfectly crisp edges to the gooey, melt-in-your-mouth center, every bite is a symphony of textures and flavors. The rich, buttery dough, the generous scattering of chocolate chips, and that hint of vanilla all come together to create a truly unforgettable treat. I know, I know, I’m biased, but trust me on this one you absolutely need to try this recipe.
Why is this recipe a must-try? Because it’s foolproof! I’ve spent years perfecting it, tweaking the ingredients and techniques until I achieved cookie nirvana. Whether you’re a seasoned baker or a complete novice, you’ll be able to whip up a batch of these beauties with ease. Plus, the ingredients are simple and readily available, so you don’t have to go on a wild goose chase to find obscure items. And let’s be honest, who can resist a warm, freshly baked chocolate chip cookie? They’re the ultimate comfort food, perfect for any occasion a cozy night in, a celebratory gathering, or simply a sweet pick-me-up.
Serving Suggestions and Variations:
The possibilities are endless! While these cookies are absolutely divine on their own, there are plenty of ways to elevate them even further. For a classic pairing, serve them warm with a tall glass of cold milk. Or, if you’re feeling a bit more adventurous, try crumbling them over a scoop of vanilla ice cream for an irresistible dessert sundae. You could even use them to make ice cream sandwiches simply sandwich a scoop of your favorite ice cream between two cookies and freeze for a few hours. Trust me, it’s a game-changer!
And don’t be afraid to get creative with the recipe! Feel free to experiment with different types of chocolate chips dark chocolate, milk chocolate, white chocolate, or even a combination of all three. You could also add chopped nuts, such as walnuts, pecans, or macadamia nuts, for extra crunch and flavor. For a hint of spice, try adding a pinch of cinnamon or nutmeg to the dough. Or, if you’re a fan of sea salt, sprinkle a few flakes on top of the cookies before baking for a sweet and salty treat. Another fun variation is to add a tablespoon of instant espresso powder to the dough for a mocha-flavored cookie. The key is to have fun and make it your own!
I’m so confident that you’ll love this recipe that I can’t wait to hear about your experience. So, go ahead, preheat your oven, gather your ingredients, and get baking! Once you’ve tried these chocolate chip cookies, I guarantee you’ll be making them again and again. And please, don’t be shy share your photos and stories with me! Tag me on social media and let me know what you think. I’m always thrilled to see your creations and hear about your baking adventures. Happy baking!
Remember to adjust baking time based on your oven. Ovens can vary, so keep an eye on your cookies and adjust the baking time accordingly. You’re looking for golden brown edges and a slightly soft center. Don’t overbake them, or they’ll be dry and crumbly. And most importantly, have fun! Baking should be a relaxing and enjoyable experience. So put on some music, pour yourself a glass of wine, and let the aroma of freshly baked cookies fill your home. It’s the perfect way to unwind and create something delicious at the same time.
Chocolate Chip Cookies: The Ultimate Guide to Baking Perfection
Classic, chewy chocolate chip cookies with a perfect balance of soft and crispy. Easy to make and always a crowd-pleaser!
Ingredients
- 2 1/4 cups all-purpose flour
- 1 teaspoon baking soda
- 1 teaspoon salt
- 1 cup (2 sticks) unsalted butter, softened
- 3/4 cup granulated sugar
- 3/4 cup packed brown sugar
- 1 teaspoon vanilla extract
- 2 large eggs
- 2 cups chocolate chips (semi-sweet or your favorite)
- Optional: 1 cup chopped nuts (walnuts, pecans, or macadamia nuts work well)
Instructions
- Combine Dry Ingredients: In a medium bowl, whisk together the flour, baking soda, and salt. Set aside.
- Cream Butter and Sugars: In a large bowl (or stand mixer), cream together the softened butter, granulated sugar, and brown sugar until light and fluffy (3-5 minutes on medium speed). Scrape down the sides of the bowl.
- Add Vanilla and Eggs: Beat in the vanilla extract until combined. Add the eggs one at a time, beating well after each addition. Scrape down the sides of the bowl.
- Gradually Add Dry Ingredients: Gradually add the dry ingredients to the wet ingredients, mixing on low speed until just combined. Be careful not to overmix.
- Stir in Chocolate Chips and Nuts (Optional): Stir in the chocolate chips and nuts (if using) until evenly distributed.
- Chill the Dough (Important!): Cover the bowl with plastic wrap and chill the dough in the refrigerator for at least 30 minutes, or preferably 2 hours (or overnight for best results).
- Preheat Oven: Preheat your oven to 375°F (190°C). Position the oven rack in the center.
- Prepare Baking Sheets: Line baking sheets with parchment paper or silicone baking mats.
- Scoop Dough: Use a cookie scoop or spoon to drop rounded tablespoons of dough onto the prepared baking sheets, leaving about 2 inches between each cookie.
- Bake: Bake for 9-11 minutes, or until the edges are golden brown and the centers are still slightly soft.
- Cool: Remove the baking sheets from the oven and let the cookies cool on the baking sheets for a few minutes before transferring them to a wire rack to cool completely.
Notes
- For Chewier Cookies: Use more brown sugar than granulated sugar.
- For Crispier Cookies: Use more granulated sugar than brown sugar.
- For Thicker Cookies: Chill the dough for a longer period of time. You can also add a tablespoon or two of cornstarch to the dough.
- Add Different Flavors: Experiment with different extracts, such as almond extract or peppermint extract. You can also add spices, such as cinnamon or nutmeg.
- Use Different Chocolate: Try using different types of chocolate chips, such as milk chocolate chips, dark chocolate chips, or white chocolate chips. You can also chop up a chocolate bar and add it to the dough.
- Add Other Mix-Ins: Get creative with your mix-ins! Try adding dried cranberries, raisins, pretzels, or even potato chips.
- Sea Salt: Sprinkle a little bit of sea salt on top of the cookies after they come out of the oven. The salt enhances the sweetness of the chocolate and adds a nice salty-sweet contrast.
- Browning Butter: For a nutty and complex flavor, brown the butter before creaming it with the sugars. To do this, melt the butter in a saucepan over medium heat. Continue cooking, swirling the pan occasionally, until the butter turns a golden brown color and has a nutty aroma. Be careful not to burn the butter. Let the browned butter cool slightly before using it in the recipe.
- Freezing the Dough: You can freeze the cookie dough for later use. Scoop the dough into balls and place them on a baking sheet lined with parchment paper. Freeze for about 30 minutes, or until the dough is firm. Then, transfer the frozen dough balls to a freezer bag or container. The dough can be stored in the freezer for up to 3 months. When you’re ready to bake the cookies, simply bake them from frozen, adding a few extra minutes to the baking time.
- Storing the Cookies: Store the baked cookies in an airtight container at room temperature for up to 3 days. They can also be stored in the freezer for up to 2 months.


Leave a Comment