

Birria tacos, the culinary sensation sweeping the nation, are more than just a trendy food; they’re a deeply flavorful and satisfying experience. Have you ever tasted something so rich and complex that it felt like a warm hug on a chilly day? That’s the magic of birria. These aren’t your average tacos; they’re a symphony of tender, slow-cooked meat, crispy tortillas, and a vibrant consommé that will leave you craving more.
Birria, traditionally a goat stew originating from Jalisco, Mexico, has a history steeped in tradition and celebration. It was initially considered a rustic dish, but over time, it evolved into a beloved staple, often served at festive occasions. The modern iteration, particularly birria tacos, has taken the world by storm, and for good reason! The combination of the savory, melt-in-your-mouth meat, the satisfying crunch of the tortilla, and the intensely flavorful dipping broth is simply irresistible.
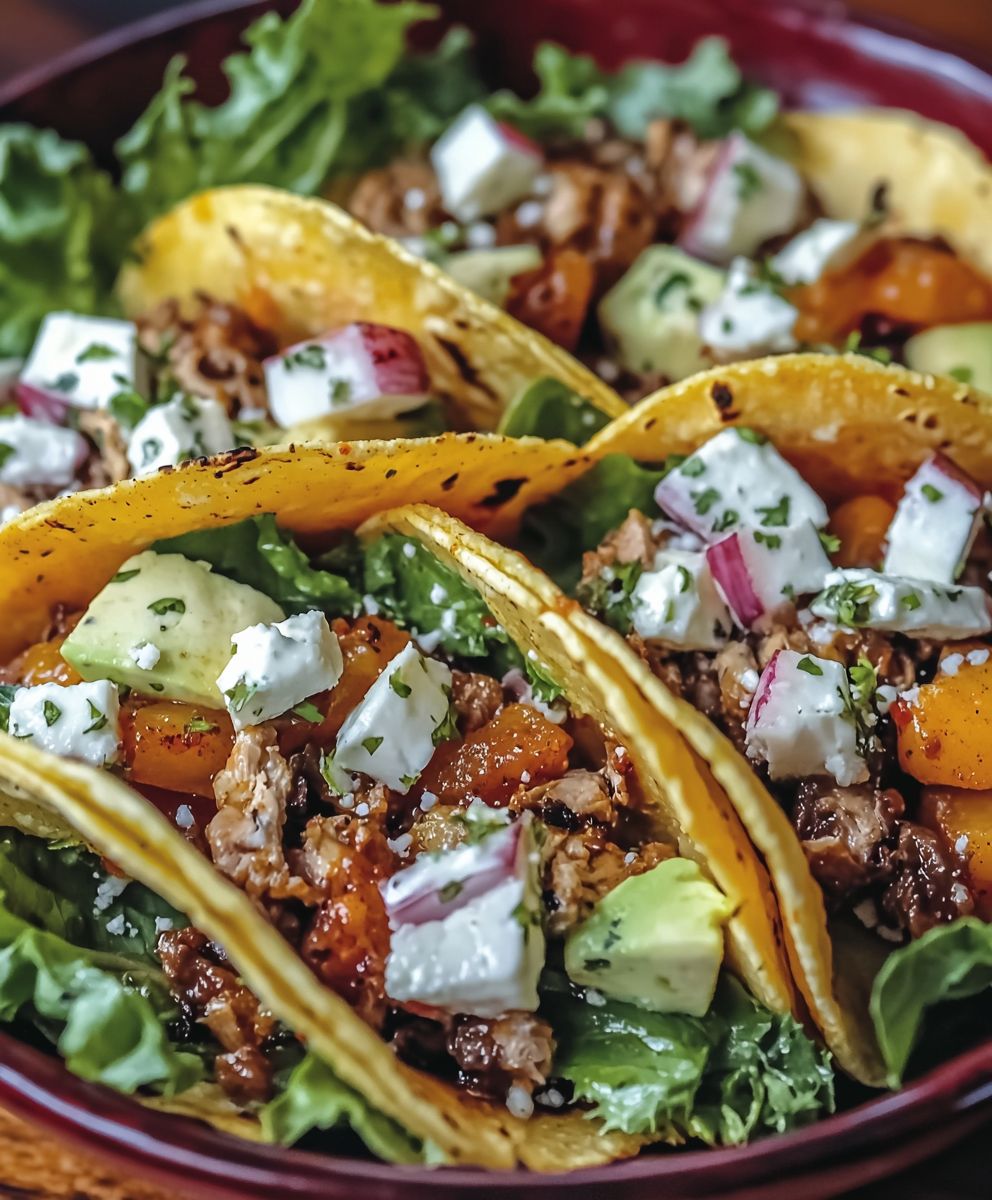
People adore birria tacos for their incredible depth of flavor. The slow-cooking process allows the meat to become incredibly tender and infused with the rich spices. The crispy tortilla adds a delightful textural contrast, and the consommé, often served as a dipping sauce, elevates the entire experience to another level. Whether you’re a seasoned foodie or simply looking for a delicious and comforting meal, birria tacos are guaranteed to impress. Get ready to embark on a culinary adventure that will tantalize your taste buds and leave you wanting more!

Ingredients:
- For the Birria:
- 3 lbs Beef Chuck Roast, cut into 2-3 inch chunks
- 2 lbs Beef Short Ribs
- 1 large White Onion, roughly chopped
- 6 cloves Garlic, minced
- 4 dried Guajillo Chiles, stemmed and seeded
- 4 dried Ancho Chiles, stemmed and seeded
- 2 dried Pasilla Chiles, stemmed and seeded
- 1 Chipotle Pepper in Adobo Sauce, plus 1 tablespoon adobo sauce
- 2 Roma Tomatoes, roughly chopped
- 1/4 cup Apple Cider Vinegar
- 2 tablespoons Mexican Oregano
- 1 tablespoon Ground Cumin
- 1 teaspoon Ground Cinnamon
- 1/2 teaspoon Ground Cloves
- 1/2 teaspoon Ground Ginger
- 1 Bay Leaf
- 8 cups Beef Broth (or water)
- Salt and Black Pepper to taste
- 2 tablespoons Olive Oil
- For the Tacos:
- 24 Corn Tortillas
- 2 cups Shredded Oaxaca Cheese (or Monterey Jack)
- 1/2 cup Chopped Cilantro
- 1/2 cup Chopped White Onion
- Lime wedges, for serving
- Birria Consommé (from the birria cooking liquid)
- Vegetable Oil, for frying
Preparing the Chile Paste:
- Rehydrate the Dried Chiles: This is a crucial step for getting the best flavor from your chiles. In a large pot, bring 4 cups of water to a boil. Remove from heat and add the guajillo, ancho, and pasilla chiles. Make sure they are submerged. Let them soak for about 20-30 minutes, or until they are softened and pliable. This will make them easier to blend.
- Blend the Chile Paste: Once the chiles are rehydrated, carefully transfer them (along with about 1 cup of the soaking liquid) to a blender. Add the chipotle pepper (with adobo sauce), tomatoes, onion, garlic, apple cider vinegar, oregano, cumin, cinnamon, cloves, and ginger. Blend until completely smooth. You might need to add a little more of the soaking liquid to get a smooth consistency. Be careful when blending hot liquids!
- Strain the Chile Paste (Optional but Recommended): For a super smooth birria, strain the chile paste through a fine-mesh sieve into a bowl. This will remove any small pieces of chile skin or seeds that didn’t fully blend. It’s an extra step, but it makes a big difference in the final texture.
Cooking the Birria:
- Sear the Beef: Season the beef chuck roast and short ribs generously with salt and pepper. In a large Dutch oven or heavy-bottomed pot, heat the olive oil over medium-high heat. Sear the beef in batches, making sure not to overcrowd the pot. Sear on all sides until nicely browned. This step is important for developing a rich, deep flavor. Remove the seared beef from the pot and set aside.
- Sauté Aromatics: In the same pot, add the remaining chopped onion and cook until softened, about 5 minutes. Add the minced garlic and cook for another minute until fragrant.
- Add the Chile Paste and Cook: Pour the prepared chile paste into the pot with the onions and garlic. Cook for about 5-7 minutes, stirring frequently, until the paste darkens slightly and becomes very fragrant. This step helps to deepen the flavor of the chiles.
- Combine and Simmer: Return the seared beef to the pot. Add the bay leaf and beef broth (or water). Bring the mixture to a boil, then reduce the heat to low, cover the pot, and simmer for at least 3-4 hours, or until the beef is incredibly tender and easily shreds with a fork. The longer it simmers, the more flavorful it will be! I usually aim for 4 hours.
- Shred the Beef: Once the beef is cooked, remove it from the pot and let it cool slightly. Shred the beef using two forks. Discard the bay leaf.
- Skim the Fat (Optional): If you want a less fatty birria, you can skim off some of the excess fat from the surface of the cooking liquid. I usually do this, but it’s up to your preference.
- Return the Shredded Beef to the Pot: Add the shredded beef back to the pot with the cooking liquid (consommé). Stir to combine. Taste and adjust seasoning with salt and pepper as needed.
Making the Birria Tacos:
- Prepare Your Work Station: This part goes quickly, so it’s best to have everything ready. Have your shredded birria, shredded cheese, chopped cilantro, chopped onion, consommé, and tortillas within easy reach. Heat a large skillet or griddle over medium heat.
- Dip the Tortillas: This is the key to a great birria taco! Dip each corn tortilla into the birria consommé, making sure to coat both sides. This will give the tortillas that beautiful red color and incredible flavor.
- Fill the Tacos: Place the dipped tortilla on the hot skillet. Add a generous amount of shredded birria and shredded cheese to one half of the tortilla.
- Fold and Cook: Fold the tortilla in half to create a taco. Cook for about 2-3 minutes per side, or until the tortilla is golden brown and crispy and the cheese is melted and gooey. You can press down on the taco with a spatula to help it crisp up.
- Repeat: Repeat the dipping, filling, and cooking process with the remaining tortillas and birria.
- Serve Immediately: Serve the birria tacos immediately, garnished with chopped cilantro and chopped onion. Don’t forget the lime wedges for squeezing over the tacos! And of course, serve with a bowl of the birria consommé for dipping.
Tips for the Best Birria Tacos:
- Don’t Skip the Chile Soaking: Rehydrating the dried chiles is essential for unlocking their full flavor potential.
- Sear the Beef Well: Searing the beef creates a beautiful crust and adds depth of flavor to the birria.
- Simmer Low and Slow: The longer the birria simmers, the more tender and flavorful it will become.
- Don’t Be Afraid to Adjust the Seasoning: Taste the birria throughout the cooking process and adjust the seasoning with salt and pepper as needed.
- Use Good Quality Tortillas: The quality of your tortillas will make a big difference in the final result. Look for fresh, authentic corn tortillas.
- Get Creative with Toppings: While cilantro and onion are the classic toppings, feel free to experiment with other toppings like salsa, guacamole, or pickled onions.
- Make it Ahead: The birria can be made ahead of time and stored in the refrigerator for up to 3 days. In fact, the flavor often improves after a day or two!
- Freeze for Later: Birria freezes beautifully! Store it in an airtight container for up to 3 months. Thaw overnight in the refrigerator before reheating.
- Experiment with Different Meats: While beef is the most common meat used for birria, you can also use goat, lamb, or a combination of meats.
- Spice it Up: If you like your birria spicy, add more chipotle peppers or a pinch of cayenne pepper to the chile paste.
Variations:
Quesabirria Tacos:
These are essentially birria tacos with extra cheese! Load up the tortillas with even more cheese before folding and cooking. The cheese will melt and create a crispy, cheesy crust on the outside of the taco.
Birria Ramen:
Use the birria consommé as a broth for ramen noodles. Top with shredded birria, a soft-boiled egg, green onions, and a sprinkle of sesame seeds.
Birria Pizza:
Top a pizza crust with birria, cheese, and your favorite pizza toppings. Bake until the crust is golden brown and the cheese is melted and bubbly.
Birria Grilled Cheese:
Spread birria and cheese between two slices of bread and grill until golden brown and the cheese is melted.
Birria Empanadas:
Fill empanada dough with birria and cheese and bake or fry until golden brown.
Birria Nachos:
Top tortilla chips with birria, cheese,
Conclusion:
So, there you have it! This Birria Tacos recipe is more than just a meal; it’s an experience. From the deeply savory, slow-braised meat to the crispy, cheese-laden tortillas dipped in that rich consommé, every bite is a symphony of flavors and textures that will leave you craving more. I truly believe this is a must-try for anyone who appreciates authentic Mexican cuisine or simply loves a good, comforting dish. Why is it a must-try? Because it’s incredibly delicious, surprisingly easy to make (despite the longer cooking time, it’s mostly hands-off!), and guaranteed to impress your friends and family. The depth of flavor achieved through the combination of dried chiles, spices, and slow cooking is simply unmatched. Forget those watered-down imitations; this is the real deal. But the fun doesn’t stop there! Feel free to get creative with your serving suggestions and variations. While I personally love serving these Birria Tacos with a simple garnish of chopped cilantro and onions, and a squeeze of lime, there are endless possibilities.Serving Suggestions & Variations:
* Elevate the Consommé: Add a splash of sherry vinegar or a squeeze of orange juice to the consommé for a brighter, more complex flavor. You can also garnish it with diced avocado or a dollop of Mexican crema. * Spice it Up: If you like things extra spicy, add a few more dried chiles de árbol to the braising liquid, or serve the tacos with a side of your favorite hot sauce. * Beyond Tacos: Don’t limit yourself to just tacos! The birria meat is also fantastic in burritos, quesadillas, or even served over rice. You can even use the consommé as a base for a hearty soup. * Cheese Please!: Experiment with different types of cheese. While Oaxaca cheese is traditional, Monterey Jack, mozzarella, or even a blend of cheeses will work beautifully. * Vegetarian Option: While this recipe is traditionally made with meat, you can adapt it for a vegetarian version by using mushrooms or jackfruit as a substitute. Just be sure to adjust the cooking time accordingly. I’ve poured my heart and soul into perfecting this recipe, and I’m confident that you’ll love it as much as I do. The key is to be patient with the slow braising process that’s where the magic happens! Don’t be afraid to experiment with different chiles and spices to find your perfect flavor profile. Now, it’s your turn! I wholeheartedly encourage you to give this Birria Tacos recipe a try. Gather your ingredients, put on some music, and get ready to embark on a culinary adventure. I promise you won’t be disappointed. And most importantly, I want to hear about your experience! Did you make any modifications? What did your family and friends think? Share your photos and stories in the comments below. I can’t wait to see your creations and hear your feedback. Happy cooking, and enjoy every delicious bite! Let me know if you have any questions, I’m always happy to help. This recipe is a labor of love, and I hope it brings as much joy to your table as it has to mine. Don’t forget to tag me in your social media posts so I can see your amazing Birria Tacos! Print
Birria Tacos: The Ultimate Guide to Making Authentic Mexican Birria Tacos
- Total Time: 285 minutes
- Yield: 24 tacos 1x
Description
Tender beef birria simmered in rich chile broth, shredded, and served in crispy, consommé-dipped tacos with melted cheese, cilantro, and onion.
Ingredients
- 3 lbs Beef Chuck Roast, cut into 2–3 inch chunks
- 2 lbs Beef Short Ribs
- 1 large White Onion, roughly chopped
- 6 cloves Garlic, minced
- 4 dried Guajillo Chiles, stemmed and seeded
- 4 dried Ancho Chiles, stemmed and seeded
- 2 dried Pasilla Chiles, stemmed and seeded
- 1 Chipotle Pepper in Adobo Sauce, plus 1 tablespoon adobo sauce
- 2 Roma Tomatoes, roughly chopped
- 1/4 cup Apple Cider Vinegar
- 2 tablespoons Mexican Oregano
- 1 tablespoon Ground Cumin
- 1 teaspoon Ground Cinnamon
- 1/2 teaspoon Ground Cloves
- 1/2 teaspoon Ground Ginger
- 1 Bay Leaf
- 8 cups Beef Broth (or water)
- Salt and Black Pepper to taste
- 2 tablespoons Olive Oil
- 24 Corn Tortillas
- 2 cups Shredded Oaxaca Cheese (or Monterey Jack)
- 1/2 cup Chopped Cilantro
- 1/2 cup Chopped White Onion
- Lime wedges, for serving
- Birria Consommé (from the birria cooking liquid)
- Vegetable Oil, for frying
Instructions
- In a large pot, bring 4 cups of water to a boil. Remove from heat and add the guajillo, ancho, and pasilla chiles. Make sure they are submerged. Let them soak for about 20-30 minutes, or until they are softened and pliable.
- Once the chiles are rehydrated, carefully transfer them (along with about 1 cup of the soaking liquid) to a blender. Add the chipotle pepper (with adobo sauce), tomatoes, onion, garlic, apple cider vinegar, oregano, cumin, cinnamon, cloves, and ginger. Blend until completely smooth. You might need to add a little more of the soaking liquid to get a smooth consistency. Be careful when blending hot liquids!
- For a super smooth birria, strain the chile paste through a fine-mesh sieve into a bowl.
- Season the beef chuck roast and short ribs generously with salt and pepper. In a large Dutch oven or heavy-bottomed pot, heat the olive oil over medium-high heat. Sear the beef in batches, making sure not to overcrowd the pot. Sear on all sides until nicely browned. Remove the seared beef from the pot and set aside.
- In the same pot, add the remaining chopped onion and cook until softened, about 5 minutes. Add the minced garlic and cook for another minute until fragrant.
- Pour the prepared chile paste into the pot with the onions and garlic. Cook for about 5-7 minutes, stirring frequently, until the paste darkens slightly and becomes very fragrant.
- Return the seared beef to the pot. Add the bay leaf and beef broth (or water). Bring the mixture to a boil, then reduce the heat to low, cover the pot, and simmer for at least 3-4 hours, or until the beef is incredibly tender and easily shreds with a fork.
- Once the beef is cooked, remove it from the pot and let it cool slightly. Shred the beef using two forks. Discard the bay leaf.
- If you want a less fatty birria, you can skim off some of the excess fat from the surface of the cooking liquid.
- Add the shredded beef back to the pot with the cooking liquid (consommé). Stir to combine. Taste and adjust seasoning with salt and pepper as needed.
- Have your shredded birria, shredded cheese, chopped cilantro, chopped onion, consommé, and tortillas within easy reach. Heat a large skillet or griddle over medium heat.
- Dip each corn tortilla into the birria consommé, making sure to coat both sides.
- Place the dipped tortilla on the hot skillet. Add a generous amount of shredded birria and shredded cheese to one half of the tortilla.
- Fold the tortilla in half to create a taco. Cook for about 2-3 minutes per side, or until the tortilla is golden brown and crispy and the cheese is melted and gooey. You can press down on the taco with a spatula to help it crisp up.
- Repeat the dipping, filling, and cooking process with the remaining tortillas and birria.
- Serve the birria tacos immediately, garnished with chopped cilantro and chopped onion. Serve with lime wedges and a bowl of the birria consommé for dipping.
Notes
- Rehydrating the dried chiles is essential for unlocking their full flavor potential.
- Searing the beef creates a beautiful crust and adds depth of flavor to the birria.
- The longer the birria simmers, the more tender and flavorful it will become.
- Taste the birria throughout the cooking process and adjust the seasoning with salt and pepper as needed.
- The quality of your tortillas will make a big difference in the final result. Look for fresh, authentic corn tortillas.
- While cilantro and onion are the classic toppings, feel free to experiment with other toppings like salsa, guacamole, or pickled onions.
- The birria can be made ahead of time and stored in the refrigerator for up to 3 days. In fact, the flavor often improves after a day or two!
- Birria freezes beautifully! Store it in an airtight container for up to 3 months. Thaw overnight in the refrigerator before reheating.
- While beef is the most common meat used for birria, you can also use goat, lamb, or a combination of meats.
- If you like your birria spicy, add more chipotle peppers or a pinch of cayenne pepper to the chile paste.
- Prep Time: 45 minutes
- Cook Time: 240 minutes


Leave a Comment