

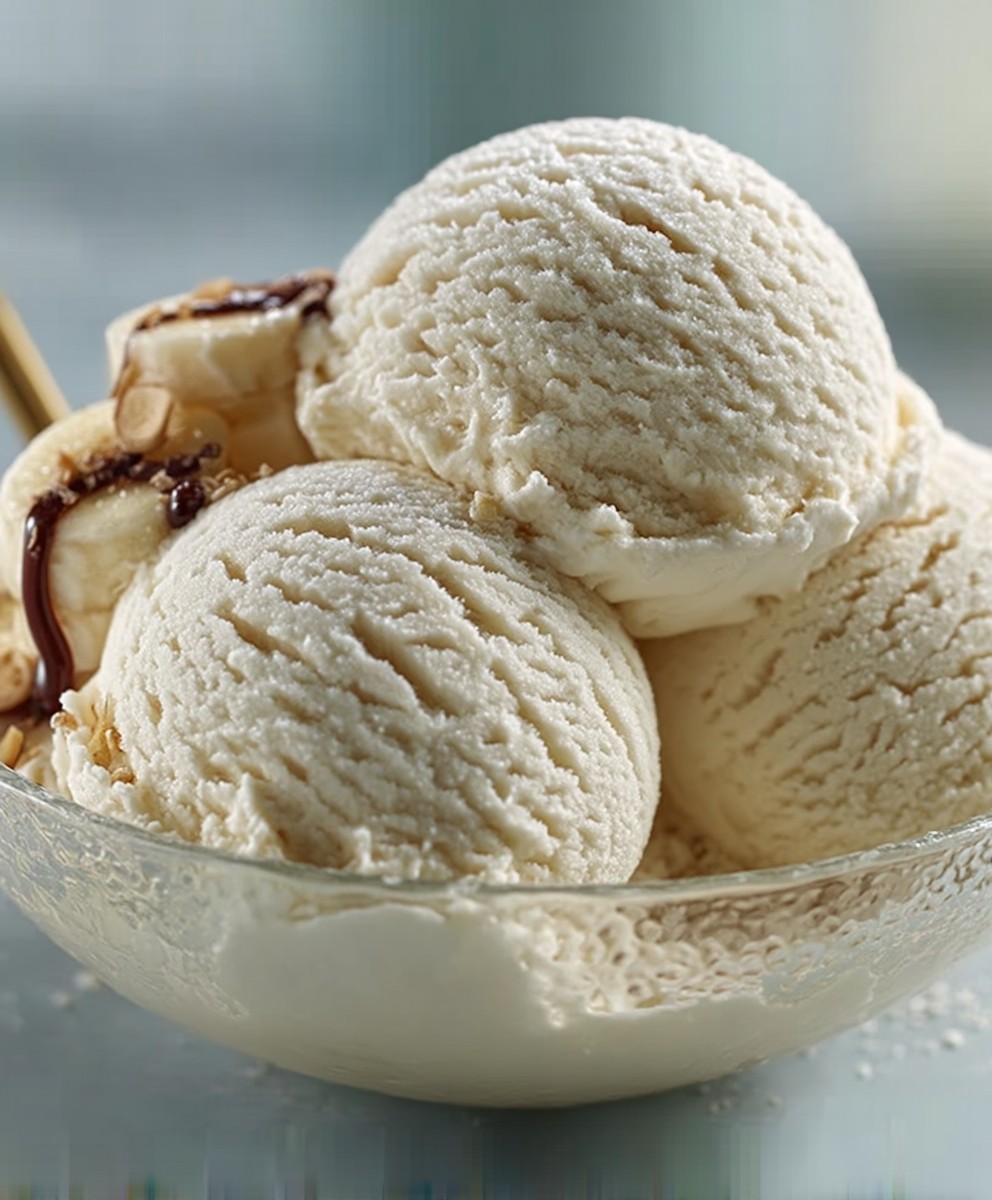
Banana ice cream, a delightful and surprisingly simple dessert, is about to become your new go-to treat! Imagine a creamy, dreamy, ice cream-like experience, but without the added sugars and complicated ingredients. Sounds too good to be true? Trust me, it’s not! This recipe transforms humble bananas into a frozen delight that will have you questioning everything you thought you knew about healthy desserts.
While the exact origins of using frozen bananas as a base for a dessert are a bit hazy, the concept has gained immense popularity in recent years as people seek healthier and more accessible alternatives to traditional ice cream. It’s a testament to the ingenuity of home cooks and food bloggers who have embraced the natural sweetness and creamy texture of bananas.
What makes banana ice cream so irresistible? It’s the perfect combination of simplicity, health, and deliciousness. The naturally sweet flavor of ripe bananas shines through, creating a satisfying treat without the need for refined sugars. The texture is incredibly smooth and creamy, mimicking the indulgence of traditional ice cream. Plus, it’s incredibly convenient! With just one ingredient and a blender or food processor, you can whip up a batch of this frozen goodness in minutes. Get ready to experience the magic of banana ice cream your taste buds will thank you!

Ingredients:
- 4 ripe bananas, peeled and sliced
- 1/4 cup milk (dairy or non-dairy)
- 1 teaspoon vanilla extract
- Optional: 2 tablespoons peanut butter, almond butter, or other nut butter
- Optional: 2 tablespoons cocoa powder for chocolate banana ice cream
- Optional: 1/4 cup chopped nuts, chocolate chips, or other toppings
- Optional: 1-2 tablespoons honey or maple syrup, to taste (if you prefer a sweeter ice cream)
Freezing the Bananas: The Foundation of Your Ice Cream
This is the most crucial step, so pay close attention! The bananas need to be properly frozen to achieve that creamy, ice cream-like texture. Trust me, I’ve tried shortcuts, and they just don’t work as well.
- Prepare the Bananas: Peel your bananas. Make sure they are ripe the riper, the sweeter and creamier your ice cream will be. Brown spots are perfectly fine!
- Slice the Bananas: Slice the bananas into roughly 1-inch thick pieces. This helps them freeze faster and more evenly, and it makes it easier for your food processor or blender to handle them later.
- Arrange on a Tray: Line a baking sheet or plate with parchment paper or a silicone mat. This prevents the banana slices from sticking to the surface and becoming impossible to remove.
- Freeze Solid: Spread the banana slices in a single layer on the prepared baking sheet. Make sure they aren’t touching each other too much, as this can cause them to freeze together in a clump. Place the baking sheet in the freezer and freeze for at least 2 hours, or preferably overnight. The bananas should be completely frozen solid. You should be able to tap them and hear a solid “thunk.”
Blending the Frozen Bananas: The Magic Happens Here
Now for the fun part! This is where the frozen bananas transform into creamy, dreamy ice cream. Be patient and follow these steps carefully.
- Prepare Your Equipment: Make sure you have a food processor or a high-powered blender. A regular blender might struggle with the frozen bananas, so a food processor is generally recommended. If using a blender, you may need to add a bit more liquid to help it blend.
- Add Frozen Bananas to the Processor: Remove the frozen banana slices from the freezer and add them to your food processor or blender. If they are stuck together, you can break them apart slightly with your hands.
- Start Blending: Pulse the bananas a few times to break them up into smaller pieces. This will help prevent your food processor or blender from overheating.
- Add Liquid: Add the milk (dairy or non-dairy) and vanilla extract. The milk helps to create a smoother, creamier texture. Start with the smaller amount of milk and add more as needed.
- Blend Until Smooth: Continue to blend, stopping occasionally to scrape down the sides of the bowl with a spatula. This ensures that all the banana pieces are incorporated and that you get a consistent texture. The mixture will go through several stages: first, it will look crumbly, then it will start to clump together, and finally, it will become smooth and creamy like soft-serve ice cream. This process can take several minutes, so be patient!
- Adjust Consistency: If the mixture is too thick, add a little more milk, one tablespoon at a time, until you reach your desired consistency. If it’s too thin, you can add a few more frozen banana slices.
Adding Flavors and Toppings: Customize Your Creation
This is where you can really get creative and make your banana ice cream your own! The possibilities are endless.
- Add Flavorings (Optional): If you want to add peanut butter, almond butter, cocoa powder, honey, or maple syrup, now is the time to do it. Add the flavorings to the food processor or blender and blend until they are fully incorporated. Taste and adjust the amount of flavoring to your liking. For example, if you’re adding peanut butter, start with 2 tablespoons and add more if you want a stronger peanut butter flavor.
- Incorporate Toppings (Optional): If you want to add chopped nuts, chocolate chips, or other toppings, you can either blend them in briefly at the end or stir them in by hand after the ice cream is blended. Blending them in will create a more uniform distribution of the toppings, while stirring them in will keep them more intact.
Serving and Storing: Enjoy Your Homemade Treat
Your banana ice cream is ready to be enjoyed! Here’s how to serve it and store any leftovers.
- Serve Immediately: The banana ice cream is best served immediately after blending, when it has a soft-serve consistency. You can scoop it into bowls or cones and enjoy!
- For a Firmer Consistency: If you prefer a firmer consistency, you can transfer the ice cream to a freezer-safe container and freeze it for another 1-2 hours. This will allow it to harden up a bit.
- Storing Leftovers: If you have any leftovers, store them in a freezer-safe container in the freezer. The ice cream will become quite hard when frozen solid, so you may need to let it thaw for a few minutes before scooping. It’s best to consume the ice cream within a week or two for the best flavor and texture. After that, it may start to develop ice crystals.
Tips and Tricks for Perfect Banana Ice Cream
Here are a few extra tips and tricks to help you make the best banana ice cream possible:
- Use Ripe Bananas: As mentioned earlier, ripe bananas are key to a sweet and creamy ice cream. Don’t be afraid to use bananas that are starting to brown.
- Freeze Bananas in a Single Layer: This prevents them from clumping together and ensures that they freeze evenly.
- Don’t Over-Blend: Over-blending can cause the ice cream to become too liquidy. Blend just until it reaches a smooth and creamy consistency.
- Adjust Liquid as Needed: The amount of liquid you need will depend on the ripeness of your bananas and the power of your food processor or blender. Add more liquid as needed to achieve your desired consistency.
- Experiment with Flavors: Don’t be afraid to experiment with different flavors and toppings. Some other popular additions include berries, chocolate sauce, caramel sauce, and sprinkles.
- For a Healthier Option: Use non-dairy milk and skip the added sweeteners for a healthier version of banana ice cream. The natural sweetness of the bananas is often enough!
- Troubleshooting: Too Icy? If your banana ice cream turns out icy, it’s likely due to not enough fat content. Adding a tablespoon or two of nut butter or even a small amount of coconut cream can help improve the texture. Also, make sure your bananas are frozen solid before blending.
- Troubleshooting: Not Sweet Enough? If your bananas weren’t ripe enough, or you simply prefer a sweeter ice cream, add a tablespoon or two of honey, maple syrup, or agave nectar while blending. Taste and adjust to your preference.
Variations to Try:
Chocolate Peanut Butter Banana Ice Cream:
Add 2 tablespoons of cocoa powder and 2 tablespoons of peanut butter while blending.
Berry Banana Ice Cream:
Add 1/2 cup of frozen berries (such as strawberries, blueberries, or raspberries) while blending.
Coffee Banana Ice Cream:
Add 1 tablespoon of instant coffee powder while blending.
Mint Chocolate Chip Banana Ice Cream:
Add 1/4 teaspoon of peppermint extract and 1/4 cup of mini chocolate chips after blending.
Tropical Banana Ice Cream:
Add 1/2 cup of frozen pineapple or mango chunks while blending.
I hope you enjoy making and eating this delicious and healthy banana ice cream! It’s a great way to satisfy your sweet tooth without any guilt. Let me know in the comments if you try it and what variations you come up with!
Conclusion:
So there you have it! This isn’t just another dessert; it’s a creamy, dreamy, guilt-free indulgence that will have you wondering why you ever bothered with store-bought ice cream in the first place. This banana ice cream recipe is a must-try for so many reasons. First and foremost, it’s incredibly simple. We’re talking minimal ingredients and effort for maximum flavor payoff. Secondly, it’s naturally sweet, meaning you can skip the refined sugars and still enjoy a satisfying treat. And finally, it’s endlessly customizable, allowing you to create your own signature flavor combinations.
But beyond the practical benefits, this recipe is a must-try because it’s pure joy in a bowl. The smooth, velvety texture and the subtle sweetness of the bananas create a truly delightful experience. It’s the perfect way to cool down on a hot day, satisfy a sweet craving, or simply treat yourself to something special. Trust me, once you try it, you’ll be hooked!
Now, let’s talk serving suggestions and variations, because the fun doesn’t stop with the basic recipe. For a classic touch, serve your banana ice cream in a waffle cone or a sundae dish, topped with a sprinkle of chocolate shavings or a drizzle of honey. If you’re feeling adventurous, try adding a dollop of peanut butter or a handful of chopped nuts for extra flavor and texture.
Looking for more exciting variations? How about adding a tablespoon of cocoa powder for a chocolate banana ice cream? Or blending in some fresh berries for a fruity twist? You could even add a splash of vanilla extract or a pinch of cinnamon for a warm, comforting flavor. The possibilities are truly endless!
Here are a few more ideas to get your creative juices flowing:
Serving Suggestions:
- Classic Sundae: Top with chocolate sauce, whipped cream, and a cherry.
- Banana Split: Arrange scoops between banana halves, add pineapple and strawberry toppings, and finish with whipped cream and nuts.
- Affogato Style: Pour a shot of hot espresso over a scoop of banana ice cream for a delightful coffee-infused treat.
- Smoothie Booster: Add a scoop to your favorite smoothie for extra creaminess and sweetness.
Flavor Variations:
- Chocolate Chip: Fold in mini chocolate chips after blending.
- Peanut Butter: Blend in a tablespoon of peanut butter for a nutty flavor.
- Berry Blast: Add a handful of fresh or frozen berries (strawberries, blueberries, raspberries) during blending.
- Cinnamon Spice: Add a pinch of cinnamon and nutmeg for a warm, comforting flavor.
- Coffee Infusion: Blend in a teaspoon of instant coffee granules for a coffee kick.
I truly believe that this banana ice cream recipe will become a staple in your kitchen. It’s a healthy, delicious, and versatile treat that everyone will love. So, what are you waiting for? Grab some ripe bananas, dust off your blender or food processor, and get ready to experience the magic of homemade banana ice cream.
I’m so excited for you to try this recipe and discover your own favorite variations. And when you do, please, please, please share your experience! Leave a comment below, tag me in your photos on social media, or simply tell a friend about it. I can’t wait to hear what you think and see what delicious creations you come up with. Happy blending! Let me know what you think of this easy banana ice cream!
Banana Ice Cream: The Ultimate Guide to Homemade Bliss
Easy, healthy, and delicious banana ice cream made with just a few ingredients! Customize with your favorite flavors and toppings for a guilt-free treat.
Ingredients
- 4 ripe bananas, peeled and sliced
- 1/4 cup milk (dairy or non-dairy)
- 1 teaspoon vanilla extract
- Optional: 2 tablespoons peanut butter, almond butter, or other nut butter
- Optional: 2 tablespoons cocoa powder for chocolate banana ice cream
- Optional: 1/4 cup chopped nuts, chocolate chips, or other toppings
- Optional: 1-2 tablespoons honey or maple syrup, to taste (if you prefer a sweeter ice cream)
Instructions
- Peel ripe bananas (brown spots are fine!).
- Slice into roughly 1-inch thick pieces.
- Line a baking sheet with parchment paper.
- Spread banana slices in a single layer and freeze for at least 2 hours, preferably overnight, until completely frozen.
- Use a food processor or high-powered blender.
- Remove the frozen banana slices from the freezer and add them to your food processor or blender. If they are stuck together, you can break them apart slightly with your hands.
- Pulse the bananas a few times to break them up into smaller pieces.
- Add the milk (dairy or non-dairy) and vanilla extract.
- Blend, scraping down the sides as needed, until smooth and creamy like soft-serve. This may take several minutes.
- If too thick, add more milk (1 tablespoon at a time). If too thin, add more frozen banana slices.
- Add peanut butter, almond butter, cocoa powder, honey, or maple syrup and blend until incorporated.
- Blend in chopped nuts, chocolate chips, or other toppings briefly, or stir them in by hand.
- Enjoy immediately for a soft-serve consistency.
- Freeze for 1-2 hours for a firmer texture.
- Store in a freezer-safe container. Thaw for a few minutes before scooping. Best consumed within a week or two.
Notes
- Use ripe bananas for the best sweetness and creaminess.
- Freeze bananas in a single layer to prevent clumping.
- Don’t over-blend, or the ice cream may become too liquidy.
- Adjust the amount of liquid based on the ripeness of the bananas and the power of your blender/food processor.
- Experiment with different flavors and toppings!
- For a healthier option, use non-dairy milk and skip added sweeteners.
- Troubleshooting: Too Icy? Add a tablespoon or two of nut butter or even a small amount of coconut cream can help improve the texture. Also, make sure your bananas are frozen solid before blending.
- Troubleshooting: Not Sweet Enough? If your bananas weren’t ripe enough, or you simply prefer a sweeter ice cream, add a tablespoon or two of honey, maple syrup, or agave nectar while blending. Taste and adjust to your preference.

Leave a Comment