

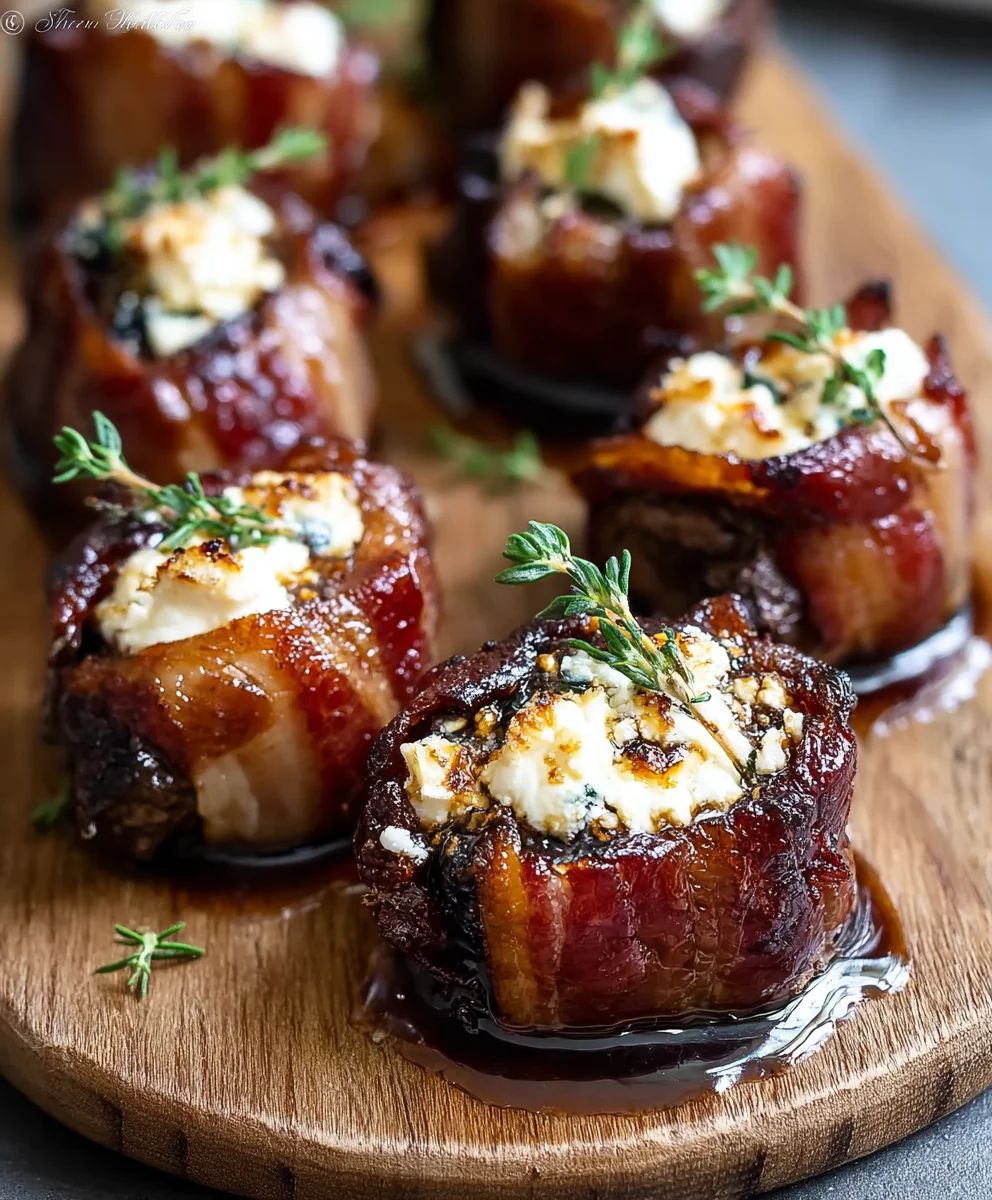
Copycat Costco Chicken Bake is more than just a meal; it’s a cherished culinary experience that brings the iconic food court classic directly into your home kitchen. I’ve always been captivated by the sheer genius of this beloved bake – that perfect harmony of tender, seasoned chicken, creamy bacon-cheddar filling, all encased in a delightfully crispy crust. It’s no wonder this particular item has achieved legendary status among Costco shoppers, becoming a staple for quick, satisfying lunches or dinners.
While the original Costco food court item might not boast ancient historical roots, its cultural significance in modern American casual dining is undeniable. For many, it evokes a sense of comfort and nostalgia, a dependable treat after a bustling shopping trip. Its irresistible blend of savory flavors and comforting textures has solidified its place as a go-to favorite for millions. Today, I am absolutely thrilled to share with you a meticulously crafted recipe designed to help you recreate that exact magic. My aim is to provide you with a foolproof method for making the perfect
Copycat Costco Chicken Bake
that truly rivals the original, delivering that same satisfying crunch and rich, cheesy goodness whenever the craving strikes.

Ingredients:
- For the Dough:
- 1 cup warm water (about 105-115°F / 40-46°C)
- 2 ¼ teaspoons active dry yeast (one standard packet)
- 1 tablespoon granulated sugar
- 2 ½ cups all-purpose flour, plus more for dusting
- 1 teaspoon salt
- 2 tablespoons olive oil, plus more for greasing the bowl
- For the Chicken Filling:
- 2 cups cooked chicken, shredded or diced (about 2 large chicken breasts)
- 6 slices bacon, cooked until crispy and crumbled
- ½ cup good quality Caesar salad dressing
- ¼ cup chopped green onions (scallions), white and light green parts
- 1 teaspoon garlic powder
- ½ teaspoon black pepper
- For the Cheese Blend:
- 1 cup shredded mozzarella cheese
- ½ cup shredded provolone cheese
- ¼ cup grated Parmesan cheese
- For the Topping/Glaze:
- 1 large egg, whisked with 1 tablespoon water (for egg wash)
- 2 tablespoons grated Parmesan cheese (for sprinkling)
Preparing the Perfect Dough for Your Copycat Costco Chicken Bake
Creating the foundation for your Copycat Costco Chicken Bake begins with a beautiful, pliable dough. This isn’t just any dough; it’s designed to be sturdy enough to hold all that delicious filling, yet tender and flavorful once baked to a golden perfection. Patience is key here, but I promise, the results are absolutely worth every minute spent nurturing this crucial component. A well-made dough is what truly elevates this homemade version to a restaurant-quality experience.
- Activate the Yeast: In a large mixing bowl or the bowl of a stand mixer, pour in the warm water. It’s incredibly important that the water temperature is just right – think comfortably warm to the touch, not hot. Too hot, and you’ll kill the yeast, rendering it inactive; too cold, and it won’t activate properly. Sprinkle the active dry yeast and the granulated sugar over the water. Give it a gentle stir with a spoon or whisk, just enough to ensure everything is mixed, and then let it sit undisturbed for about 5-10 minutes. You’ll know it’s ready when the mixture becomes delightfully foamy and bubbly on top, indicating that the yeast is alive, thriving, and ready to work its magic in making your Copycat Costco Chicken Bake crust light and airy. This activation step is absolutely crucial for a successful, well-risen dough!
- Combine Dry Ingredients: While the yeast is proofing, take a separate medium-sized bowl and whisk together the all-purpose flour and salt. This seemingly simple step is important because it ensures that the salt, which controls yeast activity and adds flavor, is evenly distributed throughout the flour. This prevents any pockets of overly salty dough in your finished product.
- Mix the Dough: Once your yeast mixture has transformed into a gloriously foamy spectacle, indicating full activity, add the 2 tablespoons of olive oil to it. The olive oil contributes to the dough’s texture and flavor. Gradually add the flour mixture to the wet ingredients. If you’re using a stand mixer, start on a low speed with a dough hook. If mixing by hand, use a sturdy wooden spoon or a spatula. Continue mixing until a shaggy, somewhat sticky dough forms and most of the flour has been incorporated into the wet ingredients.
- Kneading for Structure: This is where the magic of gluten development happens, which is essential for the structure of your Copycat Costco Chicken Bake crust.
- By Hand: Turn the dough out onto a lightly floured surface. Resist the urge to add too much extra flour at this stage, as it can make the dough tough. Knead the dough vigorously for about 8-10 minutes. At first, it might seem sticky and a bit unwieldy, but as you continue to work it, it will become smoother, more elastic, and less sticky. Use the heel of your hand to push the dough away from you, fold it back over itself, rotate it a quarter turn, and repeat the process. You’re aiming for a smooth, resilient ball of dough that springs back when gently poked with your finger.
- By Stand Mixer: If you’re fortunate enough to have a stand mixer with a dough hook, you can let it do the heavy lifting. Increase the speed to medium-low and knead for about 5-7 minutes. Watch the dough carefully; it should gather around the hook and pull cleanly away from the sides of the bowl, indicating proper gluten development.
You’ll literally feel and see the dough transforming from a rough, sticky mass into a supple, workable, and beautifully elastic texture. This thorough kneading process develops the gluten strands, giving our finished Copycat Costco Chicken Bake its characteristic chewiness and strength to hold all the delicious filling.
- First Rise (Proofing): Lightly grease a clean large bowl with a little olive oil. This prevents the dough from sticking and makes for easier removal later. Place the kneaded dough ball into the bowl, turning it once to coat the entire surface with oil. This protective layer prevents the dough from drying out and forming a crust during its rise. Cover the bowl tightly with plastic wrap or a clean, damp kitchen towel. Place it in a warm, draft-free spot in your kitchen. A slightly warm oven (turned off, of course!) or near a sunny window works wonders. Let the dough rise for 1 to 1.5 hours, or until it has visibly doubled in size. A good, unhurried rise is absolutely essential for a tender, flavorful crust for your Copycat Costco Chicken Bake.
- Punch Down and Rest: Once the dough has proudly doubled in size, gently punch it down to release the accumulated air. This step isn’t just for fun; it helps to redistribute the yeast cells and create a finer, more even texture in the final product. Cover it again with plastic wrap or the kitchen towel and let it rest for another 10-15 minutes. This short rest is a critical step as it allows the gluten to relax after being punched down, making the dough much easier to roll out into the perfect rectangle later on, without it snapping back excessively.
Creating the Savory Chicken Filling for Your Copycat Costco Chicken Bake
The heart and soul of our Copycat Costco Chicken Bake is undeniably its incredibly flavorful and irresistibly creamy filling. This magical combination of tender chicken, crispy bacon, and a creamy, zesty Caesar dressing creates a taste sensation that’s both wonderfully familiar and utterly comforting. Get ready to awaken your taste buds with this component!
- Prepare the Chicken: If you haven’t already prepared your chicken, now is the time. You have several options: you can boil, bake, pan-fry, or even use a rotisserie chicken for convenience. Cook two large chicken breasts until they are thoroughly cooked through. Once cooked, allow them to cool slightly until they are manageable enough to handle. Then, shred or dice the chicken into small, bite-sized pieces. I personally find that shredding the chicken gives a better texture, mimicking the original bake more closely and allowing it to meld beautifully with the other ingredients. Aim for approximately 2 cups of prepared chicken.
- Cook the Bacon: In a skillet, cook the bacon slices until they reach that perfect stage of wonderful crispiness. The exact level of crispiness is up to your preference, but a good crunch adds an essential textural element to the filling. Once cooked, use tongs to transfer the bacon to a plate lined with paper towels to drain off any excess fat. This step is important to prevent your filling from becoming greasy. Once the bacon has cooled sufficiently, crumble it into small, delightful pieces. The smoky, salty crunch of bacon is a non-negotiable component of this recipe; it adds so much depth and flavor to your Copycat Costco Chicken Bake.
- Chop Green Onions: Finely chop your fresh green onions. Make sure to include both the white and the light green parts, as both contribute to the flavor and color. These humble additions add a subtle, fresh oniony brightness that cuts through the richness of the chicken and bacon, providing a wonderful counterpoint to the creamy dressing.
- Combine Filling Ingredients: Now, let’s bring it all together! In a large mixing bowl, combine the shredded or diced cooked chicken, the delightfully crumbled crispy bacon, the freshly chopped green onions, your chosen good quality Caesar salad dressing, the garlic powder, and the freshly ground black pepper.
- Mix Thoroughly: Using a sturdy spoon or, even better, your clean hands (I often recommend wearing food-safe gloves for this part to ensure an even mix), combine all the ingredients together until the chicken is thoroughly coated with the creamy dressing and everything is evenly distributed throughout the mixture. You want every single bite of your finished Copycat Costco Chicken Bake to have that perfect blend of savory, creamy, and zesty flavors. This ensures a consistent and delicious experience. Take a small taste of the mixture at this point and adjust the seasoning if necessary; perhaps a touch more pepper, or a pinch more garlic powder, depending on your personal preference. Remember, this incredibly flavorful filling is truly the star of the show for your homemade Copycat Costco Chicken Bake!
Assembling Your Irresistible Copycat Costco Chicken Bake
Now comes the truly exciting part: bringing all the perfectly prepared elements together to form that iconic, handheld delight! This step requires a little bit of precision and care, but don’t worry too much about perfection; even if it’s not perfectly uniform, it will still taste absolutely incredible. I always find immense satisfaction in watching it all take shape, knowing that soon, I’ll be enjoying my very own, freshly baked Copycat Costco Chicken Bake.
- Preheat Oven and Prepare Baking Sheet: First things first, get your oven ready. Preheat your oven to a robust 400°F (200°C). While the oven is heating, line a large baking sheet with parchment paper. This simple step is a game-changer; it not only prevents your chicken bake from sticking to the pan but also makes cleanup an absolute breeze, which we all appreciate after a delicious meal.
- Prepare the Cheese Blend: In a small bowl, combine all your lovely shredded cheeses: the mozzarella for its incredible melt, the provolone for its mild, tangy flavor, and the grated Parmesan for a salty, savory kick. Give them a quick toss together to ensure an even mix. This blend is what will give the Copycat Costco Chicken Bake its characteristic gooey, cheesy interior.
- Roll Out the Dough: Lightly flour a clean work surface. Turn out your well-rested, beautiful dough onto this floured surface. Using a rolling pin, begin to roll the dough out into a large rectangle. Aim for dimensions of approximately 12×16 inches and a thickness of about ¼-inch. Try your best to keep the edges as straight and even as possible, as this will significantly make the sealing process much easier later on. Don’t be afraid to use a little more flour if you find the dough is starting to stick to your work surface or rolling pin. Consistency in thickness is key for an even bake.
- Layer the Cheese: Carefully transfer your rolled dough rectangle to the prepared baking sheet. Now, sprinkle about half of your glorious cheese blend evenly over one half of the dough rectangle. Make sure to leave a clear 1-inch border along the edges of that half. This border will be absolutely crucial for properly sealing the bake, preventing any delicious filling from escaping during baking.
- Add the Chicken Filling: Spoon the savory chicken filling mixture that you prepared earlier over the layer of cheese on the same half of the dough. Spread it out evenly, again making sure to leave that essential 1-inch border around the edges of the filling. It’s important not to overfill the bake at this stage, as it will become very difficult to seal properly if it’s too bulky.
- Add Remaining Cheese: Now, for the final layer of cheesy goodness! Sprinkle the remaining half of the cheese blend evenly over the chicken filling. This ensures that every bite of your Copycat Costco Chicken Bake is packed with that irresistible, melted cheese goodness.
- Fold and Seal: This is the moment of transformation! Carefully and gently fold the other plain half of the dough (the half without any filling or cheese) over the filling, aligning the edges as precisely as you can. Once aligned, gently but firmly press down on the edges to seal the two dough halves together. You can use your fingers to crimp the edges, pressing them tightly, or for a more decorative and extra-secure seal, use the tines of a fork to press down all along the seam. A good, tight seal is incredibly important here to keep all that delicious, molten filling securely inside your Copycat Costco Chicken Bake during baking!
- Egg Wash and Parmesan Topping: In a small bowl, whisk together the large egg with 1 tablespoon of water. This creates a beautiful egg wash. Using a pastry brush, generously brush the entire top surface of your assembled chicken bake with this egg wash. This will not only give your bake a gorgeous, shiny, deep golden-brown crust but also helps the Parmesan cheese adhere. Now, sprinkle the remaining 2 tablespoons of grated Parmesan cheese evenly over the top of the egg-washed crust. This adds an extra layer of savory flavor and a delightful crispness.
- Create Vents: Using a sharp knife or a kitchen shears, make 3-4 small slits or decorative cuts on the top of the dough. These slits are not just for looks; they act as essential vents, allowing steam to escape from the filling during baking. This prevents the crust from becoming too soggy, potentially bursting open, and ensures a beautifully cooked interior.
Baking Instructions for Your Golden Copycat Costco Chicken Bake
The moment of truth has arrived! Baking your Copycat Costco Chicken Bake is where all your diligent hard work comes to fruition, transforming simple ingredients into a golden, bubbling, and aromatic masterpiece. Get ready for your kitchen to smell absolutely divine, filling your home with the promise of an incredible meal!
- Bake Until Golden: Carefully transfer the baking sheet with your assembled chicken bake into the preheated 400°F (200°C) oven. Ensure it’s centered in the oven for even heat distribution. Bake for 25-35 minutes. The precise timing can vary slightly depending on your individual oven, so it’s important to observe. You are looking for the crust to achieve a beautiful, deep golden-brown color, and you should see signs of the delicious filling bubbling through the vents you created. Every oven behaves a little differently, so keep a watchful eye on it, especially during the last 10 minutes of baking. If you notice the top browning too quickly before the rest of the bake is done, you can loosely tent it with aluminum foil to prevent over-browning.
- Check for Doneness: The visual cues are absolutely key here for a perfectly baked Copycat Costco Chicken Bake. Look for that unmistakable beautiful golden-brown crust. You’ll also see that the filling is visibly bubbly and heated through, a sure sign that the cheeses inside are perfectly melted and gooey. You might even catch a delightful aroma wafting from the oven. Resist the strong urge to open the oven door too frequently during baking, as this can cause temperature fluctuations and affect the rising and crisping of the crust!
- Cooling Time: Once your chicken bake has reached that perfect state of golden, bubbly perfection, carefully remove the baking sheet from the oven. Now, this is arguably the hardest part of the entire recipe: allowing your magnificent Copycat Costco Chicken Bake to cool for at least 5-10 minutes (and sometimes even a bit longer is beneficial) directly on the baking sheet before you even attempt to slice and serve it. This crucial cooling period allows the incredibly hot and molten filling, particularly the cheese, to set slightly. This makes it much, much easier to cut into neat portions and, more importantly, prevents all that glorious, gooey cheese and filling from spilling out everywhere when you make the first cut. Trust me, this short wait is absolutely worth every second for a cleaner and more enjoyable serving experience!
Serving Your Homemade Copycat Costco Chicken Bake
Congratulations! You’ve successfully crafted your very own, magnificent Copycat Costco Chicken Bake. Now, after all your hard work and patience, it’s finally time to enjoy the delicious fruits of your labor. This hearty bake is substantial enough to be a satisfying meal all on its own, but a few simple additions can easily transform it into an even more complete and satisfying dining experience for you and your loved ones.
- Slice and Serve: After patiently enduring the crucial resting period, grab a sharp knife or, even better, a pizza cutter. These tools will make quick work of slicing your chicken bake into individual portions. You can cut it into generous large rectangles for a substantial serving, or into smaller squares if you’re serving it as part of a larger spread or for less ravenous appetites. The slices should hold together beautifully thanks to that brief cooling period.
- Suggested Pairings: While your homemade Copycat Costco Chicken Bake is undeniably fantastic and fulfilling on its own, a fresh green salad with a light vinaigrette makes for a perfect, refreshing counterpoint to the richness and warmth of the bake. The crispness and acidity of a salad can truly enhance the overall meal. Other wonderful side options include a creamy coleslaw, which mirrors some of the flavors in the filling, or even some simply steamed broccoli or asparagus for a healthy touch that complements it beautifully. For those who simply adore dipping sauces, offering a side of extra Caesar dressing (to echo the filling) or a classic ranch dressing can be a delightful addition, allowing everyone to customize their experience.
- Storage Tips: If, by some miracle, you happen to have any leftovers of your delicious Copycat Costco Chicken Bake (which is a very big “if” in my house, as it tends to disappear quickly!), make sure to store them properly. Place any remaining portions in an airtight container and refrigerate them for up to 3-4 days. For reheating, the absolute best method to preserve the integrity of the crust is to use a toaster oven or a conventional oven. Reheat at 350°F (175°C) for about 10-15 minutes, or until it’s heated through and the crust crisps up beautifully again. While microwaving is an option for sheer speed, be aware that the crust won’t be as crispy, often resulting in a softer texture.
- Make Ahead Option: Planning ahead can be a lifesaver! You can conveniently prepare the dough and the chicken filling components a day in advance. Store the dough in a lightly oiled, covered bowl in the refrigerator (it will undergo a slow, cold rise overnight, which can actually enhance flavor!). Keep the chicken filling in a separate airtight container in the fridge as well. Then, when you’re ready to enjoy, simply take them out, assemble, and bake fresh. This makes weeknight dinners or entertaining much less stressful, allowing you to enjoy your delicious Copycat Costco Chicken Bake with ease.
Conclusion:
If you’ve followed along with me through this incredible culinary journey, you now hold the keys to recreating a beloved classic right in your own kitchen. I truly believe that this recipe for the
Copycat Costco Chicken Bake
isn’t just another dish; it’s an experience, a delightful trip down memory lane, and a testament to how simple ingredients can come together to create something truly magical. What makes this recipe an absolute must-try, you ask? It’s the perfect harmony of textures and flavors – that irresistibly golden, slightly crisp crust giving way to a warm, creamy, and savory chicken and cheese filling. Every single bite delivers that comforting, familiar taste that has made the original a legendary fan favorite, but with the added satisfaction of knowing you’ve crafted it yourself, with fresh ingredients and a dash of your own culinary passion. It’s more than just food; it’s comfort, convenience, and pure deliciousness rolled into one perfectly baked package.
But the journey doesn’t end with just pulling your magnificent chicken bake out of the oven! Oh no, dear reader, that’s where the fun truly begins with serving and customization. For a quick and satisfying lunch or dinner, this bake stands gloriously on its own. However, I often find myself pairing it with a simple, vibrant green salad, perhaps with a light vinaigrette, to cut through the richness and add a refreshing contrast. A bowl of warm, creamy tomato soup or a hearty minestrone makes for another fantastic accompaniment, especially on a chilly evening. If you’re looking for something a bit more substantial, consider serving it alongside some fluffy steamed rice, which soaks up any errant creamy goodness beautifully, or a medley of roasted vegetables like asparagus, broccoli, or bell peppers for an added nutritional punch and a lovely textural counterpoint. Don’t underestimate the power of a simple side of garlic bread or even just a warm, crusty baguette for dipping into any overflow of cheesy sauce – pure bliss!
Now, let’s talk variations, because one of the most exciting aspects of cooking at home is making a recipe truly your own. While our base recipe is designed for maximum authenticity, there’s ample room to experiment and tailor it to your personal preferences. Feeling adventurous with your cheese choices? Swap out or add different cheeses! A blend of Monterey Jack and Colby for extra meltiness, a touch of smoked gouda for a deeper flavor profile, or even some pepper jack if you like a little kick, would all be delightful. You can also play with the chicken itself. While shredded rotisserie chicken is a time-saver and my go-to, feel free to use leftover grilled chicken, or even pan-seared chicken breast that you’ve seasoned and diced. For an added layer of flavor and texture, consider sautéing some finely diced onions and garlic to mix into your chicken and cheese filling. A handful of fresh spinach or some sautéed mushrooms would also be excellent additions, providing both color and extra nutrients without compromising that signature savory taste. For those who enjoy a little extra zest, a pinch of dried herbs like oregano or thyme, or even a dash of smoked paprika, can elevate the flavor profile beautifully. And don’t forget the crust! While we use a specific dough for that authentic feel, puff pastry or even crescent roll dough sheets can be creative alternatives, offering a slightly different texture but still delivering a delicious, flaky shell.
Furthermore, consider scaling this recipe up or down! You could create mini chicken bakes using muffin tins for individual portions, perfect for appetizers or a kid-friendly snack. Or, for a large gathering, you might even consider adapting it into a casserole format, layering the ingredients in a baking dish and topping it with a larger sheet of dough. The possibilities are truly endless, limited only by your imagination and the contents of your pantry. This flexibility ensures that the
Copycat Costco Chicken Bake
can become a regular, cherished item in your weekly meal rotation, always fresh and never boring.
Ultimately, my greatest hope is that you’re now feeling inspired, armed with all the knowledge and tips you need to confidently tackle this recipe. I absolutely encourage you to roll up your sleeves, gather your ingredients, and give this incredible dish a try. I promise you, the aroma filling your kitchen as it bakes, and that first glorious bite, will make every moment worthwhile. And once you do, please, please come back and share your experience with me! What did you pair it with? Did you try any exciting variations? Did it bring back fond memories of those glorious food court trips? I love hearing about your culinary adventures, seeing your photos, and learning from your creative twists. Your feedback and stories are what truly make this community vibrant and rewarding for us all. So go forth, bake with joy, and let’s celebrate the delicious triumph of homemade goodness together!
Authentic Copycat Costco Chicken Bake
Copycat Costco Chicken Bake is more than just a meal; it’s a cherished culinary experience that brings the iconic food court classic directly into your home kitchen. This meticulously crafted recipe helps you recreate that exact magic, delivering the same satisfying crunch and rich, cheesy goodness.
Ingredients
-
1 cup warm water (105-115°F)
-
2 ¼ tsp active dry yeast
-
1 tbsp granulated sugar
-
2 ½ cups all-purpose flour
-
1 tsp salt
-
2 tbsp olive oil
-
2 cups cooked chicken, shredded or diced
-
6 slices beef bacon, cooked until crispy and crumbled
-
½ cup Caesar salad dressing
-
¼ cup chopped green onions
-
1 tsp garlic powder
-
½ tsp black pepper
-
1 cup shredded mozzarella cheese
-
½ cup shredded provolone cheese
-
¼ cup grated Parmesan cheese
-
1 large egg, whisked with 1 tbsp water
-
2 tbsp grated Parmesan cheese
Instructions
-
Step 1
In a large bowl, activate yeast and sugar in warm water (105-115°F) for 5-10 mins until foamy. Add olive oil, flour, and salt. Mix until a shaggy dough forms, then knead for 5-10 minutes until smooth and elastic. Place dough in a lightly oiled bowl, cover, and let rise in a warm place for 1-1.5 hours until doubled. Gently punch down dough, cover, and rest for 10-15 minutes. -
Step 2
Cook and shred 2 cups chicken. Cook 6 slices beef bacon until crispy, drain, and crumble. Chop ¼ cup green onions. In a bowl, combine shredded chicken, crumbled beef bacon, green onions, ½ cup Caesar dressing, 1 tsp garlic powder, and ½ tsp black pepper. Mix well to ensure all ingredients are evenly coated. -
Step 3
Preheat oven to 400°F (200°C) and line a baking sheet with parchment paper. Combine mozzarella, provolone, and ¼ cup Parmesan cheese. On a lightly floured surface, roll dough into a 12×16 inch rectangle, about ¼-inch thick. Transfer dough to the baking sheet. Sprinkle half of the cheese blend on one half of the dough, leaving a 1-inch border. Spread the chicken filling evenly over the cheese, maintaining the border. Sprinkle with remaining cheese. Fold the plain half of the dough over the filling. Press and crimp edges firmly to seal. -
Step 4
Brush the top of the bake with egg wash (1 egg whisked with 1 tbsp water), then sprinkle with 2 tbsp Parmesan cheese. Make 3-4 small slits on top of the dough for venting. -
Step 5
Bake in the preheated oven for 25-35 minutes, or until the crust is deep golden-brown and the filling is bubbling. If the top browns too quickly, loosely tent with aluminum foil. -
Step 6
Remove from oven and let cool on the baking sheet for 5-10 minutes before slicing into portions and serving. This allows the filling to set.
Important Information
Nutrition Facts (Per Serving)
It is important to consider this information as approximate and not to use it as definitive health advice.
Allergy Information
Please check ingredients for potential allergens and consult a health professional if in doubt.


Leave a Comment