

Angel food cake: just the name evokes images of fluffy clouds and ethereal sweetness, doesn’t it? I remember the first time I tasted it a slice offered by my grandmother, so light it practically dissolved on my tongue. It was pure magic! And today, I’m thrilled to share my foolproof recipe for this delightful dessert with you.
This iconic cake has a fascinating history, dating back to the late 19th century in America. It was a time of culinary innovation, and the invention of the rotary egg beater played a crucial role in its creation. The ability to whip egg whites to stiff peaks was essential for achieving the cake’s signature airy texture. Angel food cake quickly became a symbol of elegance and refinement, often served at special occasions and celebrations.
But what is it about angel food cake that makes it so universally loved? Well, for starters, it’s incredibly light and delicate, making it a guilt-free indulgence. The subtle sweetness and slightly chewy texture are simply irresistible. Plus, it’s incredibly versatile! You can enjoy it plain, with fresh berries and whipped cream, or even grilled for a unique twist. Whether you’re looking for a simple dessert to satisfy your sweet tooth or an elegant centerpiece for your next gathering, angel food cake is always a perfect choice. So, let’s get baking and create some heavenly goodness!

Ingredients:
- 1 cup cake flour, sifted
- 1 1/2 cups granulated sugar, divided
- 12 large egg whites, at room temperature
- 1 1/2 teaspoons cream of tartar
- 1/4 teaspoon salt
- 1 1/2 teaspoons vanilla extract
- 1/2 teaspoon almond extract (optional, but I highly recommend it!)
- 1/4 cup powdered sugar, for dusting (optional)
Preparing the Egg Whites: The Key to Angelic Success
Okay, let’s talk egg whites. This is where the magic happens, and it’s crucial to get it right. Make absolutely sure there’s no trace of yolk in your egg whites. Even a tiny bit of yolk can prevent them from whipping up properly. I always crack each egg white into a separate small bowl before adding it to the main bowl, just to be extra safe. Trust me, it’s worth the extra effort!
- Prepare your bowl and whisk: Ensure your mixing bowl and whisk attachment (or beaters if you’re using a hand mixer) are impeccably clean and grease-free. I like to wipe them down with a bit of lemon juice or vinegar to remove any lingering residue. This helps the egg whites whip up to their full potential.
- Whip the egg whites: In your clean mixing bowl, add the egg whites, cream of tartar, and salt. Begin whipping on medium speed until soft peaks form. Soft peaks will hold their shape briefly but will droop at the tip when you lift the whisk.
- Gradually add the sugar: Gradually add 1 cup of the granulated sugar, about a tablespoon at a time, while continuing to whip on medium speed. Make sure each addition of sugar is fully incorporated before adding the next. This slow addition helps create a stable meringue.
- Whip to stiff, glossy peaks: Increase the speed to medium-high and continue whipping until stiff, glossy peaks form. Stiff peaks will stand straight up when you lift the whisk, and the meringue will look shiny and smooth. Be careful not to overwhip, as this can make the meringue dry and crumbly. You want it to be firm but still pliable.
- Add the extracts: Gently fold in the vanilla extract and almond extract (if using). Be careful not to deflate the meringue.
Incorporating the Flour: A Gentle Touch
Now comes the delicate part: incorporating the flour. We want to be as gentle as possible to avoid deflating all that beautiful air we just whipped into the egg whites.
- Sift the flour and remaining sugar: In a separate bowl, whisk together the sifted cake flour and the remaining 1/2 cup of granulated sugar. Sifting is crucial for angel food cake because it helps to lighten the flour and prevent lumps, which can weigh down the batter.
- Gently fold in the flour mixture: Gradually sprinkle the flour mixture over the meringue, about 1/4 cup at a time. Use a large rubber spatula to gently fold the flour into the meringue. Folding means cutting down through the center of the mixture, scraping along the bottom of the bowl, and bringing the mixture up and over the top. Rotate the bowl as you fold to ensure everything is evenly incorporated.
- Be careful not to overmix: Continue folding until the flour is just incorporated. It’s okay if there are a few small streaks of flour remaining, but avoid overmixing, as this will deflate the meringue and result in a tough cake.
Baking the Angel Food Cake: Patience is a Virtue
Angel food cake requires a special baking pan an ungreased tube pan with a removable bottom. The ungreased pan allows the cake to cling to the sides as it rises, giving it its characteristic tall and airy structure. The removable bottom makes it easier to release the cake after baking.
- Prepare the pan: Do NOT grease the tube pan. This is very important! The cake needs to cling to the sides of the pan to rise properly.
- Pour the batter into the pan: Gently pour the batter into the ungreased tube pan. Use a spatula to spread the batter evenly.
- Cut through the batter: Use a knife or skewer to cut through the batter in a circular motion to remove any large air pockets. This will help prevent large holes from forming in the cake.
- Bake the cake: Bake in a preheated oven at 325°F (160°C) for 50-60 minutes, or until the cake is golden brown and a toothpick inserted into the center comes out clean. The cake should spring back lightly when touched.
- Invert the pan immediately: As soon as you remove the cake from the oven, invert the pan onto a wire rack. This is crucial to prevent the cake from collapsing. The cake needs to cool completely upside down.
- Cool completely: Let the cake cool completely upside down for at least 1-2 hours, or preferably overnight. This allows the cake to fully set and prevents it from shrinking.
Releasing and Serving: The Grand Finale
After the cake has cooled completely, it’s time to release it from the pan. This can be a bit tricky, but with a little patience, you’ll be able to do it without damaging the cake.
- Loosen the sides: Use a thin knife or offset spatula to carefully loosen the cake from the sides of the pan. Gently run the knife along the edges, being careful not to tear the cake.
- Remove the bottom: If your tube pan has a removable bottom, gently push the bottom up to release the cake. If not, you may need to carefully invert the cake onto a plate and then loosen the bottom with a knife.
- Invert onto a serving plate: Gently invert the cake onto a serving plate.
- Dust with powdered sugar (optional): If desired, dust the cake with powdered sugar before serving.
- Serve and enjoy!: Slice the cake with a serrated knife and serve. Angel food cake is delicious on its own, but it’s also wonderful with fresh berries, whipped cream, or a drizzle of fruit sauce.
Tips for Success:
- Room temperature egg whites: Room temperature egg whites whip up to a greater volume than cold egg whites.
- Don’t overmix: Overmixing the batter will deflate the meringue and result in a tough cake.
- Cool completely upside down: Cooling the cake upside down is essential to prevent it from collapsing.
- Use a serrated knife: A serrated knife will slice through the cake more easily without tearing it.
Variations:
- Lemon Angel Food Cake: Add 1 tablespoon of lemon zest and 2 tablespoons of lemon juice to the batter.
- Orange Angel Food Cake: Add 1 tablespoon of orange zest and 2 tablespoons of orange juice to the batter.
- Chocolate Angel Food Cake: Add 1/4 cup of unsweetened cocoa powder to the flour mixture.
Conclusion:
This isn’t just another cake recipe; it’s an invitation to experience cloud-like perfection. I truly believe this angel food cake recipe is a must-try for anyone who appreciates a light, airy, and subtly sweet dessert. Its delicate texture and pure flavor make it incredibly versatile, perfect for showcasing seasonal fruits or simply enjoying on its own.
Think of it: a warm summer evening, a slice of this ethereal cake, and a scoop of fresh berries. Can you imagine anything more delightful? But the beauty of this recipe lies not only in its simplicity but also in its adaptability.
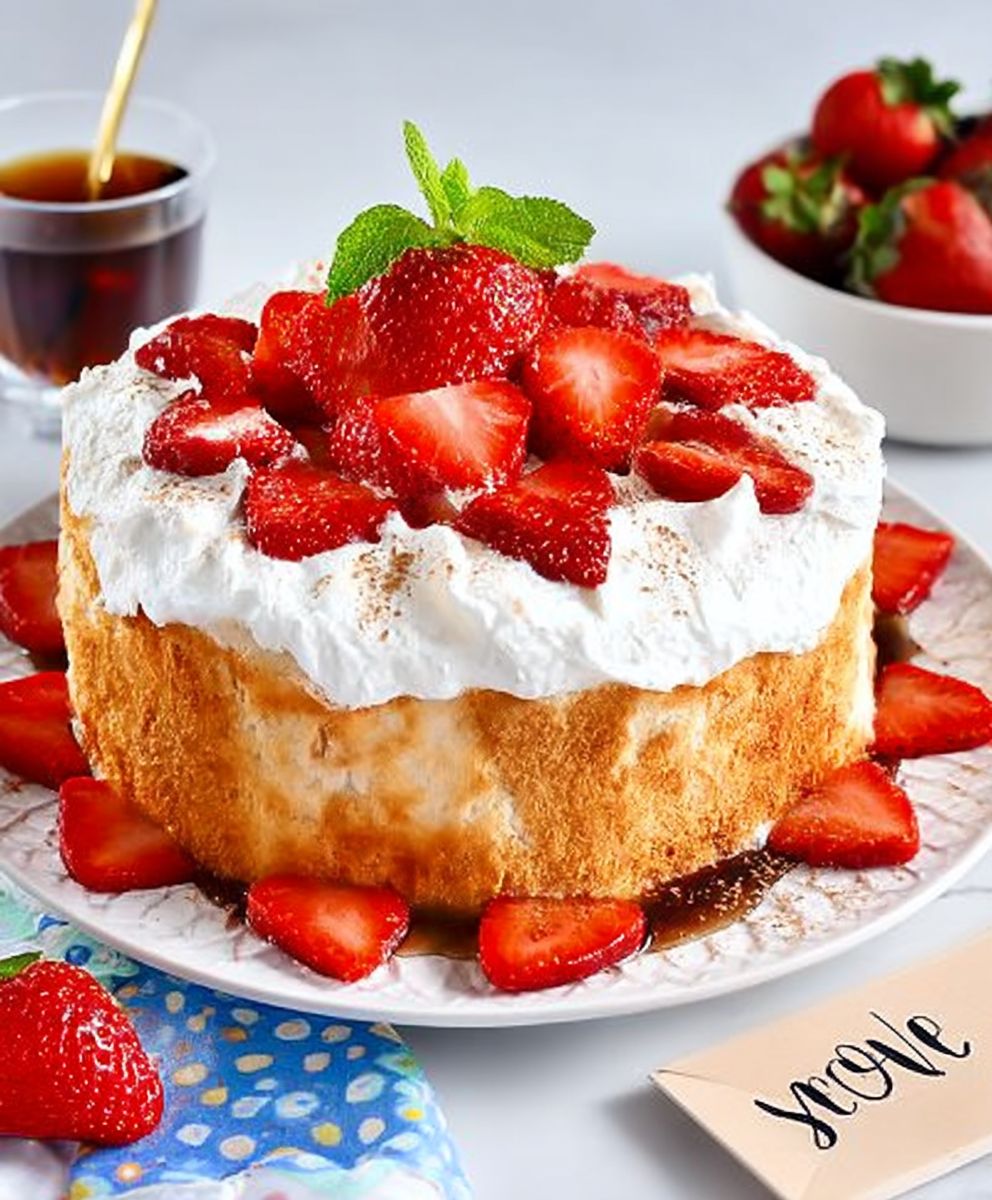
For a classic presentation, dust the cooled cake with powdered sugar. The fine, white powder creates a beautiful contrast against the golden crust and adds a touch of sweetness. Or, for a more decadent treat, try topping it with whipped cream and sliced strawberries. The creamy richness of the whipped cream complements the lightness of the cake perfectly, while the strawberries add a burst of fresh, fruity flavor.
If you’re feeling adventurous, consider making a homemade fruit compote. A warm berry compote, a tangy cherry compote, or even a spiced apple compote would all be fantastic additions. The warm fruit will soak into the cake slightly, creating a moist and flavorful experience.
Another variation I absolutely adore is grilling slices of the angel food cake. Yes, you read that right! Grilling the cake gives it a slightly smoky flavor and a caramelized crust that is simply irresistible. Serve it with grilled peaches and a drizzle of honey for a truly unforgettable dessert.
And don’t forget about ice cream! A scoop of vanilla bean ice cream, strawberry ice cream, or even a more adventurous flavor like lavender honey would be a wonderful accompaniment. The cold ice cream against the warm cake is a delightful contrast in both temperature and texture.
For a lighter option, try serving the cake with a dollop of Greek yogurt and a sprinkle of granola. The Greek yogurt adds a tangy creaminess, while the granola provides a satisfying crunch. This is a great way to enjoy the cake for breakfast or as a healthy snack.
I’ve even experimented with using this cake as the base for a trifle. Layer it with custard, fruit, and whipped cream for a show-stopping dessert that is sure to impress your guests. The possibilities are truly endless!
But beyond all the serving suggestions and variations, the real magic of this recipe lies in the joy of baking it yourself. There’s something incredibly satisfying about whipping those egg whites into a stiff, glossy meringue and watching the cake rise in the oven. The aroma alone is enough to make your mouth water.
So, I urge you to give this recipe a try. Don’t be intimidated by the seemingly simple ingredients; the key is in the technique. Follow the instructions carefully, and I promise you’ll be rewarded with a truly exceptional cake.
Once you’ve baked your own angel food cake, I would absolutely love to hear about your experience. Share your photos, your variations, and your serving suggestions in the comments below. Let’s create a community of angel food cake enthusiasts! I can’t wait to see what you come up with. Happy baking!
Angel Food Cake: The Ultimate Guide to Baking Perfection
Light, airy, and heavenly Angel Food Cake. This classic dessert is made with whipped egg whites and a gentle touch, resulting in a cloud-like texture.
Ingredients
- 1 cup cake flour, sifted
- 1 1/2 cups granulated sugar, divided
- 12 large egg whites, at room temperature
- 1 1/2 teaspoons cream of tartar
- 1/4 teaspoon salt
- 1 1/2 teaspoons vanilla extract
- 1/2 teaspoon almond extract (optional)
- 1/4 cup powdered sugar, for dusting (optional)
Instructions
- Ensure your mixing bowl and whisk attachment are impeccably clean and grease-free.
- In your clean mixing bowl, add the egg whites, cream of tartar, and salt. Begin whipping on medium speed until soft peaks form.
- Gradually add 1 cup of the granulated sugar, about a tablespoon at a time, while continuing to whip on medium speed.
- Increase the speed to medium-high and continue whipping until stiff, glossy peaks form. Be careful not to overwhip.
- Gently fold in the vanilla extract and almond extract (if using). Be careful not to deflate the meringue.
- In a separate bowl, whisk together the sifted cake flour and the remaining 1/2 cup of granulated sugar.
- Gradually sprinkle the flour mixture over the meringue, about 1/4 cup at a time. Use a large rubber spatula to gently fold the flour into the meringue.
- Continue folding until the flour is just incorporated. It’s okay if there are a few small streaks of flour remaining, but avoid overmixing.
- Do NOT grease the tube pan.
- Gently pour the batter into the ungreased tube pan. Use a spatula to spread the batter evenly.
- Use a knife or skewer to cut through the batter in a circular motion to remove any large air pockets.
- Bake in a preheated oven at 325°F (160°C) for 50-60 minutes, or until the cake is golden brown and a toothpick inserted into the center comes out clean.
- As soon as you remove the cake from the oven, invert the pan onto a wire rack.
- Let the cake cool completely upside down for at least 1-2 hours, or preferably overnight.
- Use a thin knife or offset spatula to carefully loosen the cake from the sides of the pan.
- If your tube pan has a removable bottom, gently push the bottom up to release the cake. If not, you may need to carefully invert the cake onto a plate and then loosen the bottom with a knife.
- Gently invert the cake onto a serving plate.
- If desired, dust the cake with powdered sugar before serving.
- Slice the cake with a serrated knife and serve.
Notes
- Make sure there’s no trace of yolk in your egg whites.
- Room temperature egg whites whip up to a greater volume than cold egg whites.
- Don’t overmix the batter.
- Cool completely upside down.
- Use a serrated knife to slice the cake.


Leave a Comment