

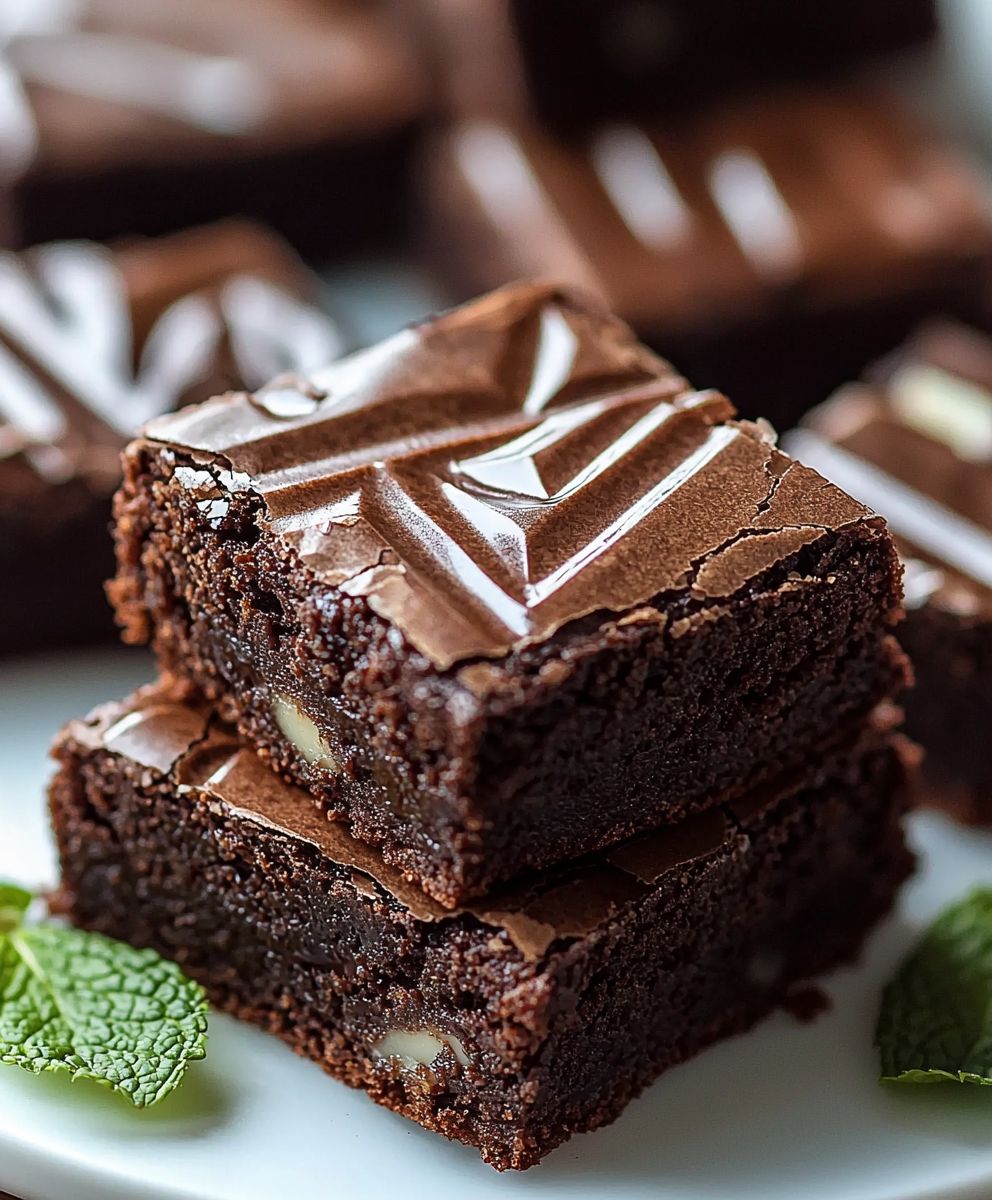
Andes Mint Brownies: Prepare to be utterly captivated by the fudgy, minty magic that awaits you! Imagine sinking your teeth into a rich, decadent brownie, perfectly balanced with the cool, refreshing taste of Andes mints. This isn’t just a dessert; it’s an experience, a delightful dance of chocolate and mint that will leave you craving more.
While the exact origins of incorporating Andes mints into brownies are shrouded in delicious mystery, the combination itself speaks to a timeless love affair between chocolate and mint. Mint has been used to complement chocolate for centuries, dating back to ancient civilizations who recognized the harmonious blend of these flavors. The Andes Crème de Menthe Thins, introduced in 1950, quickly became a beloved treat, and it was only a matter of time before creative bakers began incorporating them into their favorite desserts.
People adore Andes Mint Brownies for their irresistible combination of textures and tastes. The fudgy, chewy brownie base provides a comforting warmth, while the creamy, cool mint offers a refreshing contrast. They are incredibly easy to make, perfect for a quick weeknight treat or a show-stopping dessert for special occasions. The convenience of using readily available Andes mints makes this recipe a winner, allowing you to create a gourmet-tasting dessert with minimal effort. Trust me, once you try these, they’ll become a staple in your baking repertoire!

Ingredients:
- 1 cup (2 sticks) unsalted butter, melted
- 2 cups granulated sugar
- 4 large eggs
- 1 teaspoon vanilla extract
- 1 cup all-purpose flour
- ¾ cup unsweetened cocoa powder
- ¼ teaspoon salt
- ½ teaspoon baking powder
- 1 cup Andes Mint baking chips, divided
- ½ cup chopped Andes Mints, for topping (optional)
Preparing the Brownie Batter:
Okay, let’s get started! First things first, we need to get that rich, fudgy brownie base ready. This is where the magic happens, so pay close attention!
- Melt the Butter: In a large, microwave-safe bowl, melt the butter. I usually do this in 30-second intervals, stirring in between, to prevent it from splattering everywhere. You want it completely melted but not boiling. If you prefer, you can melt the butter in a saucepan over low heat. Just make sure to watch it carefully!
- Combine Butter and Sugar: Once the butter is melted, add the granulated sugar to the bowl. Whisk them together really well until the mixture is smooth and there are no lumps of sugar. This step is important because it helps create that shiny, crackly top we all love on brownies.
- Incorporate the Eggs: Now, crack in the eggs one at a time, whisking vigorously after each addition. This is crucial for incorporating air into the batter, which contributes to the brownie’s texture. Don’t skip the vigorous whisking! You want the mixture to be light and slightly fluffy.
- Add the Vanilla Extract: Stir in the vanilla extract. It might seem like a small addition, but it really enhances the overall flavor of the brownies.
- Dry Ingredients Time: In a separate bowl, whisk together the flour, cocoa powder, salt, and baking powder. Whisking ensures that everything is evenly distributed, preventing any pockets of baking powder or cocoa powder in your brownies.
- Combine Wet and Dry Ingredients: Gradually add the dry ingredients to the wet ingredients, mixing until just combined. Be careful not to overmix! Overmixing develops the gluten in the flour, which can result in tough brownies. You want to mix until the flour streaks disappear, but no more. A few small lumps are okay.
- Fold in the Andes Mint Baking Chips: Gently fold in ¾ cup of the Andes Mint baking chips. Save the remaining ¼ cup for topping the brownies later. Folding ensures that the chips are evenly distributed throughout the batter without breaking them.
Baking the Brownies:
Now that our batter is ready, it’s time to bake these beauties! This is where patience comes in handy. You want them perfectly fudgy, not dry and cakey.
- Preheat the Oven: Preheat your oven to 350°F (175°C). Make sure your oven is properly preheated before you put the brownies in. This ensures even baking.
- Prepare the Baking Pan: Grease and flour an 8×8 inch baking pan. You can also line the pan with parchment paper, leaving an overhang on the sides. This makes it super easy to lift the brownies out of the pan once they’re cooled. If you’re using parchment paper, you can skip the greasing and flouring.
- Pour in the Batter: Pour the brownie batter into the prepared baking pan and spread it evenly.
- Top with Andes Mints (Optional): Sprinkle the remaining ¼ cup of Andes Mint baking chips and the chopped Andes Mints (if using) over the top of the batter. This adds a beautiful finishing touch and extra minty flavor.
- Bake: Bake for 25-30 minutes, or until a toothpick inserted into the center comes out with moist crumbs attached. The baking time may vary depending on your oven, so keep an eye on them. You want the center to be set but still slightly fudgy.
- Cool Completely: Let the brownies cool completely in the pan before cutting. This is the hardest part, I know! But trust me, it’s worth the wait. Cooling allows the brownies to set properly, making them easier to cut and preventing them from crumbling. If you used parchment paper, you can lift the brownies out of the pan and place them on a cutting board to cool.
Cutting and Serving:
Finally, the moment we’ve all been waiting for! Time to cut and enjoy these delicious Andes Mint Brownies. Here are a few tips for getting those perfect, clean cuts.
- Use a Sharp Knife: Use a sharp knife to cut the brownies. A dull knife will just squish them.
- Clean the Knife: Clean the knife after each cut to prevent the brownies from sticking. You can also dip the knife in hot water and wipe it dry before each cut. This helps create clean, even slices.
- Cut into Squares: Cut the brownies into squares. The size is up to you! I usually cut them into 16 squares, but you can make them smaller or larger depending on your preference.
- Serve and Enjoy: Serve the brownies and enjoy! They’re delicious on their own, but you can also serve them with a scoop of vanilla ice cream or a dollop of whipped cream.
Tips for the Best Andes Mint Brownies:
- Use High-Quality Ingredients: Using high-quality ingredients, especially the cocoa powder and chocolate chips, will make a big difference in the flavor of your brownies.
- Don’t Overbake: Overbaking is the enemy of fudgy brownies. Keep a close eye on them and take them out of the oven when a toothpick inserted into the center comes out with moist crumbs attached.
- Let Them Cool Completely: I know it’s tempting to dig in while they’re still warm, but letting the brownies cool completely is essential for achieving that perfect fudgy texture and clean cuts.
- Add a Pinch of Espresso Powder: For an even richer chocolate flavor, add a pinch of espresso powder to the dry ingredients. It won’t make the brownies taste like coffee, but it will enhance the chocolate flavor.
- Store Properly: Store leftover brownies in an airtight container at room temperature for up to 3 days. You can also freeze them for longer storage.
Variations:
- Peppermint Extract: Add a few drops of peppermint extract to the batter for an even more intense minty flavor.
- Chocolate Chunks: Substitute some of the Andes Mint baking chips with chocolate chunks for a richer, more decadent brownie.
- Cream Cheese Swirl: Swirl a mixture of cream cheese, sugar, and vanilla extract into the batter before baking for a cheesecake brownie effect.
- Nuts: Add chopped walnuts or pecans to the batter for a nutty crunch.
I hope you enjoy making these Andes Mint Brownies as much as I do! They’re the perfect treat for any occasion, and they’re sure to be a hit with everyone who tries them. Happy baking!
Conclusion:
And there you have it! These Andes Mint Brownies are truly a must-try for any chocolate lover, especially those with a soft spot for that refreshing minty kick. The fudgy brownie base, combined with the creamy, melty Andes Mint pieces, creates a symphony of textures and flavors that will leave you wanting more. Seriously, these are dangerously addictive!
But why are these brownies so special? It’s the perfect balance. The rich, dark chocolate of the brownie is perfectly complemented by the cool, sweet mint. It’s a classic combination that’s elevated by the homemade goodness of a from-scratch brownie. Forget the boxed mixes; these are the real deal, and the difference is undeniable.
Beyond the incredible taste, these brownies are also surprisingly easy to make. The recipe is straightforward, and even beginner bakers can achieve impressive results. Plus, the visual appeal is undeniable. Those glistening chocolate squares, studded with vibrant green mints, are guaranteed to impress at any gathering.
Looking for serving suggestions? These brownies are fantastic on their own, warm from the oven, perhaps with a scoop of vanilla ice cream melting on top. For an extra touch of indulgence, drizzle them with a simple chocolate ganache or a white chocolate sauce. They’re also delicious served with a cold glass of milk or a steaming cup of coffee.
But the fun doesn’t stop there! Feel free to experiment with variations to make these brownies your own. Try using different types of mint chocolate, like peppermint patties or even mint chocolate chips. You could also add a layer of cream cheese frosting for an extra decadent treat. For a festive touch, sprinkle crushed candy canes on top during the holidays. Another great idea is to add a swirl of mint extract to the brownie batter for an even more intense mint flavor. Consider adding chopped walnuts or pecans for a nutty crunch. The possibilities are endless!
These Andes Mint Brownies are perfect for any occasion, from a casual weeknight dessert to a special celebration. They’re a guaranteed crowd-pleaser, and they’re sure to become a new family favorite. They are also great for gifting! Wrap them up in a pretty box or tin, and you’ll have a thoughtful and delicious present for friends, family, or neighbors.
So, what are you waiting for? Grab your ingredients, preheat your oven, and get ready to bake up a batch of these irresistible brownies. I promise you won’t regret it!
And most importantly, I want to hear about your experience! Did you try the recipe? Did you make any variations? What did you think? Share your photos and comments below. I can’t wait to see your creations and hear your feedback. Happy baking, and enjoy every delicious bite of these amazing Andes Mint Brownies! I am confident you will love this recipe as much as I do. Let me know if you have any questions, and I will be happy to help.
Andes Mint Brownies: The Ultimate Recipe for Chocolate Mint Lovers
Fudgy and decadent Andes Mint Brownies packed with mint chocolate flavor. These brownies are easy to make and perfect for any occasion!
Ingredients
- 1 cup (2 sticks) unsalted butter, melted
- 2 cups granulated sugar
- 4 large eggs
- 1 teaspoon vanilla extract
- 1 cup all-purpose flour
- ¾ cup unsweetened cocoa powder
- ¼ teaspoon salt
- ½ teaspoon baking powder
- 1 cup Andes Mint baking chips, divided
- ½ cup chopped Andes Mints, for topping (optional)
Instructions
- Melt the Butter: In a large, microwave-safe bowl, melt the butter in 30-second intervals, stirring in between, until completely melted but not boiling. Alternatively, melt in a saucepan over low heat.
- Combine Butter and Sugar: Add the granulated sugar to the melted butter and whisk together until smooth with no lumps.
- Incorporate the Eggs: Crack in the eggs one at a time, whisking vigorously after each addition until the mixture is light and slightly fluffy.
- Add the Vanilla Extract: Stir in the vanilla extract.
- Dry Ingredients Time: In a separate bowl, whisk together the flour, cocoa powder, salt, and baking powder.
- Combine Wet and Dry Ingredients: Gradually add the dry ingredients to the wet ingredients, mixing until just combined. Be careful not to overmix. Mix until the flour streaks disappear, but no more. A few small lumps are okay.
- Fold in the Andes Mint Baking Chips: Gently fold in ¾ cup of the Andes Mint baking chips. Save the remaining ¼ cup for topping the brownies later.
- Preheat the Oven: Preheat your oven to 350°F (175°C).
- Prepare the Baking Pan: Grease and flour an 8×8 inch baking pan. You can also line the pan with parchment paper, leaving an overhang on the sides.
- Pour in the Batter: Pour the brownie batter into the prepared baking pan and spread it evenly.
- Top with Andes Mints (Optional): Sprinkle the remaining ¼ cup of Andes Mint baking chips and the chopped Andes Mints (if using) over the top of the batter.
- Bake: Bake for 25-30 minutes, or until a toothpick inserted into the center comes out with moist crumbs attached. The baking time may vary depending on your oven, so keep an eye on them. You want the center to be set but still slightly fudgy.
- Cool Completely: Let the brownies cool completely in the pan before cutting. If you used parchment paper, you can lift the brownies out of the pan and place them on a cutting board to cool.
- Use a Sharp Knife: Use a sharp knife to cut the brownies. A dull knife will just squish them.
- Clean the Knife: Clean the knife after each cut to prevent the brownies from sticking. You can also dip the knife in hot water and wipe it dry before each cut. This helps create clean, even slices.
- Cut into Squares: Cut the brownies into squares. The size is up to you! I usually cut them into 16 squares, but you can make them smaller or larger depending on your preference.
- Serve and Enjoy: Serve the brownies and enjoy! They’re delicious on their own, but you can also serve them with a scoop of vanilla ice cream or a dollop of whipped cream.
Notes
- Use high-quality ingredients, especially the cocoa powder and chocolate chips, for the best flavor.
- Don’t overbake the brownies; they should be fudgy.
- Let the brownies cool completely before cutting for clean slices.
- For a richer chocolate flavor, add a pinch of espresso powder to the dry ingredients.
- Store leftover brownies in an airtight container at room temperature for up to 3 days or freeze for longer storage.


Leave a Comment