

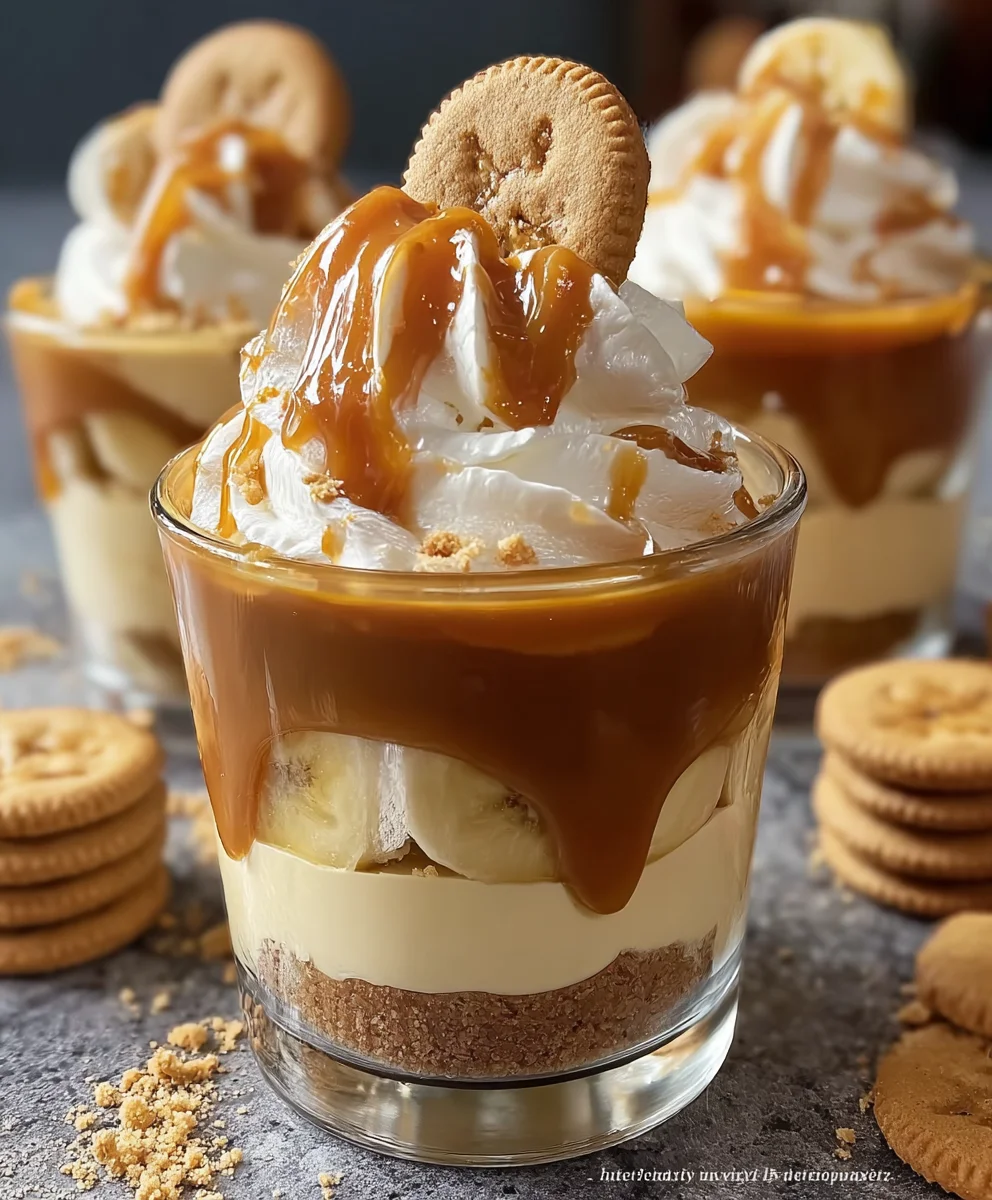
Caramel Banana Pudding Extra Cookies Cups – just reading those words conjures images of pure, unadulterated comfort and joy, doesn’t it? As someone who cherishes classic desserts with a modern, convenient twist, I am absolutely thrilled to share my ultimate take on a beloved Southern staple. Banana pudding has long been a culinary icon, gracing family gatherings and potlucks with its humble yet irresistible charm. Traditionally, it’s a dish celebrated for its simple elegance: ripe bananas, creamy vanilla pudding, and tender wafer cookies, all layered to perfection. However, I believe we can elevate this experience even further, transforming it into something truly extraordinary and effortlessly served.
My special rendition, this delightful Caramel Banana Pudding Extra Cookies Cups, takes everything you adore about the original and enhances it with luscious, golden caramel and the delightful crunch of extra cookie goodness, all presented in charming individual cups. Imagine sinking your spoon into layers of velvety smooth caramel-infused pudding, sweet ripe bananas, and a generous amount of crunchy vanilla wafers, each bite offering a symphony of textures and flavors. It’s the perfect make-ahead dessert for entertaining, a delightful treat for family, or a simply luxurious indulgence just for you. Get ready to fall in love with a classic, reimagined!

Ingredients:
-
For the Rich Caramel Sauce:
- 1 cup (200g) granulated sugar
- 1/4 cup (60ml) water
- 6 tablespoons (85g) unsalted butter, cut into 6 pieces, at room temperature
- 1/2 cup (120ml) heavy cream, warmed slightly
- 1/2 teaspoon sea salt, or to taste
-
For the Velvety Banana Pudding Base:
- 1/2 cup (100g) granulated sugar
- 1/4 cup (30g) cornstarch
- 1/2 teaspoon sea salt
- 3 large egg yolks
- 2 cups (480ml) whole milk
- 2 tablespoons (28g) unsalted butter, cut into small pieces
- 1 teaspoon pure vanilla extract
- 4-5 ripe but firm bananas, sliced into 1/4-inch rounds (about 4-5 cups of slices)
-
For the Dreamy Whipped Cream Topping:
- 1 1/2 cups (360ml) cold heavy cream
- 1/4 cup (30g) powdered sugar (confectioners’ sugar)
- 1 teaspoon pure vanilla extract
-
For Assembly & Extra Cookies:
- 1 (12-ounce) box Nilla wafers (or similar vanilla/shortbread cookies), crushed and whole
- A few extra whole Nilla wafers for garnish (optional)
Phase 1: Crafting the Rich Caramel Sauce
- First things first, let’s get our caramel started! This is where some patience and a watchful eye really pay off. In a medium, heavy-bottomed saucepan, combine your granulated sugar and water. Stir just until the sugar is moistened. We want to avoid splashing sugar crystals up the sides of the pan as much as possible, as these can cause crystallization later.
- Place the saucepan over medium heat. Do not stir the sugar mixture once it starts to boil. Instead, you can gently swirl the pan occasionally to ensure even cooking. Keep a close eye on it. The mixture will first boil, then large bubbles will appear, and finally, it will start to take on a beautiful amber color around the edges. This transformation typically takes about 8-12 minutes, but it can vary.
- The key here is observation: as the edges brown, the color will spread inwards. Continue cooking until the entire mixture turns a rich, deep amber color. We’re aiming for the color of an old copper penny, not too light (which means it won’t have enough flavor) and certainly not burnt (which will be bitter). As soon as it reaches that perfect hue, immediately remove the pan from the heat.
- Now, for the exciting part – carefully and quickly add the room temperature butter, one piece at a time, whisking constantly. Be prepared for the mixture to bubble up vigorously; this is normal! Keep whisking until all the butter is fully incorporated and the mixture is smooth and glossy. Using room temperature butter helps prevent the caramel from seizing up too much.
- Next, slowly and carefully pour in the warm heavy cream, whisking continuously. Again, the mixture will bubble and steam dramatically. Continue whisking until the caramel is smooth and uniform. Warming the cream beforehand helps to reduce the thermal shock and makes for a smoother caramel, so don’t skip that little step!
- Finally, whisk in the sea salt. Start with 1/2 teaspoon and taste the caramel. If you feel it needs a touch more, add a pinch at a time until it reaches your desired balance of sweet and salty. The salt truly enhances the depth of the caramel flavor.
- Pour the finished caramel sauce into a heatproof jar or bowl. Allow it to cool completely at room temperature. As it cools, it will thicken significantly, becoming that luscious, pourable consistency we want for our Caramel Banana Pudding Extra Cookies Cups. You can make this caramel a few days ahead and store it in the refrigerator; just gently rewarm it before using to make it pourable again.
Phase 2: Preparing the Velvety Banana Pudding Base
- Let’s get started on the heart of our pudding: the creamy banana custard. In a medium saucepan, off the heat for now, combine the 1/2 cup granulated sugar, cornstarch, and 1/2 teaspoon sea salt. Whisk these dry ingredients together thoroughly. This ensures there are no lumps of cornstarch later and that the sugar and salt are evenly distributed.
- In a separate medium bowl, whisk your three large egg yolks until they are uniformly yellow and slightly frothy. This will be the base for our rich custard.
- Gradually whisk the 2 cups of whole milk into the egg yolks. Pouring it slowly and mixing ensures a smooth, well-combined mixture.
- Now, pour the egg and milk mixture into the saucepan with the dry ingredients. Whisk constantly as you do this to prevent any lumps from forming. It’s crucial to get everything smooth before we introduce heat.
- Place the saucepan over medium heat. Now, this next part requires constant attention – whisk, whisk, whisk! You must stir the mixture continuously with a whisk or a rubber spatula, making sure to scrape the bottom and sides of the pan. This prevents scorching and ensures even cooking of the custard.
- Continue cooking and whisking for about 8-12 minutes. The mixture will gradually thicken. You’ll know it’s ready when it comes to a gentle boil (you’ll see a few big bubbles pop) and coats the back of a spoon. It should be thick enough to hold a line when you run your finger across the spoon. Don’t rush this step, as undercooked cornstarch can leave a starchy taste.
- Once thickened, immediately remove the saucepan from the heat. Stir in the 2 tablespoons of unsalted butter, piece by piece, until it’s completely melted and incorporated. The butter adds richness and a beautiful gloss to our pudding.
- Finally, whisk in the 1 teaspoon of pure vanilla extract. Vanilla is essential for that classic banana pudding flavor.
- Pour the finished pudding into a clean bowl. To prevent a skin from forming on top (which can be unappealing), press a piece of plastic wrap directly onto the surface of the pudding. Make sure it touches every bit of the pudding.
- Allow the pudding to cool on the countertop for about 30 minutes, then transfer it to the refrigerator to chill for at least 2-3 hours, or preferably until completely cold. A thoroughly chilled pudding will set properly and make for the best Banana Pudding Extra Cookies Cups.
- While the pudding is chilling, it’s a good time to prep your bananas. Slice your ripe but firm bananas into 1/4-inch rounds. I recommend slicing them closer to assembly time to minimize browning, though a little lemon juice tossed with them can help if you’re preparing far in advance.
Phase 3: Whipping Up the Dreamy Topping
- Making whipped cream is quite simple, but a few tips can make all the difference. Start with a very cold bowl and cold heavy cream. You can even chill your whisk attachment (if using a stand mixer) or beaters (if using a hand mixer) for a few minutes beforehand. This helps the cream whip up faster and hold its peaks better.
- In your chilled bowl, pour the 1 1/2 cups of cold heavy cream. Add the 1/4 cup of powdered sugar and 1 teaspoon of pure vanilla extract. Powdered sugar is preferred over granulated sugar for whipped cream because it contains a small amount of cornstarch, which helps stabilize the whipped cream and prevents it from weeping.
- Using an electric mixer (stand mixer with whisk attachment or a hand mixer), start beating the mixture on low speed until it just begins to thicken. Then increase the speed to medium-high.
- Continue beating until soft peaks form. This means that when you lift the whisk, the cream will hold a peak that gently slumps over.
- For this recipe, we want to go a little further, aiming for medium-stiff peaks. These peaks will hold their shape better but still be light and airy. Be careful not to overbeat, or you’ll end up with butter! The whole process usually takes about 2-4 minutes, depending on your mixer and cream temperature.
- Once your whipped cream is ready, keep it chilled in the refrigerator until you’re ready to assemble your Caramel Banana Pudding Extra Cookies Cups.
Phase 4: Assembling Your Caramel Banana Pudding Extra Cookies Cups
- Now for the grand finale – assembling these delightful Caramel Banana Pudding Extra Cookies Cups! Gather all your components: the cooled caramel sauce, chilled banana pudding base, freshly whipped cream, sliced bananas, and of course, your Nilla wafers. You’ll also need about 6-8 individual serving cups or jars (8-10 ounce capacity works well).
- First, let’s prepare the cookies for the “Extra Cookies” aspect. Take about half of your Nilla wafers and crush them into coarse crumbs. You can do this by placing them in a Ziploc bag and crushing with a rolling pin, or pulsing briefly in a food processor. Keep the other half of the cookies whole for layering.
- Layer 1: Crushed Cookie Base. Start by spooning a generous layer of the crushed Nilla wafer crumbs into the bottom of each individual cup. This creates a wonderful textural contrast and a sturdy base for our pudding. Gently press them down to form an even layer.
- Layer 2: Sliced Bananas. Arrange a single layer of your sliced bananas over the crushed cookies in each cup. Try to make them fit snugly, covering as much of the cookie layer as possible.
- Layer 3: Velvety Banana Pudding. Spoon a generous amount of your chilled banana pudding over the bananas. Make sure it completely covers the banana slices. This will be a substantial layer, so be generous!
- Layer 4: Whole Nilla Wafers & Caramel Drizzle. Here’s where we add more of the “Extra Cookies.” Place 2-3 whole Nilla wafers (or enough to cover most of the pudding surface) directly on top of the pudding layer. Then, drizzle a nice amount of your homemade caramel sauce over the cookies. This layer really enhances the “Caramel Banana Pudding” experience.
- Repeat the Layers (Optional, but highly recommended for Extra Cookies Cups!): For a truly decadent and tall cup, repeat the layers:
- Another layer of sliced bananas.
- Another layer of the velvety banana pudding.
- Another layer of whole Nilla wafers, followed by another generous drizzle of caramel sauce.
Adjust the number of layers based on the size of your cups and how many servings you want to get. The goal is to maximize that delicious layering!
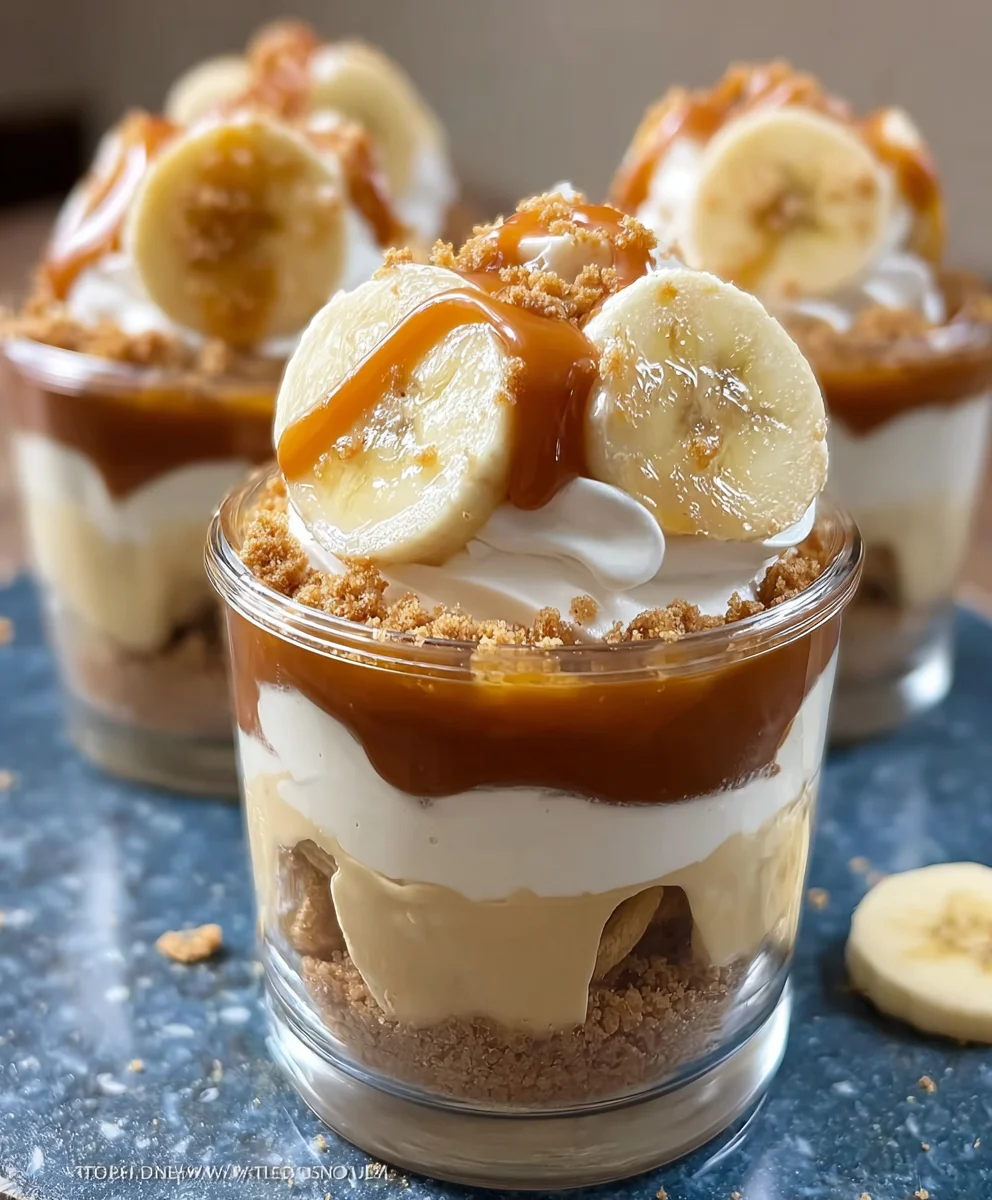
- Final Layer: Dreamy Whipped Cream. Once you’re happy with your pudding and cookie layers, top each cup with a generous dollop or swirl of your dreamy whipped cream. You can use a spoon for a rustic look or pipe it on using a pastry bag with a star tip for a more elegant finish.
- Garnish (The “Extra” Touch): For the ultimate Caramel Banana Pudding Extra Cookies Cups, crown each serving with a few extra whole Nilla wafers, perhaps a sprinkle of additional crushed cookies, or even a final small drizzle of caramel sauce. This makes them look absolutely irresistible and telegraphs that these are indeed the “extra” cookies versions.
Phase 5: Chilling and Serving Suggestions
- Once all your Caramel Banana Pudding Extra Cookies Cups are assembled, it’s crucial to give them time to chill. Loosely cover each cup with plastic wrap or a lid. Place them in the refrigerator for at least 4 hours, but ideally overnight. This chilling period is vital for several reasons: it allows the pudding to fully set, the flavors to meld beautifully, and the Nilla wafers to soften just enough to become cake-like without completely dissolving, providing that classic banana pudding texture.
- While the pudding is chilling, the caramel will infuse into the layers, and the bananas will impart their sweet essence throughout the creamy base. The “extra cookies” will absorb moisture, transforming into a delightful, soft texture that is truly a signature of a great banana pudding.
- When you are ready to serve, pull the cups out of the refrigerator. They are best enjoyed cold. If you garnished with fresh banana slices on top, these are best added just before serving to prevent browning.
- These individual Caramel Banana Pudding Extra Cookies Cups are perfect for parties, picnics, or simply as a special treat at home. Their single-serving nature makes them convenient and appealing. The combination of creamy pudding, soft bananas, decadent caramel, and those wonderful softened cookies creates a symphony of textures and flavors that is truly unforgettable. Enjoy every delightful spoonful of this enhanced classic!
Conclusion:
Well, my friends, we’ve reached the sweet finale of our culinary journey, and I genuinely hope you’re feeling as excited as I am about this incredible dessert. This isn’t just another recipe; it’s an invitation to experience pure, unadulterated joy in every single spoonful. I truly believe that once you whip up a batch, you’ll understand why this particular creation stands head and shoulders above the rest. It’s the kind of treat that doesn’t just satisfy your sweet tooth; it wraps you in a warm, comforting hug, transporting you back to cherished childhood memories while simultaneously creating new, delicious ones. The combination of creamy, luscious banana pudding, the rich, deeply caramelized sauce, and the satisfying crunch of those extra cookies, all nestled together, creates a symphony of textures and flavors that is nothing short of extraordinary. It’s decadent without being overly heavy, comforting yet surprisingly elegant, and, most importantly, incredibly easy to make, ensuring a triumphant dessert experience for even novice bakers. Trust me, this is a showstopper, a crowd-pleaser, and a dessert that will undoubtedly earn you rave reviews from anyone lucky enough to try it.
What truly sets this dessert apart is the meticulous balance of its components. We’re talking about a banana pudding that’s so silky smooth, so infused with natural banana flavor, it’s practically dreamy. Then, we layer in that gorgeous, homemade caramel – not too sweet, with just a hint of buttery saltiness that perfectly complements the fruit. And those ‘extra cookies’? Ah, that’s where the magic truly unfolds! We’re not just talking about a base layer; we’re talking about an abundance of delightful crunch and texture woven throughout, adding an irresistible dimension to every bite. It’s a texture party in your mouth, a delightful contrast that keeps you coming back for more. Imagine biting into the cool, soft pudding, encountering a luscious ribbon of caramel, and then hitting that satisfying, familiar snap of a cookie. It’s an experience designed to delight all your senses, a culinary masterpiece that looks as good as it tastes. This recipe transforms simple ingredients into something truly spectacular, making it a powerful contender for your new go-to dessert for any occasion, big or small.
Serving Suggestions to Elevate Your Experience:
While these beautiful cups are absolutely perfect served chilled, straight from the refrigerator, there are a few ways you can elevate the experience even further. For a classic touch, a dollop of freshly whipped cream, perhaps lightly sweetened with a whisper of vanilla, makes an exquisite topping. You could also shave a little dark chocolate over the top for a hint of bittersweet richness, or sprinkle a tiny pinch of sea salt flakes to really make that caramel sing. If you’re feeling adventurous, try serving a warm drizzle of extra caramel sauce on the side, allowing your guests to add even more of that golden goodness to their individual servings. For those who appreciate a pairing, a strong cup of coffee or a glass of cold milk makes a wonderfully comforting accompaniment. And don’t forget the presentation! A sprig of fresh mint or a thin slice of banana, artfully placed, can turn each cup into a mini work of art, perfect for impressing guests at your next dinner party or simply making a weeknight treat feel extra special.
Creative Twists and Variations to Make it Your Own:
The beauty of a dessert like this lies in its versatility. While the core recipe is divine, feel free to experiment and make it uniquely yours. Instead of traditional vanilla wafers, consider using shortbread cookies for a buttery richness, or even chocolate chip cookies for an extra layer of decadence. Graham crackers can offer a different kind of crunch and a slightly more rustic feel. For an added textual dimension, a sprinkle of toasted pecans or walnuts between the layers would be absolutely delicious, complementing the caramel beautifully. You could even introduce other fruits, though I’d recommend keeping banana as the star, perhaps adding a few fresh berries for a pop of tartness if you desire a fruitier profile. For a holiday twist, a pinch of nutmeg or cinnamon mixed into the pudding would add a lovely warmth. And if you’re serving a crowd, consider assembling this magnificent creation in a large trifle bowl instead of individual cups; it makes for a stunning centerpiece and is equally delightful to scoop out. The possibilities are truly endless, limited only by your imagination, so don’t be afraid to play around with the components and discover your new favorite iteration.
So, there you have it, my fellow dessert enthusiasts. I’ve shared with you a recipe that I truly adore, a dessert that promises to bring smiles and satisfaction to everyone who tries it. Now it’s your turn! I implore you to roll up your sleeves, gather your ingredients, and dive into the delightful process of creating your very own batch of these incredible cups. You’ll find the process incredibly rewarding, and the end result – a symphony of flavors and textures – will be well worth every moment of effort. Imagine the joy of presenting these to your loved ones, or simply savoring one yourself after a long day. I am so confident that you will fall head over heels for this treat, especially once you taste the exquisite balance and richness that only this recipe offers. And when you do, please, please, don’t keep the experience to yourself! I absolutely love seeing your creations. So, once you’ve crafted your perfect set of Caramel Banana Pudding Extra Cookies Cups, snap a picture, share your thoughts, and let me know how much you and your family enjoyed every single delicious layer. Your feedback and shared experiences truly make my day, and it helps our community of dessert lovers grow even stronger. Let’s spread the joy of this magnificent dessert far and wide!
Go on, embrace the sweetness, and get ready to create something truly magical in your kitchen. I can’t wait to hear all about your delicious success!
Caramel Banana Pudding Extra Cookies Cups
This Caramel Banana Pudding Extra Cookies Cups recipe takes classic banana pudding to the next level. With layers of crunchy cookies, creamy banana pudding, and sweet caramel sauce, this dessert is rich, indulgent, and perfect for any sweet tooth. Easy to make and served chilled, it’s a crowd-pleaser that’s topped with whipped cream for extra flair.
Ingredients
-
1 cup (200g) granulated sugar (for caramel)
-
1/4 cup (60ml) water (for caramel)
-
6 tbsp (85g) unsalted butter, room temp (for caramel)
-
1/2 cup (120ml) heavy cream, warmed (for caramel)
-
1/2 tsp sea salt (for caramel)
-
1/2 cup (100g) granulated sugar (for pudding base)
-
1/4 cup (30g) cornstarch (for pudding base)
-
1/2 tsp sea salt (for pudding base)
-
3 large egg yolks (for pudding base)
-
2 cups (480ml) whole milk (for pudding base)
-
2 tbsp (28g) unsalted butter (for pudding base)
-
1 tsp pure vanilla extract (for pudding base)
-
4-5 ripe bananas, sliced 1/4-inch rounds (approx. 4-5 cups slices)
-
1 1/2 cups (360ml) cold heavy cream (for topping)
-
1/4 cup (30g) powdered sugar (for topping)
-
1 tsp pure vanilla extract (for topping)
-
1 (12-ounce) box Nilla wafers (or similar), crushed and whole
-
Extra whole Nilla wafers for garnish (optional)
Instructions
-
Step 1
1. Combine 1 cup granulated sugar and 1/4 cup water in a heavy saucepan. Heat over medium without stirring until the mixture turns a deep amber color (8-12 minutes). Immediately remove from heat.\n2. Carefully whisk in 6 tbsp room temperature butter, one piece at a time, until smooth.\n3. Slowly pour in 1/2 cup warm heavy cream, whisking constantly until smooth and uniform. \n4. Whisk in 1/2 tsp sea salt. Pour into a heatproof jar and cool completely at room temperature; it will thicken significantly. -
Step 2
1. In a medium saucepan, whisk 1/2 cup granulated sugar, 1/4 cup cornstarch, and 1/2 tsp sea salt.\n2. In a separate bowl, whisk 3 large egg yolks. Gradually whisk in 2 cups whole milk.\n3. Pour the egg-milk mixture into the saucepan with dry ingredients, whisking constantly to prevent lumps.\n4. Place saucepan over medium heat. Whisk continuously for 8-12 minutes until the mixture gently boils and coats the back of a spoon.\n5. Remove from heat. Stir in 2 tbsp unsalted butter and 1 tsp vanilla extract.\n6. Pour pudding into a clean bowl, pressing plastic wrap directly onto the surface to prevent a skin. Cool for 30 minutes, then chill in the refrigerator for at least 2-3 hours or until completely cold.\n7. Slice 4-5 ripe bananas into 1/4-inch rounds. -
Step 3
1. Chill a bowl and your whisk attachment/beaters. \n2. In the chilled bowl, combine 1 1/2 cups cold heavy cream, 1/4 cup powdered sugar, and 1 tsp vanilla extract. \n3. Beat with an electric mixer on medium-high speed until medium-stiff peaks form (about 2-4 minutes). Keep chilled until assembly. -
Step 4
1. Gather all components and 6-8 individual serving cups (8-10 ounce capacity).\n2. Crush half of the Nilla wafers into coarse crumbs; keep the remaining whole.\n3. **Layer 1:** Spoon a generous layer of crushed Nilla wafers into the bottom of each cup. Press gently.\n4. **Layer 2:** Arrange a single layer of sliced bananas over the crushed cookies.\n5. **Layer 3:** Spoon a generous amount of chilled banana pudding over the bananas, covering them completely.\n6. **Layer 4:** Place 2-3 whole Nilla wafers on top of the pudding, then drizzle with caramel sauce.\n7. **Repeat (Optional):** For taller cups, repeat the layers: bananas, pudding, whole Nilla wafers, and caramel drizzle.\n8. **Final Layer:** Top each cup with a generous dollop or swirl of whipped cream.\n9. **Garnish:** Crown each cup with extra whole Nilla wafers, a sprinkle of crushed cookies, or a final small drizzle of caramel sauce. -
Step 5
1. Loosely cover assembled cups and refrigerate for at least 4 hours, or ideally overnight, to allow flavors to meld and cookies to soften.\n2. Serve cold. If garnishing with fresh banana slices, add them just before serving to prevent browning.\n3. Enjoy this enhanced classic, perfect for parties or a luxurious treat.
Important Information
Nutrition Facts (Per Serving)
It is important to consider this information as approximate and not to use it as definitive health advice.
Allergy Information
Please check ingredients for potential allergens and consult a health professional if in doubt.
Leave a Comment