

Chickpea Salad is a culinary marvel that has taken the plant-based world by storm, and for excellent reason! I’m absolutely thrilled to share with you a recipe that I believe perfectly encapsulates everything wonderful about this versatile dish. Have you ever wondered how something so simple can deliver such an incredible punch of flavor and satisfaction?
While the concept of a modern, mayo-based Chickpea Salad might seem like a contemporary innovation, chickpeas themselves, known as garbanzo beans, boast a history dating back thousands of years, with their origins deeply rooted in Middle Eastern and Mediterranean cuisines. They’ve long been celebrated for their nutritional value and adaptability, a heritage that our delightful salad proudly continues. This isn’t just a dish; it’s a celebration of humble ingredients elevated to extraordinary heights.
People worldwide have fallen head over heels for this particular style of salad due to its irresistible combination of creamy texture and refreshing crunch. It’s incredibly easy to prepare, making it a dream for busy weekdays, meal prepping, or spontaneous gatherings. Whether you’re a seasoned plant-based eater or simply looking to introduce more wholesome and delicious options into your diet, this Chickpea Salad is guaranteed to become a cherished staple in your kitchen. Get ready to discover your new favorite lunch!

Ingredients:
- Two 15-ounce cans (approx. 425g each) of chickpeas, also known as garbanzo beans
- ½ cup (120ml) vegan mayonnaise or regular mayonnaise (I love using a good quality, creamy brand for the best texture in my Chickpea Salad)
- 2 medium stalks of celery, finely diced (about ¾ cup)
- ¼ cup finely diced red onion (you can soak this in a little cold water for 5 minutes if you prefer a milder onion flavor, which I sometimes do for a more subtle finish)
- ¼ cup finely chopped dill pickles or sweet pickle relish (I’m a huge fan of dill for that classic tang, but relish offers a convenient, finely chopped option)
- 2 tablespoons fresh dill, finely chopped (this is a non-negotiable for me; fresh dill truly elevates the flavor of this Chickpea Salad!)
- 1 tablespoon Dijon mustard (or yellow mustard if you prefer a more classic, mild flavor)
- 1 tablespoon fresh lemon juice (always freshly squeezed for the brightest taste, my friends!)
- ½ teaspoon sea salt, or to taste
- ¼ teaspoon freshly ground black pepper, or to taste
- Optional additions for extra flavor and flair:
- ¼ teaspoon smoked paprika for a hint of warmth and color
- ½ teaspoon garlic powder for an added layer of savory goodness
- 1-2 tablespoons nutritional yeast for a “cheesy” umami flavor (especially wonderful if you’re making a vegan version!)
- A pinch of red pepper flakes if you like a little kick
- 2 tablespoons chopped fresh parsley for an herbaceous lift and extra green color
- 2 tablespoons toasted sunflower seeds or chopped pecans for added crunch and richness
- For serving (my favorite ways to enjoy this incredible Chickpea Salad):
- Your favorite sandwich bread (whole wheat, sourdough, rye, or gluten-free options work beautifully)
- Large lettuce leaves (such as romaine or butter lettuce) for a low-carb wrap
- Crackers or cucumber slices for a delightful appetizer or snack
- As a topping for a green salad
Gathering and Prepping Your Ingredients
- Drain and Rinse the Chickpeas: First things first, grab your two cans of chickpeas. Open them up and pour them into a colander. Rinse them thoroughly under cold running water. You want to make sure all that canning liquid is washed away, as it can sometimes impart a slightly metallic or off-flavor. I always give them a good rinse until the water runs clear. After rinsing, let them drain for a few minutes, shaking the colander occasionally to get rid of as much excess water as possible. This step is crucial because too much moisture can make your Chickpea Salad watery instead of wonderfully creamy.
-
Chop Your Veggies and Herbs: Now, let’s get those knives working!
- Celery: Take your celery stalks and finely dice them. We’re looking for small, consistent pieces here, about ¼-inch. This ensures that every bite of your Chickpea Salad gets a delightful crunch without being overwhelmed by large chunks.
- Red Onion: Finely dice your red onion. For those who find red onion a bit too pungent, a little trick I often employ is to place the diced onion in a small bowl of cold water for about 5-10 minutes. This helps to mellow out its sharp bite. Just make sure to drain and pat it very dry with a paper towel before adding it to the salad.
- Dill Pickles: Whether you’re using whole dill pickles or relish, make sure they are finely chopped. If you’re chopping pickles yourself, aim for pieces similar in size to your diced celery. This adds that essential tangy, briny flavor and a nice textural contrast to your Chickpea Salad.
- Fresh Dill: Chop your fresh dill very finely. This herb is the star of the show for its aromatic, slightly grassy, and distinctive flavor that truly defines a classic “salad” profile. Don’t skimp on the fresh dill – it makes all the difference!
- Lemon: If you haven’t already, slice your lemon and squeeze out 1 tablespoon of fresh juice. I always recommend using fresh over bottled; the brightness it brings to the Chickpea Salad is incomparable.
Crafting the Creamy Chickpea Salad Base
- Mash the Chickpeas: Transfer your drained and rinsed chickpeas into a large mixing bowl. Now comes the fun part! Using a fork, a potato masher, or even a pastry blender, begin to mash the chickpeas. My personal preference for a perfect Chickpea Salad texture is to mash about 70-80% of the chickpeas, leaving some whole or half-mashed. This gives you a wonderful combination of creaminess from the mashed beans and a delightful bite from the larger pieces. Avoid mashing them into a completely smooth paste; we want some texture in our Chickpea Salad! If you’re going for a very smooth spread, you can mash them more thoroughly, but I find the varied texture to be more satisfying.
- Introduce the Creamy Foundation: To your mashed chickpeas, add the mayonnaise (or vegan mayo), Dijon mustard, and fresh lemon juice. These ingredients are the backbone of your Chickpea Salad’s creamy, tangy, and subtly spicy flavor profile.
- Initial Seasoning and Mixing: Sprinkle in the ½ teaspoon of sea salt and ¼ teaspoon of freshly ground black pepper. Give everything a good stir with a sturdy spoon or spatula. Mix until all the ingredients are well combined and the chickpeas are evenly coated with the creamy dressing. At this stage, I often take a tiny taste. This allows me to gauge the foundational flavor before adding the remaining ingredients. We’re looking for a good balance of creaminess, tang, and a hint of savoriness. Don’t be afraid to adjust the salt or pepper now if you feel it needs a little boost.
Layering in the Flavor Boosters and Texture Elements
- Add the Crunch and Zing: Now it’s time to bring in all those wonderful diced vegetables and herbs that will truly make this a vibrant Chickpea Salad. Add the finely diced celery, red onion, and chopped dill pickles (or relish) to the bowl with your chickpea mixture. These ingredients are essential for providing that satisfying crunch and a burst of fresh, tangy flavor that complements the creamy base so well.
- The Fresh Dill Factor: Stir in the fresh dill. As I mentioned in the ingredients list, this is a powerhouse of flavor for this particular salad. The aromatic notes of fresh dill cut through the richness of the mayonnaise and brighten up the entire dish, making your Chickpea Salad taste incredibly fresh and herbaceous. Gently fold all these new additions into the chickpea mixture until everything is uniformly distributed. You’ll start to see your Chickpea Salad really come to life at this point, with beautiful flecks of green and red.
-
Consider Your Optional Flavor Enhancers (If Using):
- Smoked Paprika: If you’re adding smoked paprika, sprinkle it in now. It not only adds a lovely warm, smoky undertone but also a beautiful hint of color to your Chickpea Salad, making it even more appealing.
- Garlic Powder: For an extra layer of savory depth without the raw bite of fresh garlic, add the garlic powder. It blends seamlessly into the creamy base.
- Nutritional Yeast: If you’re going for that “cheesy” umami flavor, especially for a vegan profile, now’s the time to stir in the nutritional yeast. It adds a distinctive richness that many people adore in their Chickpea Salad.
- Red Pepper Flakes/Fresh Parsley/Toasted Seeds: If you want a bit of heat, some extra freshness from parsley, or the delightful textural contrast of toasted seeds or nuts, fold them in gently at this stage. I find that sunflower seeds add a lovely, subtle nuttiness that works perfectly in a Chickpea Salad sandwich.
Give the salad another good stir to ensure all these fantastic additions are well incorporated.
- The All-Important Taste Test and Final Adjustments: This is arguably one of the most critical steps in any recipe! Take a generous spoonful of your Chickpea Salad. Taste it critically. Does it need more salt? Perhaps a little more pepper? Does it need an extra squeeze of lemon juice to brighten it up further? Maybe another dash of Dijon mustard for more tang? Or even a bit more fresh dill if you’re a dill enthusiast like me! Adjust the seasonings to your personal preference. Remember, everyone’s palate is different, and this is your delicious Chickpea Salad! I often find I add a little extra lemon juice at this point, as it really makes all the flavors sing.
Chilling and Serving Your Delightful Chickpea Salad
- Chill for Optimal Flavor: Once you’re happy with the taste, cover the bowl with plastic wrap or transfer your Chickpea Salad to an airtight container. Place it in the refrigerator and let it chill for at least 30 minutes. I strongly recommend an hour or even longer if you have the time! Chilling is more than just about serving it cold; it allows all the wonderful flavors to meld together and deepen. The onion mellows, the dill infuses the entire mixture, and the chickpeas absorb all the fantastic seasonings. This step truly transforms a good Chickpea Salad into an exceptional one.
-
Serving Your Masterpiece: After chilling, give the Chickpea Salad one final stir before serving.
- As a Sandwich: My absolute favorite way to enjoy this is piled high on a slice of good quality bread. You can add fresh lettuce leaves, slices of tomato, or even some avocado for an extra layer of creaminess and nutrition. This makes for an incredibly satisfying and wholesome sandwich.
- In Lettuce Wraps: For a lighter, low-carb option, spoon generous amounts of the Chickpea Salad into crisp lettuce cups, such as romaine hearts or butter lettuce leaves. It’s refreshing and incredibly satisfying.
- With Crackers or Veggies: Serve it as a dip or spread with your favorite crackers, pita chips, or an assortment of fresh raw vegetables like cucumber slices, carrot sticks, or bell pepper strips. It’s a fantastic snack or party appetizer.
- As a Salad Topper: Dollop a scoop or two onto a bed of mixed greens for a protein-packed and flavorful main course salad.
- Storage: Your freshly made Chickpea Salad will keep wonderfully in an airtight container in the refrigerator for 3 to 4 days. It often tastes even better the next day once the flavors have had more time to mingle! I find that making a larger batch allows me to enjoy quick, delicious meals throughout the week. You’ll be amazed at how versatile and delicious this simple yet profound Chickpea Salad is.
Conclusion:
And there you have it, friends! We’ve journeyed together through what I truly believe is not just another recipe, but a culinary revelation. This isn’t merely about throwing a few ingredients into a bowl; it’s about crafting a dish that consistently delivers on all fronts: flavor, texture, and pure, unadulterated satisfaction. I’ve personally made this recipe countless times, and each time, it reminds me why it holds such a special place in my kitchen repertoire. It’s the kind of dish that surprises you with its depth, given its simplicity. Think about those busy weeknights when you crave something wholesome and delicious but are pressed for time – this recipe swoops in like a culinary superhero, rescuing your meal plans with its speedy preparation and minimal fuss. It’s also incredibly forgiving, allowing you to tweak and adapt it to whatever ingredients you have on hand or whatever your taste buds are currently craving. For me, the magic truly lies in how something so humble, so straightforward, can transform into such a vibrant and utterly delightful experience. It’s a testament to the power of fresh ingredients and a well-balanced flavor profile.
Why this recipe is an absolute game-changer:
First and foremost, it’s the taste. The harmonious blend of savory, tangy, and subtly sweet notes creates an explosion of flavor that will make your palate sing. Then there’s the texture – that wonderfully creamy yet slightly firm bite from the chickpeas, perfectly complemented by the crisp freshness of the celery and the delightful crunch of the onions. It’s a textural symphony! Beyond its incredible taste and mouthfeel, this recipe is a nutritional powerhouse. Packed with plant-based protein and fiber from the chickpeas, it’s a meal that truly nourishes your body, keeping you feeling full, energized, and satisfied for hours. It’s also incredibly adaptable, effortlessly fitting into various dietary preferences, whether you’re vegan, vegetarian, or simply looking to incorporate more plant-based meals into your diet. Its versatility means it’s perfect for meal prepping, ensuring you have healthy, delicious options ready to go throughout your week. And let’s not forget the sheer convenience – no cooking required beyond perhaps boiling some chickpeas if you’re not using canned ones, making it an ideal choice for quick lunches or last-minute gatherings. It’s light yet filling, refreshing yet comforting – a truly remarkable balance that few dishes achieve.
Unleash your creativity with these serving suggestions and variations:
Now, let’s talk about how you can truly make this recipe your own and integrate it into your everyday meals. While a classic sandwich or wrap is always a fantastic starting point for this versatile Chickpea Salad, don’t stop there! I love spooning generous dollops onto crisp lettuce cups – think butter lettuce or romaine hearts – for a lighter, gluten-free option that’s bursting with freshness. It makes an incredible filling for bell pepper halves or hollowed-out tomatoes, turning them into vibrant, edible bowls. For a quick snack, pair it with whole-grain crackers or sturdy vegetable sticks like cucumber and carrots. It’s also a phenomenal addition to a larger grain bowl, sitting proudly alongside quinoa, roasted vegetables, and a drizzle of a tahini dressing. Consider it a protein-packed side dish alongside a grilled portobello mushroom or a simple green salad for a complete and satisfying meal. For breakfast or brunch, I’ve even enjoyed it on toasted sourdough with a sprinkle of fresh dill. The possibilities truly are endless!
Feeling adventurous? Let’s explore some delicious variations. To elevate the flavor profile, try adding a tablespoon of fresh chopped dill or parsley for a burst of herby goodness. A pinch of smoked paprika can introduce a wonderful smoky depth, while a dash of curry powder can transport your taste buds to a whole new world of aromatic delight. For an extra layer of crunch and healthy fats, mix in some toasted sunflower seeds, chopped almonds, or even a sprinkle of everything bagel seasoning. If you like a bit of heat, a finely minced jalapeño or a pinch of red pepper flakes will do the trick. You can also play with the acidity – swap out some of the lemon juice for a splash of apple cider vinegar or even a touch of white wine vinegar for a different kind of tang. For a creamier texture, you might experiment with adding a dollop of tahini or a spoonful of mashed avocado to the dressing. Don’t be afraid to incorporate other finely diced vegetables too: finely chopped red bell peppers for sweetness, corn for a pop of color and sweetness, or even some capers for a briny kick. This recipe is your canvas; feel free to paint with your favorite flavors and textures!
Your culinary adventure starts now!
I genuinely believe that once you try this recipe, it will quickly become a beloved staple in your home, just as it has in mine. It’s more than just food; it’s an experience – a delicious, healthy, and incredibly versatile experience that you’ll want to revisit again and again. So, what are you waiting for? Head into your kitchen, gather your ingredients, and prepare to be amazed. I’m truly excited for you to embark on this culinary journey and discover the pure joy of creating something so wholesome and flavorful with your own hands. Don’t just follow the recipe; embrace it, make it your own, and let your unique culinary spirit shine through. And when you do, please, please, please come back and tell me all about it! I absolutely adore hearing about your kitchen successes, your personal twists, and how this dish fits into your life. Share your thoughts in the comments section below, or better yet, snap a photo of your magnificent creation and tag me on social media. Your experiences and feedback are what truly bring this community to life, and I can’t wait to see the wonderful variations you come up with. Happy cooking, and enjoy every single delightful bite!
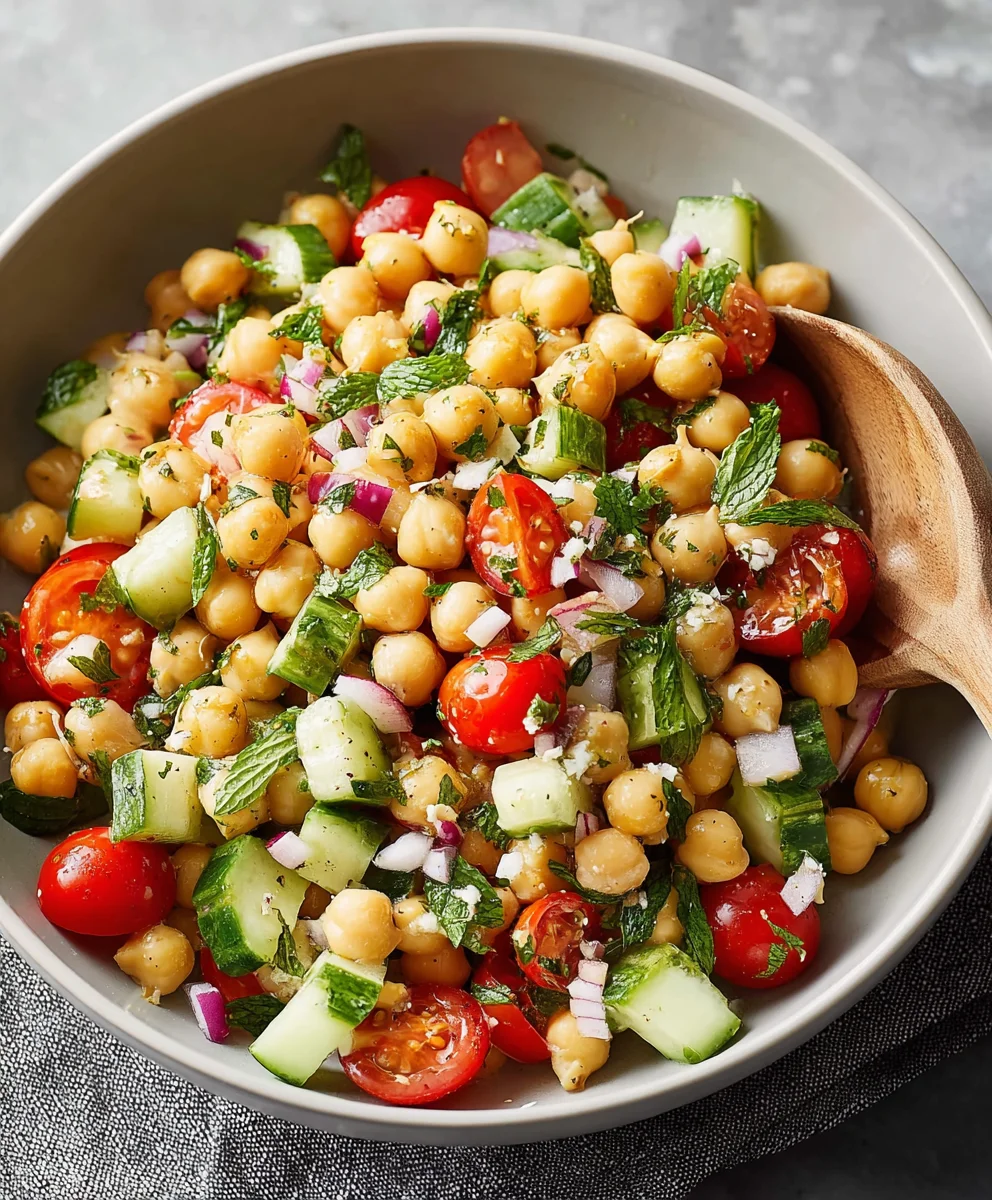
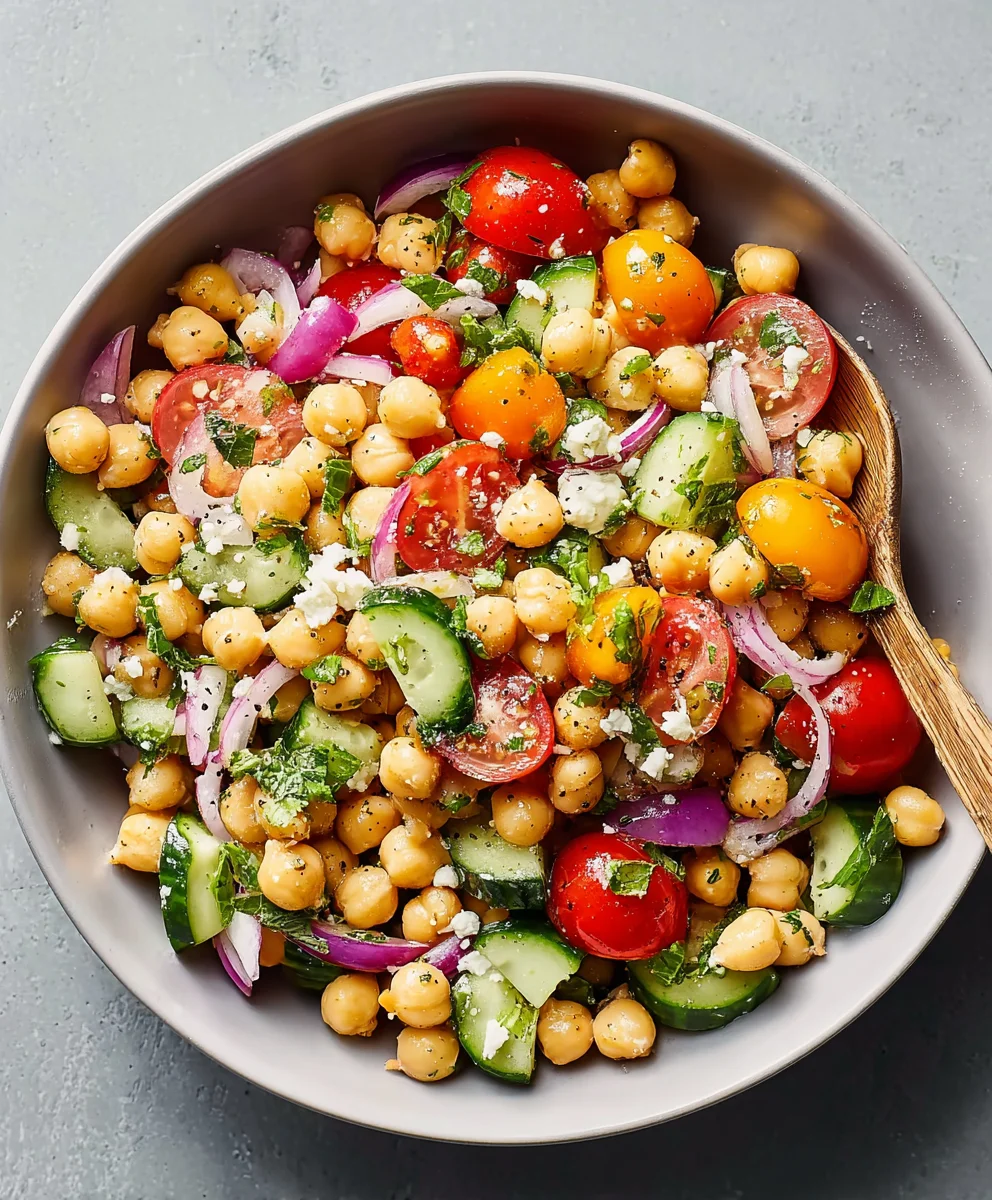
Easy Chickpea Salad
A healthy, flavorful, and easy-to-prepare plant-based Chickpea Salad recipe. This versatile dish combines creamy chickpeas with a refreshing crunch, perfect for sandwiches, wraps, or as a side, ready in minutes.
Ingredients
-
Two 15-ounce cans (approx. 850g total) chickpeas
-
½ cup (120ml) mayonnaise (vegan or regular)
-
2 medium stalks celery, finely diced (¾ cup)
-
¼ cup finely diced red onion
-
¼ cup finely chopped dill pickles or relish
-
2 tablespoons fresh dill, finely chopped
-
1 tablespoon Dijon mustard
-
1 tablespoon fresh lemon juice
-
½ teaspoon sea salt
-
¼ teaspoon black pepper
-
(Optional) ¼ teaspoon smoked paprika
-
(Optional) ½ teaspoon garlic powder
-
(Optional) 1-2 tablespoons nutritional yeast
-
(Optional) Pinch red pepper flakes
-
(Optional) 2 tablespoons fresh parsley, chopped
-
(Optional) 2 tablespoons toasted sunflower seeds or chopped pecans
Instructions
-
Step 1
Drain and rinse chickpeas thoroughly under cold water, then drain well. -
Step 2
In a large mixing bowl, mash chickpeas with a fork or potato masher, leaving about 20-30% whole for varied texture. -
Step 3
To the mashed chickpeas, add mayonnaise, Dijon mustard, fresh lemon juice, ½ teaspoon sea salt, and ¼ teaspoon black pepper. Stir well until combined. -
Step 4
Fold in the finely diced celery, red onion, chopped dill pickles (or relish), and fresh dill. -
Step 5
If using optional ingredients, stir in smoked paprika, garlic powder, nutritional yeast, red pepper flakes, fresh parsley, or toasted sunflower seeds/pecans. -
Step 6
Taste the chickpea salad and adjust seasonings as needed (salt, pepper, lemon juice, or mustard). -
Step 7
Cover the bowl and chill in the refrigerator for at least 30 minutes (1 hour or longer is recommended) to allow flavors to meld and deepen. -
Step 8
Serve chilled on your favorite bread, in lettuce wraps, with crackers or cucumber slices, or as a topping for a green salad. Store leftovers in an airtight container in the refrigerator for 3-4 days.
Important Information
Nutrition Facts (Per Serving)
It is important to consider this information as approximate and not to use it as definitive health advice.
Allergy Information
Please check ingredients for potential allergens and consult a health professional if in doubt.


Leave a Comment