

Custard Pie – ah, the mere mention evokes images of comfort and simple, timeless pleasure. There’s something uniquely enchanting about a perfectly baked pie, its golden-brown top hinting at the silky-smooth, vanilla-infused filling beneath. This iconic dessert holds a cherished place in culinary history, particularly within American Southern kitchens, where it has long been a staple of family gatherings and holiday tables. Tracing its roots back to colonial times, it represents a tradition of simple, wholesome ingredients transformed into something truly extraordinary.
I find that people adore this humble yet magnificent creation for its incredibly delicate texture that practically melts in your mouth, its subtly sweet flavor, and the undeniable sense of nostalgia it brings. It’s a versatile dessert, equally delightful served warm with a dollop of whipped cream or chilled for a refreshing treat. Whether you’re a seasoned baker or just starting your culinary journey, mastering the art of a classic Custard Pie is a truly rewarding experience, promising smiles and satisfied palates around any table. Get ready to bake a piece of history that continues to capture hearts with every delicious bite.

Ingredients:
-
For the Flaky Pie Crust (for a 9-inch pie):
- All-Purpose Flour: 1 ¼ cups (about 150g), plus extra for dusting. I always recommend sifting your flour for a lighter crust, but it’s not strictly necessary if you’re careful.
- Unsalted Butter: ½ cup (113g or 1 stick), cut into ½-inch cubes. This is absolutely crucial: your butter must be ice-cold. This is the secret to a truly flaky pie crust, as the tiny pockets of butter melt during baking, creating steam and those wonderful layers.
- Ice Water: ¼ to ½ cup (60-120ml). Start with ¼ cup and add more only as needed, one tablespoon at a time. The colder, the better!
- Granulated Sugar: 1 teaspoon. Just a touch for a hint of sweetness in the crust, balancing the richness of the Custard Pie filling.
- Salt: ½ teaspoon. Essential for enhancing all the flavors in the crust.
-
For the Creamy Custard Filling:
- Large Eggs: 4 whole eggs, plus 2 additional egg yolks. The extra yolks contribute to an incredibly rich and velvety texture in our Custard Pie.
- Granulated Sugar: ¾ cup (150g). This provides the perfect balance of sweetness to our classic Custard Pie.
- Whole Milk: 2 cups (480ml). Full-fat milk is non-negotiable here; it gives the custard its signature creaminess and body.
- Heavy Cream: 1 cup (240ml). For an extra layer of luxurious richness that truly elevates this Custard Pie from good to unforgettable.
- Pure Vanilla Extract: 1 ½ teaspoons. I love using a good quality vanilla for its deep, aromatic contribution to the Custard Pie flavor.
- Freshly Grated Nutmeg: ½ teaspoon, plus a little extra for garnish. While optional, nutmeg is the traditional spice for Custard Pie and adds a wonderful warmth and aroma. Trust me, it’s worth the extra step to grate it fresh!
- Salt: ¼ teaspoon. A small amount of salt helps to balance the sweetness and brings out the full flavor of the custard.
Preparing the Flaky Pie Crust
- Combine Dry Ingredients: In a large mixing bowl, whisk together the 1 ¼ cups of all-purpose flour, 1 teaspoon of granulated sugar, and ½ teaspoon of salt. I find that getting these dry components well combined ensures an even flavor distribution throughout the crust, which is the perfect foundation for our delicious Custard Pie.
- Cut in the Cold Butter: Add the ½ cup of ice-cold, cubed unsalted butter to the dry ingredients. Now, this is where the magic for a truly flaky crust happens! Using a pastry blender, two knives, or even your fingertips, cut the butter into the flour mixture until it resembles coarse meal with some pea-sized pieces of butter remaining. The key here is to work quickly and keep the butter as cold as possible. If your hands are warm, you might want to chill them briefly beforehand. Those little pockets of butter are what will create the beautiful, flaky layers in your Custard Pie crust.
- Gradually Add Ice Water: Drizzle in ¼ cup of the ice water, one tablespoon at a time, mixing gently with a fork or your hands until the dough just starts to come together. Add more water, a tablespoon at a time, only if absolutely necessary, until the dough forms a shaggy ball. Be careful not to overmix! Overmixing develops the gluten, making your crust tough instead of tender. We’re aiming for a barely cohesive dough here.
- Form and Chill the Dough: Gently gather the dough into a disk, wrap it tightly in plastic wrap, and refrigerate it for at least 30 minutes, or up to 2 days. This chilling period is crucial; it allows the gluten to relax, which makes the dough easier to roll out, and it also firms up the butter, further contributing to that desired flakiness for our Custard Pie.
- Roll Out the Dough: On a lightly floured surface, unwrap your chilled dough and roll it out into a 12-inch circle, about ⅛-inch thick. I like to start from the center and roll outwards, rotating the dough periodically to ensure an even thickness and prevent sticking. If the dough starts to crack, don’t worry too much; you can usually press it back together with your fingers.
- Transfer to Pie Plate: Carefully transfer the rolled-out dough to a 9-inch pie plate. The easiest way to do this is to gently roll the dough around your rolling pin, then unroll it over the pie plate. Gently ease the dough into the plate, ensuring it fits snugly into the corners without stretching it. Stretching can cause the crust to shrink during baking. Trim any excess dough, leaving about a ½-inch overhang, then fold this overhang under itself and crimp the edges decoratively. I love creating a classic fluted edge with my thumb and forefinger – it always looks so professional!
- Partial Blind Bake the Crust: This step is critical for preventing a soggy bottom on your Custard Pie. Preheat your oven to 375°F (190°C). Line the unbaked pie crust with parchment paper or foil, then fill it with pie weights, dried beans, or rice. Bake for 15 minutes. Carefully remove the parchment paper and weights, then prick the bottom of the crust all over with a fork. Return the crust to the oven and bake for another 8-10 minutes, or until it looks dry and lightly golden. This partial bake creates a sturdy foundation for our creamy Custard Pie filling. Remove from the oven and let it cool completely on a wire rack while you prepare the filling.
Making the Creamy Custard Filling
- Whisk Eggs and Sugar: In a large mixing bowl, whisk together the 4 whole large eggs, 2 additional egg yolks, and ¾ cup of granulated sugar until the mixture is light in color and slightly frothy, about 2-3 minutes. You want to make sure the sugar is well dissolved here, as undissolved sugar can sometimes sink to the bottom of the pie. This forms the rich base of our Custard Pie.
- Gently Warm Milk and Cream: In a medium saucepan, combine the 2 cups of whole milk and 1 cup of heavy cream. Heat over medium-low heat, stirring occasionally, just until the mixture is hot and steaming around the edges, but do not let it boil. We’re aiming to warm it up, not cook it. This step helps the sugar dissolve fully and the custard to set more evenly.
- Temper the Eggs: This is a crucial step for achieving a smooth, silky Custard Pie and preventing scrambled eggs! Slowly, in a thin stream, pour about half of the warm milk and cream mixture into the egg and sugar mixture, whisking constantly and vigorously. This gradually brings the temperature of the eggs up without cooking them. Once tempered, pour the entire egg mixture back into the saucepan with the remaining warm milk and cream, whisking continuously.
- Add Flavorings: Stir in the 1 ½ teaspoons of pure vanilla extract, ½ teaspoon of freshly grated nutmeg, and ¼ teaspoon of salt into the custard mixture. Give it a good whisk to ensure everything is thoroughly combined. The aroma at this stage is absolutely divine – it’s starting to smell like a classic Custard Pie already!
- Strain the Custard Mixture: For the silkiest, most luxurious Custard Pie texture, I highly recommend straining the custard mixture. Pour the entire mixture through a fine-mesh sieve into a clean bowl or a large measuring cup with a spout. This step removes any bits of cooked egg, chalazae, or undissolved sugar, ensuring your final Custard Pie is incredibly smooth and uniform. Don’t skip this step if you want that professional, velvety finish!
- Pour into Crust: Carefully pour the strained custard filling into your cooled, partially blind-baked pie crust. Ensure the filling comes up to just below the crimped edge of the crust.
Baking the Custard Pie
- Preheat Oven and Prepare for Baking: Reduce your oven temperature to 325°F (160°C). Place your pie plate on a baking sheet – this makes it easier to transfer in and out of the oven and catches any potential spills. This lower temperature is essential for a Custard Pie; it allows the custard to set slowly and evenly without cracking.
- Bake the Custard Pie: Carefully transfer the baking sheet with your Custard Pie to the preheated oven. Bake for approximately 45-60 minutes. The baking time can vary depending on your oven and the exact thickness of your custard, so keep a close eye on it.
- Monitor for Doneness: You’ll know your Custard Pie is done when the edges are set and appear slightly firm, but the very center still has a slight, delicate jiggle to it when you gently shake the pie. It’s important not to overbake a Custard Pie, as this can lead to a rubbery texture or cracks in the surface. If the edges of your crust start to brown too quickly, you can create a foil shield to protect them.
- Prevent Over-browning (Optional): If you notice the top of your Custard Pie is browning faster than you’d like before the center is set, you can loosely tent it with aluminum foil for the last 15-20 minutes of baking. This helps prevent excessive browning while allowing the custard to finish cooking through.
- Remove and Cool: Once baked to perfection, carefully remove the Custard Pie from the oven. The aroma filling your kitchen right now should be utterly intoxicating!
Cooling and Serving Your Perfect Custard Pie
- Initial Cooling at Room Temperature: Place the baked Custard Pie on a wire rack and allow it to cool at room temperature for at least 2-3 hours. During this time, the residual heat will continue to set the custard, and it will firm up beautifully. Resist the urge to cut into it prematurely! Patience is a virtue when making Custard Pie.
- Refrigerate for Final Setting: Once the Custard Pie has cooled to room temperature, transfer it to the refrigerator for at least another 3-4 hours, or ideally, overnight. This chilling period is absolutely essential for the custard to fully set and achieve that perfectly firm yet creamy sliceable texture we all crave in a classic Custard Pie. Trust me, it’s worth the wait.
- Slice and Serve: When you’re ready to serve, remove the Custard Pie from the refrigerator about 15-20 minutes beforehand to take the chill off slightly, which I find enhances its flavor and texture. Using a sharp knife that has been run under hot water and wiped clean between slices will help you get those beautiful, clean cuts.
- Garnish (Optional but Recommended): A sprinkle of extra freshly grated nutmeg over each slice is the classic finishing touch for Custard Pie. For an even more indulgent treat, you could add a dollop of freshly whipped cream. Some people also enjoy a few fresh berries on the side, but honestly, this classic Custard Pie stands perfectly on its own!
- Storage: Store any leftover Custard Pie loosely covered with plastic wrap or in an airtight container in the refrigerator for up to 3-4 days. While it’s delicious fresh, I find that the flavors of this classic Custard Pie often deepen and meld even more beautifully after a day in the fridge. It makes for an excellent make-ahead dessert!
Conclusion:
And there you have it, my friends! We’ve reached the sweet end of our journey, but the real adventure begins now – in your kitchen. This isn’t just another dessert recipe; it’s an invitation to experience pure, unadulterated comfort and joy. I truly believe that this particular Custard Pie recipe stands head and shoulders above the rest, thanks to its perfectly balanced sweetness, its incredibly silky-smooth texture that practically melts in your mouth, and that delightful, subtle hint of vanilla and nutmeg that transports you straight back to simpler times. It’s a classic for a reason, and I’ve worked tirelessly to ensure this version is nothing short of perfection, a testament to the comforting power of traditional baking.
What makes this specific Custard Pie a must-try, you ask? Well, beyond the irresistible flavor profile and the luxurious mouthfeel, it’s the sheer elegance in its simplicity. You don’t need fancy ingredients or complex techniques to achieve something truly spectacular. This recipe empowers you to create a dessert that looks impressive, tastes divine, and fills your home with the most wonderful, nostalgic aromas. Imagine the anticipation as it bakes, the golden-brown crust, the gently set custard jiggling ever so slightly – it’s a sensory feast even before the first bite. It’s a dessert that speaks of warmth, hospitality, and homemade goodness, making it an ideal choice for any occasion, from a quiet family dinner to a celebratory gathering.
Now, let’s talk about making this masterpiece truly your own. While this Custard Pie is utterly divine on its own, there are so many delightful ways to serve and personalize it. For a simple yet elegant presentation, a light dusting of freshly grated nutmeg or a sprinkle of ground cinnamon just before serving adds an extra layer of aromatic warmth. If you’re feeling a little more indulgent, a generous dollop of freshly whipped cream, ever so lightly sweetened with a touch of vanilla, is an absolute dream alongside a slice. The cool, airy cream provides a beautiful contrast to the rich, dense custard.
Serving Suggestions & Variations:
- Fresh Berry Medley: Brighten up your pie with a vibrant cascade of fresh berries! Raspberries, blueberries, or sliced strawberries piled artfully on top add a lovely tartness and freshness that cuts through the richness of the custard beautifully. It’s a fantastic option for warmer months or when you want to add a pop of color.
- Caramel or Chocolate Drizzle: For those with a serious sweet tooth, a delicate drizzle of homemade caramel sauce or a rich chocolate ganache over individual slices can elevate the dessert to a new level of decadence. Just a little goes a long way to add another layer of flavor complexity.
- A Scoop of Ice Cream: Don’t underestimate the power of a simple scoop of vanilla bean ice cream melting ever so slightly into a warm slice of pie. The hot-cold combination is always a winner and creates an even more luxurious experience.
- Temperature Play: While many enjoy this Custard Pie chilled, I urge you to try a slice served slightly warm, straight from the oven, allowing the flavors to truly bloom and the custard to feel even more comforting. Or, experience the perfectly firm, cool, and refreshing texture after it’s been thoroughly chilled in the refrigerator for several hours – both are equally delightful experiences.
- Individual Tarts: For a more refined presentation, consider baking the custard in individual tart shells. These mini Custard Pies are perfect for parties, portion control, or simply because they look incredibly charming on a dessert platter.
- Flavor Twists: Feel free to experiment with the extracts! A touch of almond extract instead of, or in addition to, vanilla can offer a subtle, sophisticated twist. Or, for an adult version, a tablespoon of bourbon or rum added to the custard mix just before baking introduces a lovely depth of flavor.
I cannot stress enough how much I encourage you to roll up your sleeves, preheat your oven, and give this extraordinary recipe a try. Don’t be intimidated; the steps are straightforward, and the reward is truly magnificent. There’s an incredible sense of accomplishment that comes with baking something so utterly delicious from scratch, and I promise you, the smiles around your table will be all the validation you need. Make it for your family, bring it to a potluck, or simply bake it for yourself because you deserve a treat.
Once you’ve experienced the magic of this Custard Pie, I would absolutely love to hear about it! Please, share your baking triumphs, your beautiful photos, and your honest feedback in the comments section below. What variations did you try? Who did you share it with? Your experiences inspire me and others in this wonderful community of home bakers. Let’s spread the joy of homemade desserts far and wide. Happy baking!
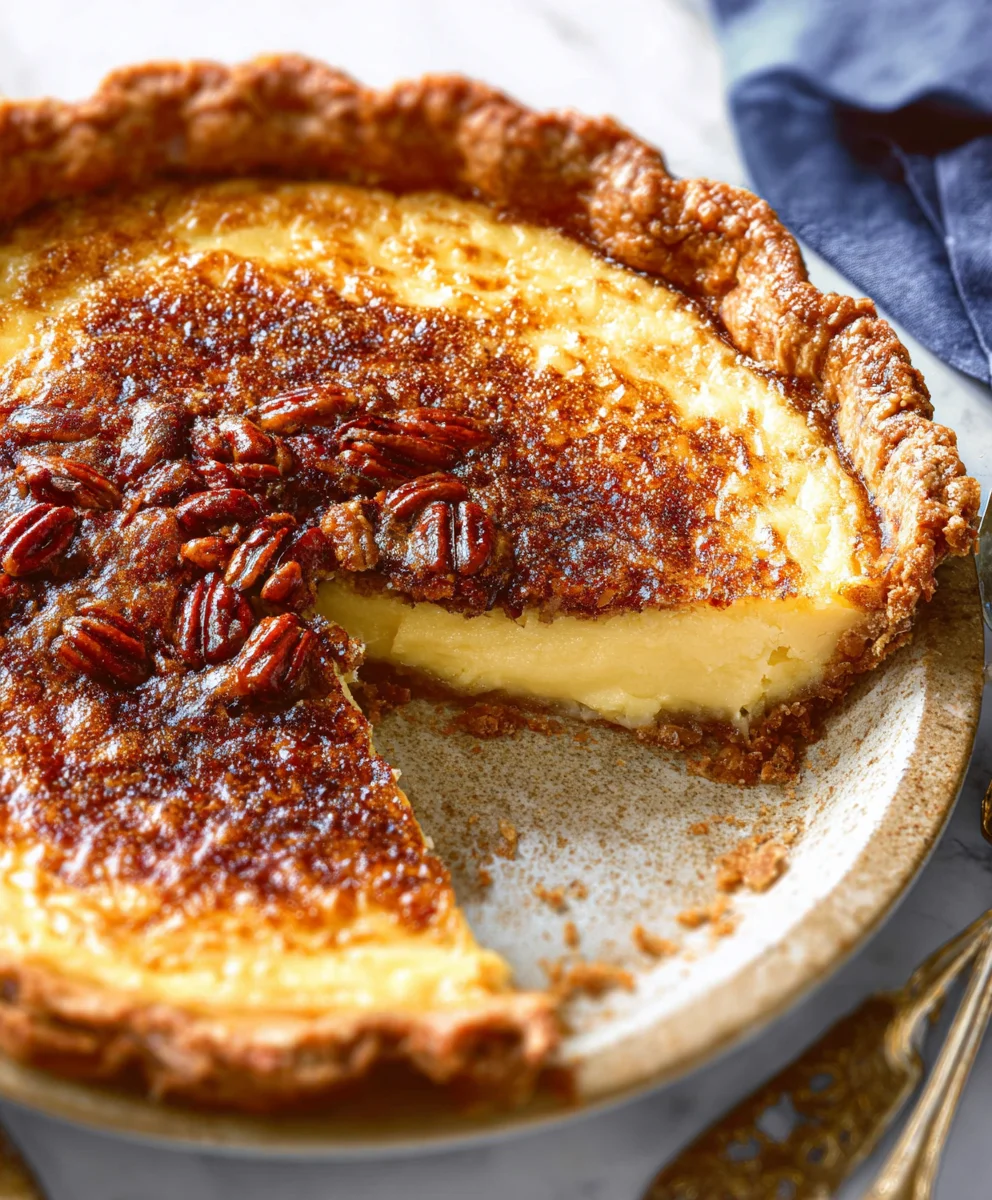
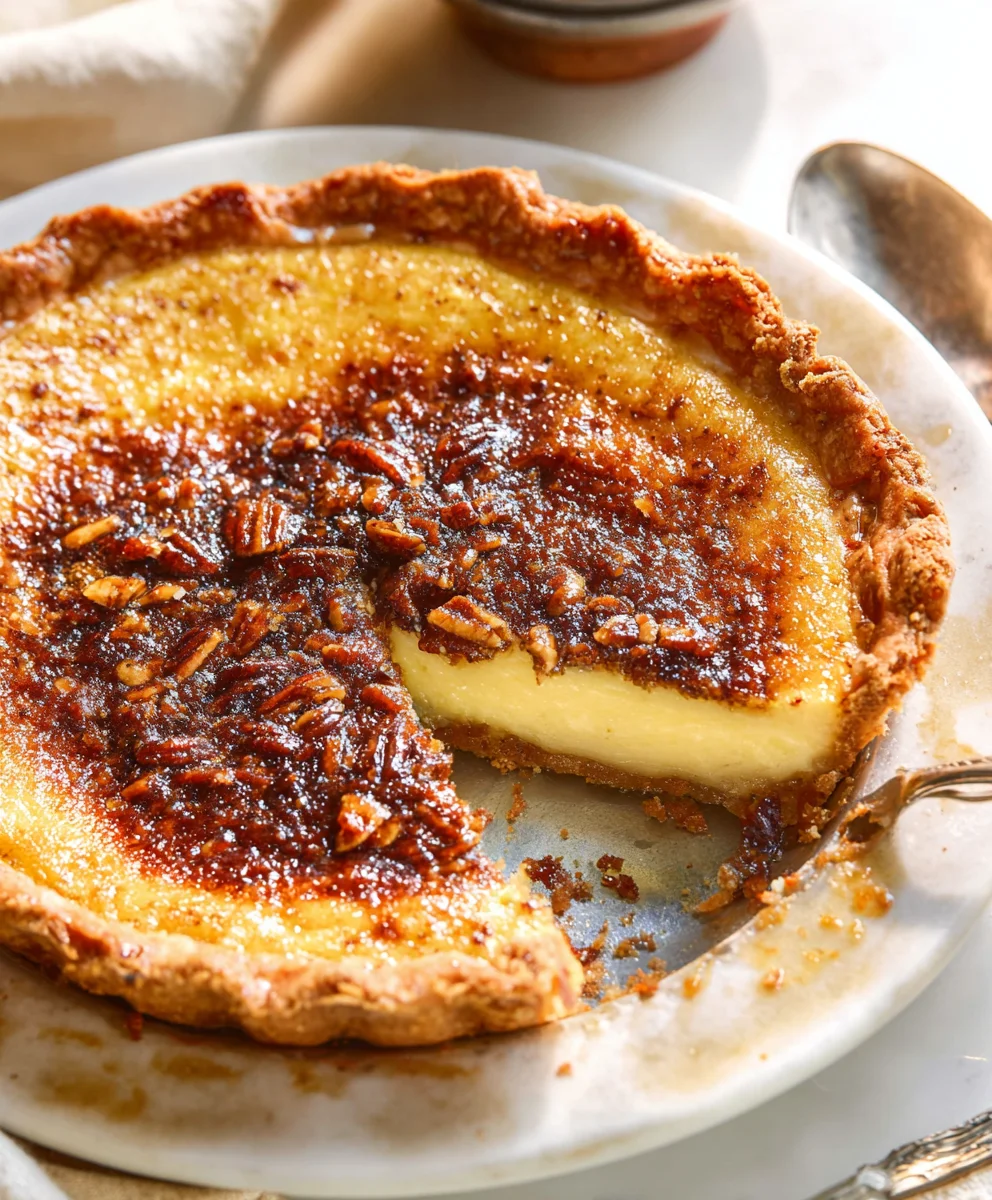
Heavenly Homemade Custard Pie
Custard Pie – a timeless dessert known for its delicate, melt-in-your-mouth texture, subtly sweet flavor, and the comforting sense of nostalgia it brings. This recipe guides you through creating a perfect pie with an oat crumble crust and a rich, velvety vanilla and spice-infused custard filling.
Ingredients
-
8 tablespoons unsalted butter, room temperature
-
1/3 cup light brown sugar
-
1 large egg yolk
-
1 teaspoon vanilla extract
-
1 1/2 cups (190 g) all-purpose flour, spooned and leveled
-
3/4 cup rolled oats
-
1/4 teaspoon salt
-
1 tablespoon water
-
4 large eggs
-
1 large egg yolk
-
1¼ cups heavy cream
-
1¼ cups whole milk
-
3/4 cup granulated sugar
-
2 teaspoons vanilla bean paste or extract
-
1/4 tsp ground nutmeg
-
1/4 tsp ground cinnamon
-
1/4 tsp fine sea salt
Instructions
-
Step 1
In a bowl, cream 8 tbsp room temperature butter, 1/3 cup light brown sugar, 1 egg yolk, and 1 tsp vanilla extract until smooth. Stir in 1 1/2 cups all-purpose flour, 3/4 cup rolled oats, and 1/4 tsp salt until crumbly. Add 1 tbsp water if needed to form a cohesive dough. Press dough evenly into a 9-inch pie plate. -
Step 2
Preheat oven to 375°F (190°C). Bake the pressed crust for 15-20 minutes, until lightly golden. Remove from oven and cool completely on a wire rack. -
Step 3
In a large mixing bowl, whisk together 4 large eggs, 1 additional large egg yolk, and 3/4 cup granulated sugar until the mixture is light in color and slightly frothy, ensuring the sugar is well dissolved. -
Step 4
In a medium saucepan, combine 1¼ cups whole milk and 1¼ cups heavy cream. Heat over medium-low heat until hot and steaming around the edges, but do not let it boil. -
Step 5
Slowly, in a thin stream, pour about half of the warm milk and cream mixture into the egg and sugar mixture, whisking constantly and vigorously. Once tempered, pour the entire egg mixture back into the saucepan with the remaining warm milk and cream, whisking continuously. -
Step 6
Stir in 2 teaspoons pure vanilla bean paste or extract, 1/4 tsp freshly grated nutmeg, 1/4 tsp ground cinnamon, and 1/4 tsp fine sea salt. Pour the entire custard mixture through a fine-mesh sieve into a clean bowl or large measuring cup to ensure a silky-smooth texture. -
Step 7
Carefully pour the strained custard filling into your cooled, partially baked pie crust. Reduce oven temperature to 325°F (160°C). Place the pie on a baking sheet and bake for approximately 45-60 minutes, until the edges are set and appear slightly firm, but the very center still has a slight, delicate jiggle. -
Step 8
Once baked, remove the pie from the oven and place it on a wire rack. Allow to cool at room temperature for at least 2-3 hours. Then, transfer to the refrigerator for at least another 3-4 hours, or ideally, overnight, for the custard to fully set. -
Step 9
When ready to serve, remove the pie from the refrigerator about 15-20 minutes beforehand. Use a sharp knife (run under hot water and wiped clean between slices) for beautiful, clean cuts. Garnish with a sprinkle of extra freshly grated nutmeg or a dollop of whipped cream if desired. Store any leftover pie, loosely covered, in the refrigerator for up to 3-4 days.
Important Information
Nutrition Facts (Per Serving)
It is important to consider this information as approximate and not to use it as definitive health advice.
Allergy Information
Please check ingredients for potential allergens and consult a health professional if in doubt.


Leave a Comment