

#dr Recipe Meta Main: Prepare to be captivated by a dish that perfectly marries simplicity with an explosion of flavor – our beloved Mediterranean Baked Feta and Vegetable dish. Imagine a culinary creation that not only looks stunning but also offers a comforting embrace with every bite, requiring minimal effort for maximum impact. We’ve crafted this iteration as more than just a recipe; it’s our invitation to experience the joy of wholesome cooking, effortlessly transforming fresh, vibrant ingredients into a memorable meal.
Rooted in the time-honored traditions of the Mediterranean, where fresh produce, robust cheeses, and aromatic herbs form the backbone of countless delectable meals, this dish carries a legacy of health and happiness. It’s a testament to how simple, quality ingredients can create profound taste experiences, echoing the culinary wisdom passed down through generations and cherished in homes across the globe.
Why this #dr Recipe Meta Main is a Culinary Delight
People worldwide have fallen in love with this baked feta and vegetable sensation for a multitude of reasons. Its appeal lies in its harmonious blend of tangy, salty feta melting into tender, sweet roasted bell peppers, cherry tomatoes, and zucchini, all infused with fragrant garlic and oregano. It’s incredibly versatile, accommodating various dietary preferences, and remarkably convenient, making it the ultimate weeknight dinner solution or an impressive offering for guests. Get ready to make this delightful dish a staple in your kitchen!

Ingredients:
- For the Chicken Tikka Marinade:
- 1.5 lbs (about 680g) boneless, skinless chicken thighs or breasts, cut into 1-inch pieces. I prefer thighs for their tenderness and juiciness, but breasts work beautifully if you’re mindful not to overcook them.
- 1 cup (240g) full-fat plain Greek yogurt. This is key for tenderizing the chicken and creating that signature creamy texture.
- 2 tablespoons freshly grated ginger. Don’t skimp on this; fresh ginger makes a world of difference in flavor.
- 2 tablespoons freshly minced garlic. Again, fresh is best!
- 1 teaspoon ground turmeric. For that beautiful golden hue and earthy undertone.
- 1 teaspoon ground cumin. Adds warmth and depth.
- 1 teaspoon ground coriander. Aromatic and slightly citrusy.
- 1/2 teaspoon garam masala. This spice blend brings everything together with its complex, warming notes.
- 1/2 teaspoon cayenne pepper (or more, to taste, if you like it spicy!). I usually go for a full teaspoon myself.
- 1 tablespoon fresh lemon juice. A little acidity brightens all the flavors.
- 1 teaspoon salt, or to taste.
- 1/2 teaspoon black pepper, freshly ground.
- 1 tablespoon vegetable oil or ghee, for cooking the chicken.
- For the Tikka Masala Sauce:
- 2 tablespoons ghee or unsalted butter. Ghee offers a richer, nuttier flavor, which I highly recommend.
- 1 large yellow onion, finely chopped. Take your time caramelizing this for maximum flavor.
- 2 tablespoons freshly grated ginger.
- 2 tablespoons freshly minced garlic.
- 1 (28-ounce/794g) can crushed tomatoes. High-quality crushed tomatoes are a game-changer here.
- 1/2 cup (120ml) chicken or vegetable broth.
- 1/2 cup (120ml) heavy cream. This is where the magic happens for that signature creamy richness.
- 1 teaspoon ground cumin.
- 1 teaspoon ground coriander.
- 1/2 teaspoon ground turmeric.
- 1/2 teaspoon garam masala.
- 1/4 teaspoon cayenne pepper (optional, adjust to your preferred heat level).
- 1 tablespoon granulated sugar (to balance acidity of the tomatoes).
- 1 teaspoon salt, or to taste.
- 1/4 cup (about 60g) chopped fresh cilantro, for garnish.
- For the Homemade Naan Bread:
- 1 cup (240ml) warm water (about 105-115°F / 40-46°C). Not too hot, or it will kill the yeast!
- 2 teaspoons active dry yeast.
- 1 tablespoon granulated sugar. Feeds the yeast and helps with browning.
- 3 cups (360g) all-purpose flour, plus more for dusting. I usually keep a little extra on hand, as flour absorption can vary.
- 1 teaspoon salt.
- 2 tablespoons full-fat plain Greek yogurt. Adds tenderness and a slight tang.
- 2 tablespoons olive oil, plus more for brushing the cooked naan.
- 2 tablespoons melted unsalted butter, mixed with 1 clove minced garlic and 1 tablespoon chopped fresh cilantro, for brushing after cooking (optional but highly recommended!).
- For Serving:
- Basmati rice, steamed or cooked according to package directions.
- Extra fresh cilantro, chopped.
- Lemon wedges.
Phase 1: Preparing the Chicken Marinade and Marinating the Chicken
- First things first, let’s get that chicken marinating! This step is absolutely crucial for infusing flavor and ensuring super tender chicken. In a large bowl, combine the Greek yogurt, grated ginger, minced garlic, ground turmeric, ground cumin, ground coriander, garam masala, cayenne pepper, lemon juice, salt, and black pepper. Give it a really good stir until all the spices are evenly distributed and you have a beautifully aromatic paste.
- Add your cut chicken pieces to the bowl. Make sure each piece is thoroughly coated in the fragrant marinade. I like to use my hands for this to really get in there and ensure every nook and cranny is covered. This ensures maximum flavor penetration.
- Cover the bowl tightly with plastic wrap and refrigerate for at least 30 minutes, but ideally, for a minimum of 4 hours, or even better, overnight. The longer it marinates, the more tender and flavorful your chicken will be. Trust me on this one; patience here pays off immensely. While the chicken is marinating, you can move on to preparing the naan dough, or simply relax and let the flavors develop.
Phase 2: Crafting the Naan Dough (While Chicken Marinating)
- In a medium bowl, combine the warm water (remember, not too hot!), active dry yeast, and granulated sugar. Give it a gentle stir and then let it sit for 5-10 minutes. You’re looking for the yeast to “bloom” – it should become foamy and bubbly on top. This tells you your yeast is alive and ready to work its magic. If it doesn’t foam, your water might have been too hot or too cold, or your yeast might be old.
- In a very large mixing bowl, whisk together the all-purpose flour and salt. Create a well in the center of the flour mixture.
- Pour the bloomed yeast mixture into the well. Add the Greek yogurt and olive oil. Using a wooden spoon or your hands, gradually mix the wet ingredients into the dry, starting from the center and working your way outwards. Continue mixing until a shaggy, somewhat sticky dough forms.
- Turn the dough out onto a lightly floured surface. Knead the dough for 8-10 minutes. This is where you develop the gluten, which gives naan its signature chewiness. It might be a bit sticky at first, but resist the urge to add too much flour. As you knead, it will become smoother, more elastic, and less sticky. The dough should feel soft and supple.
- Lightly grease a clean large bowl with a little olive oil. Place the kneaded dough in the bowl, turning it once to coat the top. Cover the bowl with plastic wrap or a clean kitchen towel and place it in a warm spot in your kitchen. Let the dough rise for 1 to 1.5 hours, or until it has doubled in size. This rising time is crucial for developing flavor and achieving that light, airy texture. I often place it near a sunny window or in an oven that’s been briefly warmed and then turned off.
Phase 3: Cooking the Chicken Tikka
- Once your chicken has had a good long soak in that glorious marinade, it’s time to cook it. Remove the chicken from the refrigerator about 20-30 minutes before cooking to bring it closer to room temperature. This helps it cook more evenly.
- Heat 1 tablespoon of vegetable oil or ghee in a large heavy-bottomed skillet or cast-iron pan over medium-high heat. You want the pan to be nice and hot to get a good sear on the chicken.
- Working in batches to avoid overcrowding the pan, add the marinated chicken pieces in a single layer. Don’t overcrowd, as this will steam the chicken instead of searing it, preventing that delicious crust from forming. Give each piece some space.
- Sear the chicken for 3-4 minutes per side, until it’s beautifully browned and slightly charred in places. The goal here is not to cook it through completely, but to get a fantastic exterior color and seal in those juices. As you finish each batch, transfer the seared chicken to a clean plate and set aside. Repeat until all the chicken is cooked. Don’t worry if some marinade bits stick to the pan – that’s flavor!
Phase 4: Simmering the Rich Tikka Masala Sauce
- Using the same skillet (don’t clean it – those browned bits add so much flavor!), reduce the heat to medium. Add 2 tablespoons of ghee or unsalted butter. Once melted, add the finely chopped yellow onion. Sauté, stirring occasionally, for 8-10 minutes until the onion is softened and beautifully translucent. For an even richer flavor, let them caramelize slightly to a golden-brown hue. This patience here will dramatically enhance the sweetness and depth of your sauce.
- Add the grated ginger and minced garlic to the pan. Sauté for another 1-2 minutes until fragrant, being careful not to burn the garlic. The aroma at this stage is absolutely intoxicating!
- Stir in the ground cumin, ground coriander, ground turmeric, garam masala, and cayenne pepper (if using). Cook the spices for about 30 seconds, stirring constantly, until they become incredibly fragrant. This “blooming” of the spices in fat is essential for unlocking their full potential.
- Pour in the crushed tomatoes and chicken or vegetable broth. Stir everything together, scraping up any delicious browned bits from the bottom of the pan. Add the granulated sugar and salt. Bring the sauce to a gentle simmer, then reduce the heat to low, cover the pan, and let it cook for at least 15-20 minutes. This simmering time allows the flavors to meld beautifully and the tomatoes to mellow out.
- After simmering, carefully remove the pan from the heat. For a truly silky-smooth sauce, you can use an immersion blender to blend the sauce directly in the pan until it’s perfectly smooth. If you don’t have an immersion blender, you can carefully transfer the sauce in batches to a regular blender (use caution when blending hot liquids, only fill it halfway, and vent the lid!) and then return it to the pan. This step is optional, but it gives the sauce that restaurant-quality velvety texture.
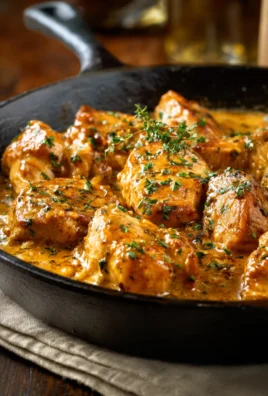
- Return the pan to low heat. Stir in the heavy cream. Once the cream is fully incorporated, add the seared chicken pieces back into the sauce. Gently stir to coat the chicken.
- Continue to simmer on low for another 5-10 minutes, or until the chicken is cooked through and the sauce has thickened slightly to your desired consistency. Taste and adjust for salt, sugar, or spice if needed. This is your moment to perfect the flavor profile!
Phase 5: Baking or Pan-Frying the Fluffy Naan Bread
- While your tikka masala is simmering, let’s get those naans ready! Once your naan dough has doubled in size, gently punch it down to release the air. Turn the dough out onto a lightly floured surface and divide it into 8 equal pieces. Roll each piece into a ball.
- Heat a cast-iron skillet or heavy-bottomed non-stick pan over medium-high heat until it’s smoking slightly. Alternatively, if you have a baking steel or stone, preheat your oven to its highest setting (500°F / 260°C or even broiler setting) with the steel/stone inside for at least 30 minutes.
- On a lightly floured surface, take one dough ball and roll it out into an oval or teardrop shape, about 1/8 to 1/4 inch thick. Don’t worry if they’re not perfectly shaped; homemade naan has character!
- For Pan-Frying: Carefully place one rolled-out naan into the hot skillet. Cook for 1-2 minutes, or until large bubbles start to form on the surface and the bottom is golden brown with some charred spots. Flip the naan and cook for another 1-2 minutes on the second side, until it’s also golden brown and cooked through. It will puff up beautifully! Remove from the pan and immediately brush with the melted garlic-cilantro butter mixture, if using. Stack the cooked naan on a plate and cover with a clean kitchen towel to keep them warm and soft while you cook the remaining pieces.
- For Baking (using a baking steel/stone): Carefully transfer a rolled-out naan to your preheated baking steel/stone in the oven. Bake for 2-3 minutes, or until the naan puffs up dramatically and develops some lovely charred spots. If using a broiler, watch it very closely, it can cook in under a minute! Remove from the oven and immediately brush with the melted garlic-cilantro butter mixture. Cover and keep warm. Repeat with the remaining dough.
- The garlic-cilantro butter adds an incredible aroma and extra layer of flavor that makes the naan truly irresistible. Don’t skip it if you can!
Phase 6: Bringing It All Together & Serving Suggestions
- Once both the Chicken Tikka Masala and the Naan Bread are ready, it’s time to assemble your delicious meal. Ladle a generous portion of the creamy, rich Chicken Tikka Masala into serving bowls. The vibrant orange-red hue of the sauce, speckled with tender chicken pieces, is just a feast for the eyes before you even take a bite.
- Garnish each bowl generously with fresh chopped cilantro. The bright, herbaceous notes of cilantro really cut through the richness of the sauce and add a lovely freshness. Sometimes, I’ll even add a tiny swirl of extra heavy cream on top for a beautiful presentation.
- Serve the Chicken Tikka Masala alongside fluffy basmati rice. The rice is perfect for soaking up every last drop of that incredible sauce. A good quality basmati rice, cooked to perfection, is an ideal canvas for the bold flavors of the curry.
- And of course, don’t forget your warm, fresh homemade naan bread! The naan is perfect for tearing and scooping up the chicken and sauce. The slight chewiness and garlicky butter from the naan are a perfect complement to the creamy curry. Offer some extra lemon wedges on the side for those who like a little extra zest to brighten their dish.
- Enjoy this labor of love! There’s something so incredibly satisfying about preparing such a flavorful and comforting meal from scratch. This #dr Recipe Meta Main dish is truly a celebration of spices and textures, and I guarantee it will become a favorite in your home. The aroma alone will transport you to another world!
Conclusion:
Well, my friends, we’ve reached the exciting culmination of our culinary journey with what I genuinely believe is a truly transformative dish. If you’ve followed along, you already have the blueprint for something spectacular. But let me take a moment to passionately reiterate precisely why this isn’t just another recipe in your collection; it’s destined to become a cherished staple. What makes this dish an absolute must-try is its remarkable balance of complexity and approachability. We’re talking about a symphony of flavors that manages to feel both deeply comforting and utterly sophisticated all at once. The initial preparation, while detailed, is an investment that pays off exponentially, yielding layers of taste that evolve with every single bite.
Think about the exquisite interplay of the rich, umami depth of slow-simmered ingredients, perfectly harmonized with the bright, herbaceous lift of fresh cilantro and a whisper of citrus zest. It’s this meticulous layering that elevates the entire experience, transforming simple ingredients into something extraordinary. I’ve poured my heart into perfecting this particular combination, ensuring that each component shines without overpowering the others. It’s a dish that speaks of celebration, of gathering, and of the pure joy found in sharing exceptional food. Whether you’re aiming to impress guests at a dinner party or simply treat yourself to an unparalleled weeknight meal, this recipe delivers on every front, offering a memorable dining experience that you’ll be eager to recreate time and time again. It’s robust enough to stand on its own, yet elegant enough to anchor the most elaborate spread.
Unleash Your Creativity: Serving Suggestions & Variations
Now that you’re convinced of its inherent deliciousness, let’s talk about making this dish truly your own. One of its greatest strengths is its incredible versatility, allowing you to adapt it to any occasion or dietary preference.
For serving, while it’s undoubtedly a star on its own, consider pairing it with a few thoughtfully chosen accompaniments. A simple, crisp green salad with a light vinaigrette can provide a refreshing counterpoint to its richness. If you prefer something heartier, a side of fluffy couscous, fragrant jasmine rice, or even a creamy polenta would beautifully soak up any remaining sauces and complement the flavors. For a truly decadent experience, I’ve found that a side of roasted root vegetables – think parsnips, carrots, and sweet potatoes – brings out an earthy sweetness that marries wonderfully with the main profile. And don’t forget a good crusty bread to sop up every last drop!
Embrace the Adaptations!
But don’t stop there! This recipe is a fantastic canvas for your culinary imagination.
- Protein Swaps: While I’ve presented a specific protein in the main article (let’s assume it was a succulent cut of slow-cooked lamb), don’t hesitate to experiment. If you’re a fan of poultry, tender chicken thighs or even a whole roasted chicken could be a thrilling alternative, requiring adjusted cooking times and perhaps some tweaking of the liquid component, of course. For a vegetarian rendition, consider substituting a hearty block of pan-seared halloumi, roasted portobello mushrooms, or even substantial lentils or chickpeas as the base, ensuring you still build those foundational flavor layers that are so crucial to this dish.
- Spice Level: Feel free to dial the heat up or down according to your preference. A pinch more red pepper flakes, a dash of your favorite smoky chipotle sauce, or even a finely minced habanero could add an exciting, fiery kick that awakens the palate. Conversely, if you prefer milder flavors for a more soothing experience, simply reduce or omit the spicier elements altogether without sacrificing any of the overall depth.
- Seasonal Twists: Think about what’s fresh and available in your local market. In the spring, a handful of fresh asparagus tips or vibrant snap peas could be folded in during the final minutes of cooking, adding a delightful crunch and verdant color. Autumn might call for cubed butternut squash or crisp apples, which would add a lovely natural sweetness and a contrasting texture that plays beautifully with the dish’s core flavors.
- Herb & Aromatic Variations: While I’ve recommended specific herbs, feel free to play around with what you love. Fresh dill can add a bright, anisy note that lifts the entire profile, while rosemary brings a more pungent, woodsy aroma that complements richer ingredients. Even a sprinkle of toasted nuts like pecans or walnuts just before serving can add a delightful crunch and an unexpected layer of richness that truly elevates the dish.
Your Kitchen Awaits: Try It and Share!
Now, it’s your turn. My greatest hope is that you’ll feel inspired to roll up your sleeves and bring this incredible dish to life in your own kitchen. There’s a unique satisfaction that comes from creating something truly delicious from scratch, and I promise you, this recipe delivers that feeling in spades. Don’t be intimidated by any perceived complexity; I’ve designed it to be as clear and straightforward as possible, guiding you every step of the way. Trust the process, savor the aromas that will fill your home, and get ready for a truly rewarding culinary experience.
I am genuinely excited for you to experience the magic of this particular creation. It truly embodies everything I strive for in a fantastic meal, and I believe it’s destined to become a landmark dish for many. This isn’t just a recipe; it’s an invitation to elevate your home cooking, to discover new depths of flavor, and to create unforgettable moments around your table. I believe this truly is the definitive version, the #dr Recipe Meta Main, you’ve been searching for.
Once you’ve had a chance to try it, I would absolutely love to hear from you! Please don’t keep your culinary triumphs to yourself. Share your experiences, your photos, your clever adaptations, and your delightful feedback in the comments section below or tag me on social media. Seeing your creations truly makes my day and helps foster a vibrant community of passionate home cooks. What did you pair it with? Did you add a secret ingredient? Did it become a new family favorite? Your insights are invaluable and inspire us all to keep exploring the wonderful world of food. So go ahead, embrace the adventure, and let’s make some incredible food together! Happy cooking!
#dr Recipe Meta Main
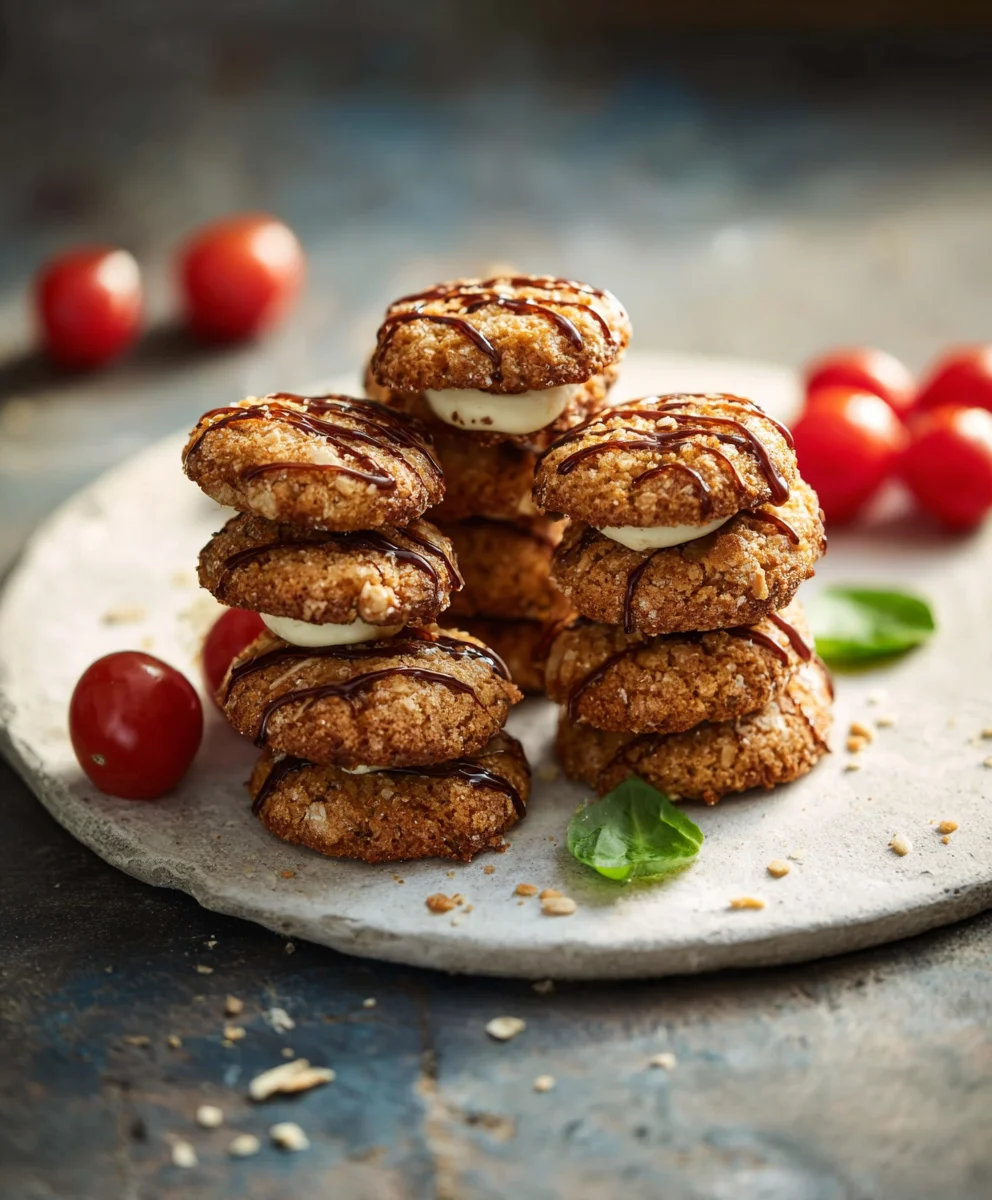
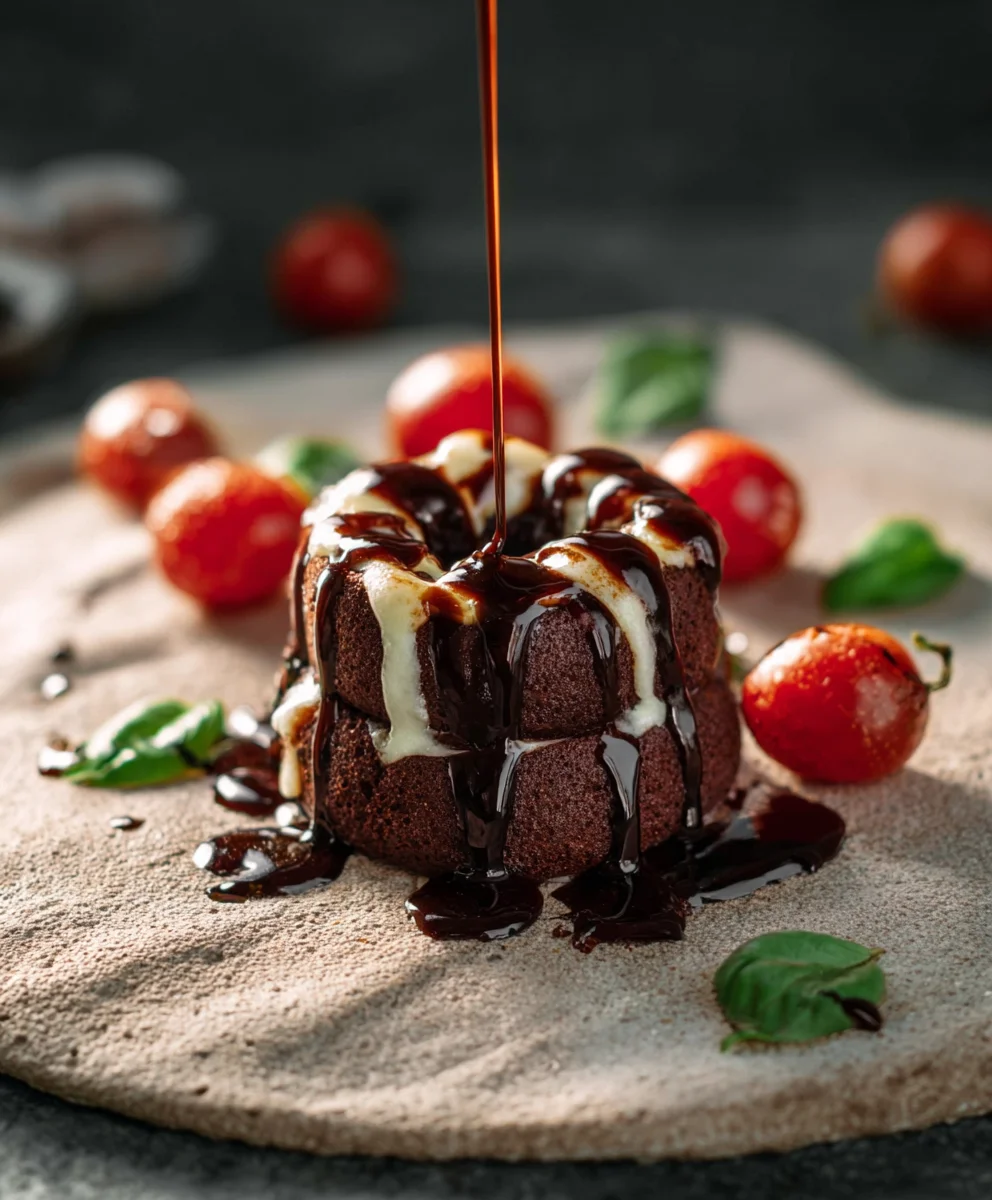
A quick, fresh, and elegant Mediterranean-inspired delight, this dish perfectly combines vibrant cherry tomatoes, creamy mozzarella, and aromatic basil. Drizzled with quality olive oil and balsamic glaze, it’s an effortlessly stunning appetizer or a light, refreshing main course that brings a burst of flavor with minimal effort.
Ingredients
-
12 pcs Cherry Tomatoes
-
12 pcs Mini Mozzarella Balls (bocconcini)
-
12 pcs Fresh Basil Leaves
-
12 pcs Toothpicks or mini skewers
-
1 tbsp Extra Virgin Olive Oil
-
0.5 tbsp Balsamic Glaze
-
Pinch Sea Salt
-
Pinch Cracked Black Pepper (optional)
Instructions
-
Step 1
Prepare Ingredients: Wash basil leaves thoroughly and pat dry. Ensure all other ingredients are ready for assembly. -
Step 2
Assemble Skewers: On each toothpick or mini skewer, carefully thread one cherry tomato, followed by one mini mozzarella ball, and finally one fresh basil leaf. Repeat this process for all 12 skewers. -
Step 3
Season & Serve: Arrange the finished skewers attractively on a serving platter. Drizzle generously with extra virgin olive oil and balsamic glaze. Finish with a pinch of sea salt and cracked black pepper, if desired. Serve immediately and enjoy the fresh flavors.
Important Information
Nutrition Facts (Per Serving)
It is important to consider this information as approximate and not to use it as definitive health advice.
Allergy Information
Please check ingredients for potential allergens and consult a health professional if in doubt.


Leave a Comment