

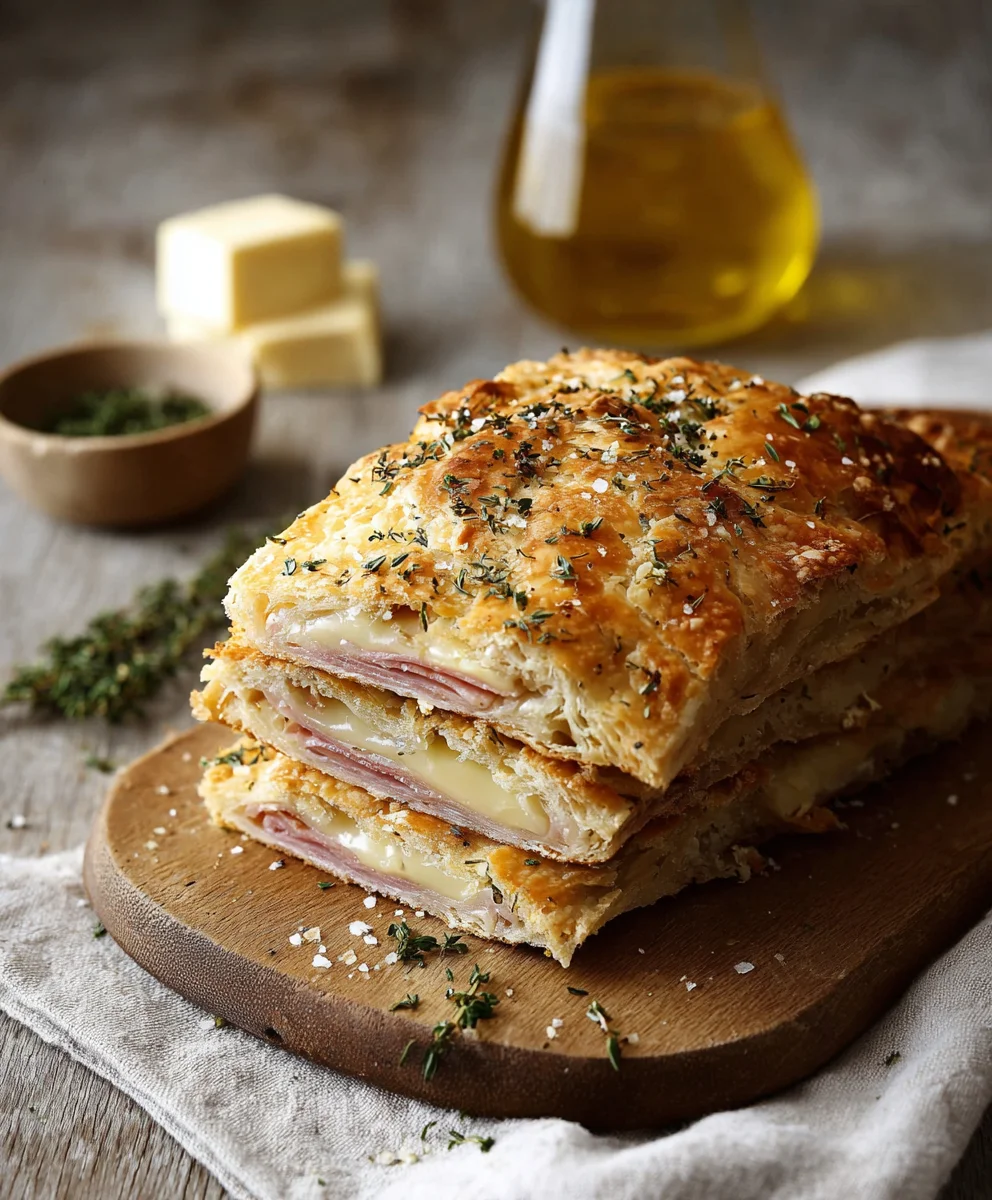
Crispy Ham & Cheese Puff Pastry Stacks are more than just a dish; they are a culinary revelation, transforming simple ingredients into an extraordinary experience. Imagine layers of golden-brown, buttery puff pastry, each one impossibly light and flaky, encasing a delightful meld of savory ham and perfectly melted cheese. One bite and you’ll understand why this dish has captured hearts, offering a textural delight and a flavor profile that is both comforting and sophisticated.
Puff pastry itself boasts a fascinating lineage, with origins tracing back centuries to European kitchens, where master chefs perfected the art of creating numerous delicate layers for both sweet and savory creations. While the pairing of ham and cheese is a universally cherished classic, elevating it with the ethereal texture of puff pastry creates a gourmet twist that feels both luxurious and remarkably approachable. These stacks offer a sophisticated take on a beloved combination, making them an ideal choice for any occasion, from an elegant brunch to a delightful appetizer for your next gathering.
What truly makes these Crispy Ham & Cheese Puff Pastry Stacks so beloved is the irresistible contrast of textures and flavors. The satisfying crunch of the exterior gives way to a tender, yielding interior, where the salty notes of the ham are beautifully balanced by the creamy, gooey embrace of the cheese. It’s a symphony for the senses, surprisingly easy to assemble, and guaranteed to impress your guests or simply treat your family to something truly special. I am excited to guide you through crafting this delightful dish in your own kitchen!

Ingredients:
- Two sheets (approx. 14 ounces or 400g each) of store-bought frozen puff pastry, ideally all-butter variety, thawed overnight in the refrigerator or according to package directions. Ensure it’s still cold but pliable.
- 1 cup (approx. 4 ounces or 115g) freshly grated Parmesan cheese. Using a microplane will give you a light, fluffy texture that melts beautifully.
- 1 cup (approx. 4 ounces or 115g) freshly grated Gruyère cheese. Its nutty, earthy notes complement the Parmesan perfectly. Alternatively, Emmental or a sharp white cheddar can be used.
- ½ cup (approx. 2 ounces or 55g) fresh mozzarella, finely shredded or minced. This adds a lovely stretch and creaminess to the layers. Avoid using fresh mozzarella balls packed in water unless you’ve drained and patted them very dry.
- 2 tablespoons unsalted butter, melted. For brushing between the layers, adding richness.
- 2 tablespoons extra virgin olive oil. For enhancing flavor and preventing sticking.
- 3 cloves garlic, very finely minced or grated. We want the flavor to distribute evenly without large chunks.
- ¼ cup fresh parsley, finely chopped. Flat-leaf parsley works best here.
- 2 tablespoons fresh chives, thinly sliced. Adds a delicate oniony freshness.
- 1 tablespoon fresh thyme leaves, picked from their stems. Earthy and aromatic.
- 1 teaspoon fresh rosemary, very finely minced. A little goes a long way with rosemary, so mince it finely to avoid spiky bits.
- 1 large egg, for the egg wash. This will give our pastry stacks a beautiful golden-brown, glossy finish.
- 1 tablespoon water or milk, for the egg wash. To thin out the egg for easier brushing.
- ½ teaspoon sea salt, or to taste. Fine sea salt is preferred for even distribution.
- ¼ teaspoon freshly ground black pepper, or to taste.
- Pinch of red pepper flakes, optional, for a subtle kick.
- All-purpose flour, for dusting your work surface.
Preparing the Puff Pastry and Herb-Cheese Mixture
- Thaw the Puff Pastry: First things first, ensure your puff pastry sheets are properly thawed but still very cold. If they become too warm, the butter layers can melt, compromising the flakiness. I usually take them out of the freezer and let them sit in the refrigerator overnight. If you’re short on time, you can thaw them at room temperature for about 30-40 minutes, but keep a close eye on them. They should be pliable enough to unfold without cracking but not sticky or warm. Once thawed, keep one sheet in the refrigerator while you work with the other.
- Prepare the Herb and Cheese Blend: In a medium-sized mixing bowl, combine the grated Parmesan, Gruyère, and shredded fresh mozzarella. Next, add all of your freshly chopped herbs: the finely chopped parsley, thinly sliced chives, picked thyme leaves, and the very finely minced rosemary. I absolutely adore how the aroma of these fresh herbs comes alive when mixed with the cheeses. Add the very finely minced garlic.
- Season the Mixture: Sprinkle in the sea salt, freshly ground black pepper, and if you’re feeling adventurous, a pinch of red pepper flakes. Give everything a really good toss with your fingertips or a spoon to ensure all the ingredients are evenly distributed. This thorough mixing is key, as you want every bite of your puff pastry stack to be bursting with flavor. Set this flavorful mixture aside.
- Melt the Butter and Prepare Olive Oil: In a small, microwave-safe bowl, melt the unsalted butter. You can also do this gently on the stovetop. Once melted, stir in the extra virgin olive oil. This butter-oil mixture will be brushed between our pastry layers, providing an extra layer of richness and helping to fuse the layers together while baking.
- Prepare Your Work Surface: Lightly dust a clean, dry work surface with all-purpose flour. This will prevent the puff pastry from sticking as you roll it out. Make sure you have enough space to work comfortably, as you’ll be handling large sheets of pastry.
Assembling the Stacks
- Roll Out the First Pastry Sheet: Carefully unfold one sheet of the thawed puff pastry onto your floured surface. Using a rolling pin, gently roll the pastry out into a rectangle, approximately 12×14 inches (30×35 cm) and about 1/8 inch (3mm) thick. The goal here isn’t to make it paper-thin, but to create an even surface that’s slightly larger than its original size. Work quickly and gently to keep the pastry cold and prevent tearing.
- Brush and Layer the First Sheet: Lightly brush the entire surface of the rolled-out puff pastry with about one-third of your melted butter and olive oil mixture. This adds flavor and helps the cheese adhere. Then, sprinkle about one-third of your herb and cheese mixture evenly over the buttered pastry, making sure to go almost to the edges. Try not to over-pile it, as we want distinct layers.
- Cut the Pastry: Using a sharp knife or a pizza cutter, carefully cut the pastry into three equal strips lengthwise. You’ll now have three long, rectangular strips, each about 4×14 inches (10×35 cm), coated with butter and cheese.
- Create the First Stack: Take one of the cut pastry strips and place it on a parchment-lined baking sheet. This makes for easy transfer later. Take a second strip and carefully place it directly on top of the first, aligning the edges as best as you can. Finally, place the third strip on top of the second. You should now have a three-layer stack of pastry, butter, and cheese. Gently press down on the stack to slightly compress the layers.
- Repeat for the Second Pastry Sheet: Retrieve the second sheet of puff pastry from the refrigerator. Repeat steps 6, 7, 8, and 9 with this second sheet, creating another identical three-layer stack on a separate part of the same baking sheet or on a new parchment-lined baking sheet if space is limited. It’s crucial to keep the pastry cold, so if your kitchen is warm, you might want to pop the sheets back into the fridge for 5-10 minutes between steps.
- Prepare the Egg Wash: In a small bowl, whisk the large egg with 1 tablespoon of water or milk until well combined and smooth. This is your egg wash.
- Brush and Chill: Lightly brush the top surface of each puff pastry stack with the egg wash. Be careful not to let the egg wash drip down the sides, as it can seal the layers together and prevent them from puffing up properly. Place the baking sheets with the prepared stacks into the refrigerator for at least 30 minutes. This chilling step is essential. It allows the butter in the pastry to firm up again, which is critical for achieving that glorious, flaky texture when baked. It also helps the layers stay distinct and prevents the cheese from oozing out too quickly.
- Preheat Oven and Prepare for Baking: While the pastry stacks are chilling, preheat your oven to 400°F (200°C). Position an oven rack in the middle of the oven.
Baking the Puff Pastry Stacks
- Bake the Stacks: Once chilled, remove the pastry stacks from the refrigerator. Transfer the baking sheet(s) to the preheated oven. Bake for 20-25 minutes, or until the pastry is deeply golden brown, incredibly puffed up, and the cheese is bubbly and slightly caramelized around the edges. Every oven is different, so keep a close eye on them, especially after the 15-minute mark. You’re looking for a beautiful, rich color, indicating that the pastry is fully cooked through and wonderfully crisp. If you notice one side browning faster, rotate the baking sheet halfway through the baking time.
- Check for Doneness: The pastry should sound hollow when tapped gently on the top. The layers should be visibly separated and flaky. If they look pale, they likely need a few more minutes to crisp up. Don’t be afraid to let them get really golden; that’s where the best flavor and texture are.
- Cool Slightly: Once baked to perfection, carefully remove the baking sheets from the oven. Allow the puff pastry stacks to cool on the baking sheet for about 5-10 minutes. This brief cooling period allows the pastry to set and become even crisper. If you try to move them too soon, they might be a bit soft and prone to breaking.
Finishing Touches and Serving
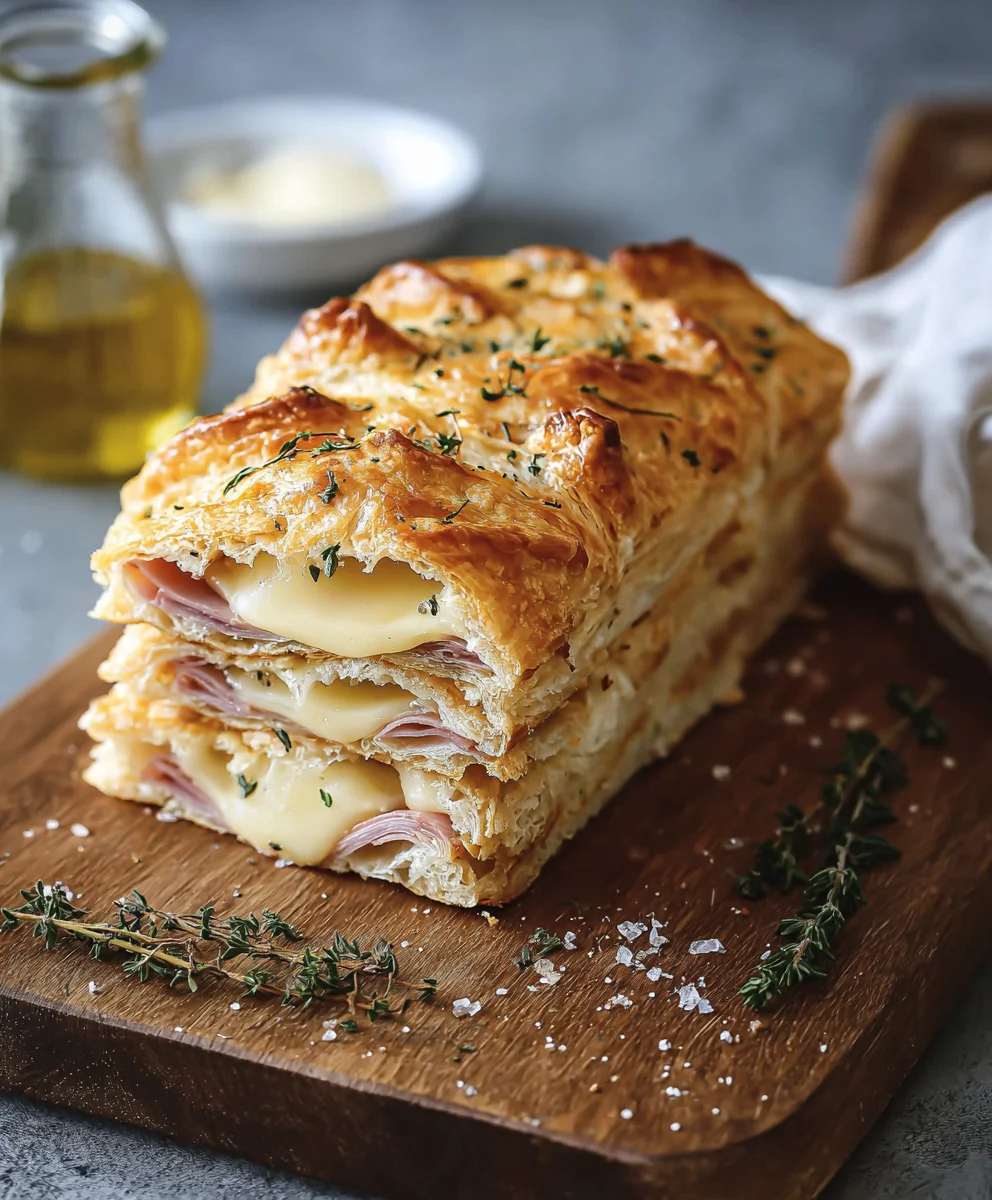
- Cut into Individual Portions: After cooling slightly, carefully transfer the stacks to a cutting board. Using a sharp serrated knife, gently slice each large stack into smaller, individual portions. You can cut them into squares, rectangles, or even triangles – whatever shape you prefer for serving. I usually aim for about 4-5 pieces per stack, yielding delicious, bite-sized or small-plate servings. The serrated knife will help you slice through the crisp layers without crushing them.
- Serve Warm: These crispy herb and cheese puff pastry stacks are undoubtedly best served warm, straight out of the oven. The cheese will still be delightfully gooey, and the pastry at its flakiest. Arrange them artfully on a serving platter.
- Garnish (Optional): For an extra touch of freshness and visual appeal, you can sprinkle a few more fresh chives or finely chopped parsley over the top just before serving. A tiny drizzle of high-quality extra virgin olive oil can also elevate the flavors.
- Storage and Reheating: If you happen to have any leftovers (which is rare in my house!), they can be stored in an airtight container at room temperature for up to one day, or in the refrigerator for up to two days. To re-crisp them, place them on a baking sheet and reheat in a preheated oven at 350°F (175°C) for about 5-7 minutes, or until warmed through and crisp again. Avoid microwaving, as it will make them soggy.
- Experiment with Variations: This recipe is incredibly versatile! You can easily swap out the cheeses; consider using fontina, provolone, or even a smoked cheddar. For the herbs, feel free to adjust based on your preference or what you have on hand – a touch of dried oregano, basil, or dill could work wonderfully. For a little extra something, you could even add a very thin layer of sun-dried tomato paste or finely diced ham between some layers. Don’t be afraid to make it your own! The beauty of puff pastry is its ability to be a canvas for so many delicious fillings. Enjoy the process of creating these delightfully crisp, cheesy, and aromatic treats! They are perfect as an appetizer, a side dish, or even a light lunch with a fresh salad.
<h2>Conclusion:</h2>
<p>Well, my friends, we’ve come to the end of our culinary journey for today, but truly, it’s just the beginning of your next delicious adventure! I sincerely hope you’re feeling inspired and excited to roll up your sleeves and bring these incredible <strong>Crispy Ham and Cheese Puff Pastry Stacks</strong> to life in your own kitchen. I can tell you from personal experience, this isn’t just another recipe; it’s a testament to how simple ingredients, when treated with a little love and the magic of puff pastry, can transform into something truly extraordinary.</p>
<p>Why is this recipe a <em>must-try</em>? Let me count the ways! First, there’s that irresistible textural contrast: the shattering crispness of the golden puff pastry, giving way to layers of savory ham and gooey, melted cheese. Then, there’s the flavor profile – a perfect harmony of salty, rich, and slightly sweet notes, elevated by the subtle hints of fresh herbs we’ve added. It’s comforting, yet elegant. It’s hearty, but not heavy. It strikes that perfect balance that makes it suitable for almost any occasion. Plus, the visual appeal is undeniable. These stacks look far more intricate and demanding than they actually are to prepare, making them an ideal choice when you want to impress without spending hours slaving over a hot stove.</p>
<h4>Beyond the Plate: Creative Serving Suggestions</h4>
<p>Now that you’ve mastered the art of these <strong>Crispy Ham and Cheese Puff Pastry Stacks</strong>, let’s talk about how to truly make them shine for any gathering or even a quiet meal at home. For a casual brunch, I love serving them alongside a vibrant green salad tossed in a light vinaigrette, or perhaps with a fresh fruit platter to cut through the richness. They are also absolutely perfect as an appetizer for a party; arrange them artfully on a platter, maybe with a small bowl of Dijon mustard or a sweet pepper jelly for dipping on the side. Imagine them gracing your holiday spread or being the star snack at your next game day!</p>
<p>Thinking of a light dinner? Pair a couple of stacks with a hearty bowl of tomato soup or a creamy mushroom bisque. They are incredibly satisfying and provide a wonderful alternative to a traditional sandwich. And for those warmer days, these stacks pack beautifully for a picnic; just let them cool completely before packing, and they’ll retain their flaky texture, ready to be enjoyed al fresco. Don’t forget a refreshing glass of crisp white wine or a craft beer to complement their savory goodness!</p>
<h4>Unleash Your Inner Chef: Delicious Variations</h4>
<p>One of the things I adore most about puff pastry is its incredible versatility, and these <strong>Crispy Ham and Cheese Puff Pastry Stacks</strong> are no exception. Once you have the basic technique down, the possibilities for customization are endless! Feel free to experiment with different cheeses – a sharp cheddar, a smoky provolone, or even a nutty Gruyère would be absolutely divine. If ham isn’t your preference, thinly sliced cooked turkey breast, prosciutto, or even crispy bacon bits would make fantastic substitutes. For those who love a bit of heat, a sprinkle of red pepper flakes between the layers can add a wonderful kick.</p>
<p>You can also sneak in some vegetables! Lightly sautéed spinach or mushrooms, caramelized onions, or even a layer of roasted red pepper strips would add another dimension of flavor and nutrition. Fresh herbs like thyme, rosemary, or chives can be mixed in with the cheese or sprinkled between layers for an aromatic boost. And for those with a sweet tooth, remember that puff pastry isn’t just for savory dishes; a simple variation with cinnamon sugar and apple slices could turn this concept into a delightful dessert stack. The world is your oyster – or rather, your puff pastry!</p>
<p><strong>Now, it’s your turn!</strong> I genuinely can’t wait for you to experience the joy of creating and savoring these <strong>Crispy Ham and Cheese Puff Pastry Stacks</strong>. They’re simple enough for a weeknight meal, yet elegant enough for entertaining. I encourage you wholeheartedly to give this recipe a try this week. Don’t be shy; embrace the process, enjoy the wonderful aromas that will fill your kitchen, and most importantly, relish every single flaky, cheesy bite. Once you’ve made them, please come back and share your experience with me! What did you pair them with? Did you try any exciting variations? Your feedback and culinary adventures truly inspire me and the entire community here.</p>
<p>Happy baking, my friends! I’m already looking forward to hearing all about your delicious successes. Until next time, keep cooking with passion and a sprinkle of fun!</p>
Quick & Easy Crispy Beef & Cheese Puff Pastry Stacks
Imagine layers of golden-brown, buttery puff pastry, each one impossibly light and flaky, encasing a delightful meld of savory flavors and perfectly melted cheese. This recipe offers a sophisticated take on a beloved combination, making it ideal for any occasion, from an elegant brunch to a delightful appetizer.
Ingredients
-
2 sheets (approx. 400g each) frozen puff pastry, thawed
-
1 cup (115g) freshly grated Parmesan cheese
-
1 cup (115g) freshly grated Gruyère cheese (or Emmental, sharp white cheddar)
-
½ cup (55g) fresh mozzarella, finely shredded
-
2 tbsp unsalted butter, melted
-
2 tbsp extra virgin olive oil
-
3 cloves garlic, finely minced
-
¼ cup fresh parsley, chopped
-
2 tbsp fresh chives, sliced
-
1 tbsp fresh thyme leaves
-
1 tsp fresh rosemary, finely minced
-
1 large egg
-
1 tbsp water or milk
-
½ tsp sea salt, or to taste
-
¼ tsp black pepper, or to taste
-
Pinch red pepper flakes (optional)
-
All-purpose flour, for dusting
Instructions
-
Step 1
Ensure puff pastry sheets are thawed but very cold and pliable. Keep one sheet refrigerated. In a bowl, combine Parmesan, Gruyère, mozzarella, parsley, chives, thyme, rosemary, garlic, salt, pepper, and optional red pepper flakes. Toss well to combine. Melt butter, then stir in olive oil. Lightly dust a clean work surface with flour. -
Step 2
On a floured surface, gently roll one pastry sheet into a 12×14 inch (30×35 cm) rectangle, about 1/8 inch (3mm) thick. Brush pastry with 1/3 of the butter-oil mixture. Sprinkle with 1/3 of the herb-cheese mixture, almost to the edges. Cut pastry into three equal lengthwise strips (approx. 4×14 inches). Stack the three strips on a parchment-lined baking sheet, pressing gently to compress. -
Step 3
Repeat the previous step (rolling, brushing, layering, cutting, stacking) with the second pastry sheet to create another identical stack. Whisk 1 large egg with 1 tbsp water or milk for egg wash. Lightly brush tops of both stacks with egg wash, avoiding the sides. Chill stacks on baking sheets in the refrigerator for at least 30 minutes. -
Step 4
Preheat oven to 400°F (200°C) while stacks chill. Bake chilled stacks for 20-25 minutes, or until deeply golden brown, incredibly puffed, and cheese is bubbly. Rotate baking sheet halfway through if needed. Cool on baking sheet for 5-10 minutes. -
Step 5
Transfer stacks to a cutting board and slice each into 4-5 individual portions using a sharp serrated knife. Serve warm for best flavor. Garnish with fresh chives or parsley, if desired. Store leftovers in an airtight container (room temp 1 day, fridge 2 days). Reheat in oven at 350°F (175°C) for 5-7 minutes to re-crisp. Experiment with other cheeses or herbs for variations.
Important Information
Nutrition Facts (Per Serving)
It is important to consider this information as approximate and not to use it as definitive health advice.
Allergy Information
Please check ingredients for potential allergens and consult a health professional if in doubt.


Leave a Comment